


Strawberry Shortcake Playhouse for The Grandchildren

4 Materials
$40
20 Hours
Medium
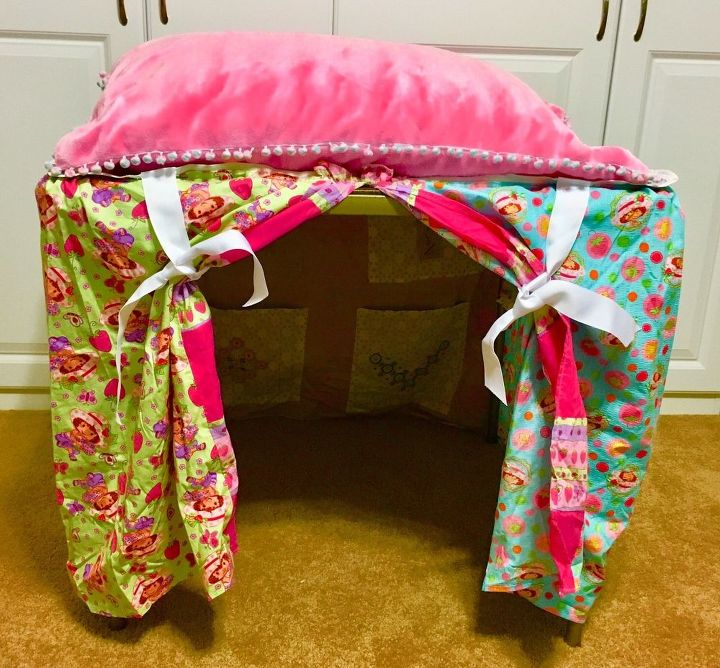
This project took scraps of fabrics that were my granddaughter’s favorites, a card table and some pillows to make the perfect playhouse for the grandchildren. When they go home, it can be all folded up and put away until the next time they come to play. Let’s help you build one of your own. Measuring accurately the sides, height, width, and depth of your card table is one of the most important factors here, because there really is no pattern. Everyone can have different measurements for their own table making each playhouse very unique and a one of a kind project. Don’t be too exacting in your measurements. It is much better to have a little bit more ease in the numbers than having them be too tight. First of all, I got the fabrics together that I thought would look good together and determined where they would fit the best.
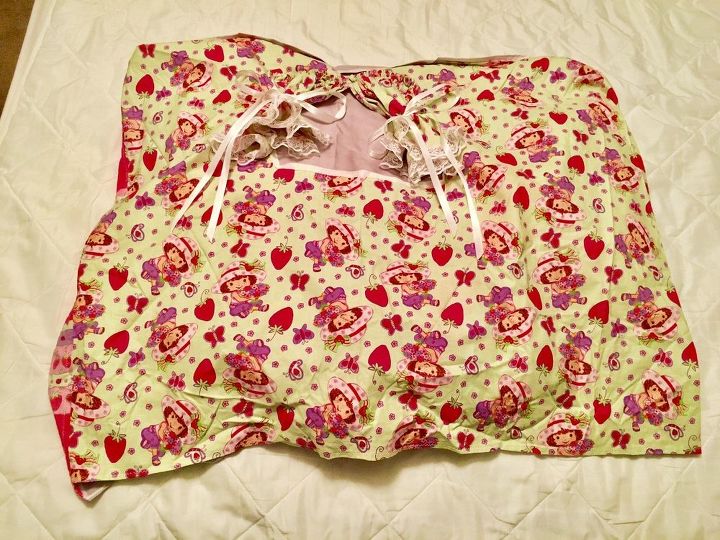
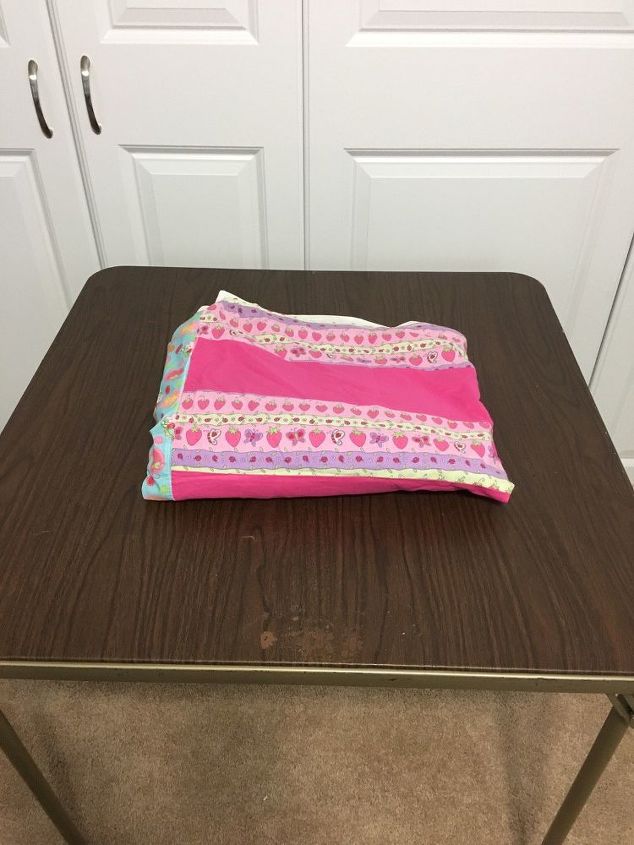
I started with the top piece that would be my foundation for the playhouse. It would need to be the roof that covers the top of the table. Everything else would hang from this. It needed to entirely cover the top of table with about two - three inches overlap for sewing the other sides to it. It needed to be a strong material that would not rip if it got handled roughly. “My grandchildren” never play rough with things, but just in case things got exciting and they forgot that they needed to be careful in these close quarters, I did not want them worrying about tearing things apart. So, the top was made out of two layers of strong fabric, sewn like a pillow case for extra stability. This means you take two pieces of fabric - exactly the same size. Put right sides together and sew up three sides all around the square with a 5/8 “ seam allowance. Turn it right side out and press the edges nice and crisply so that they look professionally done. Make sure that all the seams are turned all the way inside out and that you have pressed as close to the seam as possible on the three sides to make it lie flat. With the fourth side, turn in the top and bottom piece of fabric 5/8 “ of a seam and press together as if it were seamed already, too. You can now top stitch this line close to the folded seam lines to close up this side. Your top is now finished except sewing all the sides to it. *** And just a hint here: To keep your items from looking like they have been made at home instead of being purchased at the store, iron, press it, iron it again. It will look professionally sewn, if you press open every seam and iron your project all along the way.

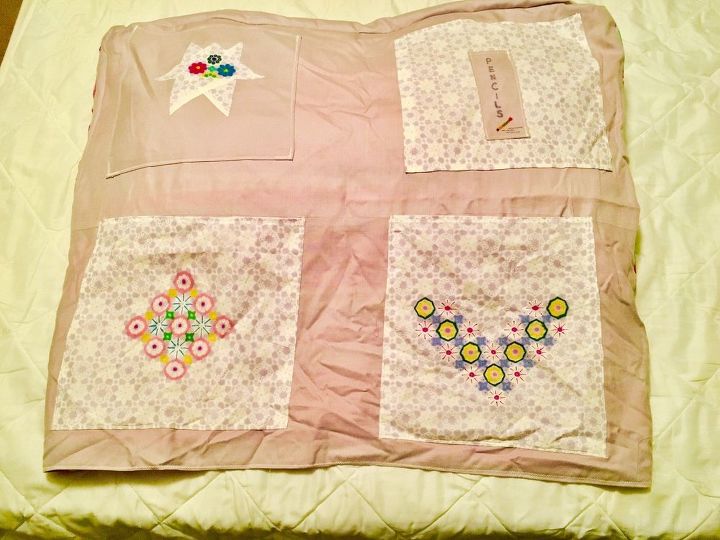
(Notice how rumpled this looks without being ironed - disastrous!) The bias tape around all four corners will be attached later after the sides are all added. We will be making another panel for the back, much like the one we just did for the roof, but this one can show your own personality. We will be adding pockets to the back so that the grandchildren can hide their “secret stuff” in them. You can never have too many pockets in a playhouse - or so I have been told... I made four pockets with different designs on the front of each one to help the grandkids know which pocket was whose. I seriously doubt more than four could fit in here at once anyway. The pockets were sewn on the right side of the inside of the back side of the playhouse. I pinned them on first then pinned the top and this back piece together so that I didn’t get it too close to the top. There still needed to be room for the children to reach the top pockets and to be able to put their hands in them without being too crowded by the top of the table. So, I started the top of the top row of pockets down 7- 10 inches from the top and then adjusted the second row of pockets accordingly. (There needs to be enough space between the rows for hands to fit in the second row of pockets, too.)
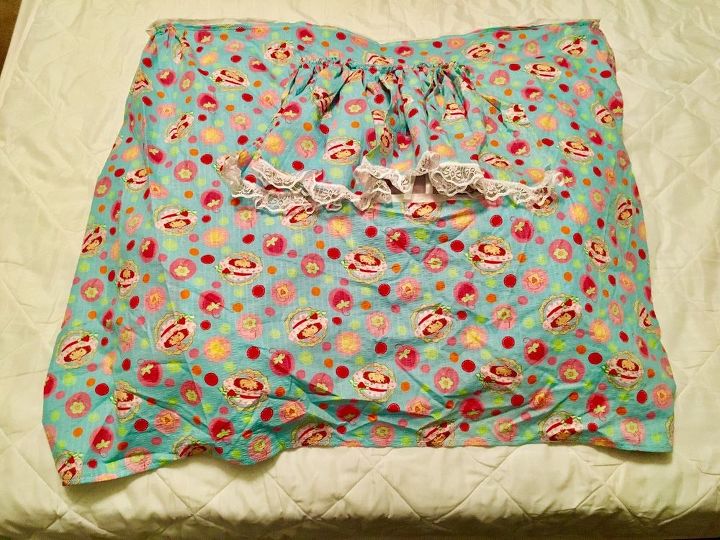
The back panel of the Strawberry Shortcake fabric can now be sewn to the back panel (just as the two top panel pieces were sewn together - forming the two layered pillow case that when finished can be attached to the back side of the roof top.
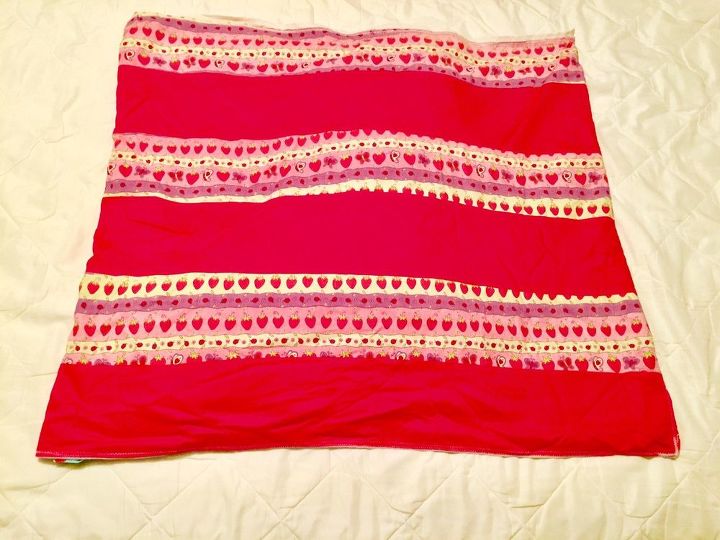
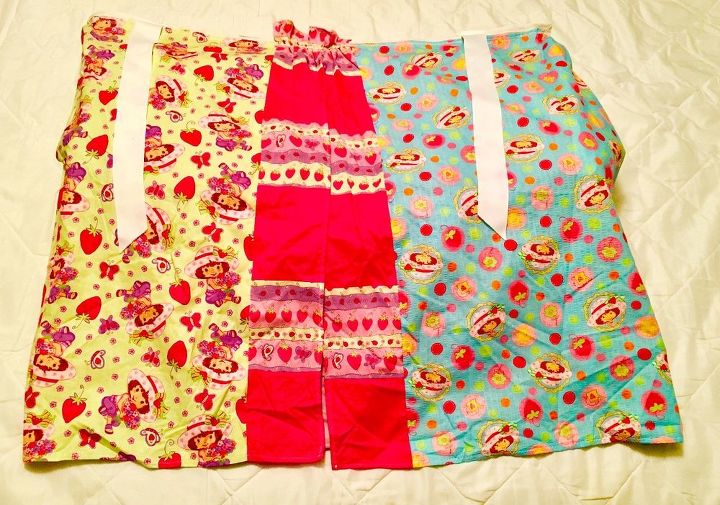
I was really scraping by for scraps, so I pieced the back panel by taking three strips of fabric of two different kinds and piecing them together to make up the one outside back panel. The two back panels were sewn together and now were sewn to the top. It was now time for the other two sides and the front.
I had the most fabric left over with the fabric that I used to make the sides. I decided to make windows on each side. I pinned the sides onto the top and made a template out of paper to cut out of each side that would be how big I wanted each Window. There was enough fabric left over from each side to make curtains out of for the window on each side and to wrap around the front for the partial front side minus the front door. I put bias tape around the three cut portions of each window. The top of each window was going to have the top of the curtain gathered and sewn on top of the window with a split betweeen the two curtains. And every curtain needs lace on the bottom, right? With a ribbon attached to the sides of each window ready to tie back each curtain in a bow, the open curtains let in enough light so that it was not dark inside the playhouse.
View from the other side of the playhouse.
Other view of other side of the playhouse.

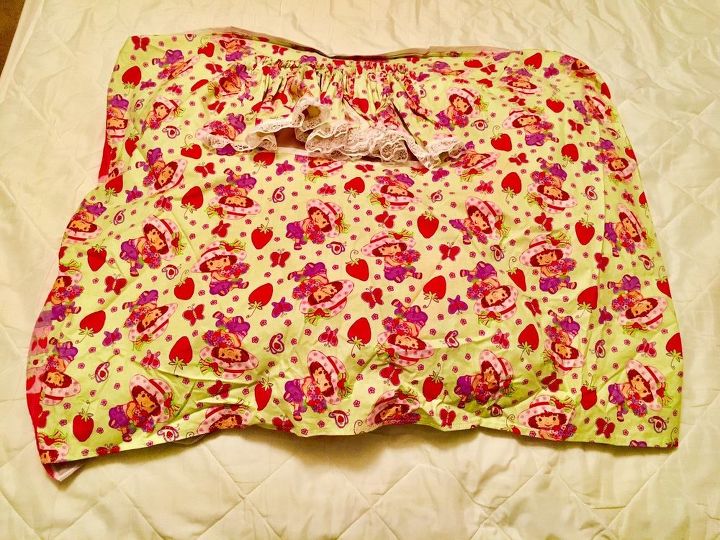
Now it was time to work on the front door. I made it a little bit like the windows in that I gathered the fabric that was left (from what was left over from the back piece) and was designated for the front door. I attached it to the roof part in the front of the playhouse and added thick grow-grain ribbon to use as tie backs when they wanted to keep the doors open. They could loosen them and let them dangle down when they wanted the doors to be closed.
A view of the flat front door.
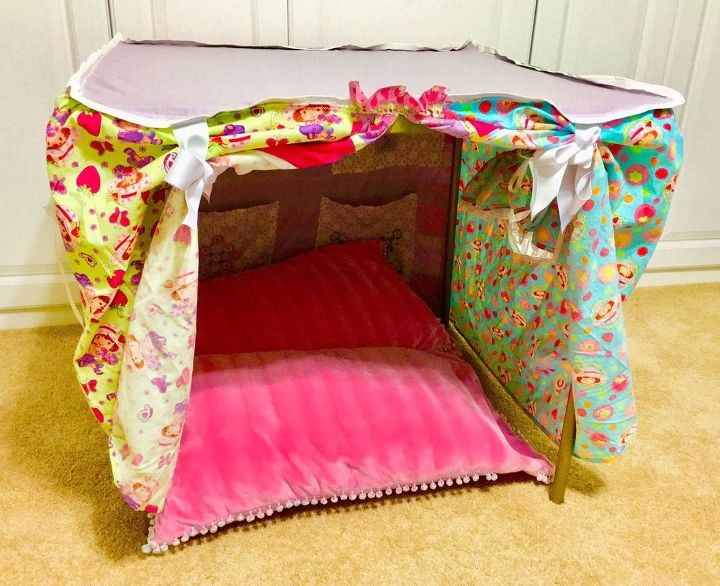
All that was left were a couple of finishing touches. Where the sides, back and front had attached to the roof, I made sure the seams were all finished off by enclosing the seam in bias tape. It made it look neater and protected the sewing. I then got a couple of puffy pillows and covered them in a minot pink material with some fun added trim to go around each pillow. They are now fun, colorful and oh,so soft. If it gets too crowded inside with all the children and the pillows, the pillows can be stashed up on top of the card table until they are needed again.
And when everyone goes home. It folds up neatly into a square and can be put away with other bed linens. I hope you have fun making a playhouse of your own and sharing it with your favorite grandchildren or friends.
Comments
Join the conversation
1 comment
-
Aww any kid would love this little playhouse!


Frequently asked questions
Have a question about this project?