


Fun Project Using Unicorn SPiT SPARKLiNG Gel Stain!

4 Materials
$15
2 Hours
Easy
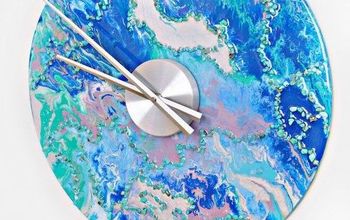
The creator of Unicorn SPiT, Michelle Nicole, challenged us to create a fun project using the new Unicorn SPiT SPARKLiNG gel stain. It's such an amazing versatile product that you can use on just about any surface that you want to add a little glitz to. It is certified non-toxic so anyone can use it! (My 3 year old LOVES it!) Galaxies are my favorite thing to "SPiT" so I decided to add some pizzazz. I created this easy to follow project so anyone can be successful. Have fun and make sure you stop by my fb page, SPiT Shine or my fb group, Crafty Unicorns & show me what you come up with!
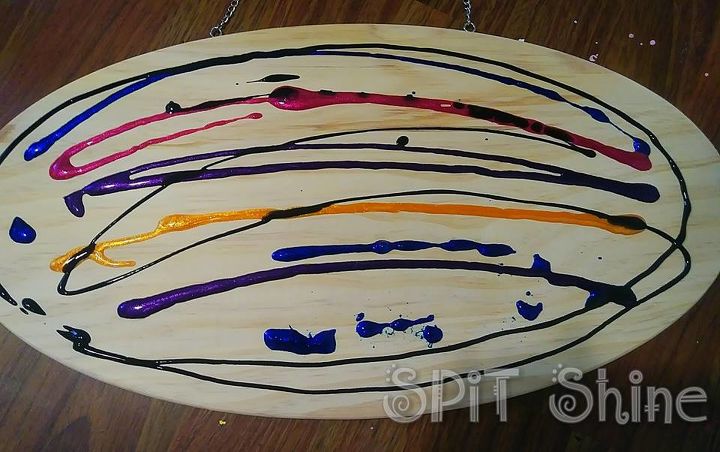
Starting with a hanging wood plaque that I got from Consumercrafts, I randomly placed the SPARKLiNG, Golden Gosling, Starling Sasha, Sapphire Swift, Vilolet Vulture and a little Midnights Blackness Unicorn SPiT.
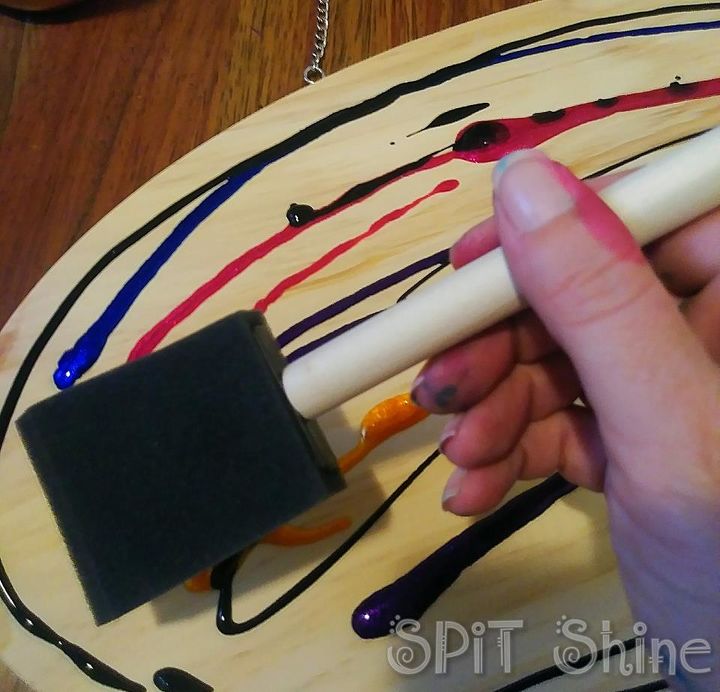
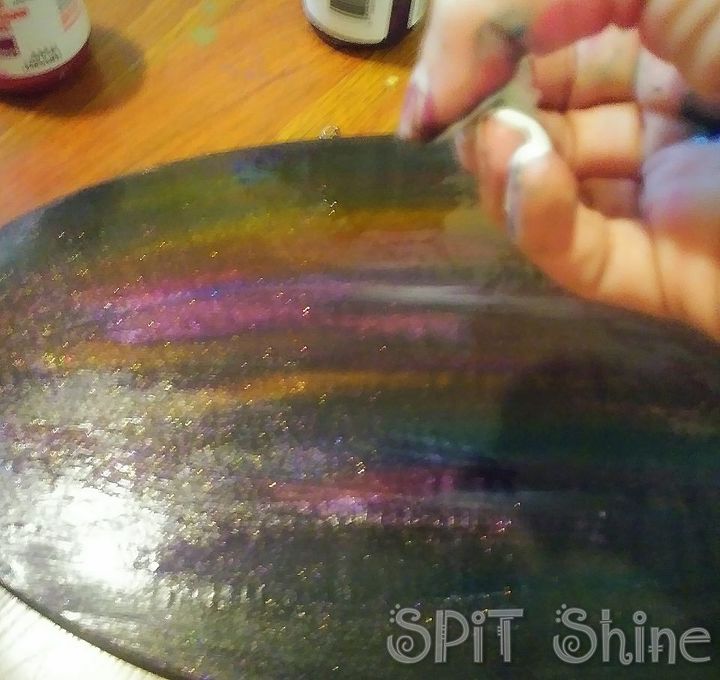
Using a sponge brush, I gentle swiped the gel stain side to side. I didn't want to over blend, just make sure that I covered the entire board. Don't worry if you didn't put enough on to begin with. You can always add more!
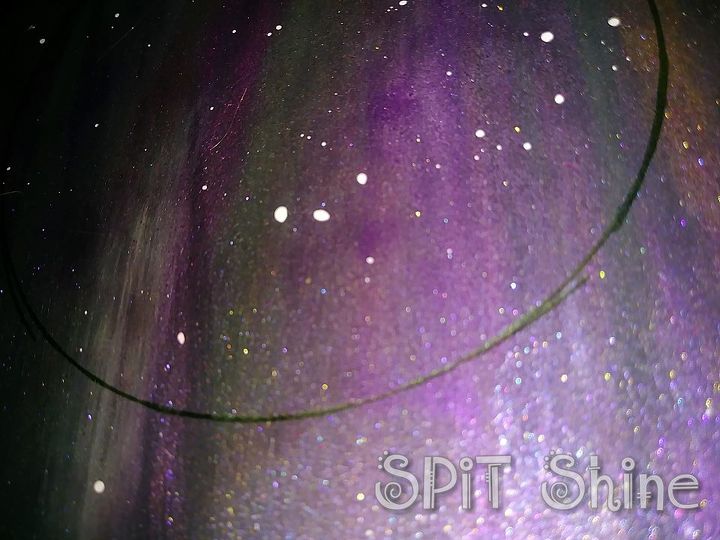
Once I had the board the way I liked it, I poured some White Ning Unicorn SPiT on my fingers and flicked stars onto it. It's ok if you get them all over the board, but try to keep them on the top half.
Once my board was dry, I did do a quick spray of Rustoleum Clear Gloss to protect that layer and create a barrier for the next layer I was going to add. Using a ring from a mason jar, I traced a circle it the top right corner.
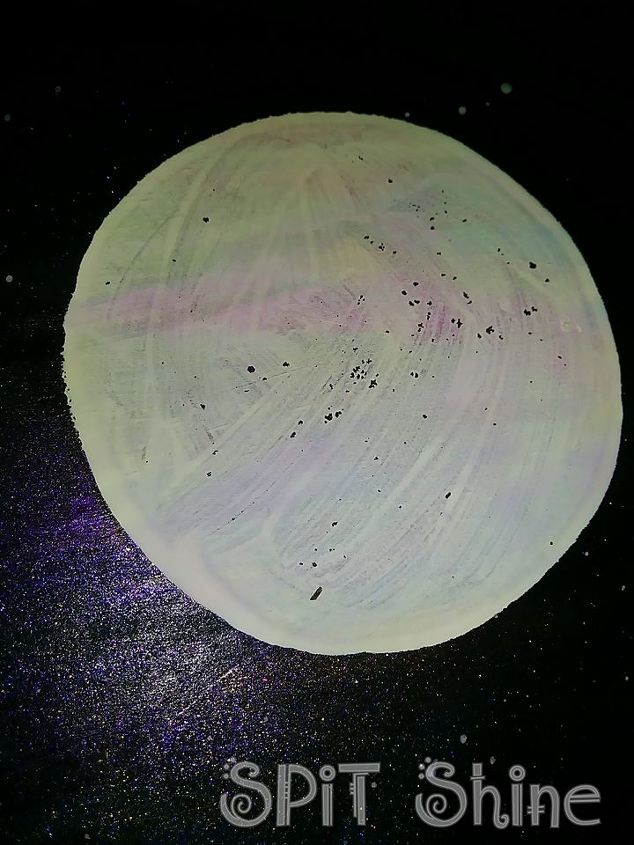
Using White Ning Unicorn SPiT, I painted the circle white. Because of the spray sealer it didn't stick all the way but I wasn't worried because I knew I was adding more. Let that white circle dry completely before moving to the next step.
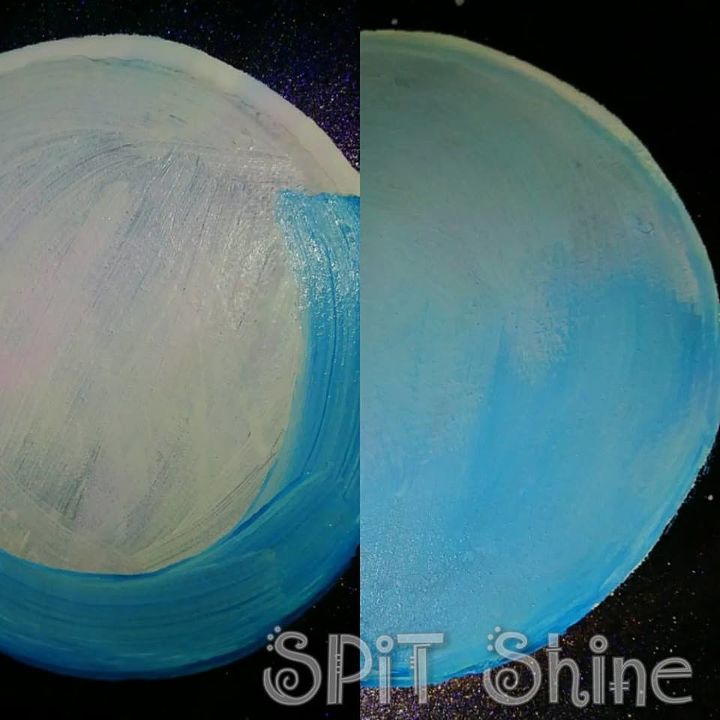
Go over the white again so it completely covers any spots that didn't stick and then start with Blue Thunder Unicorn SPiT. Keep blending using the two colors until you get the moon you like. It's ok if dark spots show through, the moon has craters. Once it's dry, do another quick spray seal over the moon.
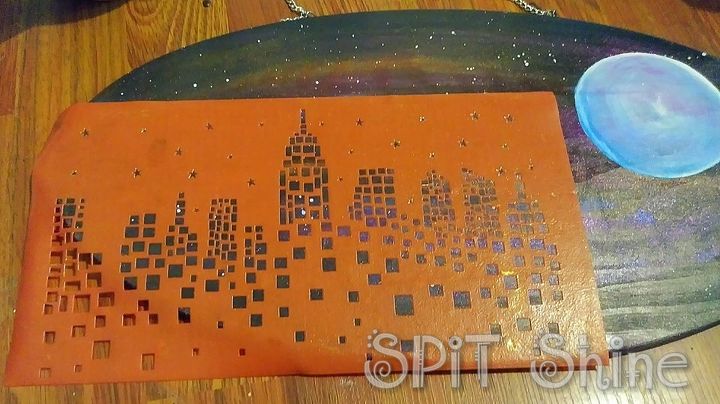
I bought this reusable stencil from Michaels. It's rubber and washable. It's also sticky on the back so you don't have to worry about bleed through. I decided not to stencil in the stars because I had already used the White Ning to create stars on the background. I was just careful when I sponged on my color. The stencil was not big enough to cover the whole bottom so I had to do this twice.
I wanted the tall building over the moon so I just adjusted the stencil to where I wanted it.
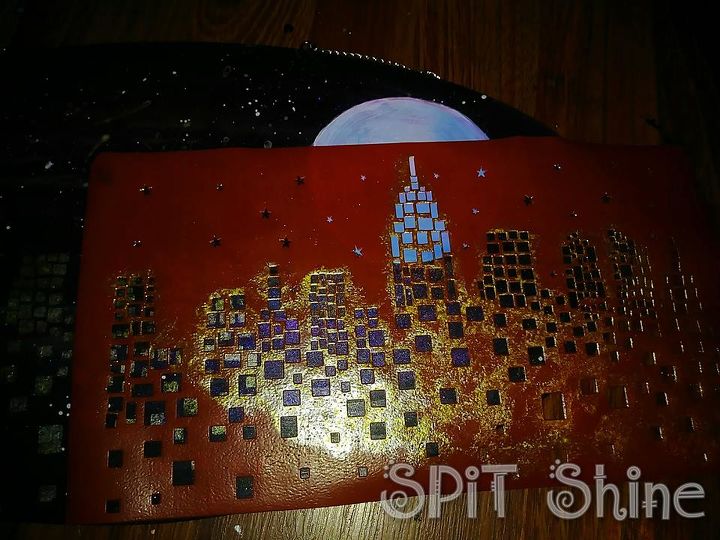
To create the lighted city, I mixed Golden Gosling SPARKLiNG with Lumiere white paint to give it a "glow". I didn't have a fancy stencil sponge so I just cut a small piece of sponge brush and used that the sponge my paint on. Do light coats. You can always add more if you need it but if you put too much on at a time, you may get bleeding even with a sticky stencil!
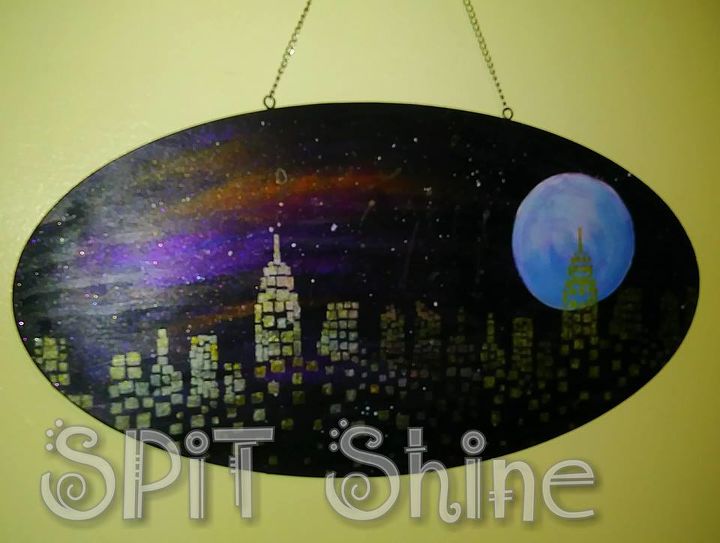
Once everything is dry, you need to seal. I used the Rustoleum Clear Gloss Spray sealer but you can use any oil based sealer you choose.
Look at the gorgeous sky line over a galaxy! If you want to get really fancy, add some glow in the dark paint on the moon and flick some over the stars!
Comments
Join the conversation
2 of 4 comments
-
Oh so pretty!!!
-
Your talent always amazes me!


Frequently asked questions
Have a question about this project?