


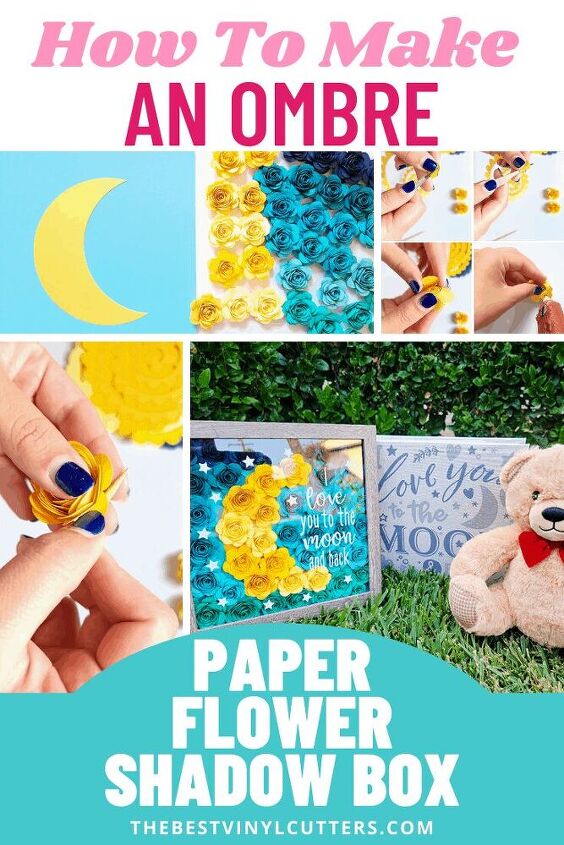
How to Make an Ombre Paper Flower Shadow Box With Cricut
Paper flower shadow boxes are really popular and on-trend, making beautiful decoration pieces and thoughtful gifts for someone special.
Not only can you use any type of flower design but you can also customize the color and size. In addition to the flower selection, you can add a bonus personalization by customizing the front of the shadow box glass.
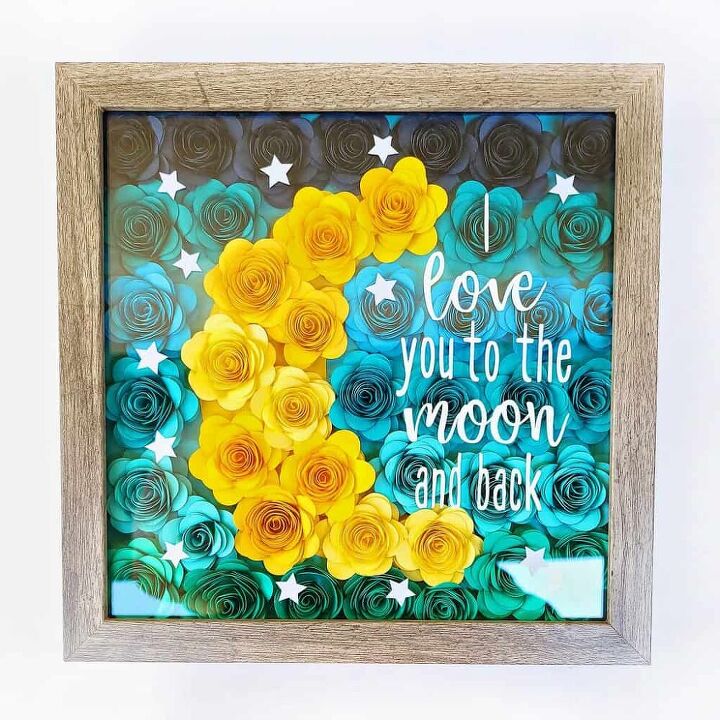
Today we will learn how to create an ombre flower shadow box with an added vinyl design. Our shadow box is perfect for any baby shower gift as it will have a super cute moon design with a vinyl decal saying, but you can easily leave out the moon design and replace the vinyl saying with a monogram to turn it into a birthday or wedding flower shadow box instead.
Let’s have a look at the supplies required and find the steps on how to make a flower shadow box with cricut.
Rolled Paper Flower Shadow Box with a Cricut Tutorial
Find below the steps to follow in order to create a beautiful rolled flower shadow box. You can easily follow this tutorial to create a shadow box for any theme, event, or occasion.
Supply List
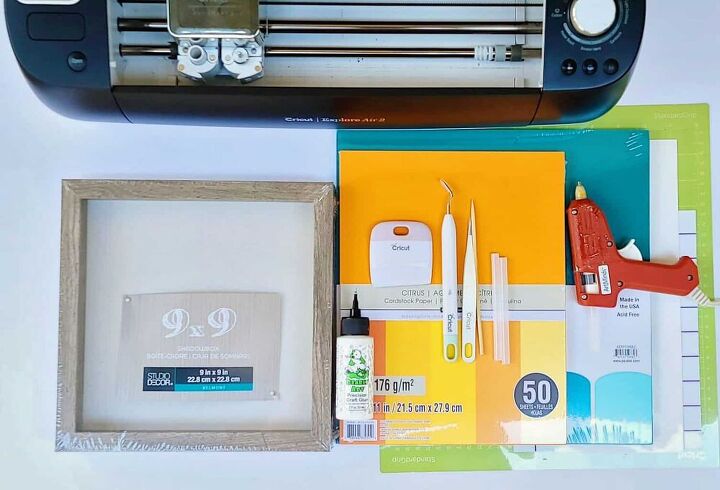
- Cricut Cutting Machine (I used the Cricut Explore Air 2 – see the review for the machine here)
- Cricut StandardGrip Cutting Mat
- White Adhesive Vinyl
- Transfer Tape
- Cricut Weeder Tool
- Cricut Scraper Tool
- Cricut Tweezer Tool
- Glue Gun
- Glue Sticks
- 9 x 9” Wood Frame Shadow Box
- Cardstock ( Search Ombre Packs on Amazon)
- Liquid Glue
- Stick (Like a wooden skewer to roll flowers)
Step 1: Open the Cricut Flower Template, Moon Cut Out, and Vinyl Saying
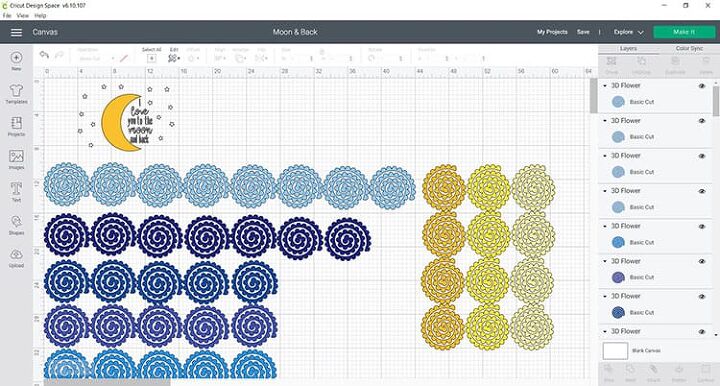
The first step is to create the design and project in Cricut Design Space and then to have the design cut out on your cardstock and vinyl.
- Click on the following link to open up the rolled flower template, moon cutout, and adhesive vinyl decal design in Cricut Design Space: https://design.cricut.com/landing/project-detail/60ca63d0d96fba0fa0884892
- You can either edit the vinyl decal design to change the size or replace the moon saying with a gorgeous monogram. If you are happy with the design as is you can simply click on “Make It.”
Note: We created the vinyl decal design to fit a 9×9 shadow box. If your shadow box is a different size then you can adjust the size of the design to fit your shadow box size.
- Select “Vinyl” as the material to cut for the first cutting mat (white). This mat will be the items that will be placed on the glass.
- Select “Cardstock” for the remaining mats.
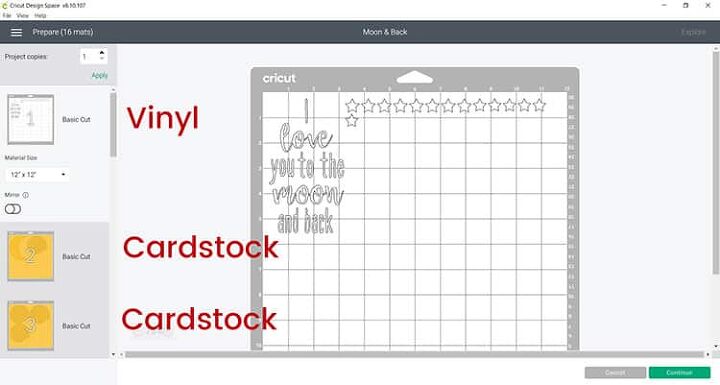
- Place your vinyl/cardstock on your green cutting mat, load the mat and let your Cricut machine cut away. You may change the colors of the cardstock to match the designs as shown in Cricut Design Space.
- Once the files are cut, carefully remove them from the mat – I find it easier to flip my mat upside down and peel the mat away from the cardstock pieces.
Step 2: Weed your Vinyl Pieces
Now it is time for the fun to begin. We will weed the vinyl to get it ready for transfer to the shadow box.
- Next, use your weeding tool and pick up the corner of the vinyl. Use your hands to peel away the excess vinyl. Go slowly around the curvy letters.
- Don’t forget to weed out the inside pieces from the letters as well.
Step 3: Make Roses
Now, it is time to roll up your flowers. All you will need is a pair of tweezers, a glue gun, and a thin wooden stick (like a skewer).
- Use the tweezer to grab the end of the cut paper flower design and begin rolling. Once you have reached the end you will want to slowly let go of the design with your tweezers. Now you may want to adjust the tightness of the roll of the flower to your liking.
- Once you are happy with the tightness of the rolled flower, use the glue gun to hold the flowers together.
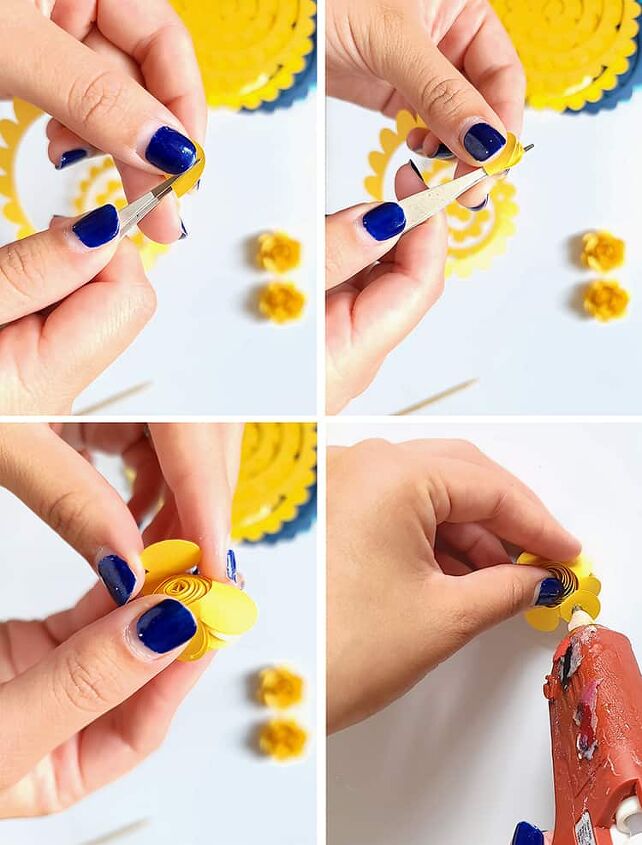
- To bring the roses to life, you will want to give them volume and dimension – this is where the stick comes in as you will bend the cardstock around the stick to give each petal an extra dimension instead of it being flat and straight out.

- Repeat the steps to create all your flowers.
Step 4: Assemble Design
Now that you have rolled all your paper flowers you will want to begin assembling them inside of the shadow box.
- Cut a 9 x 9 background paper. It is important to choose a color that matches your flowers as it will peek through from behind the flowers. As all our flowers (except for the moon) will be blue, we went with a light blue cardstock.
- Glue the moon cut out to the location you want, in our case, we placed it closer to the left as the vinyl text would be towards the right of the moon.
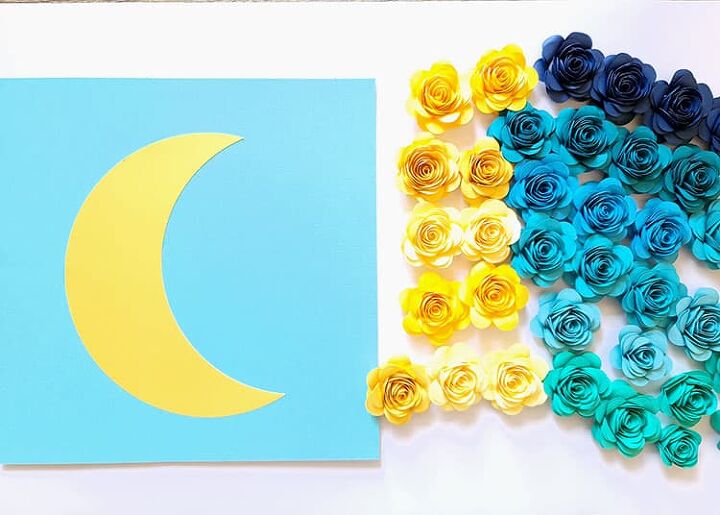
- Begin by placing the yellow flowers first inside of the moon cutout with a glue gun, to create the ombre look, you will want to place them from darkest to lightest.
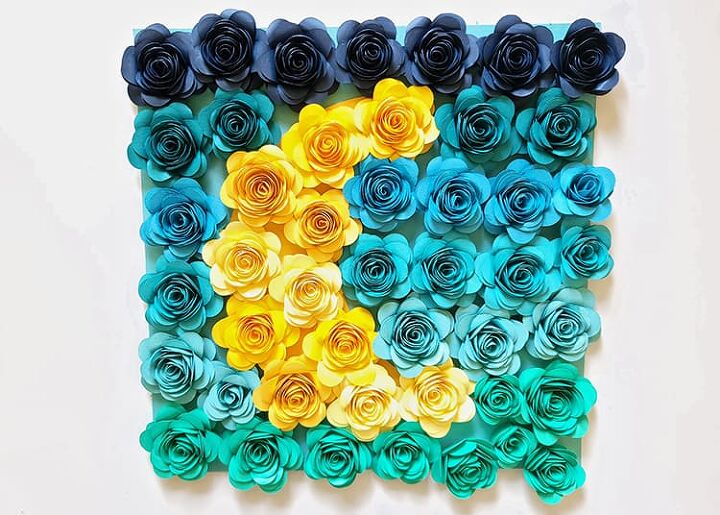
- From there you will move on to the blue-shaded roses.
- Try to place the roses as linear as possible and based on the color combination to get the ombre look.
Note: You may need to cut more roses, or even use less than the number of roses we provided in the project file. This will depend on how tight (or loosely) the paper flowers are rolled and on the size of your shadow box.
- Once you are done, you will want to open the shadow box and place the design inside, be careful when placing it inside and make sure your roses do not get damaged.
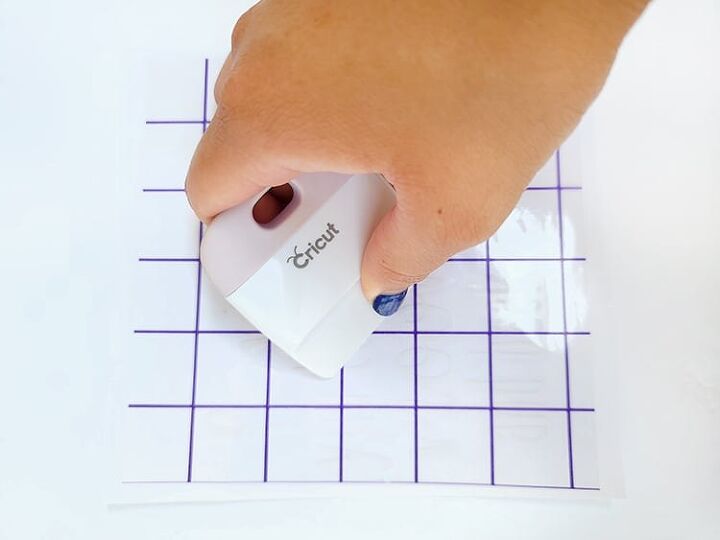
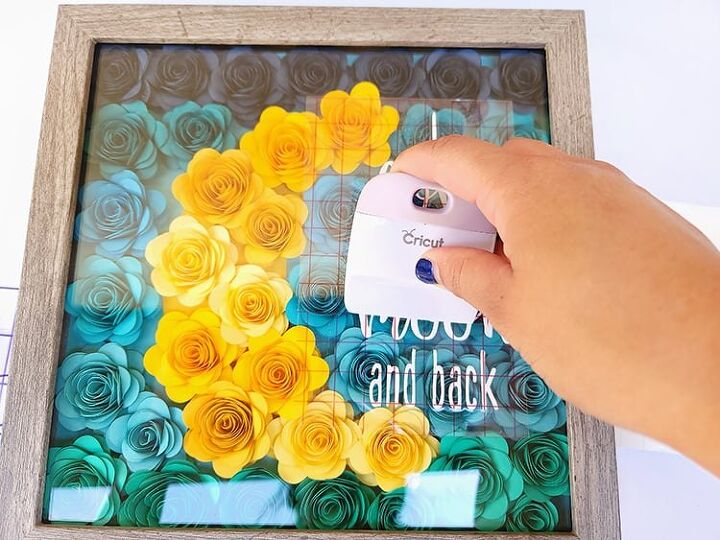
Step 5: Transfer Adhesive Vinyl to Shadowbox
Before we apply the adhesive vinyl to the shadowbox, please ensure that your box is clean and dry.
- It is much easier to use transfer tape/paper to move your design over to the shadowbox. Cut your transfer vinyl so that it is the same size or slightly larger than your adhesive vinyl.
- Place the transfer tape on top of the vinyl and be sure not to have any bubbles or bumps.
- Use your scraper to rub over both the front and the back of the design. We want the vinyl decal to stick to the sticky transfer tape so that it will lift up off the vinyl backing sheet.
- Slowly peel up the transfer tape and design from the top left-hand corner. Move slowly and try to work at a semi-diagonal angle. If your vinyl design is not lifting up with the tape, place it back down and give it another good rub with the scraper.
- Place the adhesive vinyl design on the shadowbox making sure there are no bubbles or bumps. Try to make sure that it is towards the right of the moon design and that it is straight.
- Once again, use the scraper to rub over the design. This time we want it to stick to the glass and to release from the transfer tape.
- Slowly peel back the transfer tape. Once again if your vinyl decal lifts up, simply place the tape back down and rub over the problem area again.
- Repeat the above steps to adhere your stars to the box as well.
Tip: Place your transfer tape back on the backing paper (you can reuse transfer tape so don't throw it away).
And just like that, you have created a beautiful rose ombre shadowbox.
It's a good idea to keep your Cricut mat clean, so please read this guide on how to clean a Cricut mat for some useful tips.

Comments
Join the conversation
-
Great info, thanks! I've recently bought a circuit, so I'm ready to try various projects :)
-
Awesome idea! Such a paper flower shadow box is a great personalized gift. I have a cutting machine, and usually, I look for cute custom SVG files for cricut at Art4youSpace and make most gifts and cards by myself. I'll follow your post as a guide in the hope I'll create a beautiful box like yours. Thanks for sharing!


Frequently asked questions
Have a question about this project?