


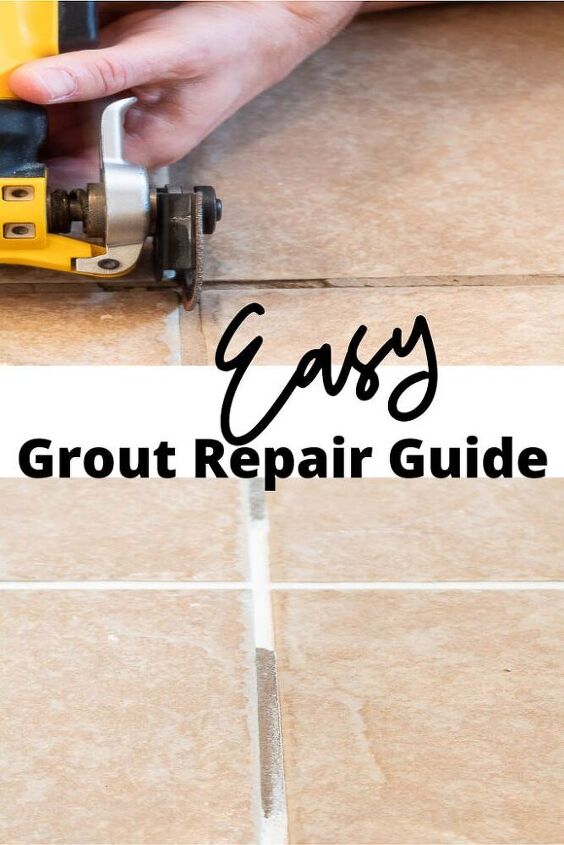
How to Quickly Repair Cracked Grout: An Easy Step by Step Guide
This post contains affiliate links. Please see my full disclosure policy for more details.
As a homeowner is there anything more annoying than those tedious little repairs that seem to crop up ALL THE TIME? They’re inevitable, and we know we need to fix them, but sometimes they just seem so intimidating that they fall straight to the bottom of our to-do list. Where they stay, for a really long time.
That’s exactly how I felt about our cracked grout in our master
bathroom tile floor. It faced me every morning while I would get ready for
work, crying “Fix me! Fix me!”
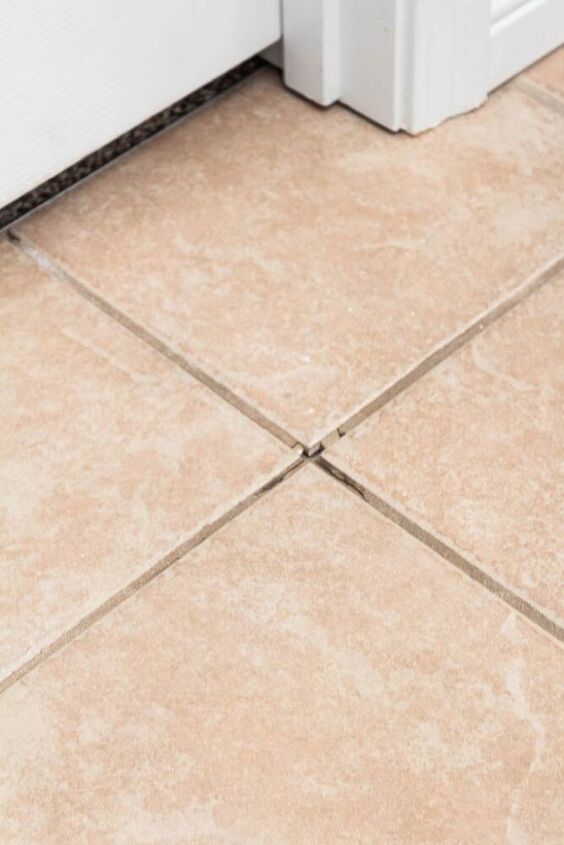
Ugh, so annoying!
And I let this tiny little repair intimidate the heck out of
me. I guess I thought trying to repair anything to do with tile would be hard,
messy and a lot of hard work. But in this case I was totally wrong!
Now, full disclosure, I didn’t actually do this repair
myself. My wonderful hubby did, but after watching him quickly repair our
cracked grout I couldn’t be more confident that I could do it on my own in the
future. Let’s just hope I don’t have to, right?
So let’s dive in to how you can easily fix your own cracked tile grout
Supplies Needed
- A multi-tool like this DEWALT one here
- Grout removal blade
- Pre-mixed grout in your color of choice
- Vacuum
- Tile Grout Float
- Tile Sponge
Important Pre-project tip!
Make sure that any tiles next to the cracked grout are not compromised and moving when you put pressure on them. Most of the time cracked grout is simply that, just broken grout. But there’s also the chance that the cracked grout stems from a tile that may have lifted up from the ground.
So be sure to check your surrounding tiles to make sure none of them have been affected. If they have, you’ll want to remove the tile and re-adhere it to the ground. Here’s a great article from This Old House on how to replace a tile.
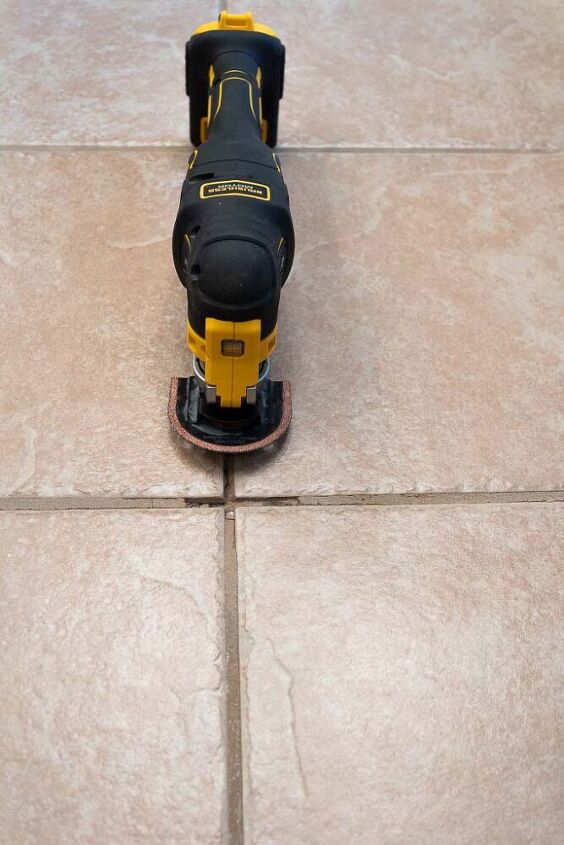
Step 1: Choose the right multi-tool blade to remove your cracked grout
Apparently you need a specific blade designed just for grout removal. Good to know since we completely ruined another blade by using it the wrong way on our tiled fireplace makeover. This blade was more curved and much rougher than the other attachments and it helped with grinding into the grout at angles rather than straight down (where you risk breaking or lifting up a tile).
One awesome bonus with this multi-tool is the handy built-in
flashlight it came with. I seriously think these multi tools are like the Swiss
army knife of DIYers. They really have everything you could need for small odd repair
jobs.
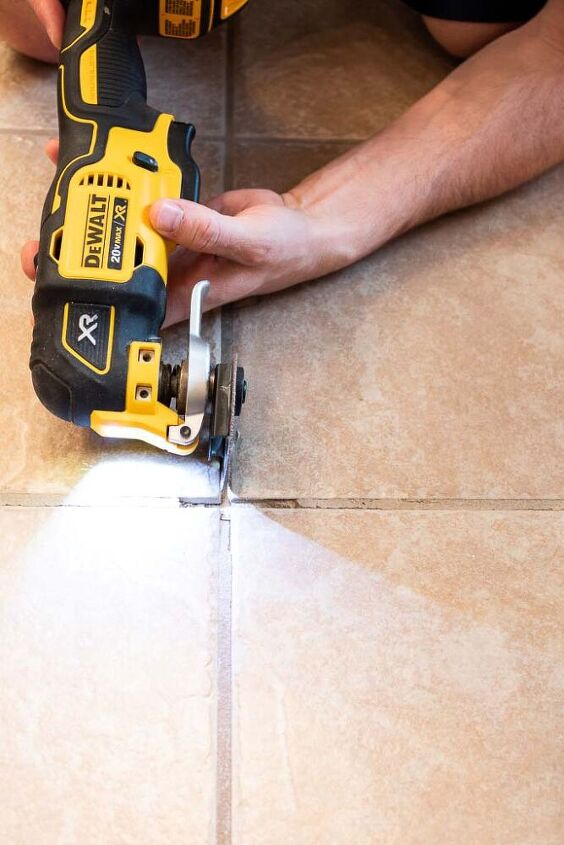
Step 2: Grind down broken grout from between tiles
Before you can remove the cracked, crumbling grout you need
to grind it down far enough to remove all of the loose pieces.
While it’s on, turn your multi tool to the side and begin in
the section with the deepest groove. Use your blade to grind down the grout
along each side of the adjoining tiles. Working your way from side to side and
down the length of the tiles; you’ll grind out a small valley within the grout.
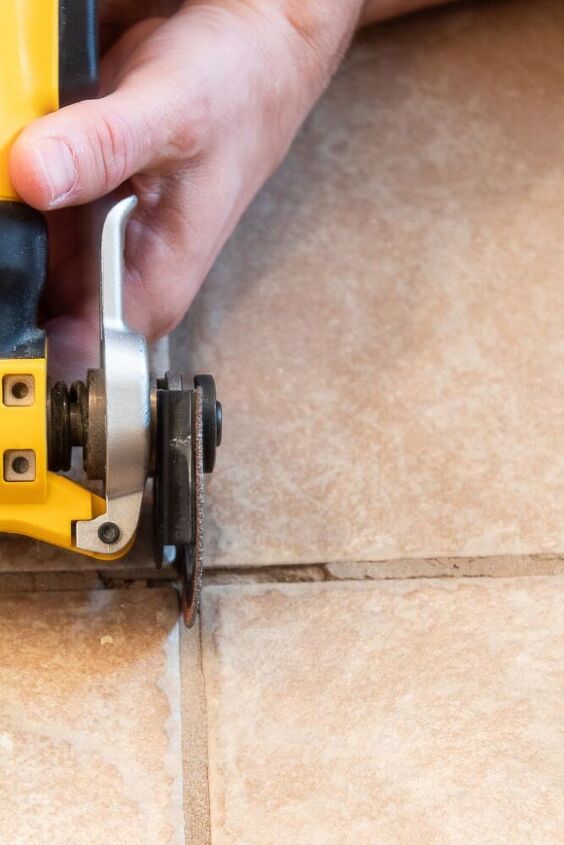
Continue working through the grout in small sections grinding
down the larger broken pieces. The goal isn’t to remove all of the grout
between the tiles, but you do want to make sure that there is enough room for
the new grout to adhere to the old. And it’s best to make the old grout between
the tiles as smooth as possible. Any jagged and uneven edges will make it
harder for the new grout to get into all of the crevices and set.
Step 3: Remove old grout and Repeat Grinding
You’ll want to take a break from grinding down the tile
grout to remove the broken pieces and debris with a vacuum or small dust buster.
This helps you to see how deep you’ve gone down and assess how much farther you
need to continue grinding the old grout.
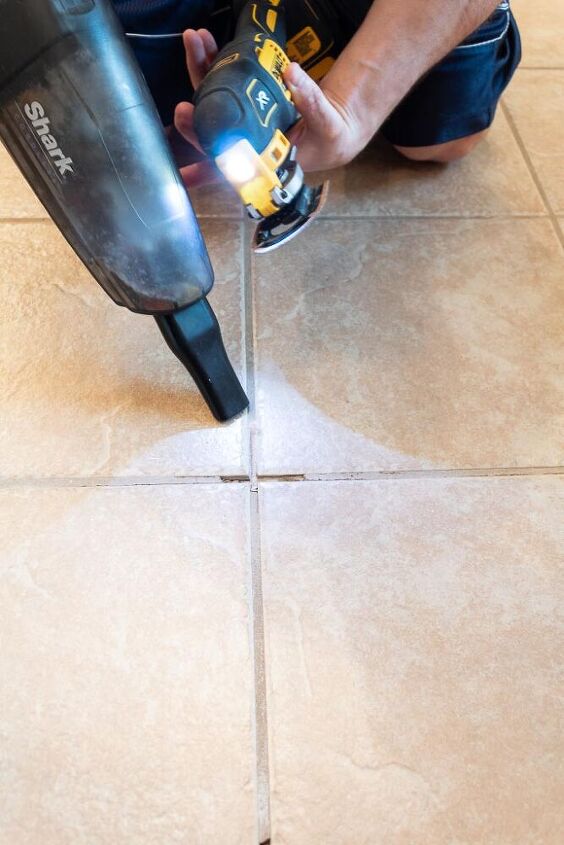
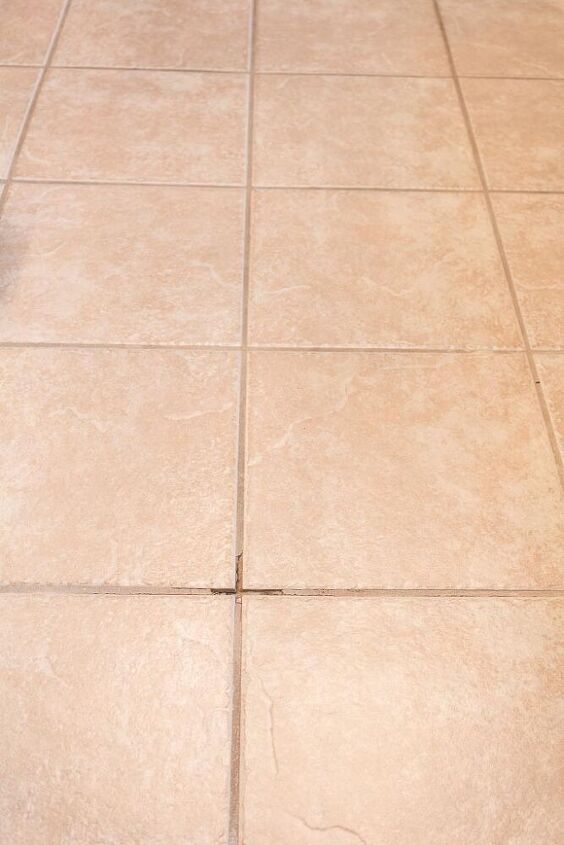
In the small broken sections of our master bathroom we probably
repeated this step several times so that we could see how much farther we
needed to grind along the edges of the tile.
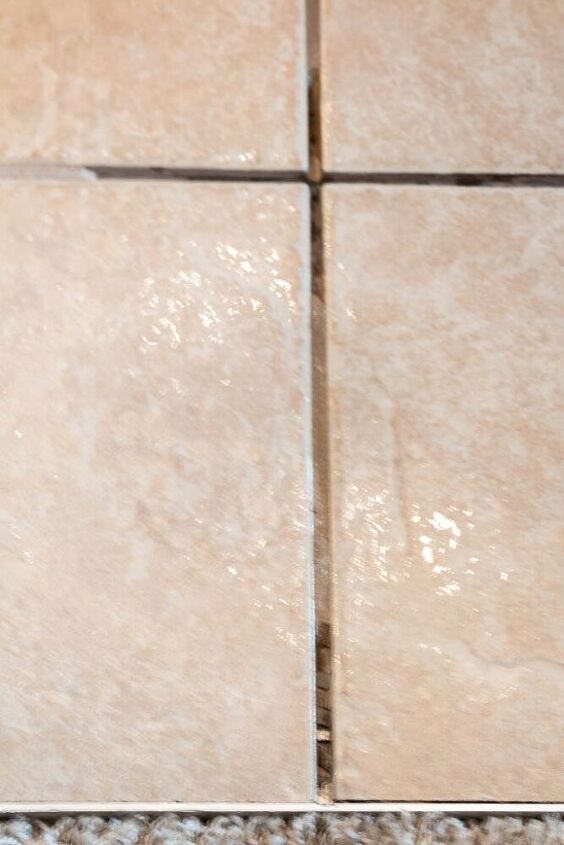
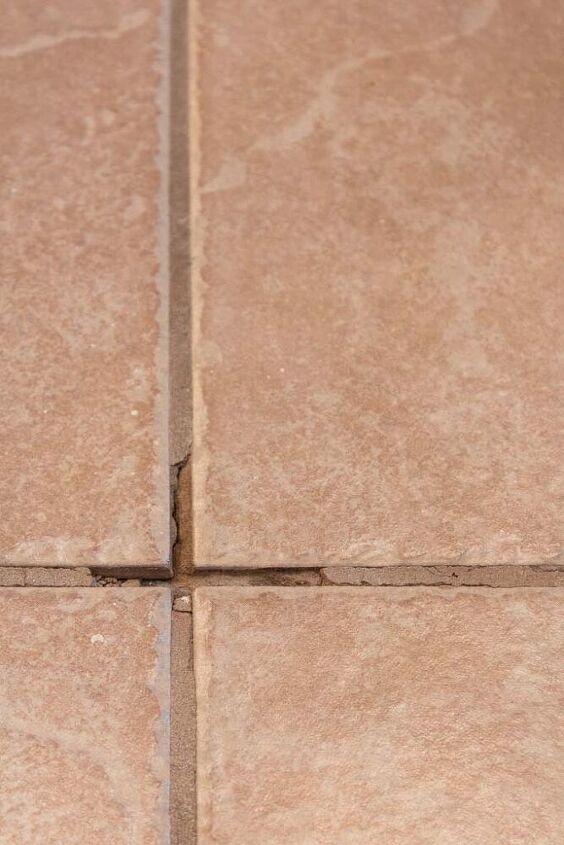
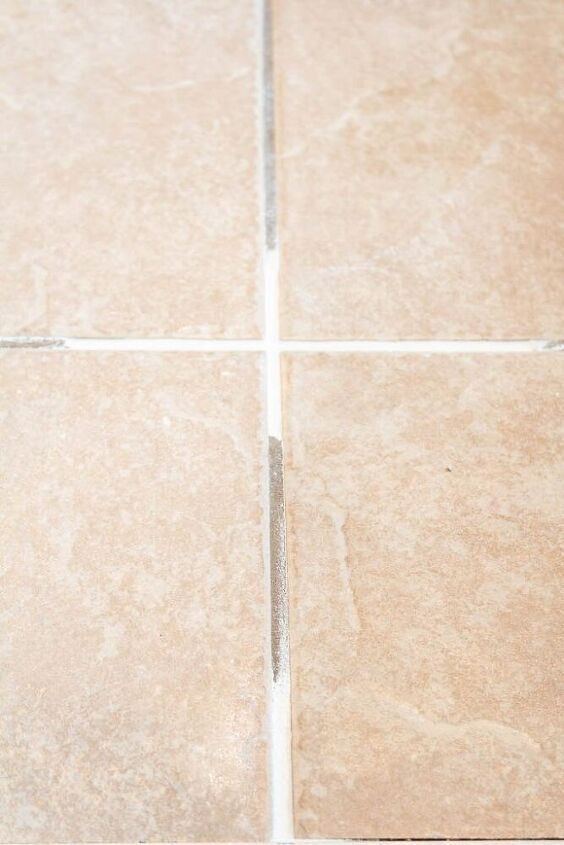
You can see from the original photos of our cracked tile
grout and when we were finished grinding that we actually had to remove more
grout than just the broken pieces. That’s because typically the grout is
compromised beyond the initial break. That’s why it’s important to continue grinding
down until you can see a smooth surface and it feels and appears secure without
any hairline cracks.
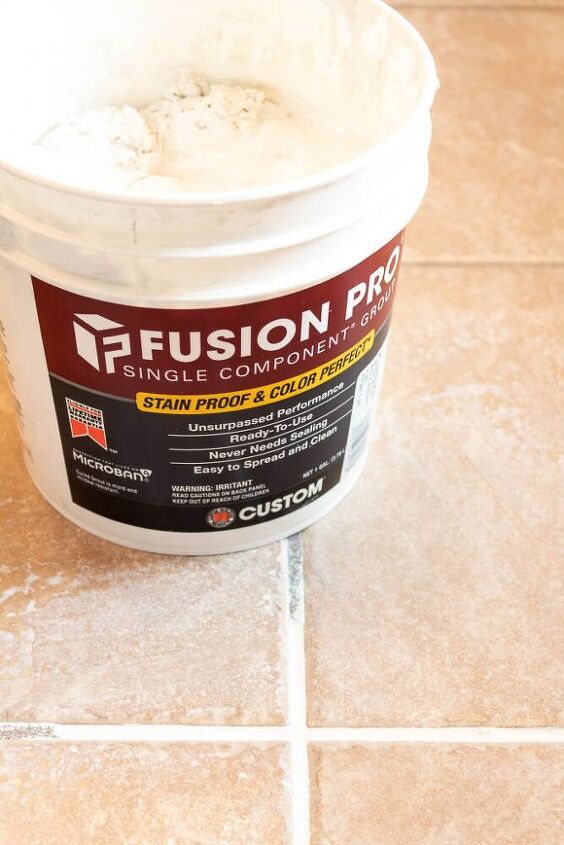
Step 4: Prepare the New tile grout
Before you can apply any new tile grout you need to give
your surface a thorough cleaning. Going over the grout lines again with a
vacuum and wiping down the tiles with a soft wet tile sponge should be all that
you really need to do to prep for your new grout.

We chose to use a pre-mixed sanded grout that we already had
on hand, but there’s a wide variety of grouts to choose from. I personally
prefer the pre-mixed version for small odd repair jobs like this one, even
though it is a tad more expensive. And you don’t have the hassle of trying to
measure and mix such a small amount for the right consistency. Plus, you can
just close up the lid and save it for another future project.
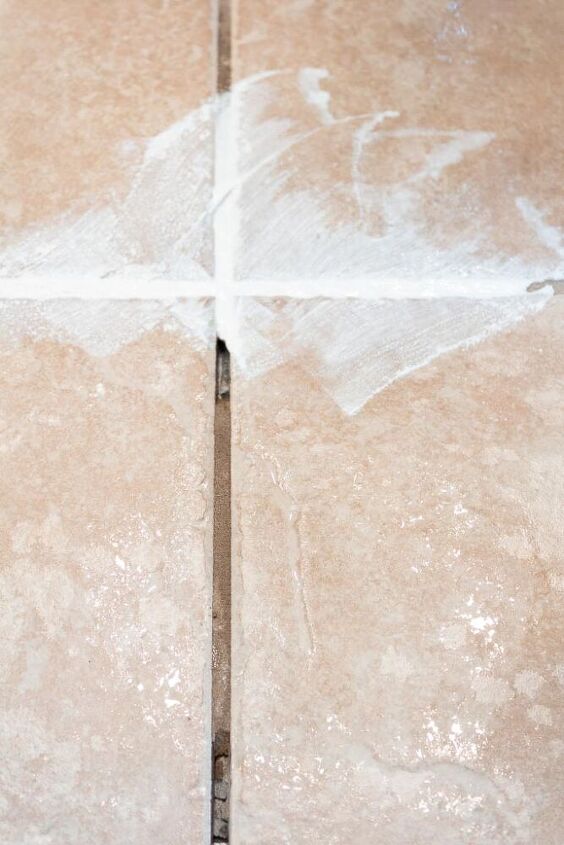
Step 5: Apply the new tile grout
Ok, so you’re almost there I promise! Using your tile float,
scoop a small section of grout onto the edge of your float and apply it into
the open spaces of your tile.

Be generous with the grout and work into the open grooves.
If you’re worried about whether you have too much or too little grout, then
just aim for more than you think you need. You can always wipe away the excess
grout. The key is to make sure it’s really compacted into the open grout lines
so that it fills in all of the space and will adhere to the old tile grout.
Use your tile float and wipe over the grout at a slight
angle to smooth over the surface.

You’re probably wondering why our new grout doesn’t match
the old one, and how big of a deal that is. I actually plan to freshen up and
paint over the grout as part of our budget bathroom makeover. So I’m not too
bothered by the mismatched color at the moment.
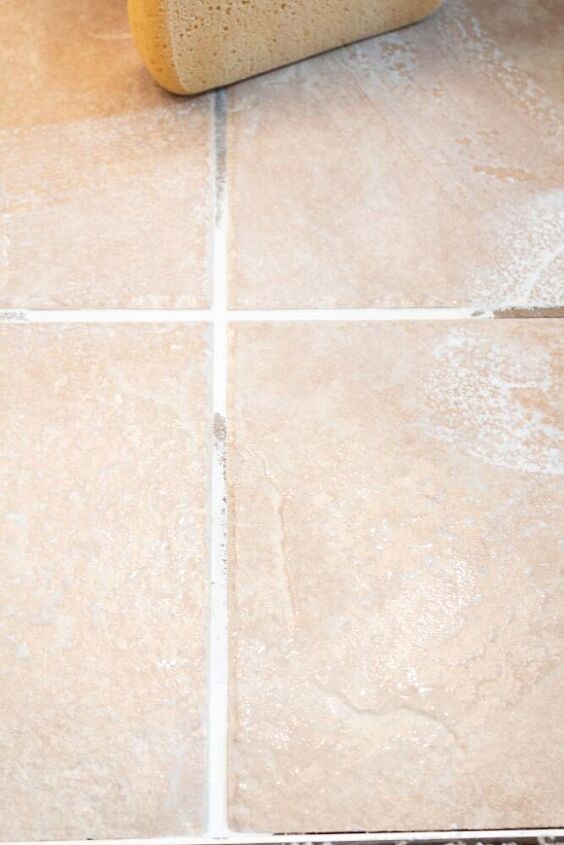
Step 6: Clean the tile surface and allow your grout to set
The last thing you need to do is clean off the fresh grout
from the surface of your tile. Use a clean wet tile sponge to wipe down your
tiles, being careful to just glide over the fresh new grout lines. You may need
to rinse and repeat this step a few times to clean off your tile surface.
And that’s it! Other than waiting for your new grout to set of
course. Which I’m completely incapable of doing. I went into the bathroom the
morning after repairing our grout and decided to poke my finger in the new
grout lines to see how dry it was. Face palm moment. Just don’t do this ok?
My hubby could spot my fingerprint in the fresh grout a mile
away and totally called me out on this one.
For a small repair job like this, about 24 hours is probably
sufficient time for the new grout to cure and harden.
Step 7: Enjoy your hard work
This entire repair took us only 20 minutes to complete. So much
easier than I originally thought and I feel way more confident about flexing my
DIY muscles when it comes to grout repair.
Don’t forget to pin this handy step by step guide for grout repair and check out the amazing transformation of our tiled floor just from painting the grout!
P.S.
Make sure to sign up for my weekly newsletter below where I
stay in touch to help you with your home and share some of my best design tips
and advice you won’t find anywhere on the blog. This is my exclusive little
community and I’d love for you to be a part of it!

Resources for this project:
See all materials


Comments
Join the conversation
-
You’re so welcome Cindy!!! Glad it was helpful
-
I’ve had to do these repairs, too, but found my grout in a cylinder, like caulk. I cleaned out the area where the caulk was missing then used my caulk gun to fill the area. Then used a damp sponge to clean up the area.


Frequently asked questions
Have a question about this project?
You can get a grout knife for about $6.00. And why not get a color sanded grout the color of your grout or close to it?
What's the best & easy way to clean your bathroom grout?