


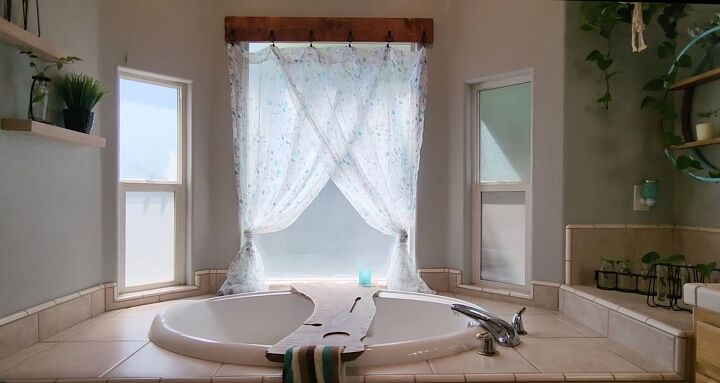
How to Hang Elegant Bathroom Window Treatments Over the Tub

Are you tired of the same old boring bathroom decor? Do you want to add a touch of style and privacy to your bathroom without breaking the bank? This easy DIY tutorial on bathroom window treatments over the tub is the perfect solution
This post was transcribed by a member of the Hometalk editorial team from the original HometalkTV episode.
Adding curtains to your bathroom couldn't be easier with this method that I used to hang mine.
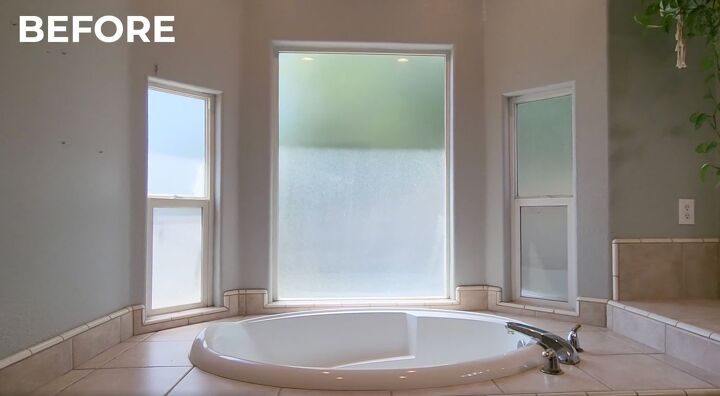
I wanted to surprise my wife and get rid of this boring bathroom. I didn't want to go with the traditional curtain rod, so I decided to do something different.
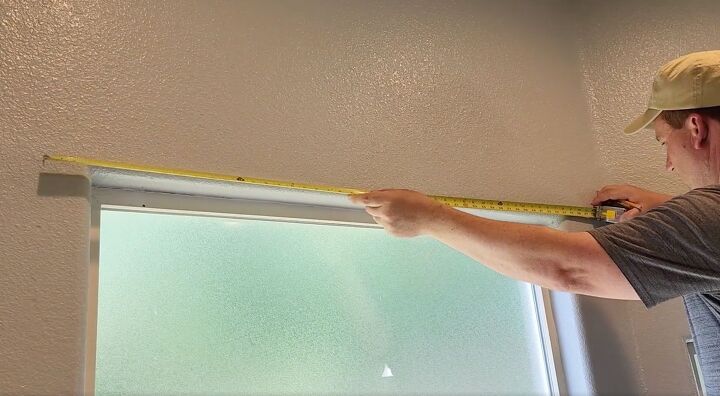
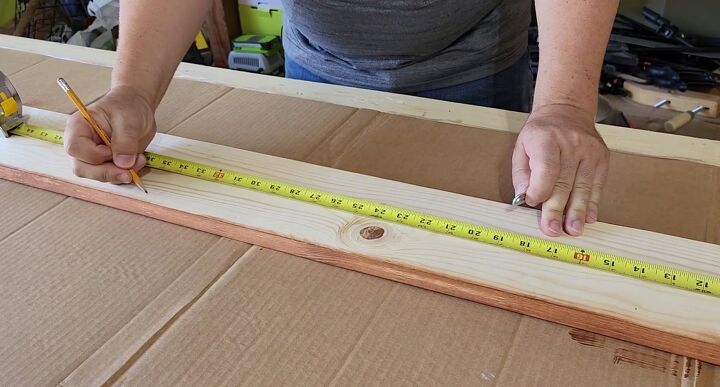
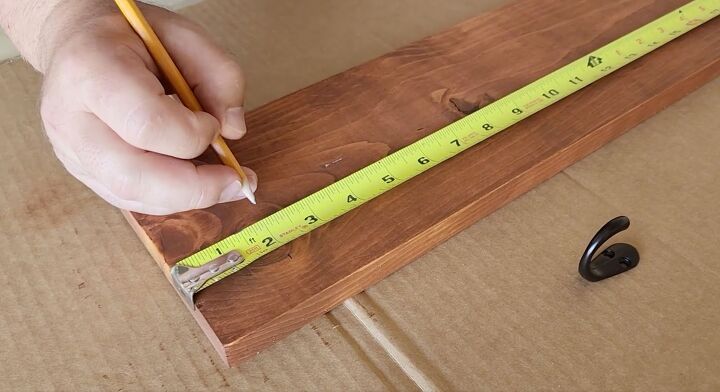
1. Measure the Window
First, I started by measuring the window.
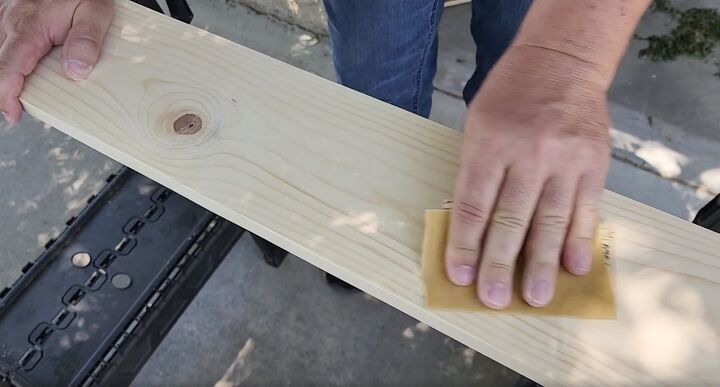
2. Sand the Board
Then, I grabbed a one-by-six piece of board that was four feet long and started sanding it.
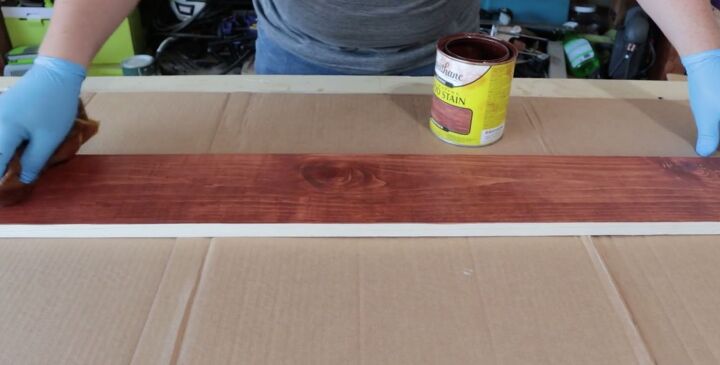
3. Apply Stain
Next, I put some stain on it.
A lot of people use a brush when they stain, but I prefer to use a towel or rag to wipe it on. I make sure to cover every single visible side of the board, taking care to wipe away any excess stain and remove any dark spots.

DEAL DASH OFFER
I often get questions about where I get my supplies, materials, and tools when I do HomeTalk projects.
I want to let you guys know about Deal Dash. It's an online auction site that only offers brand new products. The way it works is that you put in multiple bids, and if no one else bids after 10 seconds, you win the item and shipping is free. I've found many of my tools there.
If you're a new user and sign up now, you can use the promo code "HomeTalk" to get $10 off your first couple of bids.

For example, a tool that normally costs $130 was won for just $2.50 with free shipping.
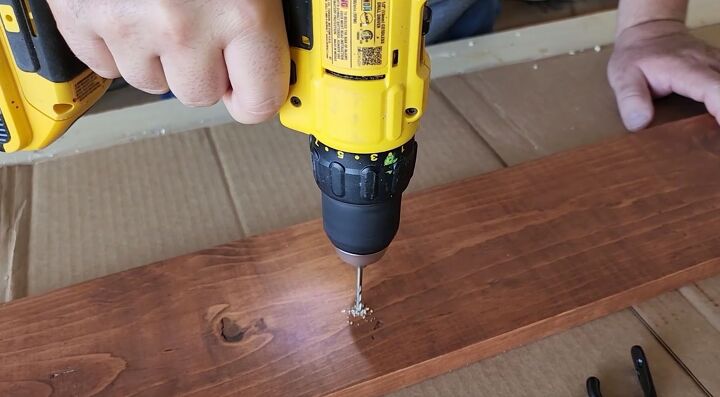
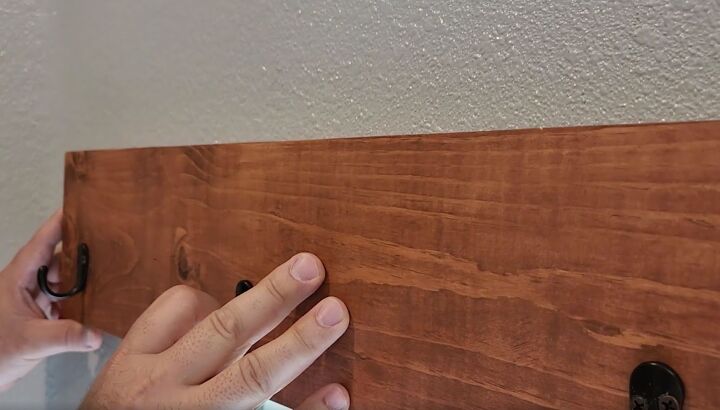
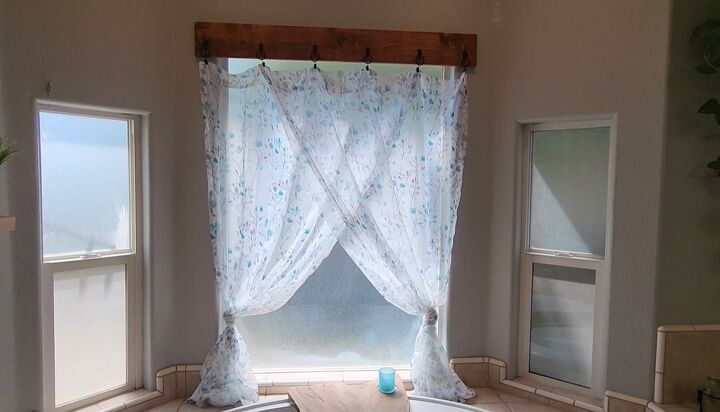
4. Attach Hardware to the Board
Now let's get back to this project. The next step was to attach the hardware to the board that would hold it against the wall. I chose hardware that would keep the board flat against the wall.

Start by marking the back of the board where you want the hardware to go.
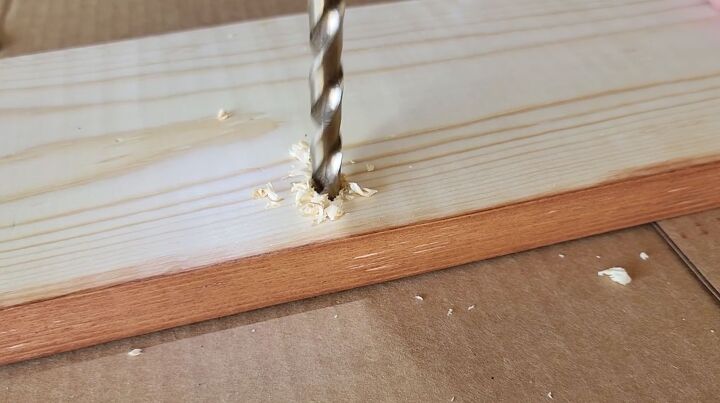
Then, drill holes for the screws that will go into the wall. This allows the screws to sit flush inside the board and hold it securely. Once you finish drilling, clean up the sawdust.
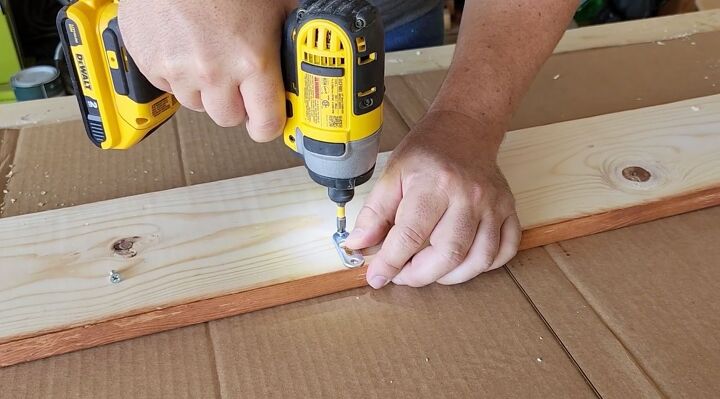
Next, install the hardware using the provided screws. For a board like this, it only takes two pieces of hardware at each end.
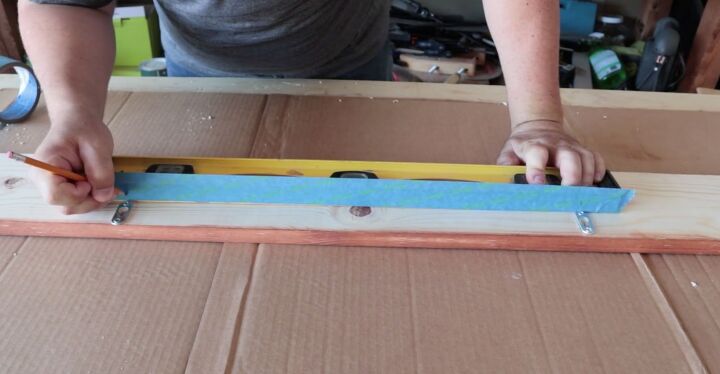
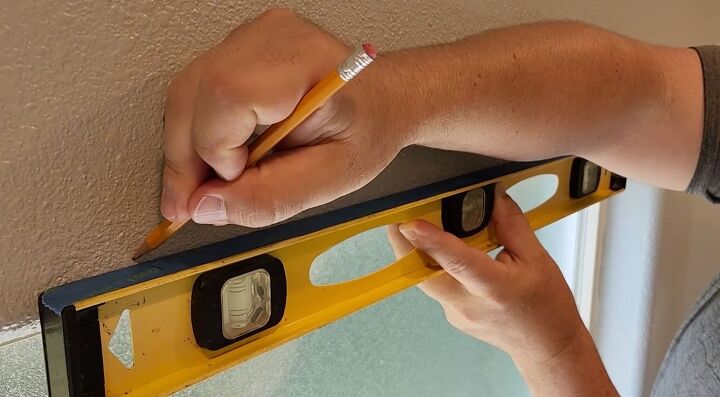
5. Hang the Board
Do you want to see a good way to hang this up and make it level every time?
Take a level and put a piece of tape across the top. Lay it flat where the hooks will go and then measure and mark right at each hook.
Once you do that, set the level aside for later.
Next, we need to put up the hooks. I used black decorative hooks and measured and marked equal distance between each hook by dividing the board. These spots are where the hooks will go.
Be sure to predrill each hole to prevent the board from splitting.

Once you finish drilling, attach the hooks using the provided screws, making sure to insert both screws in each hole.
Remember that level we used earlier? Put it against the wall and mark where you marked on the tape.
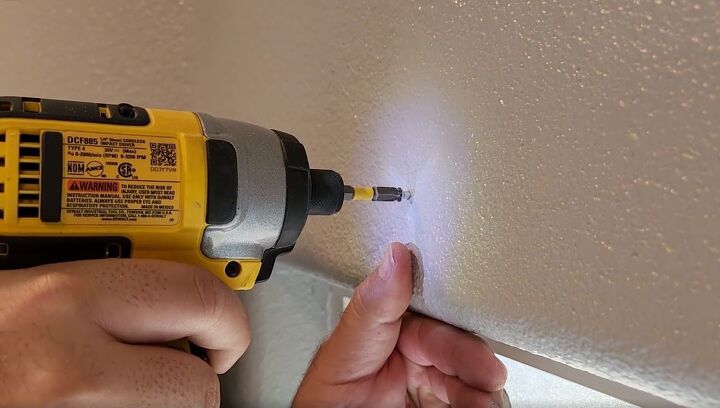
Then put screws in the wall in those two places, making sure that they stick out a bit.
Take the board and slip it onto the screws. The screws won't be visible once the board is in place, and it will be tight and secure.
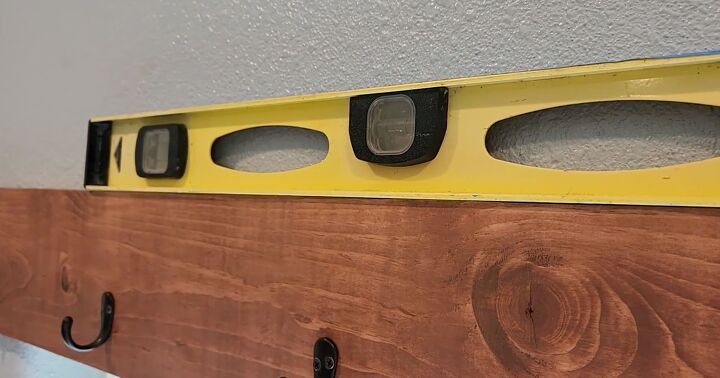
Check one more time to make sure it is level.
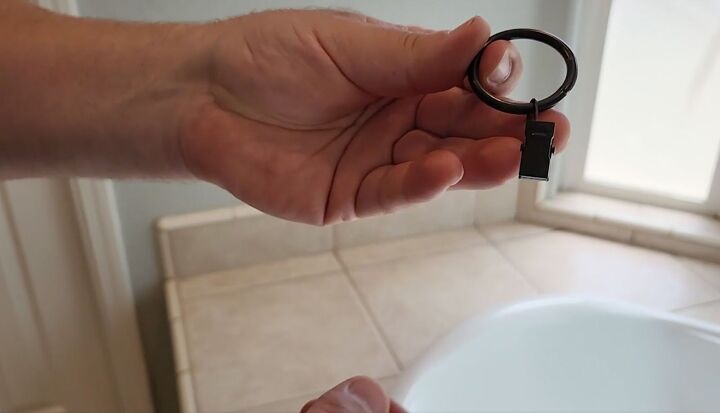
6. Add Clip Rings to the Curtains
Next, grab some clip rings. This way, there's no need for sewing to hang the curtains.
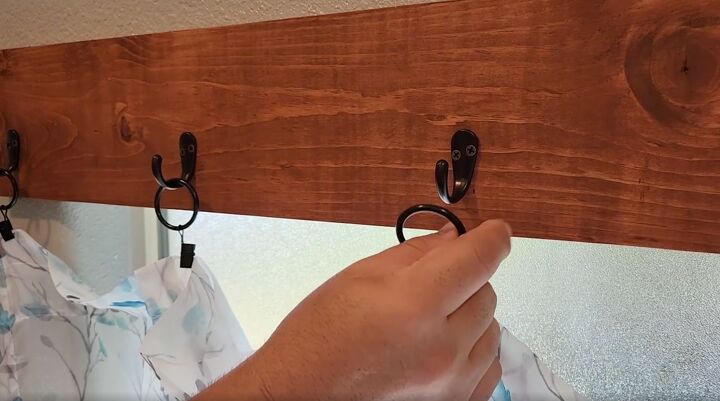
7. Hang the curtains on the board
Just clip each ring onto the curtain and then hang them on the rod. I went from a boring bathroom to a Farmhouse spa.
8. Decorate the rest of the bathroom
The last step is to decorate the rest of the bathroom.
More Bathroom Projects
Elegant Bathroom Window Treatment Tutorial
Doesn't that look amazing? This took no time at all and it was easy to do.
This bathroom window treatment over the tub idea is a great way to add some personality and privacy to your bathroom.
I hope my tutorial inspires you to get creative with your own bathroom windows, and I'd love to see your results! So, don't hesitate to comment below and let me know how your project turned out.
Thanks for reading, and happy DIY-ing!
Resources for this project:
See all materials


Comments
Join the conversation
-
Nice job! I love the piece of wood that is laying across the tub. It's looks like a great place to rest a book if you read in the tub.
-
This looks amazing. what a lucky wife! I am copying this idea for our country cabin. Love it. Thanks


Frequently asked questions
Have a question about this project?
What did your wife think?
Do you also do house cleaning and laundry? My husband would have never thought of the bath being "boring", to him it's just a bathroom!!!!