


Wrap Around Wood Mantle
I've been wanting to spruce up my peninsula fireplace for a while and finally decided to add a faux wood beam wrap around mantle!
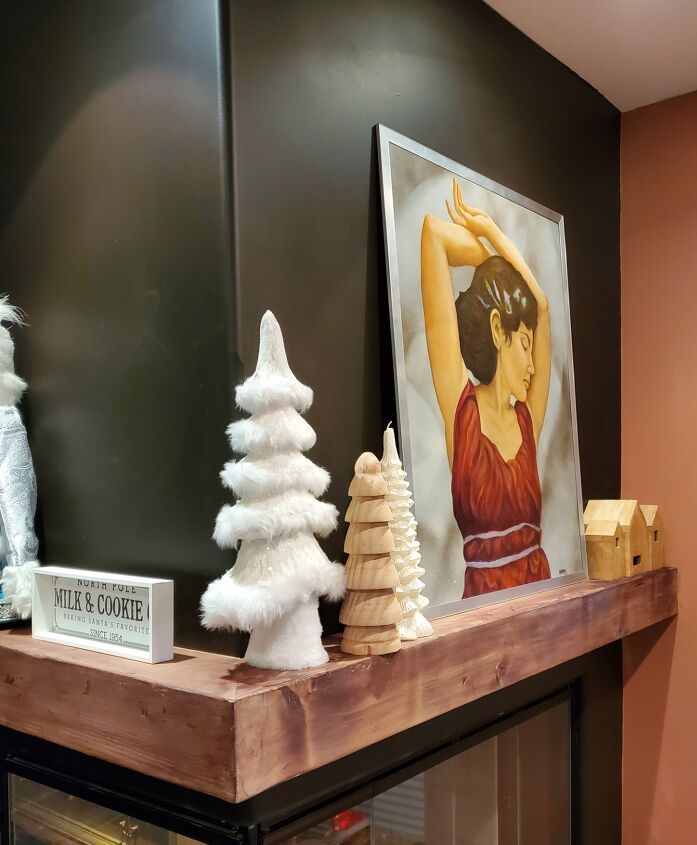
I love the character and charm it adds! It also makes decorating this space so fun! For this project I used #2 pine boards. The price of some types of wood is finally coming down so this project didn't break the bank either. 😅
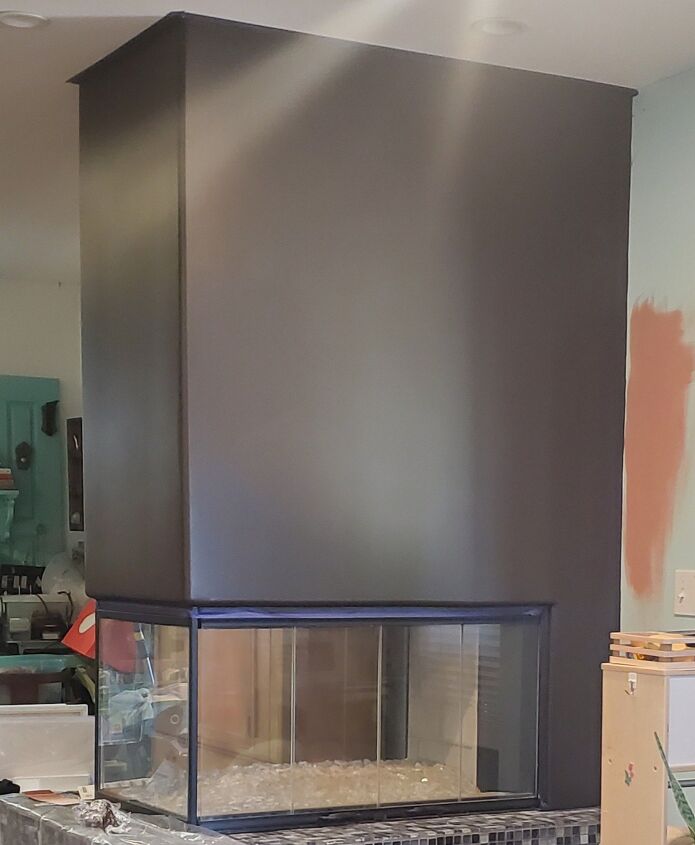
Here's where we started before. This was a couple months ago when we painted the walls and the fireplace.
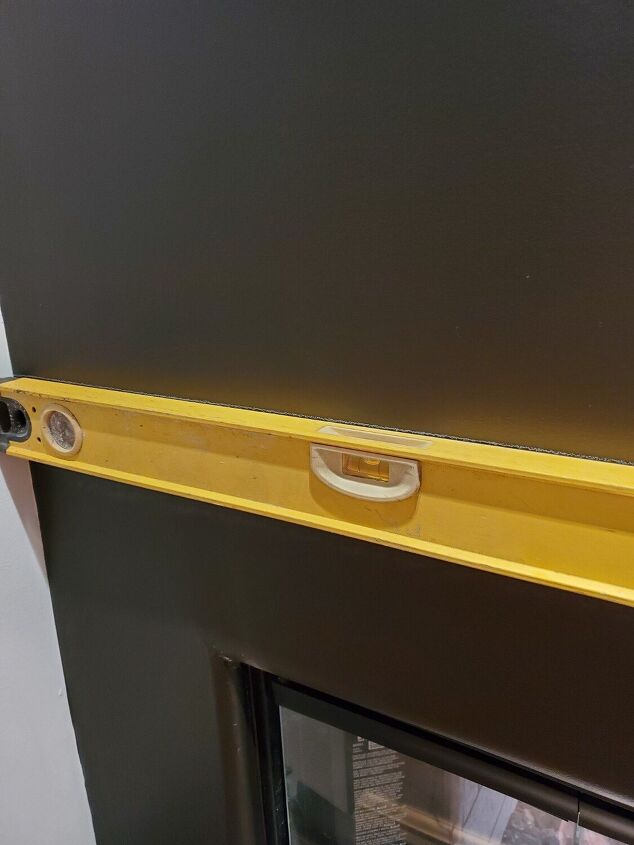
I started by figuring out where I wanted my mantle to go and marking a level line all the way around. You will need to research appropriate and safe heights/distances to add a wood mantle depending on the type of fireplace you have.
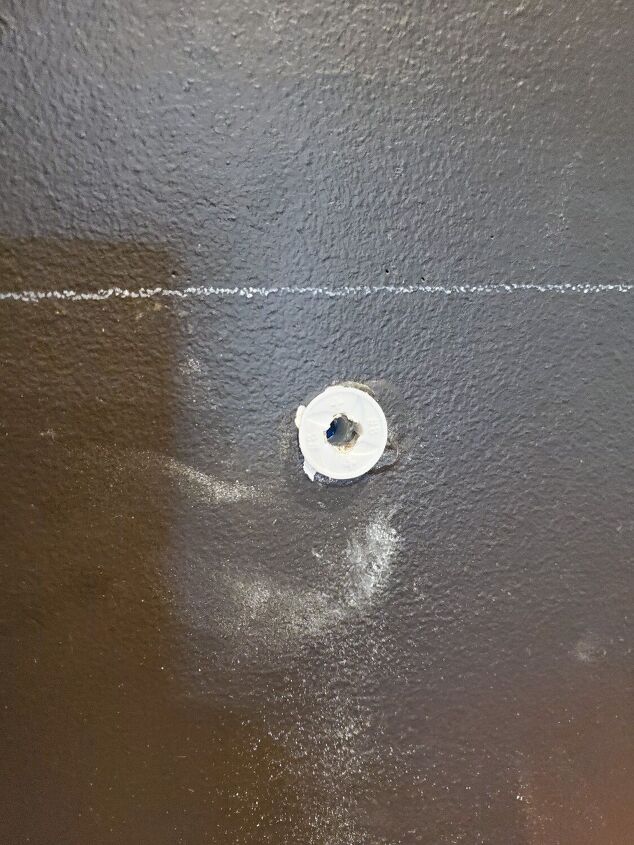
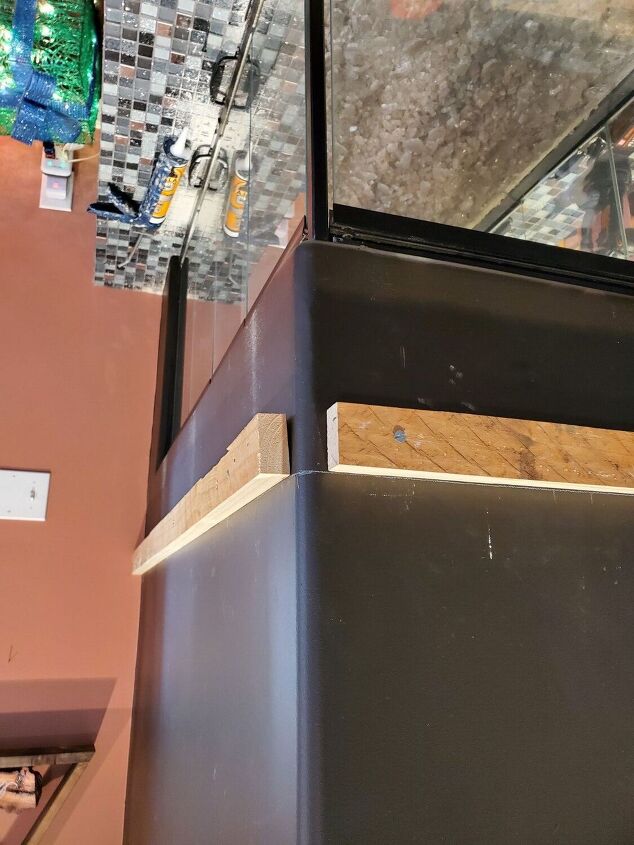
This was the first place we ran into issues. The plan was to secure a cleat into studs but we discovered there was just drywall in front of a metal surround at the location that we wanted our mantle. We did a little research and ended up using some heavy duty drywall anchors. I'm not a huge fan of anchors in general but sometimes they are the only option.
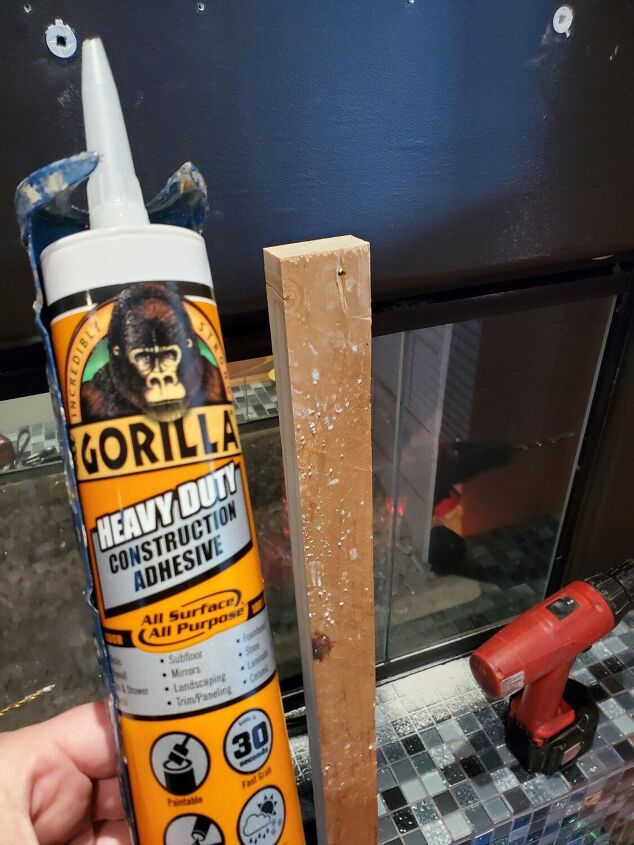
To add some extra strength, I used heavy duty adhesive in addition to the screws and drywall anchors. I also predrilled my cleats.
When I was installing the cleats, I had a couple of screws strip on me so I replaced those with larger screws. I wanted this thing to be as strong and sturdy as possible!
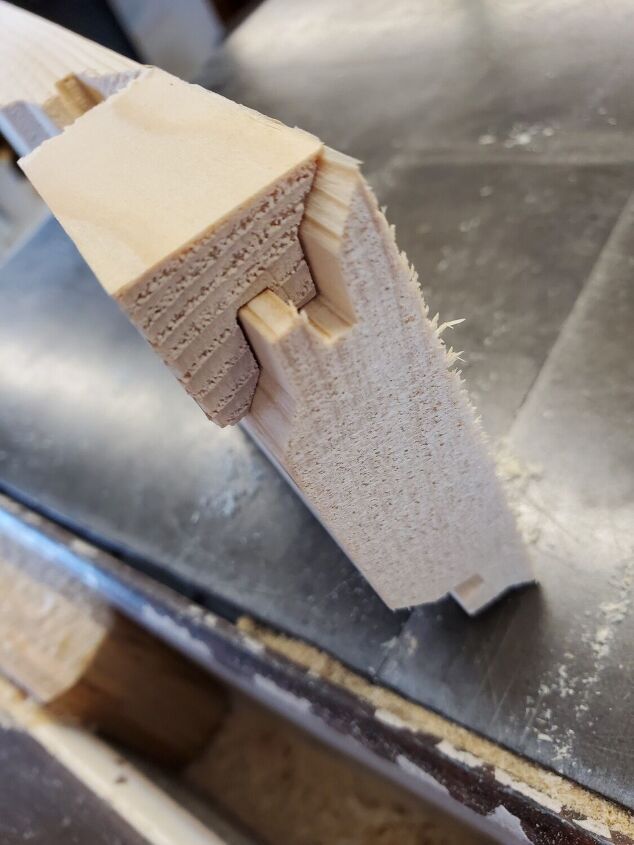
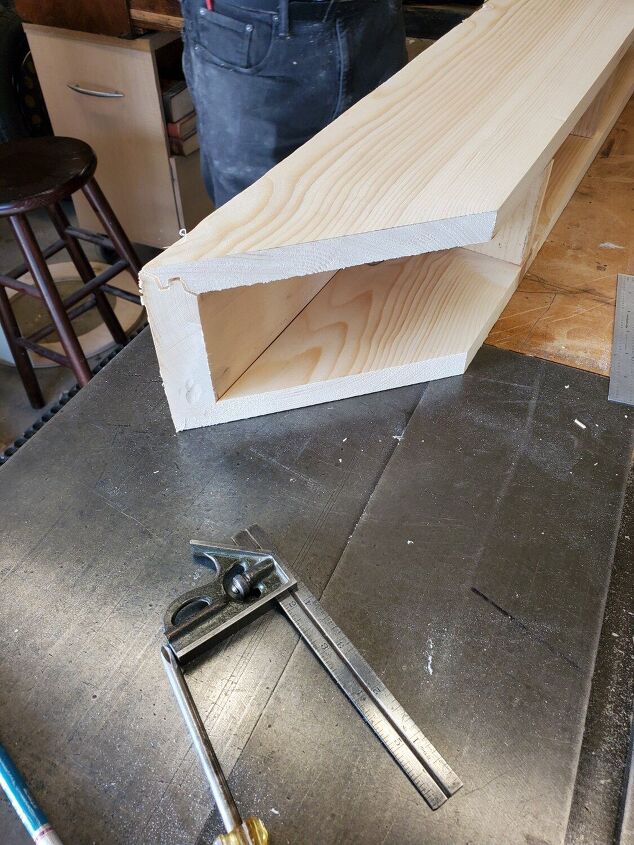
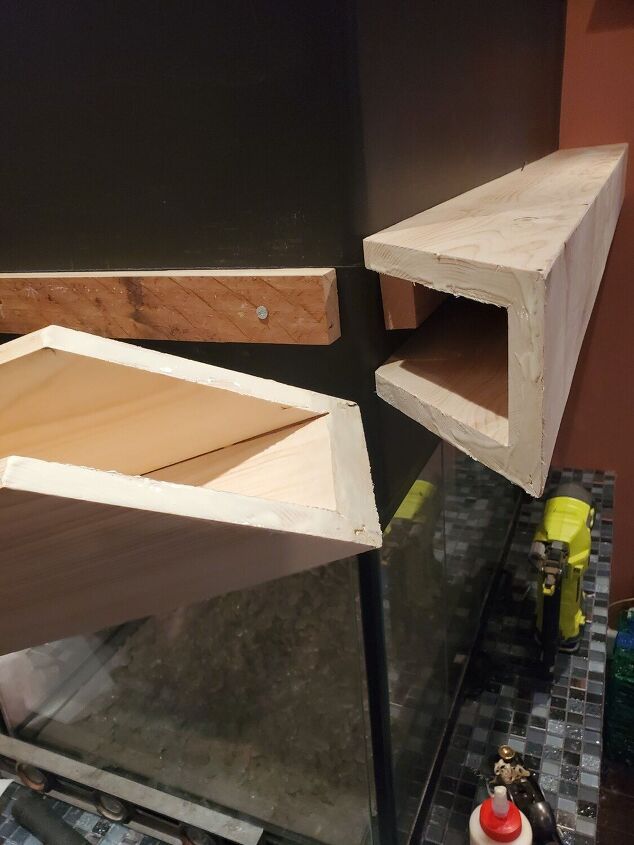
My original plan was to make three separate mitered "boxes" (one for each side of the fireplace) and screw them onto the cleats. Instead of a basic miter cut, my dad suggested a lock joint miter. This would give the piece extra strength and also make it easier to glue up the boxes.
Since my fireplace is not perfectly square, we cut the pieces long, overlapped them, and traced the exact angle we would need to cut them at to have a tight fit.
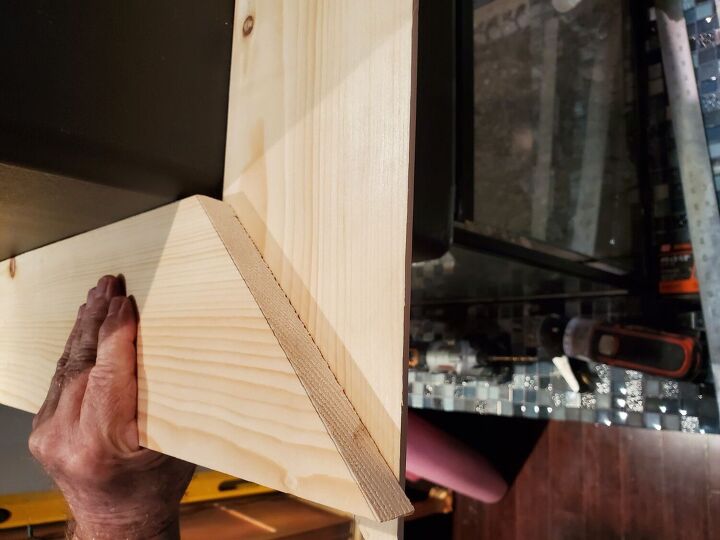
Next, we assembled the three sides of each box.
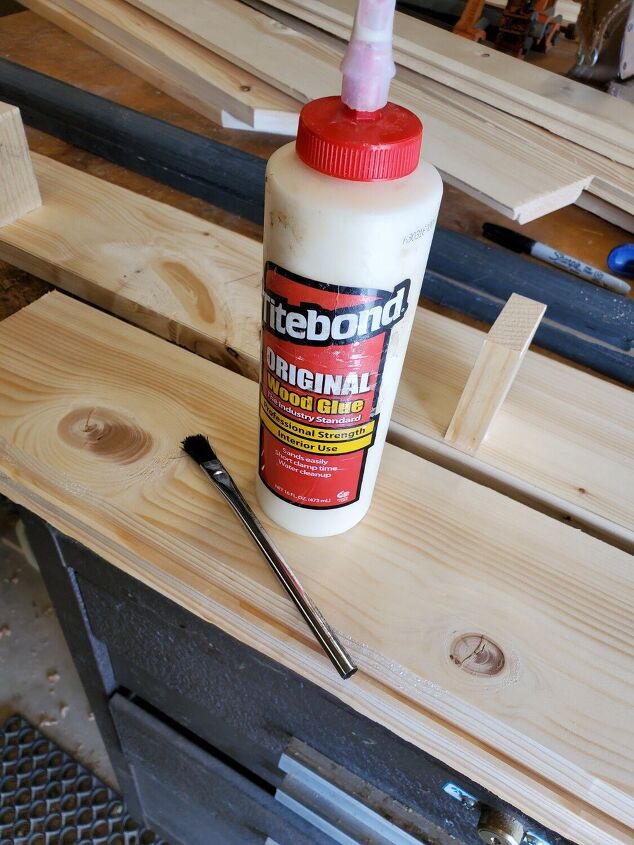
We made sure to get a good strong hold by using an acid brush to get wood glue inside all of the joints. We also cut blocks to go in between the pieces to keep them nice and square when we glued and clamped them.
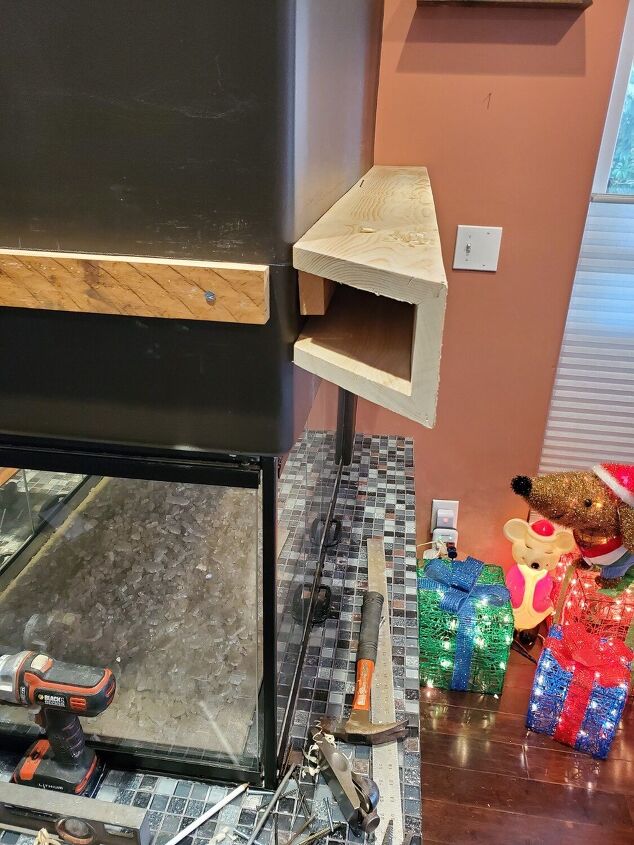
Once we had all the angles and cuts right, I nailed the boxes into the cleats.
This is where my cordless airstrike nailer comes in super handy!
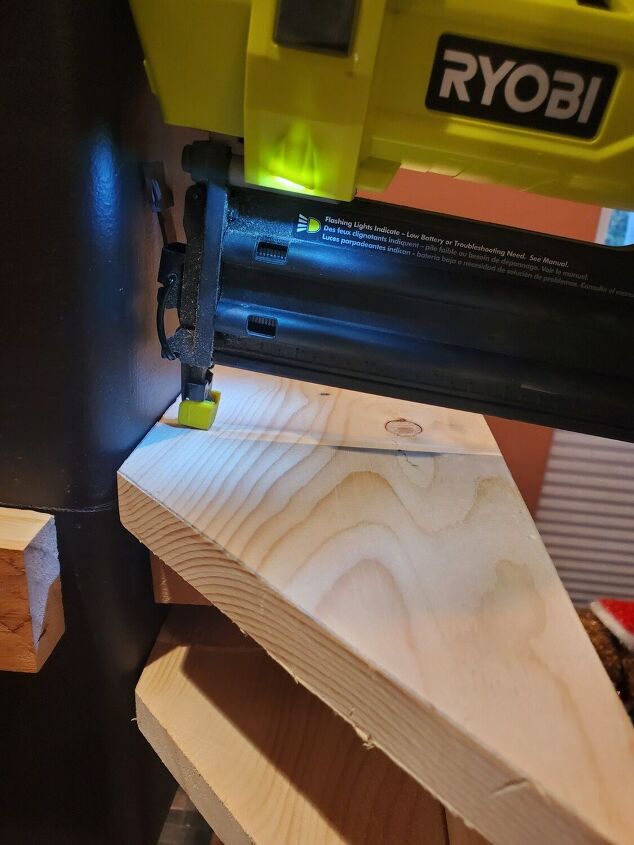
I used wood glue where each of the boxes met and then we clamped the entire front on the mantle.
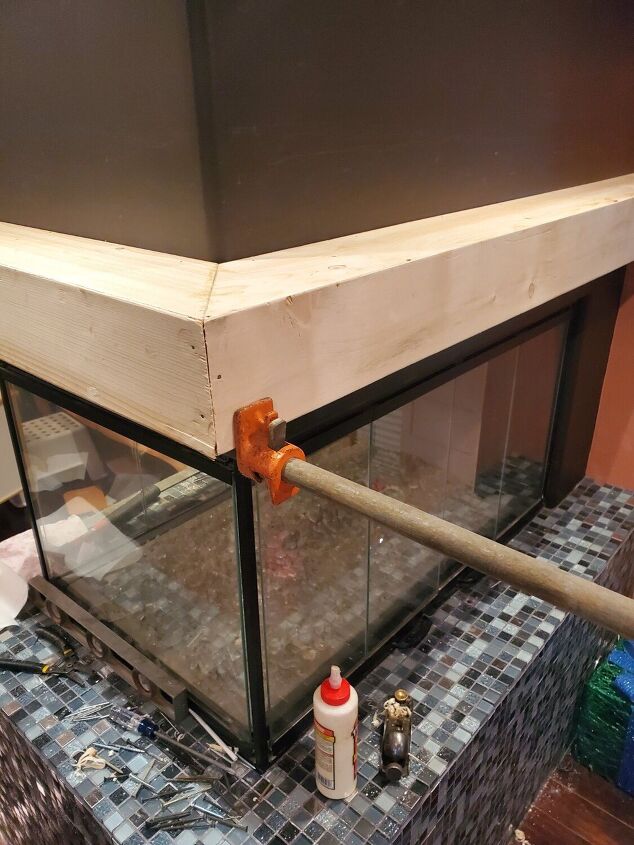
I also shot a couple of nails through each miter into the adjoining piece.
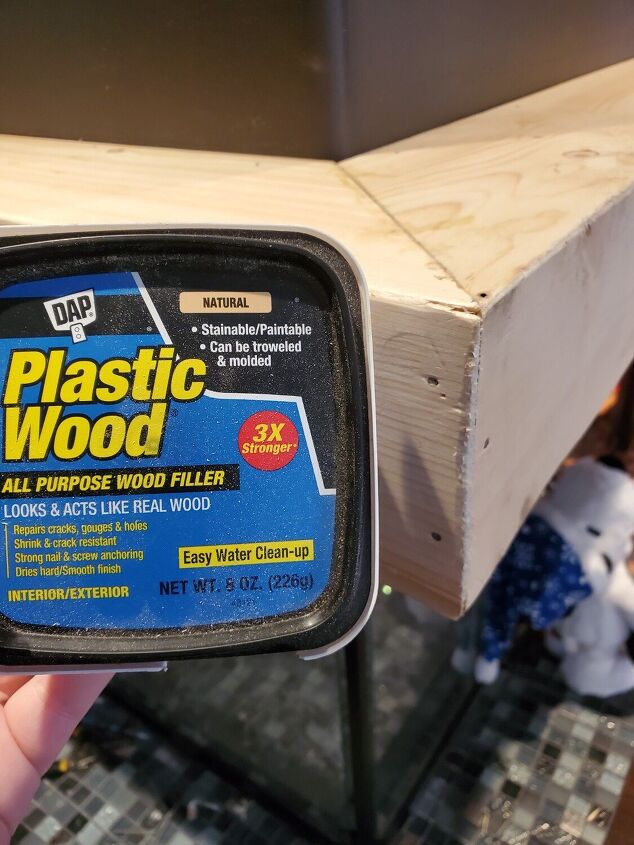
Next, I set any nails that needed to be set and filled all of the holes. When the wood filler was dry, I gave the entire mantle a good sanding. I thought I wanted it to be distressed so I started distressing the wood a bit but then I changed my mind and decided to leave it with a fairly clean and smooth finish.
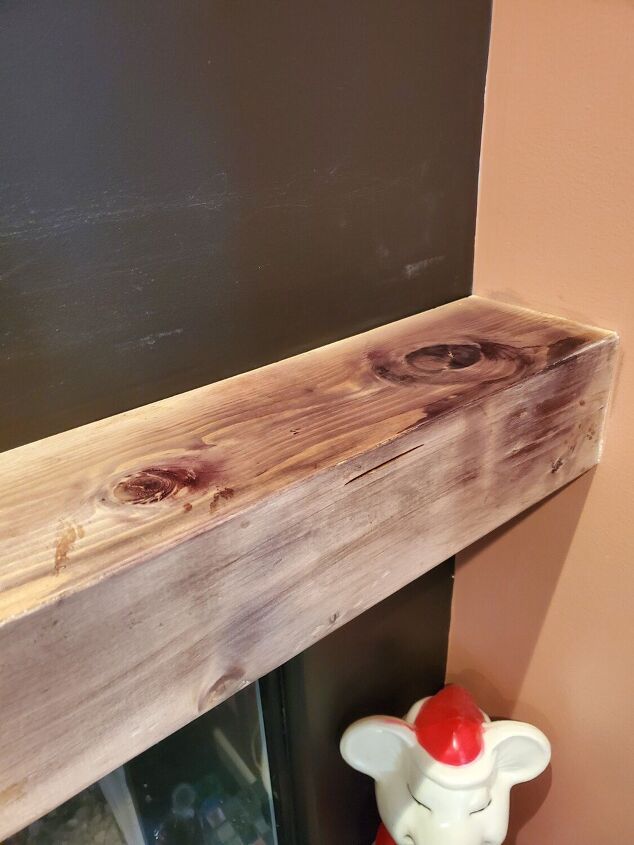
I decided to go with a medium brown water based stain. They don't stink nearly as much as oil based stain (great when staining indoors) and they also dry a lot faster.
Once the stain was dry, I sealed the entire thing with a low sheen water based sealer.

I'm so happy with how it turned out!
I hope you enjoyed following along and I hope this inspires you to create something beautiful in your own home!
Comments
Join the conversation
-
Great looking mantel. Gives the fireplace some character. Good tutorial. The lock joint miter makes it look like a solid piece of lumber. Great job!
-
best thing you can ever own is a stud finder and get one with electric exposer so you don't hit any wires .My next must have is electrical testers . All are worth the small cost of those items and a life saved .


Frequently asked questions
Have a question about this project?