


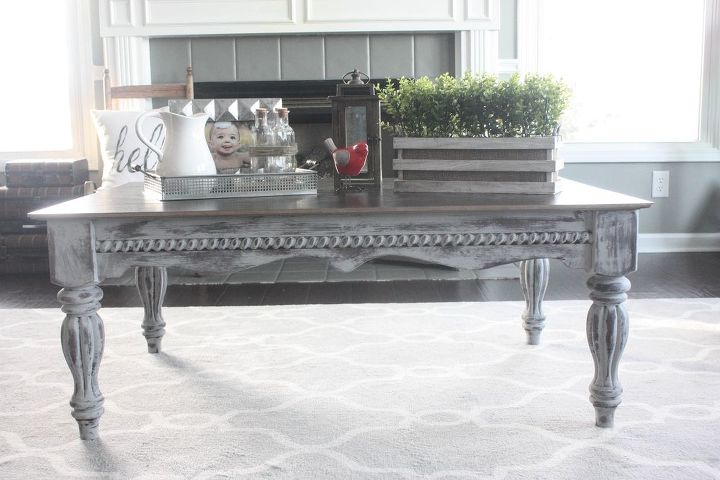
The FREE Coffee Table With a VERY Creative Top!
This is one of those projects that required a little bit of creativity. The best thing about it is that by being creative, I was able to do this entire projects with things I already had on hand, so basically, it was FREE! You see, the coffee table in and of itself was already free. Do you remember the story I shared with the Hexagon Side Table about my c0-worker whose family was having a yard sale? Well, this was one of those items. Only, it wasn't in any of the pictures she sent, so I didn't know I was getting it until I got there to pick everything up! What a great surprise!
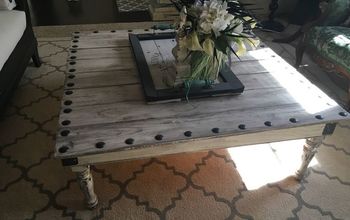
The only problem was, the glass that filled the inserts on the top was broken out, so it wasn't usable in its current condition. It needed a little love and TLC, and that is where I came in. It has actually been sitting in my garage since August, but there are just only so many hours in the day! {And trust me, I have WAY more projects than hours!}
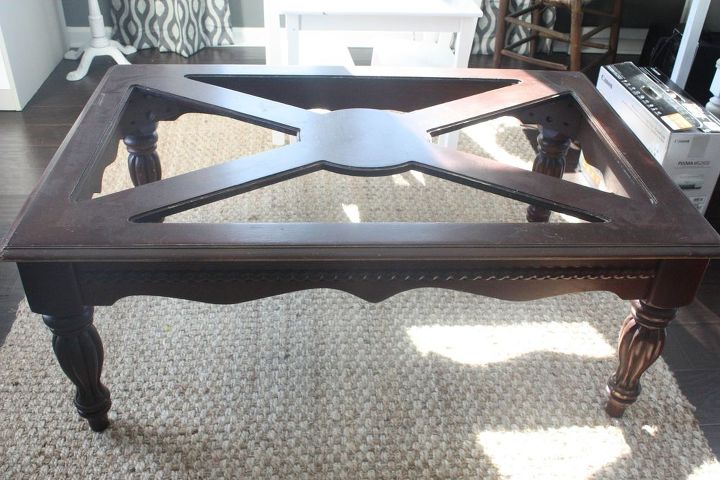
So anyway, I finally brought this beauty in and got to work. Here it is before:
The bones of this piece are fantastic. The top is neat, but it isn't my taste, per say...so I knew I wanted a fresh start.
The only problem was, the glass that filled the inserts on the top was broken out, so it wasn't usable in its current condition. It needed a little love and TLC, and that is where I came in. It has actually been sitting in my garage since August, but there are just only so many hours in the day! {And trust me, I have WAY more projects than hours!}
So anyway, I finally brought this beauty in and got to work. Here it is before:
The bones of this piece are fantastic. The top is neat, but it isn't my taste, per say...so I knew I wanted a fresh start.
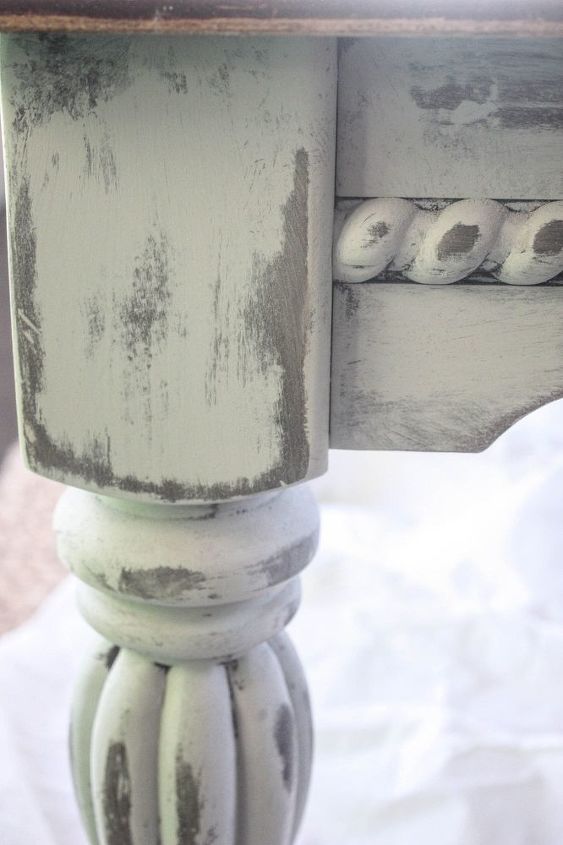
To me, this was a no brainer. I have been wanting to do another heavily distressed piece, so this one was perfect. {Can you spot the lady bug? I just noticed it as I was loading this picture! Definitely shows it has been outside for a while!}

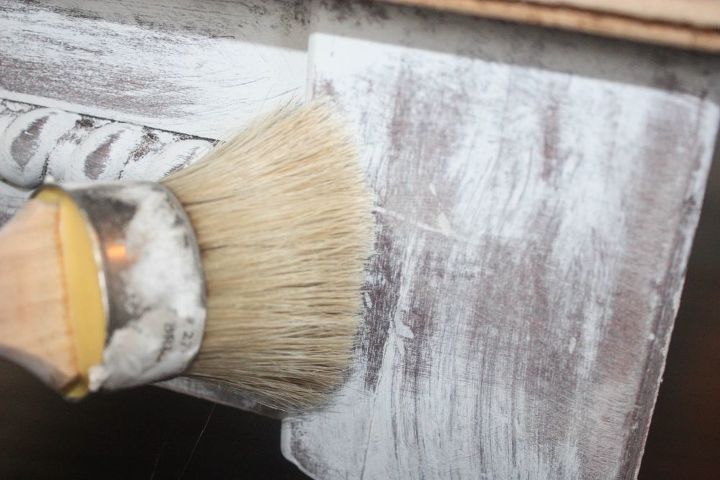
Here it is after 1 coat {which is all it took}. I just haphazardly put the paint on with a thin layer, not worrying about getting every inch. I actually didn't want to get every inch. I just wanted a thin layer because I would be sanding it down ALOT to get the look I was going for. Having a thin layer makes it that much easier to sand too!
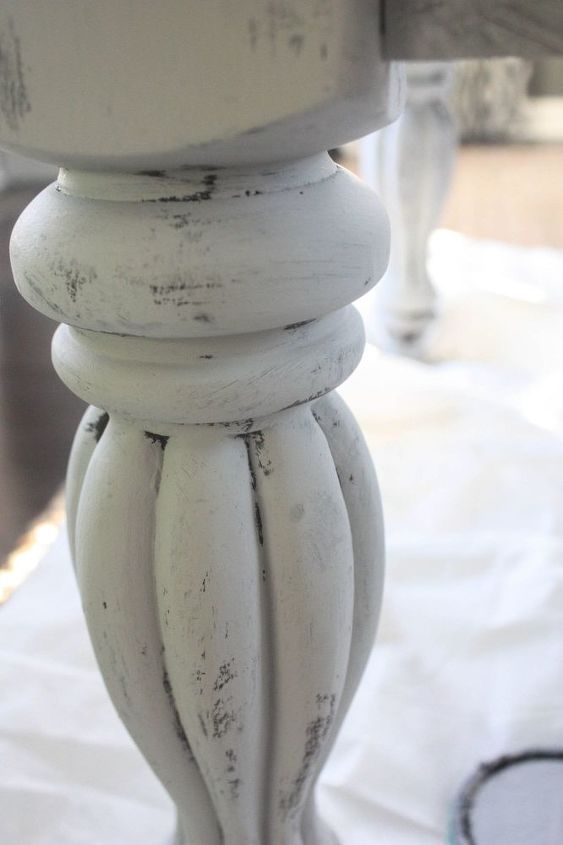
So, I got to sanding pretty much everywhere...and this is what it was starting to look like. {before I wiped it down to get the sanding dust off} I LOVE.
This may sound like a backwards way to do things, but I have never been real conventional. I actually left the top on for all of the painting. Why? Well, 2 reasons. One reason was that my husband was not home to help me get the top off, and two- I knew it wouldn't affect any of my work and that the whole top would be re-covered.
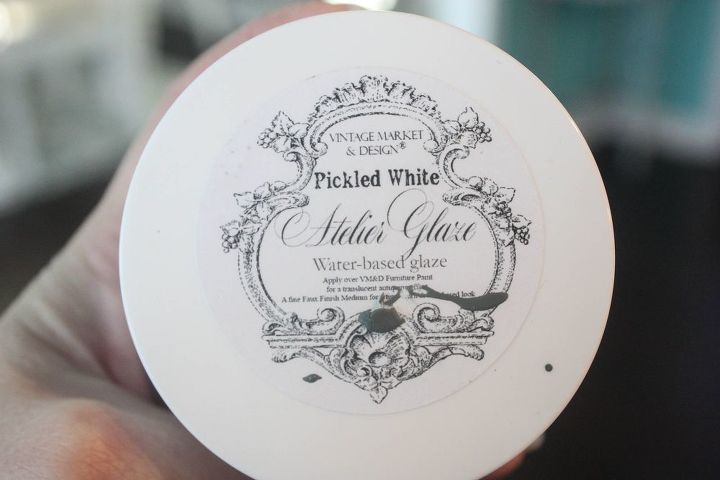
You just "paint" over the existing {after it is very good and dry} and let it sit. So easy.
So, now that the bottom portion of the table was complete, I had to figure out just what I could use for the top, and here is the key...I wanted it to be something I already had on hand, so that this entire piece could be completely FREE for me. SO, my husband had a great idea. He suggested using some of our leftover flooring to go on the top! WHAT A CREATIVE IDEA! He is good at helping me come up with ideas. Thanks Mr. Re-Fab
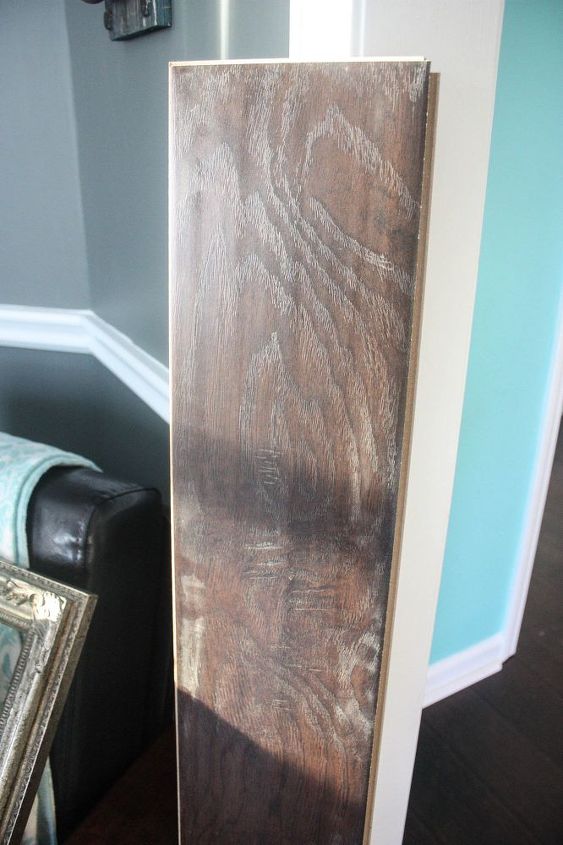
He took the leftover boards and snapped them together. We needed 4 to fit across this table. It is a very good sized table! They laid PERFECT across the top and did not have to be cut down or anything. I was amazed. We did have to trim the edges to give them a more clean look. To attach, we used the same screws from the previous top. That made it lay down perfectly flat.
For lots more pictures of the finished product, along with more from the process, check out my blog! You will also find many more easy DIY projects and complete room renovations! Thanks for checking out my project :)

Want more details about this and other DIY projects? Check out my blog post!
Comments
Join the conversation
4 comments
-
I really, really love what you did to this table! Using floor boards is a genius idea and it fits so well with the bottom of the table. Love!!
-
Pretty- love that finish!


Frequently asked questions
Have a question about this project?