


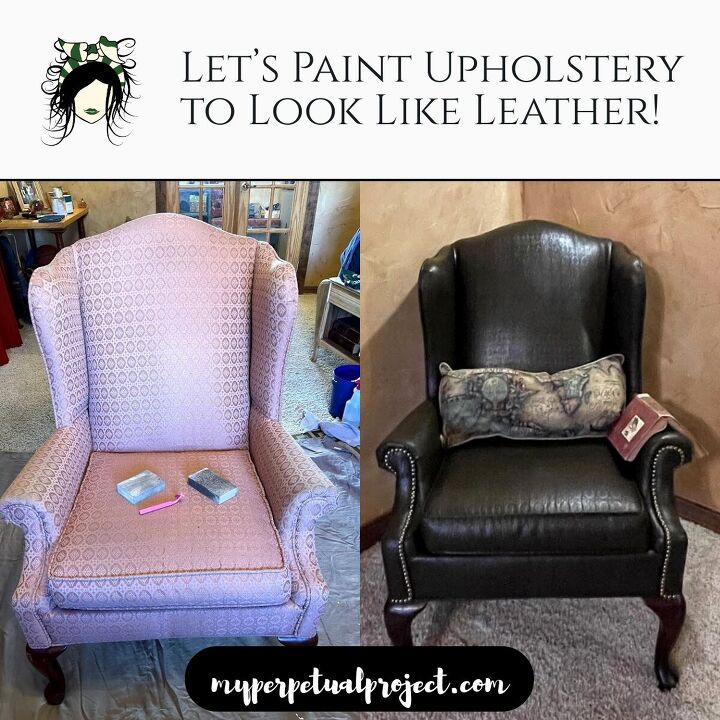
What I Learned When Painting My 2nd Upholstered Chair

A few months ago, I painted a pink wingback chair for my son. The velvet brown paint I used transformed the pink fabric into a leather-look deep brown. I loved the process so much that I decided to paint another wingback chair.
Here are the before and after pics of the son's chair.
The post is here:
https://www.hometalk.com/diy/living-room/furniture/i-painted-an-upholstered-chair-44478166
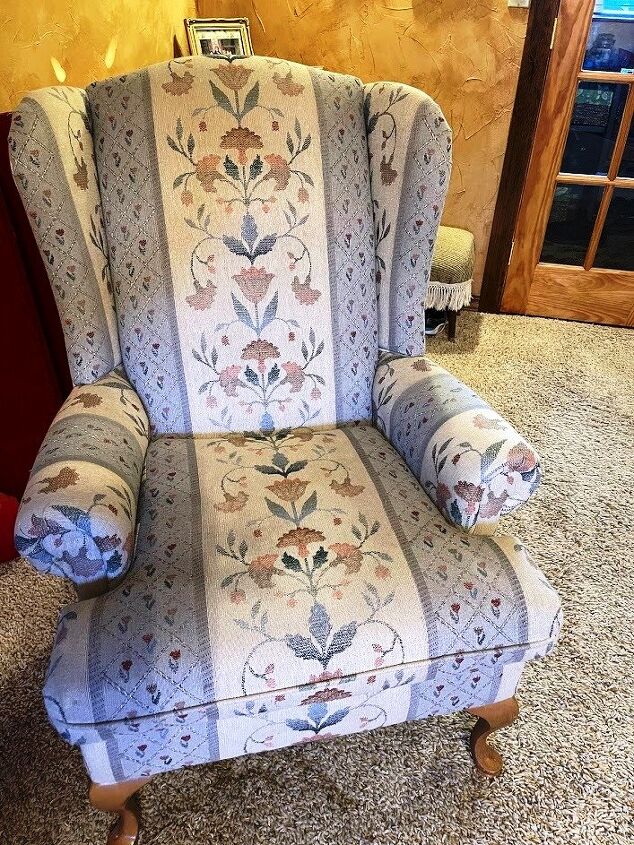
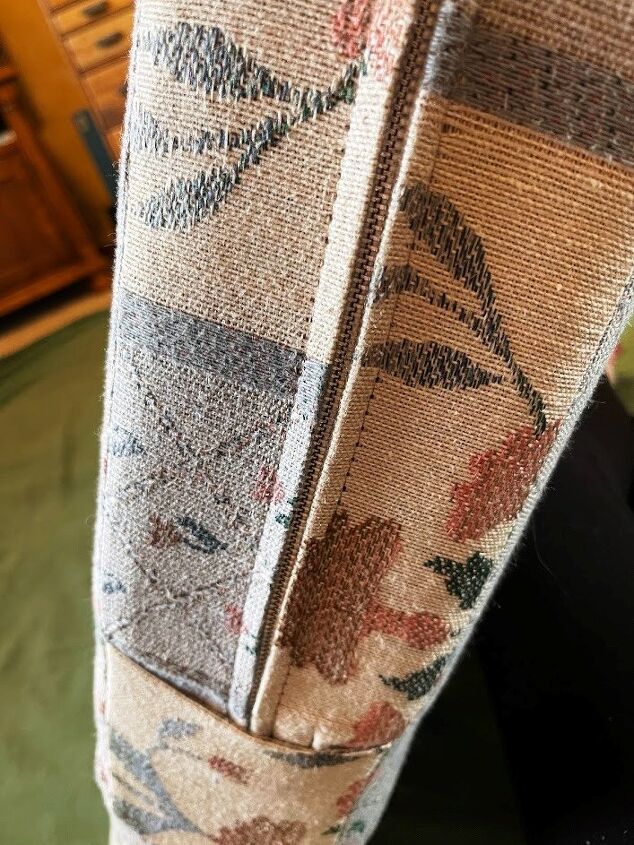
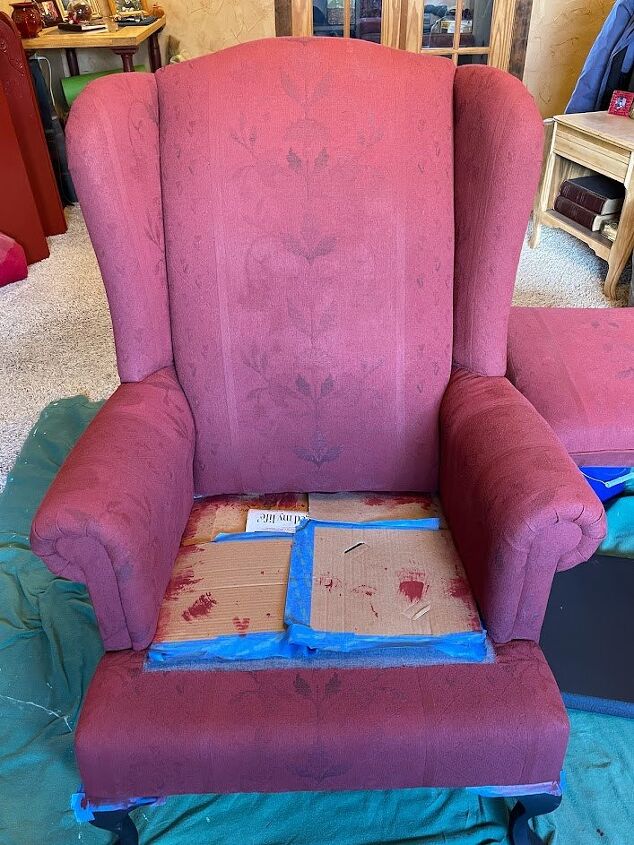
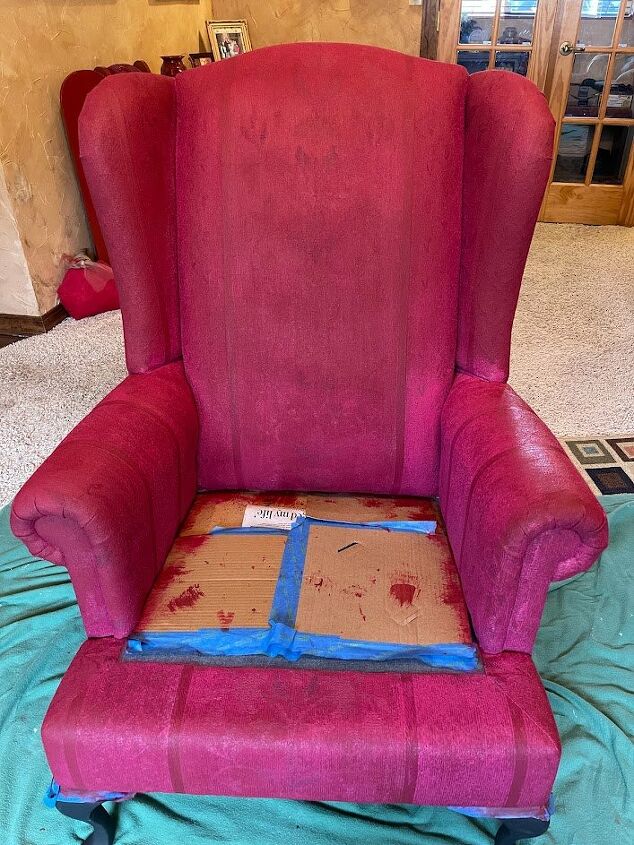
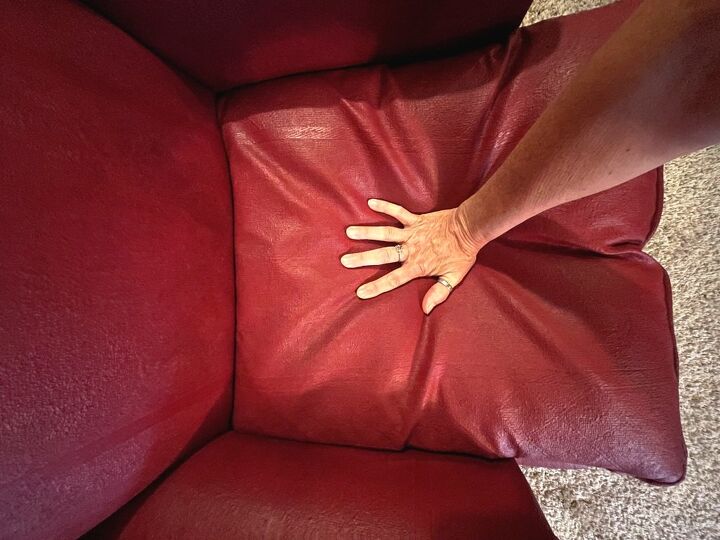
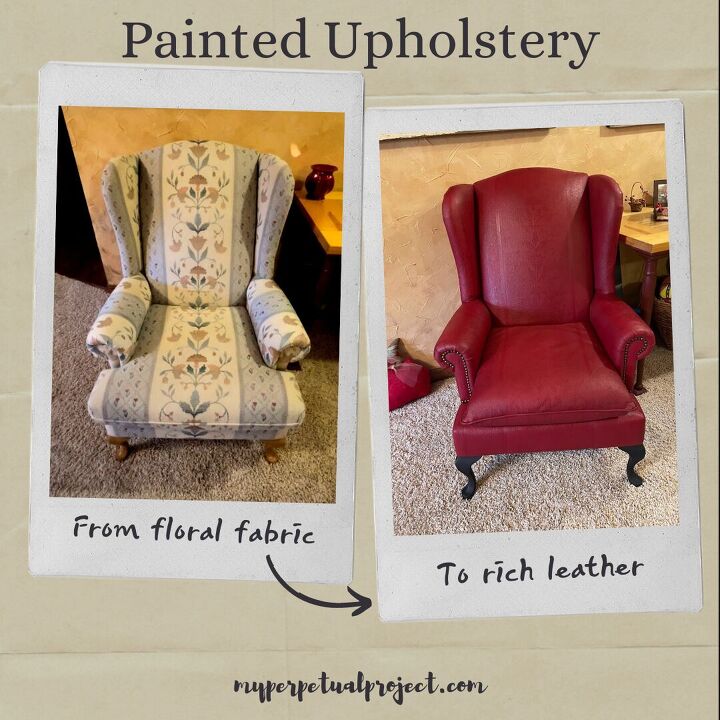
Once I decided to paint another upholstered chair, I headed to the thrift stores. The first stop was Habitat, where my son found his for $25. While they had a few chairs, they were all over $45! I was able to find one with an interesting pattern at another thrift store. Although it has some wear and tear, since it was $25, I bought it. It wasn't until I got it home that I realized the style of the cushion was different than the 1st chair I painted.
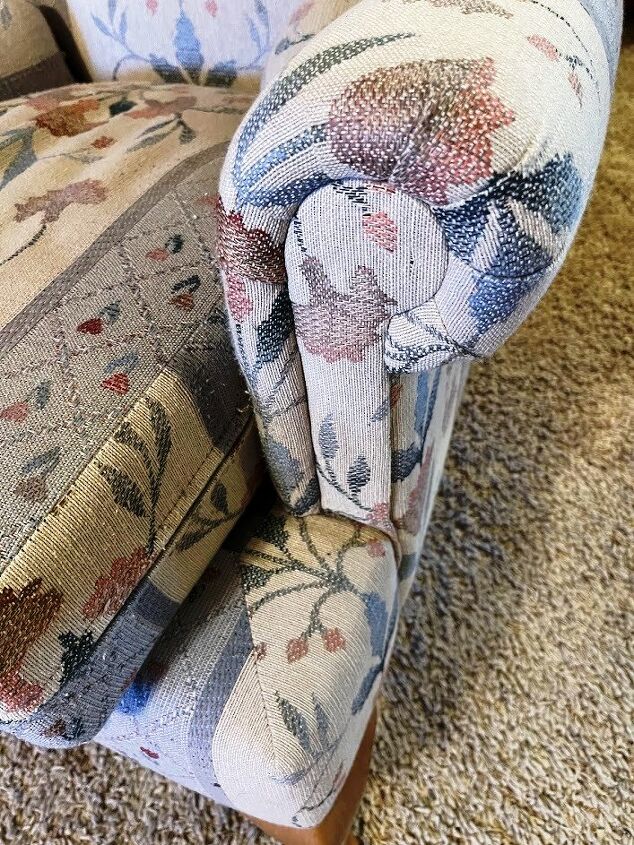
Although the cushion was in good shape, I was disappointed that part of the front of the arm was covered. I planned to add decorative tacks along the front so I needed to alter the shape of the cushion. I flipped the cushion around to make sure the new cushion shape would look ok.
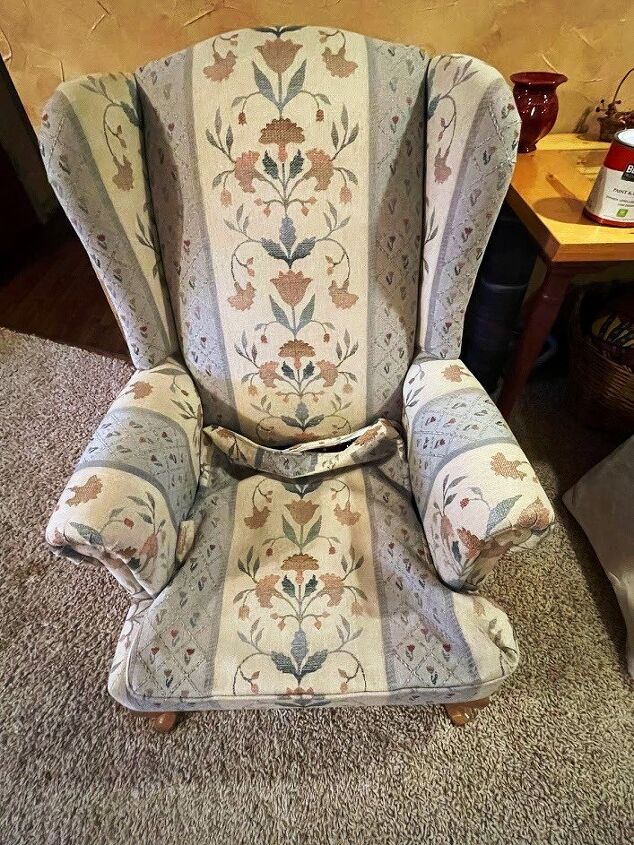
It did look good so I decided to change it. *I'll write a detailed post on how I altered the cushion*
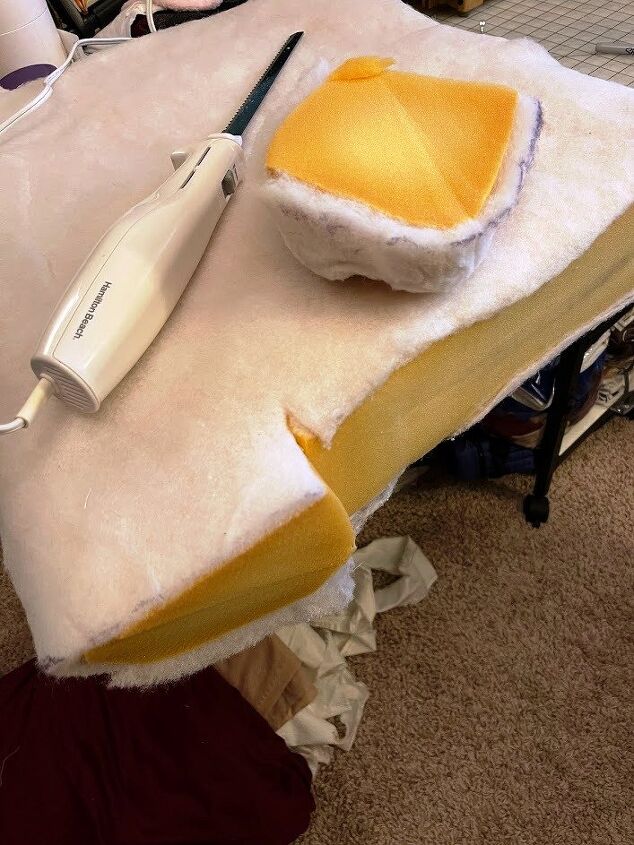
After I finished sewing the cushion, I used an electric knife to change the shape of the foam padding.
If you have a cushion you want to alter, here are the supplies I used. You could easily sew this by hand.
- Sewing machine
- Thread
- Pins
- Scissors
- Knife or electric knife
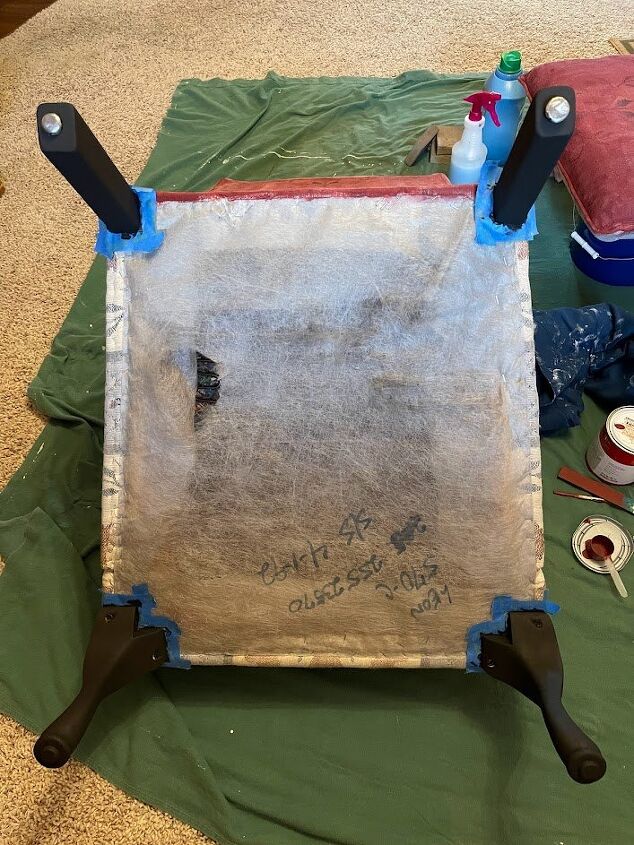
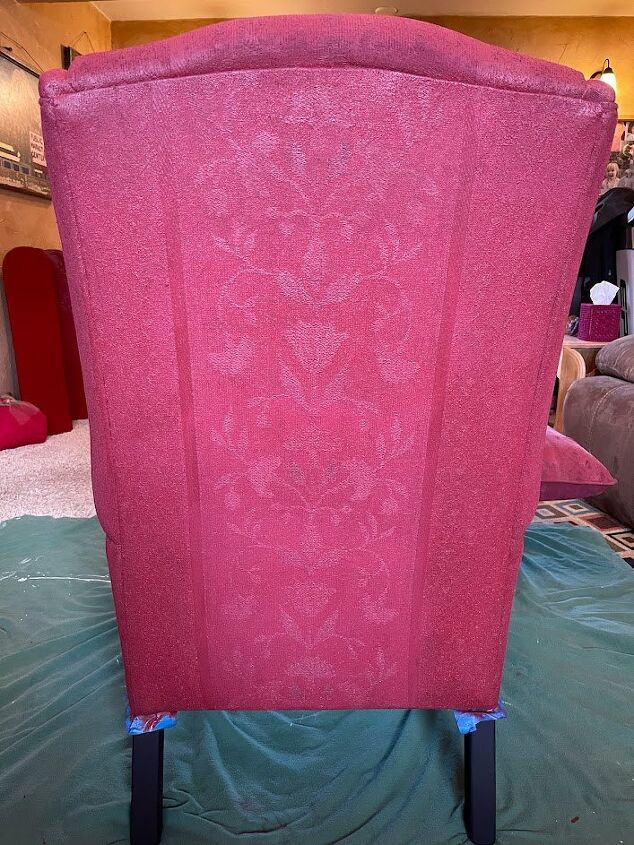
The first step is to make sure the piece of furniture is clean and to give it a good vacuuming. This chair was fairly dirty so I used some upholstery cleaner I had on hand. I sprayed all the soiled areas well, then scrubbed them with a wet cloth. Once the fabric was dry, I vacuumed it. I also clipped off loose threads.
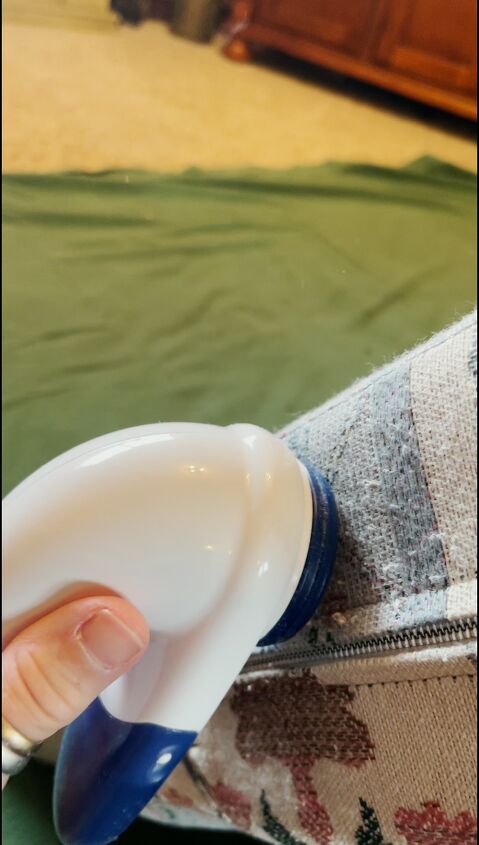
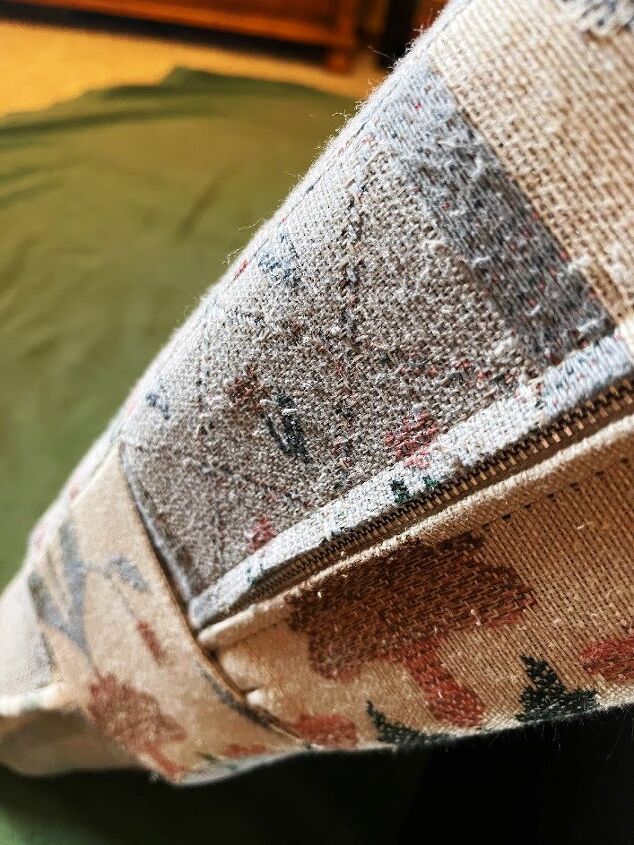
Since the chair has been well-used, there were several areas where the fabric was balled up on the cushion, the arms & the back cushion. I used a fabric shaver to remove the little fuzz balls. It worked so well!.
After de-fuzzing.
- Upholstery cleaner
- Wet rag
- Vacuum
- Fabric shaver (*optional)
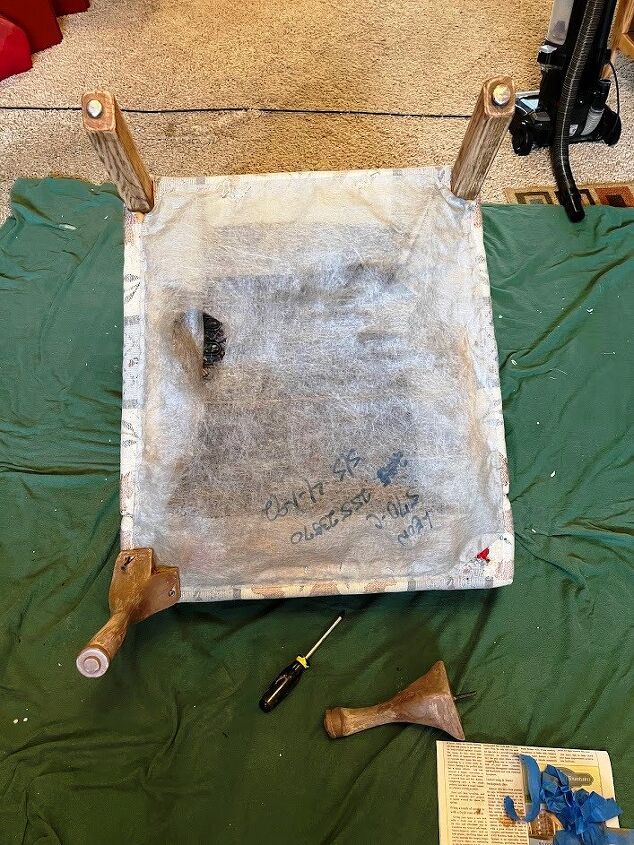
The next step was to stain or paint the legs. When I worked on my son's chair, I sanded & restained the legs. When I started working on the legs, I noticed the front legs were made of plastic and the back legs were wood. I removed the front legs and used stripper on them to remove the finish. I lightly sanded the back legs
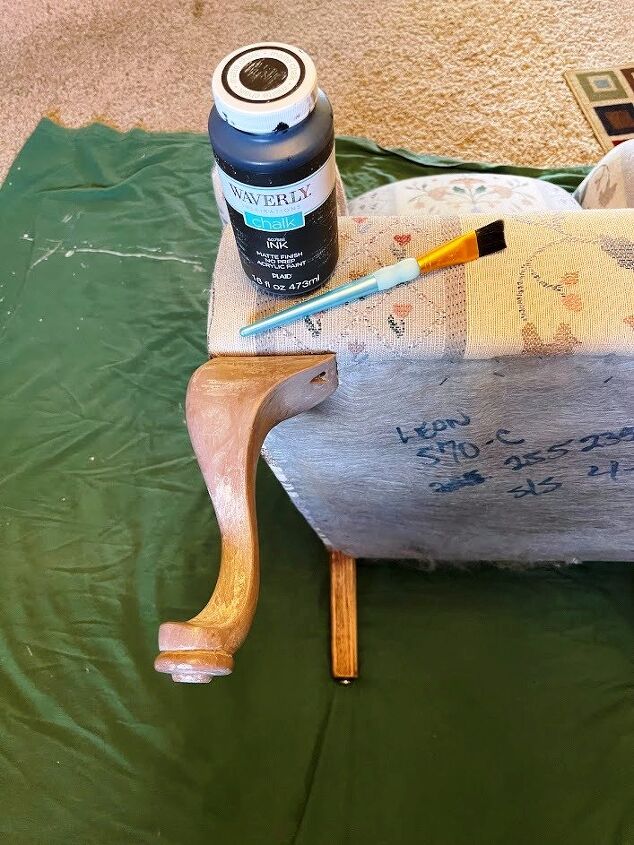
Since the front legs were plastic, staining them was out of the question so I decided to use some black chalk paint that I had. I reattached the front legs & taped off the fabric before painting. I applied two coats of paint using a small artist brush.
- Sanding block
- Stripper (*optional)
- Paint or stain
- Paintbrush
- If staining - a sealer
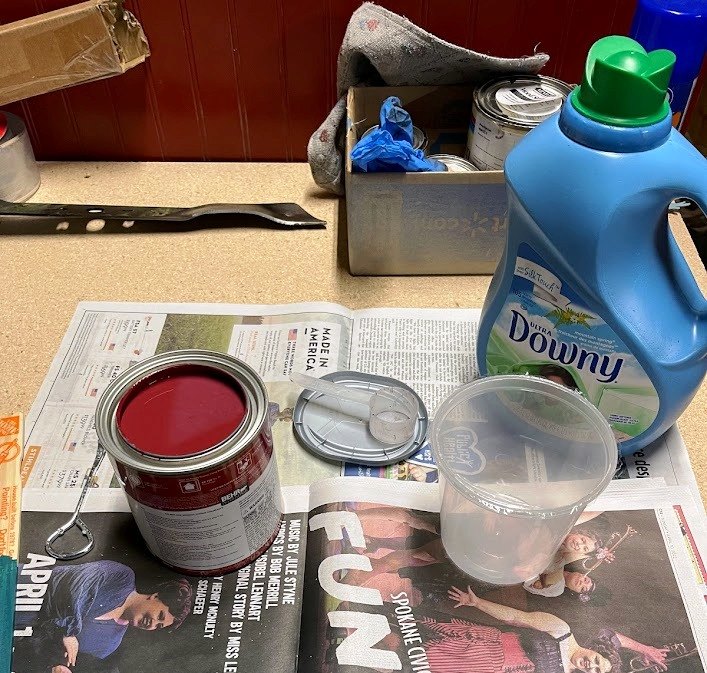
Once the chair was prepped, it was time to get the supplies ready. Before painting the fabric, it needs to be slightly damp. The technique I'm using suggests using a spray bottle with a mixture of water and fabric softener. I would say the mixture I made was about a 50/50 mix but I didn't do an exact measurement.
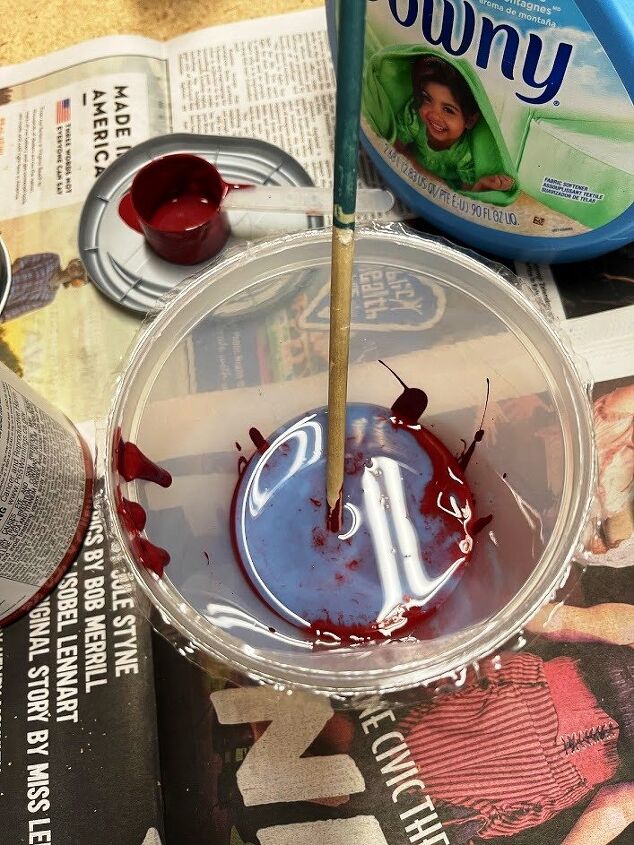
To prepare the paint, I poured a little bit of paint into a plastic container then I mixed in a little fabric softener. Adding fabric softener to paint gives the paint a rubbery texture will help the painted fabric stay flexible and help prevent cracking. This part of the process is a bit like a science experiment.

The amount of softener you need will depend on your paint. With the paint I used this time, I found that a 50/50 mixture was about right. Once I knew the formula, I mixed up a larger batch and started painting.
Supplies needed to paint upholstery
- Fabric softener
- Paint
- Paint can opener
- Inexpensive paintbrushes
- Container for mixing paint with softener
- Stir sticks or spoons
- Spray bottle
- Measuring cups
- Sandpaper or sanding block
- Painter's tape
- Annie Sloan clear & dark waxes (*optional)
- Soft clothes to apply wax
- Decorative tacks
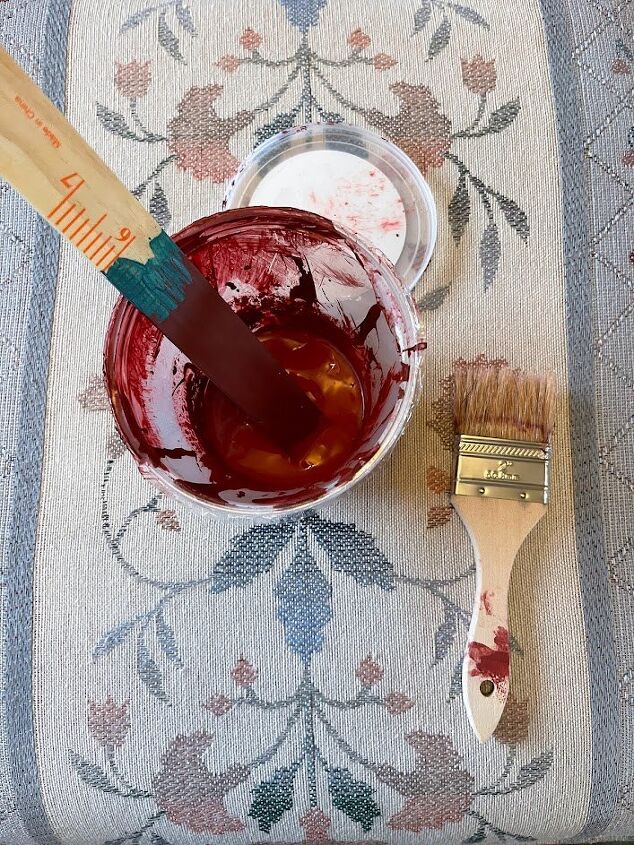
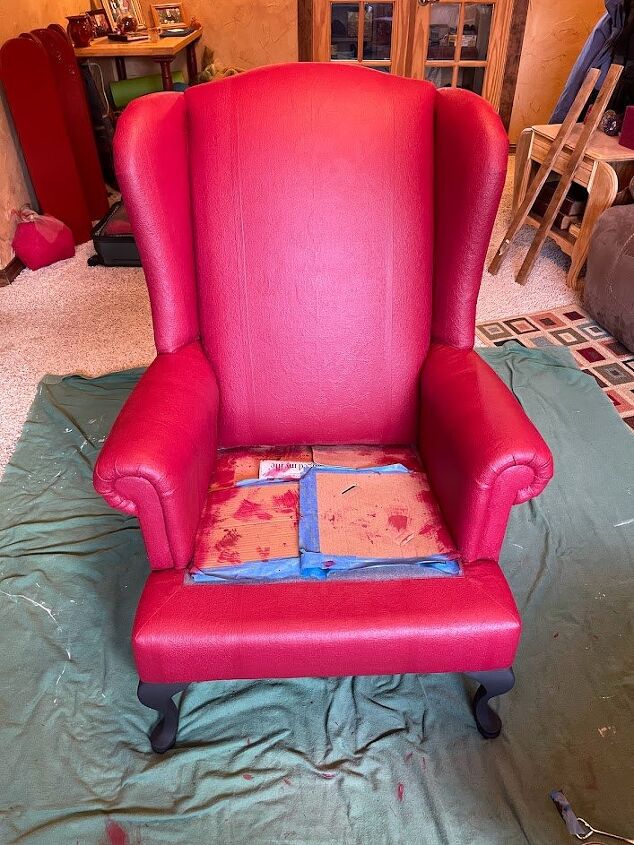
Now that the paint was mixed, it was time to start painting. The first step is to wet the fabric in small sections. This helps the paint soak into the fabric almost like a stain would. Using the spray bottle filled with the water & fabric softener mixture, I sprayed one of the sides of the cushion. I thought I'd start with the cushion like I did with the first chair to get an idea of how the paint would work with the fabric.
The first thing I noticed was this fabric had a much larger weave than the first chair. What did that mean? I took more paint to cover an area than with the first chair. I painted the entire chair, then allowed it to dry overnight.
The next morning, I looked at the fabric. The paint had soaked in pretty well, which is what you want it to do, and I could see where some of the areas got missed with the first coat. Before painting the 2nd coat, I gave the chair a good sanding with a sanding block.
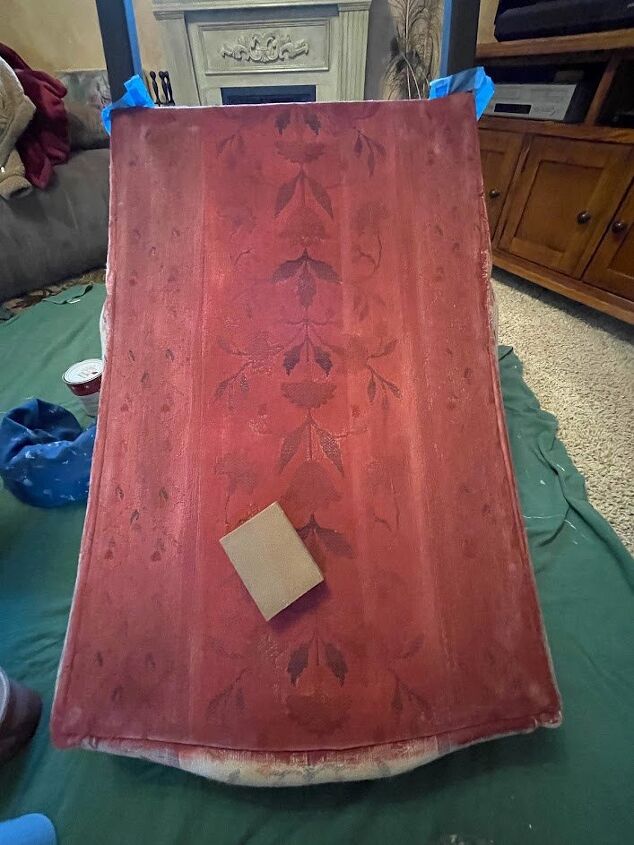
With the first chair, I only sanded it lightly after a few coats of paint. This chair was way different! The paint raised the fibers aLOT. I would end up sanding between every coat. After sanding, I took a damp cloth and wiped down the fabric. When I applied the 2nd coat, I was surprised that it dried in a couple of hours!
*You can apply more than one coat of paint in a day as long as the fabric & paint are dry but you can also leave it to dry overnight if you prefer.
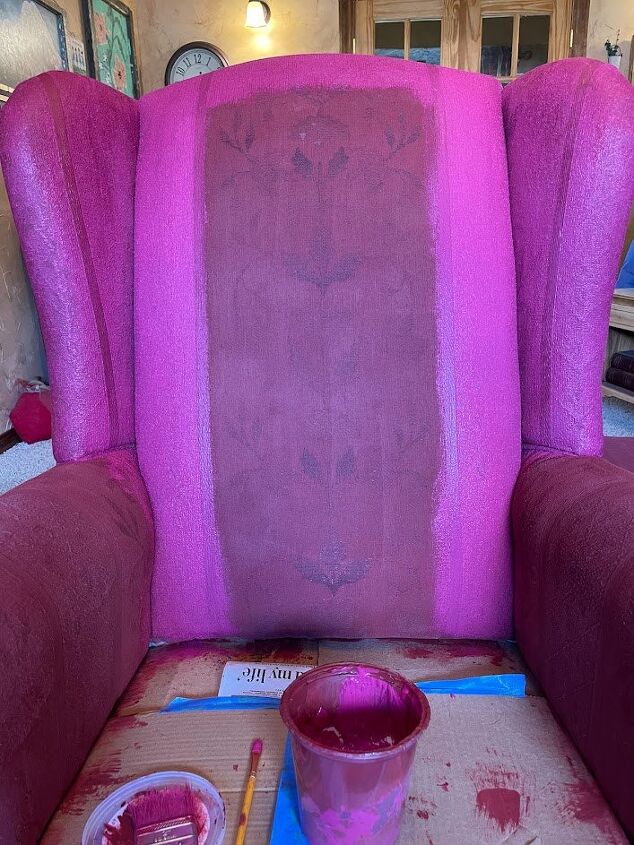
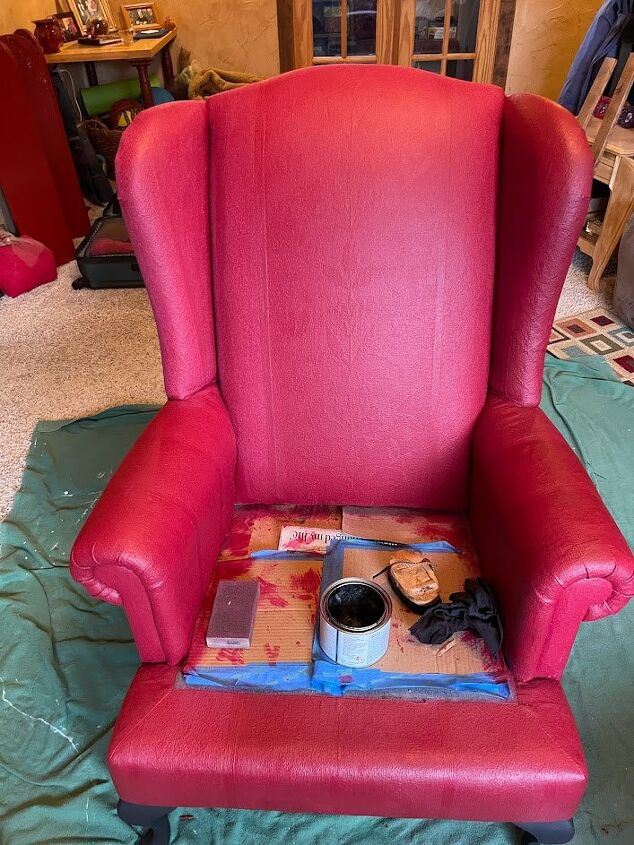
Since the 2nd coat dried so quickly, I decided to do a 3rd coat the same day. With the fabric soaking in more paint, along with having to sand between each coat, the quart that I bought was gone. Instead of driving into town, I went to the local hardware store to get more paint. I took the old can and they did a color match.
When I got home and opened the can, instead of burgundy, it was hot pink! While I was skeptical that it would be the right color, I started painting anyway. To my surprise, as the paint dried, it was the perfect color!
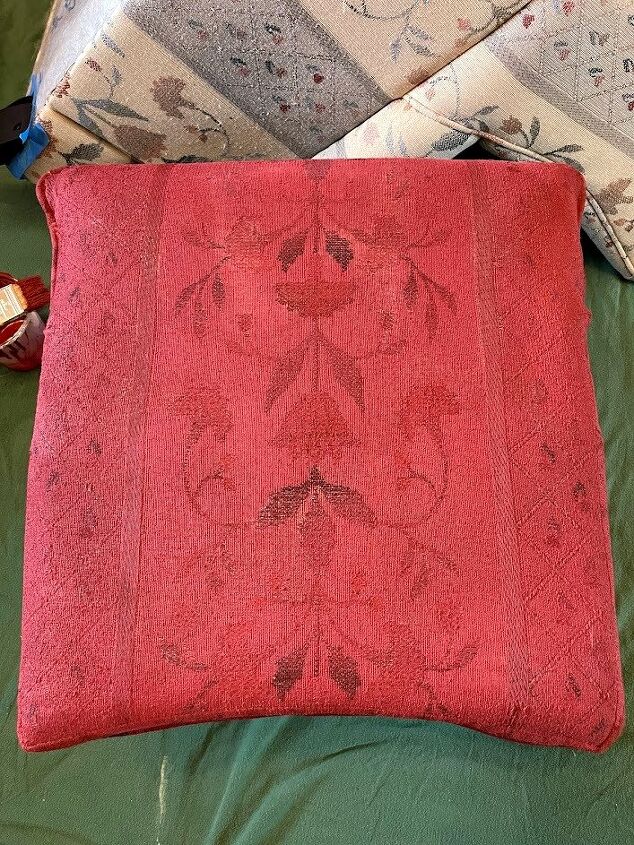
After the 3rd coat, I let the chair dry overnight. I ended up putting 8 or 9 coats of paint on this chair! I lost count. I wish I had known that it would take so much paint so I could have bought a gallon. I used 3 quarts!
When I painted the first chair, I used both clear and dark wax. With this chair, I only used dark wax. It may be due to the number of coats of paint, but the clear was didn't change the feel of the fabric so I skipped using it. To wax the piece, I used Annie Sloan's dark wax and a washcloth.
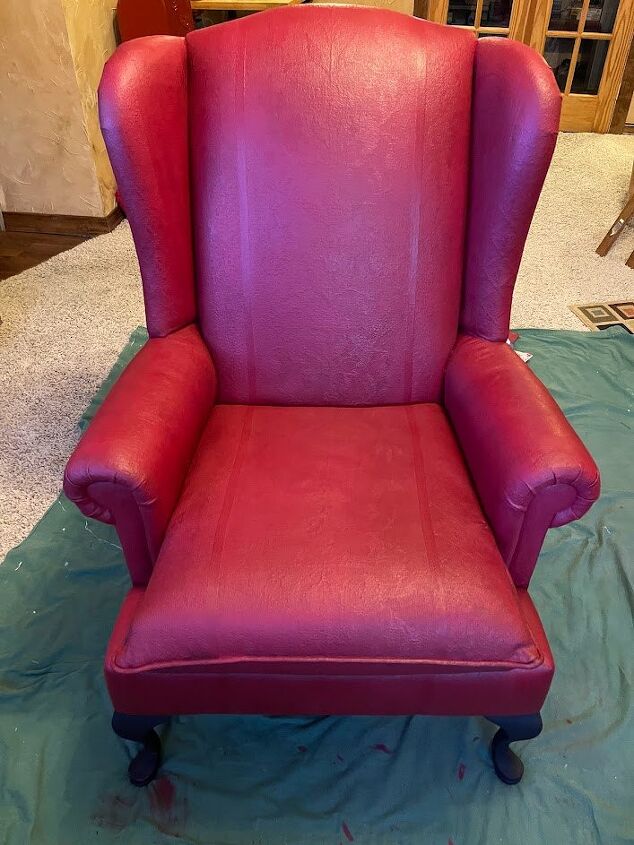
The wax does change the feel of the material. It becomes so much softer! As I applied the wax, I buffed it with both a piece of t-shirt material and a waxing brush.
Both the paint/downey mix and the wax add a finish to the material to make it pliable.
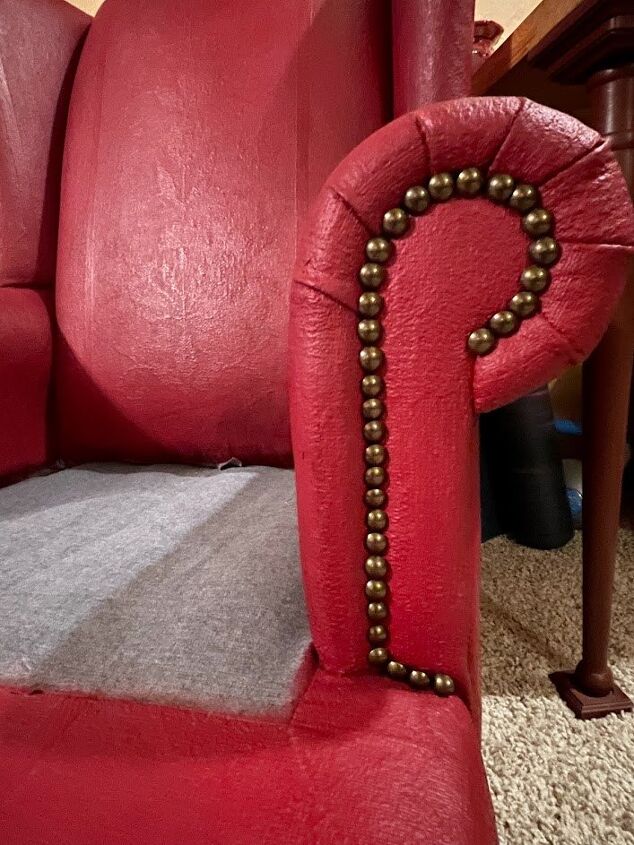
It was time to add the finishing touch - decorative tacks! This is the reason I took the time to alter the shape of the cushion! By changing the cushion from a T shape to a square, I exposed the front of the chair arms where I would be inserting the tacks.
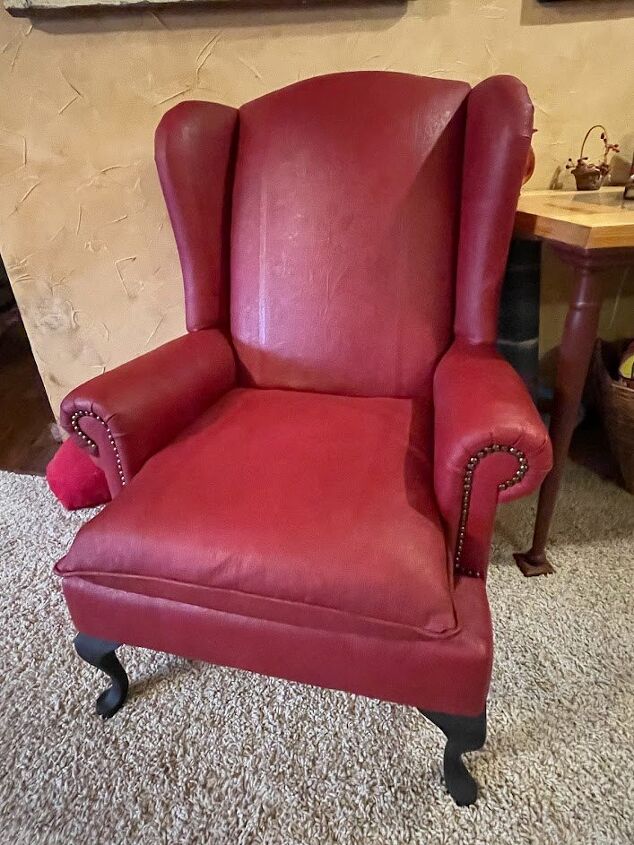
I started at the bottom outside edge of the right arm, pushing the tacks into the stitching line. It was amazing how easily they went into the space. Using a small hammer, I gently tapped in each tack to make sure it was well-seated. The tacks added the perfect finishing touch to this 'leather' chair!
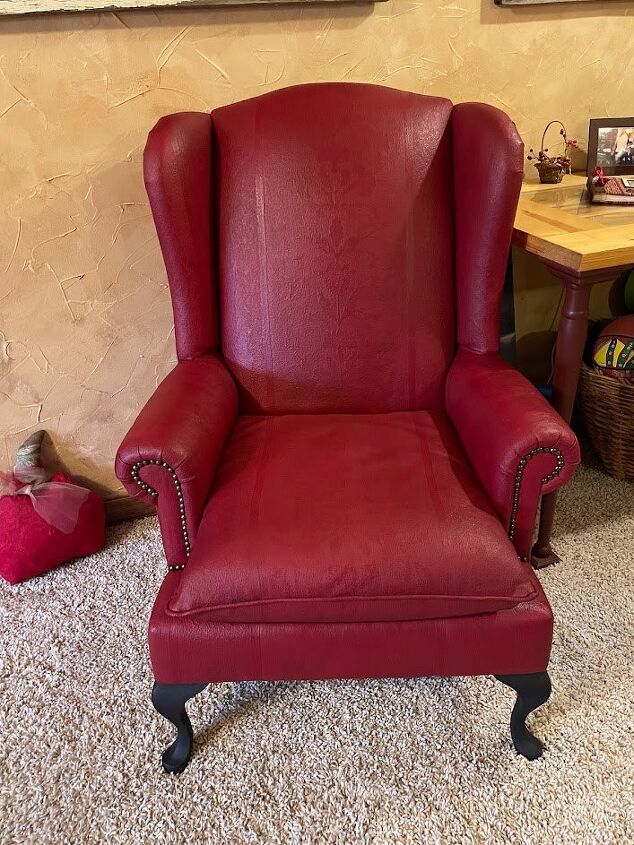
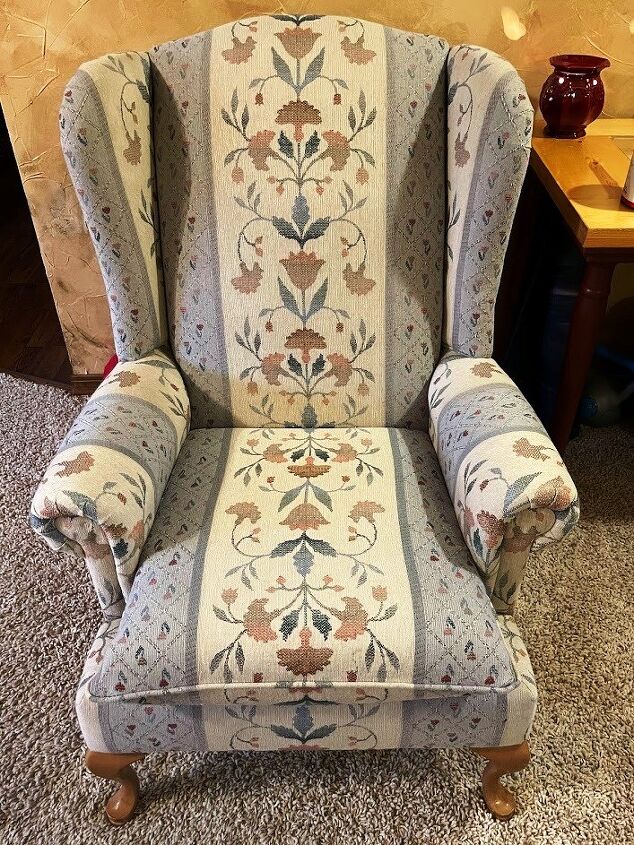
Well? What do you think? Can you even believe this is the same chair?! Even though this was the 2nd time I've painted a wingback chair, there were still several times during the project that I was sure it wouldn't work, I kept telling myself to trust the process. Many of the videos I've watched said the same thing - trust the process. This project took more paint and therefore more time to complete, but I could not be more pleased with the results! You would never know this stunning deep red wingback chair was once cream & light blue floral fabric!
If you decide to paint an upholstered chair, here are a few things you'll want to look for and answers to some questions I've received.
- Look for a chair that doesn't have much wear and tear
- Make sure the fabric has a tight weave as that will save you time and paint
- If you like the look of the decorative tacks, make sure the cushion does not hide the arms of the chair
- Add a small amount of fabric softener at a time to your paint
- If you add too much, the paint will get too thick to work with
- Adding more paint will not fix the issue
- Once the paint is dry and the wax has cured, neither the paint nor wax will rub off on your clothing
- While painting, there will be a pretty strong smell of fabric softener in the house
- Trust the process. There will be times during the painting/drying that you will doubt that the fabric will actually look good in the end
Detailed instructions are on my blog at the link below.
Resources for this project:
See all materials


Comments
Join the conversation
-
This ended up looking fabulous! I was apprehensive that it would turnout with that big stripe down the middle, but you really did a great job. I want to try this for our loveseat. I tried spray-on paint; thankfully, I sprayed it on the back first-what a horrid mess. I am going to try this asap! Thanks for all the steps.
-
NO question. I just came to say you are talented. I have neither the patience nor the talent to do this. It looks wonderful.


Frequently asked questions
Have a question about this project?
Not a question…..ABSOLUTELY BEAUTIFUL!!! You inspire me with your projects and your results are beautiful! Thanks for sharing!💐
Have you tried using your concoction on faux leather? I have cat scratches on mine love seats and I would love to fix them.
Absolutely gorgeous!!! So beautiful!
Can I paint a chair in the same way that has a silk upholstery .?