


One Room Challenge | Week 2

Fall 21′ Garage Edition

Welcome to Week 2 of the One Room Challenge! I’m a few days late to posting here but there was a lot going on to cover. Let’s start off where we left off, shall we?
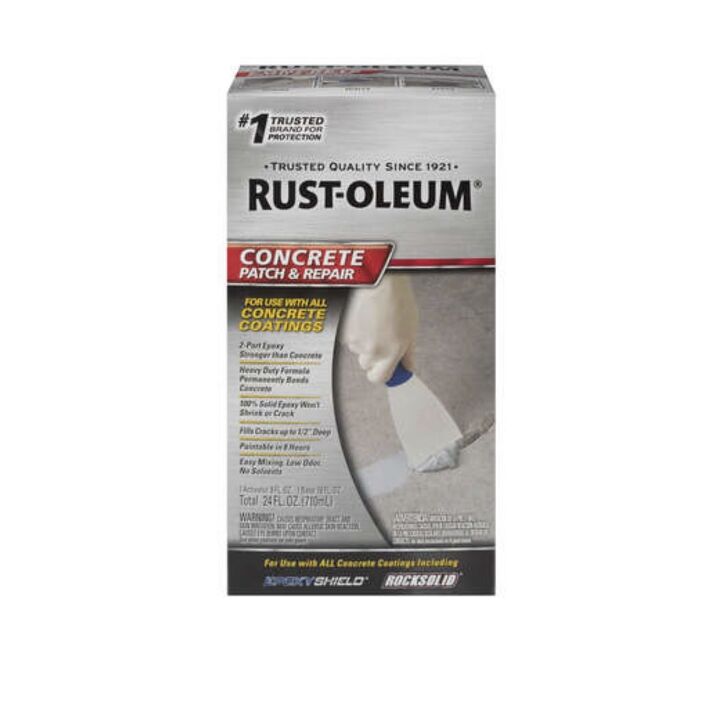
So, last week we covered the prep work that goes into epoxying your concrete floors. We left off with the concrete etch and letting the concrete dry, do you remember? If not, that’s okay, just head back to my previous blog post for a refresher! Once the floor is completely dry, you will want to repair any cracks or divots in the concrete. I used the Rustoleum Concrete Patch & Repair kit. This is a two part, industrial strength epoxy that permanently bonds concrete. The product states that it won’t shrink or crack and creates an extremely hard surface that is stronger than concrete. The downside is, you have to wait 8 hours after applying, to paint on the epoxy.
Your floor should already be clean, structurally sound, and free of dust, dirt, grease, or oil before starting. Mix the components together at a 2:1 ratio. Mix two parts of Part B BASE with 1 part of Part A ACTIVATOR on a clean, flat piece of cardboard until a uniform gray, putty-like consistency is achieved.
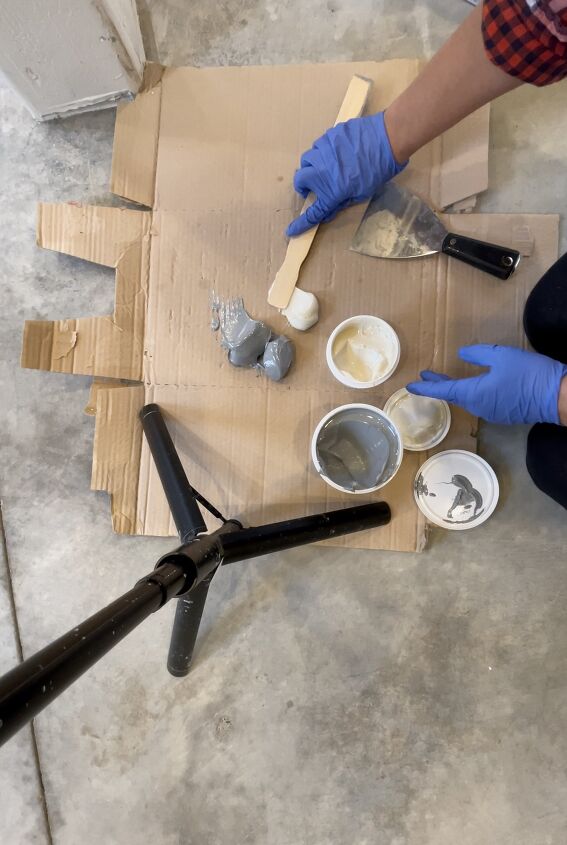
Then, using a putty knife, apply the mixture evenly over cracks and divots. Level and finish to a smooth surface.
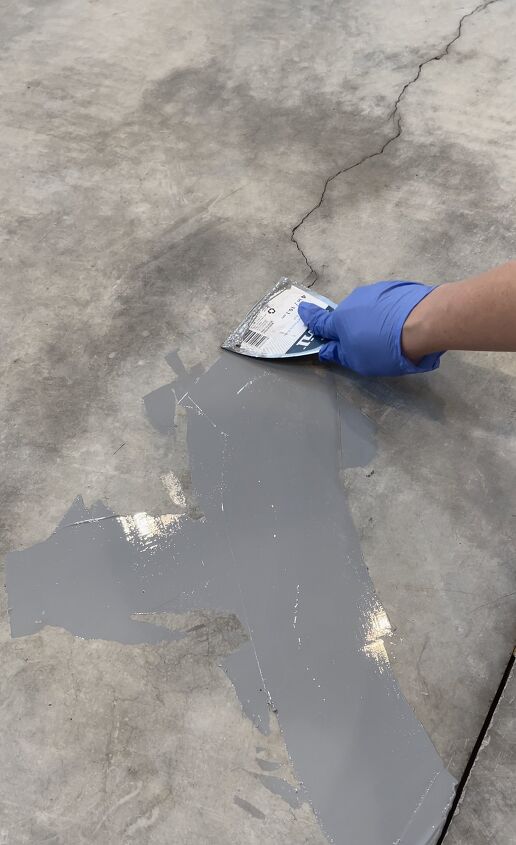
Only mix what you will use within 30 minutes. If a second layer is needed for larger repairs, apply 1-2 hours after the first layer. Allow to cure for 8 hours before sanding or painting.
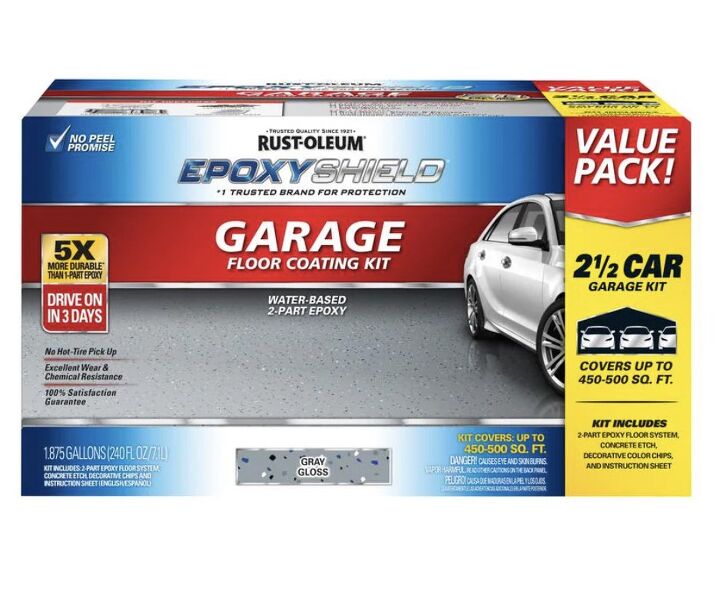
Finally, we are ready to EPOXY!!! I used the Rustoleum Epoxyshield Garage Floor Coating Kit.
I have to say, Rustoleum made this process pretty fool proof. I went directly to their website for a step-by-step tutorial and I felt very confident with tackling this for the first time.
In the above kit, It comes with two pouches of epoxy. Only mix one at a time because you only have about 1.5 hours to apply it once mixed. Each pouch has a Part A pouch and a Part B pouch with a burst seal dividing the two. Mix each pouch individually for 2-3 minutes prior to bursting the seal.
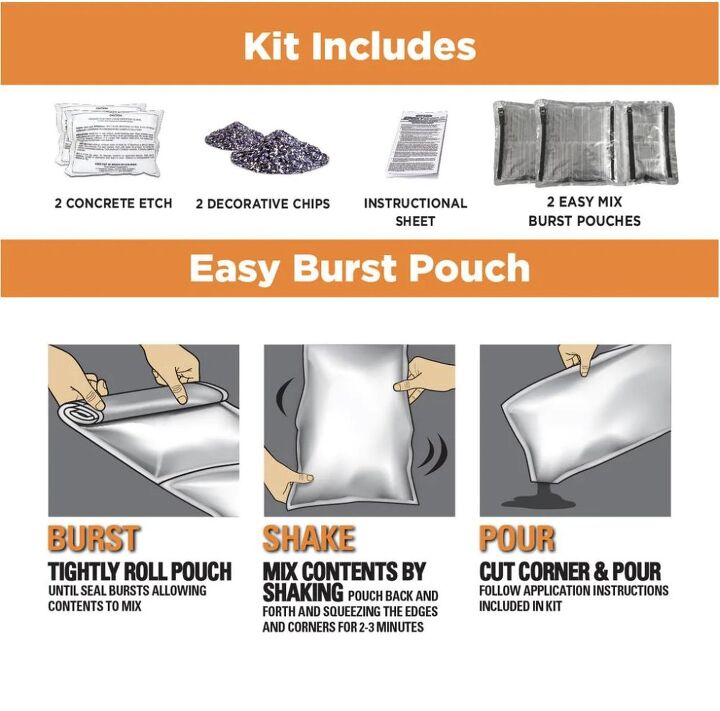
Once mixed, go ahead and tightly roll one end of the pouch towards the middle seal to burst it into the other end. Mix thoroughly for another 2-3 minutes. Once mixed, cut a corner off of the pouch and pour the contents into a paint tray. Refer to above picture for visual. You may have to wait a certain amount of time before applying it to your concrete, depending on your air temperature. It was about 70 degrees outside when I did this, so I waited the recommended time of 30 minutes. The chart is included in the kit.
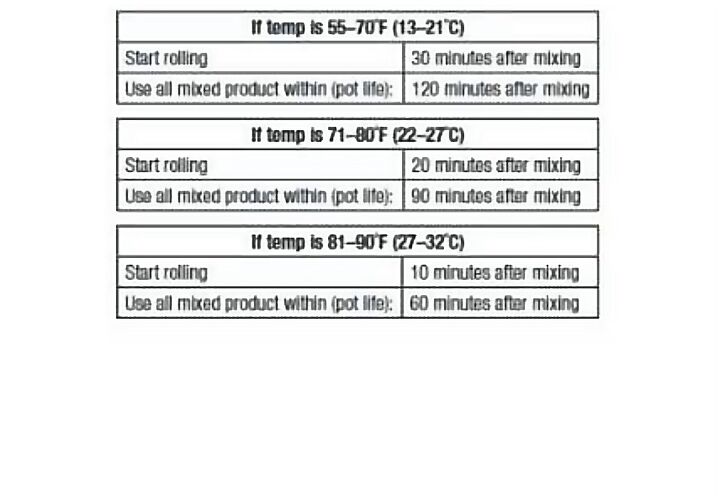
TIP: Concrete temperature should not be below 55 degrees or above 90 degrees
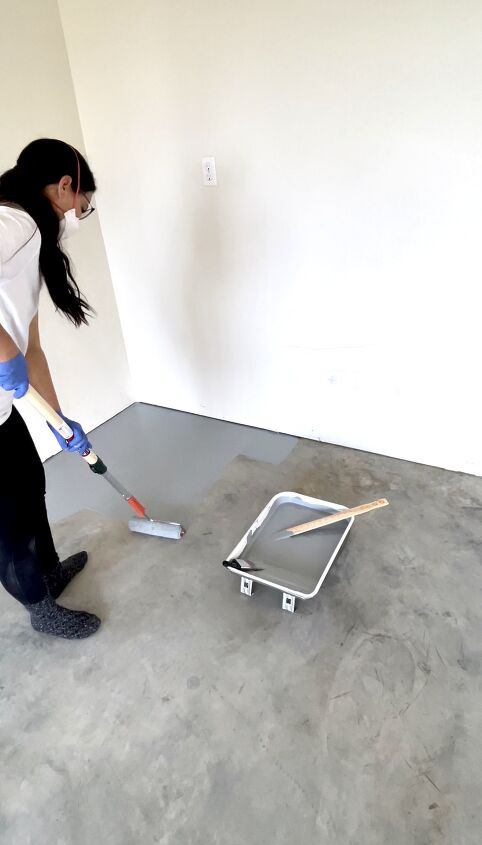
Now, stir your epoxy another time, as it has been sitting for (30 minutes in my case). Brush on epoxy to edges working in 4′ x 4′ sections at a time. Be sure to keep a wet edge to avoid brush or roller marks. This may be obvious but I’ll say it anyways: It’s best to work from the back of the garage towards an exit to avoid traffic over your freshly epoxied floors.

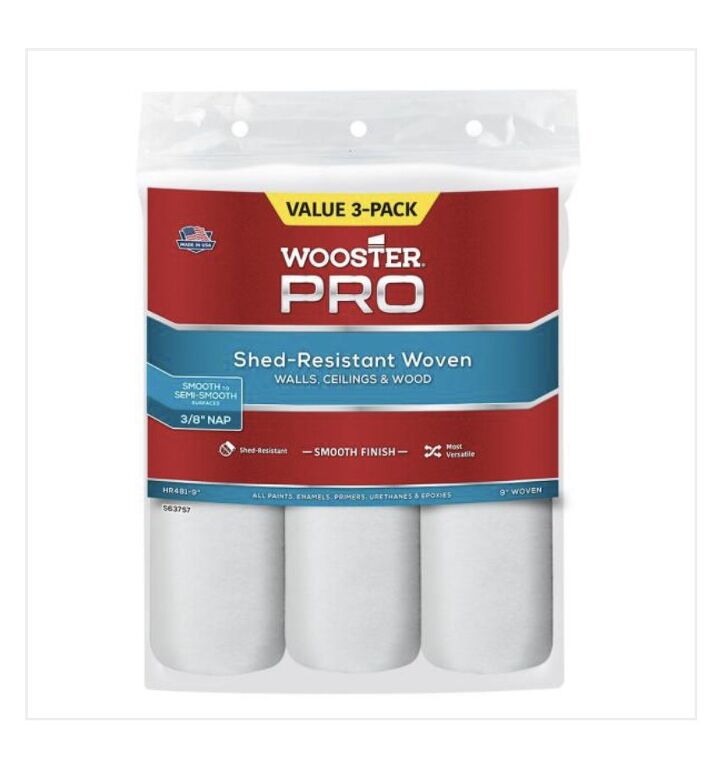
After brushing on the edges, use a 9″ lint free woven roller with a 3/8 inch or 3/16 inch nap.
After each 4′ x 4′ section, you can throw your decorative color chips. I did not use this on my floors. My husband and I preferred the look without them. Remember, you only have 1-2 hours to apply the epoxy, depending on your air temp, refer to above chart.
Once your entire floor is covered, let it dry at least 24 hours before applying the clear coat.
Now we’re ready for our Rustoleum Epoxy Shield Clear coat and anti skid additive if desired. This clear coat kit comes with 1 pouch that is supposed to cover 450-500 soft. My garage is 700 sq ft, so I needed two kits. The pouch is just like the epoxy pouch. There is a part A and a part B that you will once again need to mix individually for 2-3 minutes before bursting the seal. Once mixed, roll towards center to break the seal and mix again for another 2-3 minutes.
Cut a corner off of the pouch and pour it into a paint tray. Pour in the anti-skid additive and mix thoroughly. Roll on with a 9″ lint free woven roller with a 3/8 inch or 3/16 inch nap. Let dry for 12-16 hours before light foot traffic and 72 hours before heavy traffic and drive on.
TIP: The anti skid additive will settle to the bottom of the paint tray, stir mixture between rolling.

Let’s wrap up Week 2 of the ORC
After the floors were finished, I then moved on to painting the walls. Since my flooring option was limited to light gray or tan due to stock issues, this changed up my color scheme. I went with a blue/gray ombre wall.
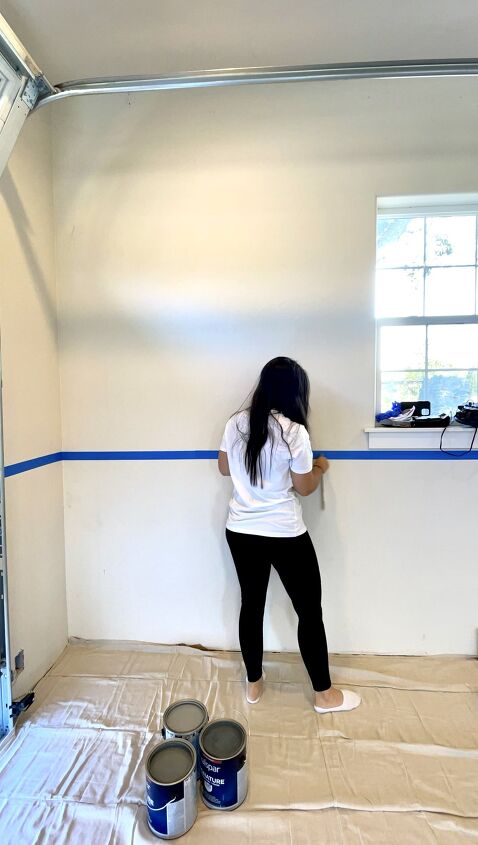
I started by measuring the height of my wall and then deciding how I wanted to divvy up the colors. My walls are 10 feet, so I had plenty of wall to work with. I initially started off with three colors and then decided I wanted more of a faded effect and got three more colors on the same color swatch. The darkest color that I started with was Tempest Skies by Sherwin Williams.
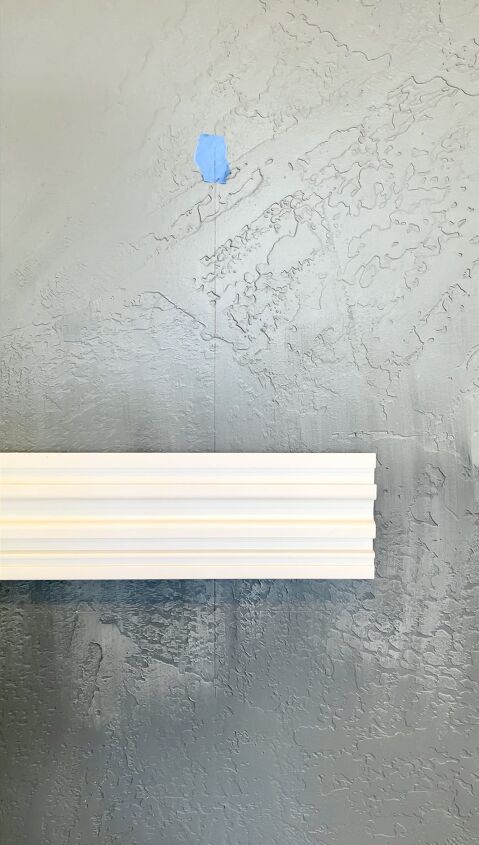
Blending without brush marks was a bit tricky as you can see above. I ended up diluting slightly with water and blending with my hands. You want enough water to blend without having drips.
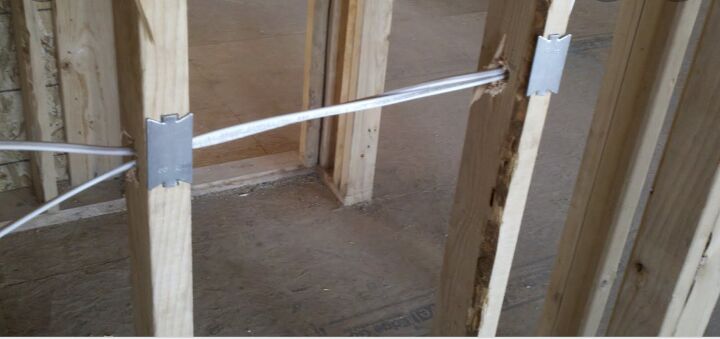
I ended up buying the Verstrack slat wall system by Craftsman. Each slat can hold a maximum of 75 pounds. It recommended using a #10 machine head screw. I made a mistake here using 3 inch screws… You aren’t supposed to use more than 2 inch screws on your interior walls because of ELECTRICAL wires!! Did you know that electrical wires can run horizontally through the studs??
Per code, electricians are supposed to install wires 1.5 inches from the edge of a stud and if you’re calculating for your drywall (1/2 inch). That would give you a maximum screw length of 2 inches to avoid hitting any wires.

Occasionally, electricians will use a metal plate in between the stud and the drywall to protect the wires (refer to image below). But, this does not always happen, so it is best to never use more than a 2 inch screw.
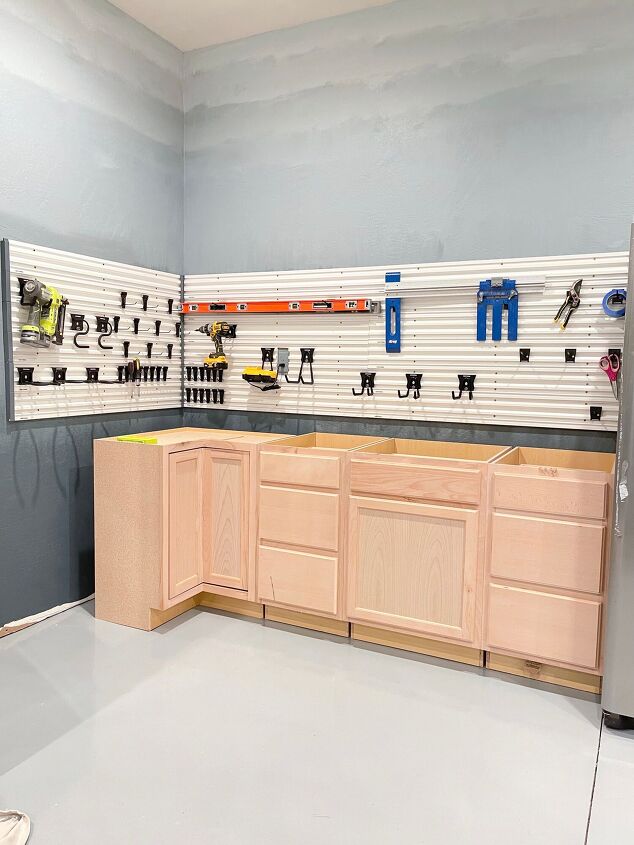
After I finished installing the slat wall (with my tail tucked between my legs after using 3 inch screws for the whole thing 🤦🏻♀️), I installed some cabinets. I got some pretty basic and cheap cabinets from the Home Depot Hamilton Beech unfinished collection. My goal was to get the cabinets installed, painted, and countertop installed before the end of week two, but that may have been a little too ambitious of me. I think we did a huge amount of work during week two and I’m walking away proud of what we accomplished!
To summarize, for week two we:
- Epoxied the floor and added the clear coat
- Painted the walls and storage rack to match
- Installed the Slat wall system
- Installed cabinets
- Started organizing
- Paint Cabinets
- Install countertop
- Install cabinet hardware
- Install PRX Profile Pro rack system
In addition to the above list, I still have to build a bike rack that is safe for a carbon fiber bike, install base boards, build a work bench, and build hanging storage.
I was too late in posting to link up for the One Room Challenge, but please be sure to check out everyone else on the One room challenge who did link up. Don’t forget, there are guest participants AND featured participants. Have questions? Reach out HERE!
Please use proper safety precautions and do appropriate research when attempting projects. You are responsible for your own safety.


Frequently asked questions
Have a question about this project?