


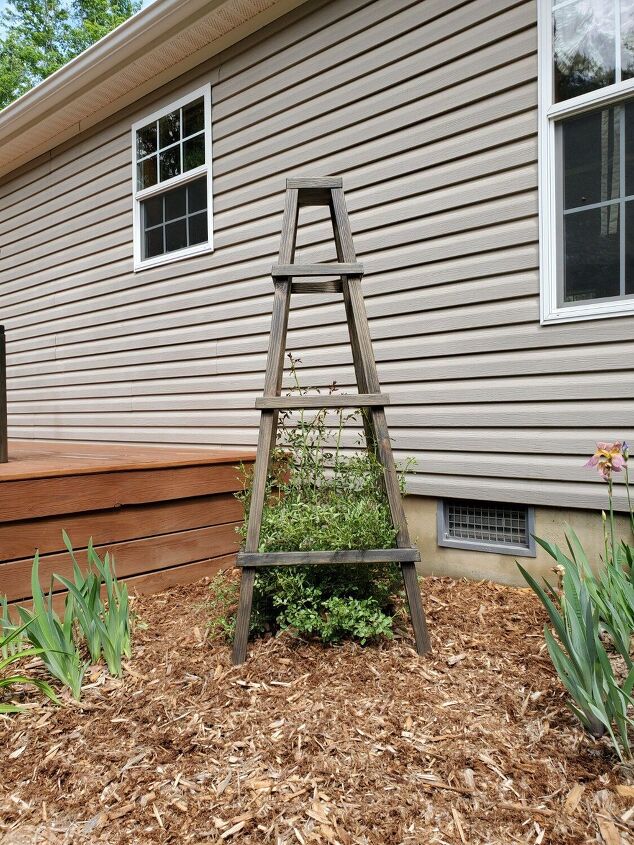
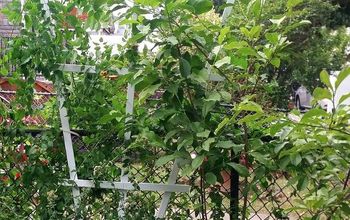
Garden Trellis

It's spring and I'm eager to work in my flower beds!! One of the projects on my to do list is to make a trellis for my Rose bush to climb on. Every year my Rose bush produces long runs and they always end up going behind the deck or up the foundation headed for the siding.
I normally end up cutting the runs off and its a never ending cycle all summer long. So this year I will be able to use my new trellis and hopefully enjoy more blooms!
This trellis also would be amazing for a veggie garden as well!
Material List:
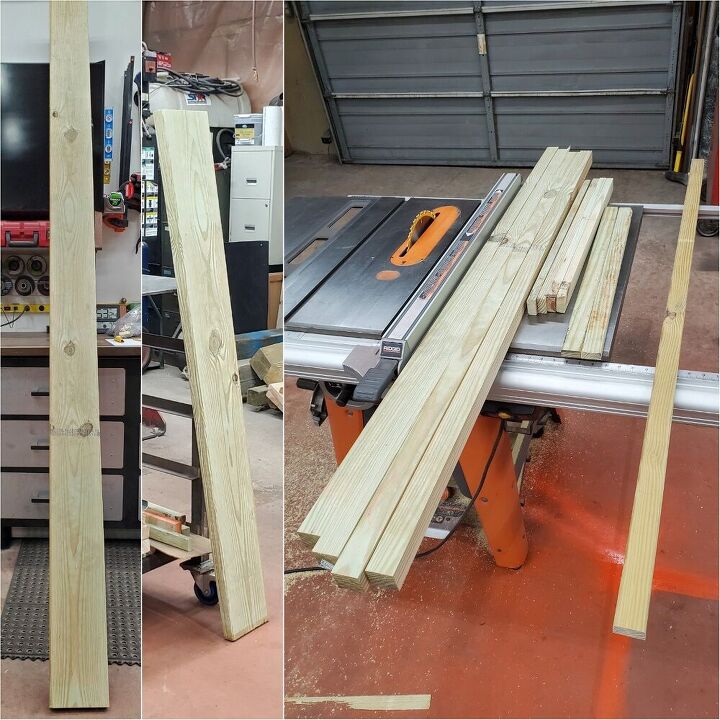
- 2x8 Treated board (we had a 10' on hand)
- Pneumatic 18 gauge nail gun
- 1 1/2" nails
- Table saw
- Tape measure
- Drill
- 4- Deck screws
- Angle
- Outdoor Stain
- Brush for stain
Cut List:
- 4 Poles cut at 5 foot long and 1 1/2" square
- 2 braces cut at 10 3/8" (top)
- 2 braces cut at 11 3/4" (top)
- 2 braces cut at 15 1/4" (middle)
- 2 braces cut at 16 6/8" (middle)
- 2 braces cut at 20 5/8" (bottom)
- 2 braces cut at 22" (bottom)
*All braces cut at a 7° angle / \
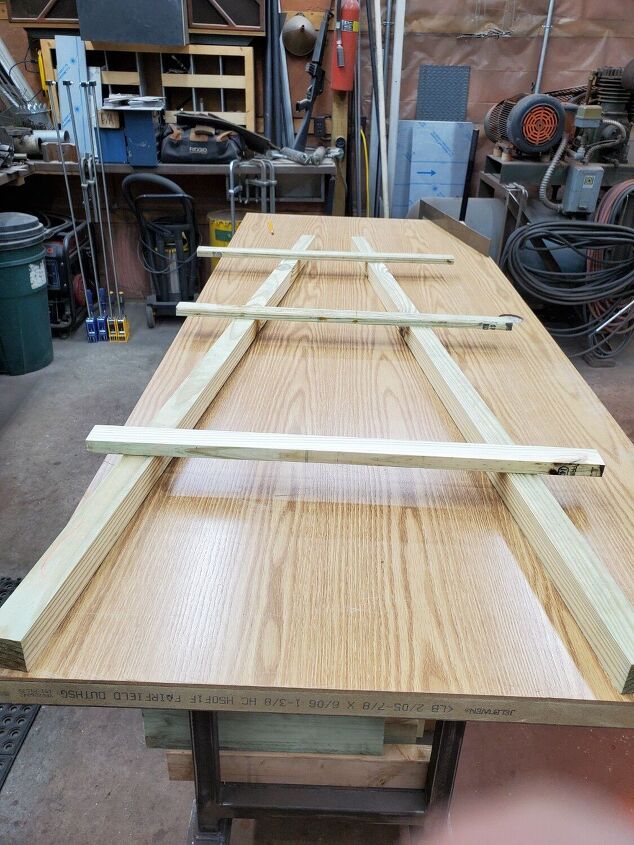
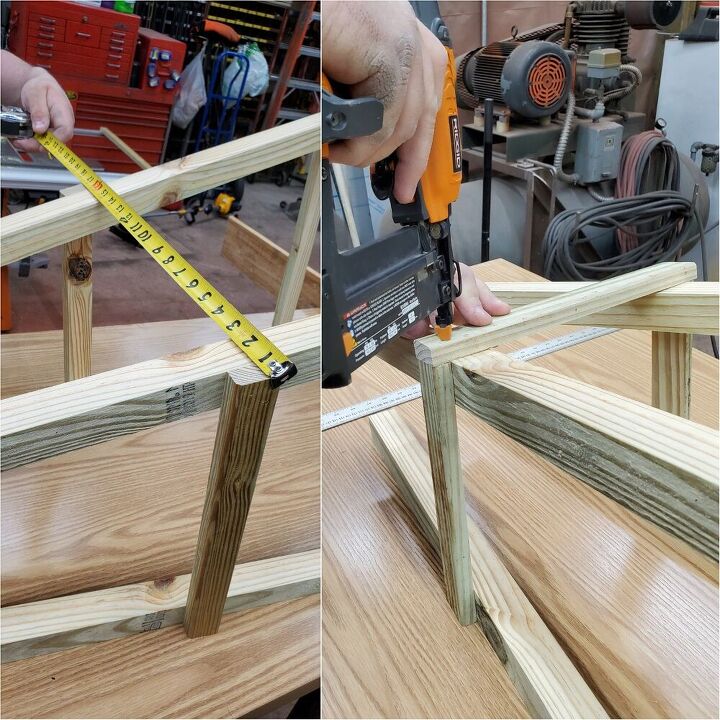
Once we had the poles cut, we laid down the first side and tested out where we wanted the braces to be.
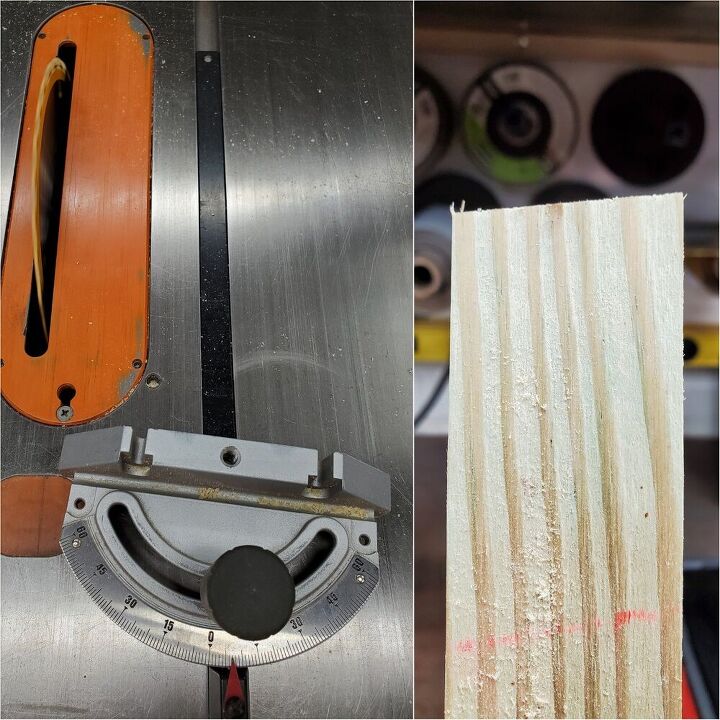
Cut the poles with a 7° angle on one end and this will be the top of your trellis. You will have a board sitting on the top of all 4 poles.
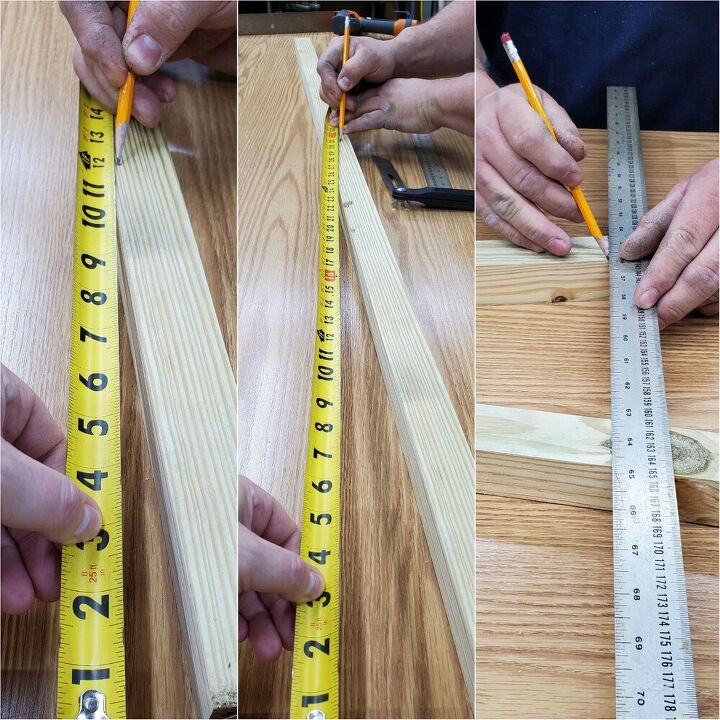
Measure from the bottom up to where you want each rung. My specific trellis has rungs at 12 inches, 31 inches and 48 inches.
We transfered those measurements onto both poles. Then we used a straight edge and marked where the braces needed to go.
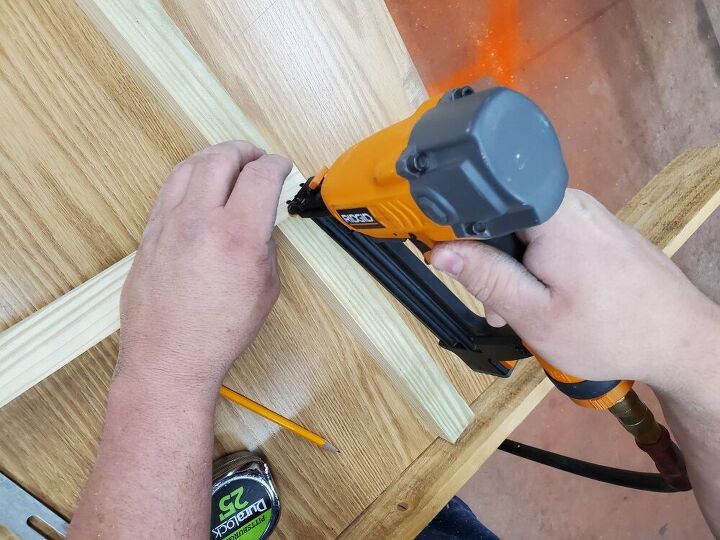
Then we nailed the the braces to the poles using the lines we measured out.
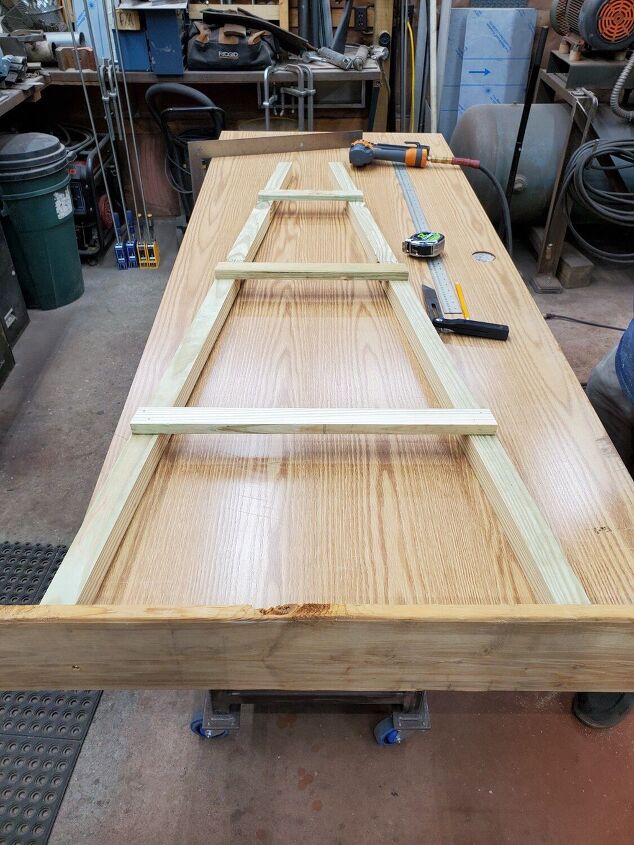
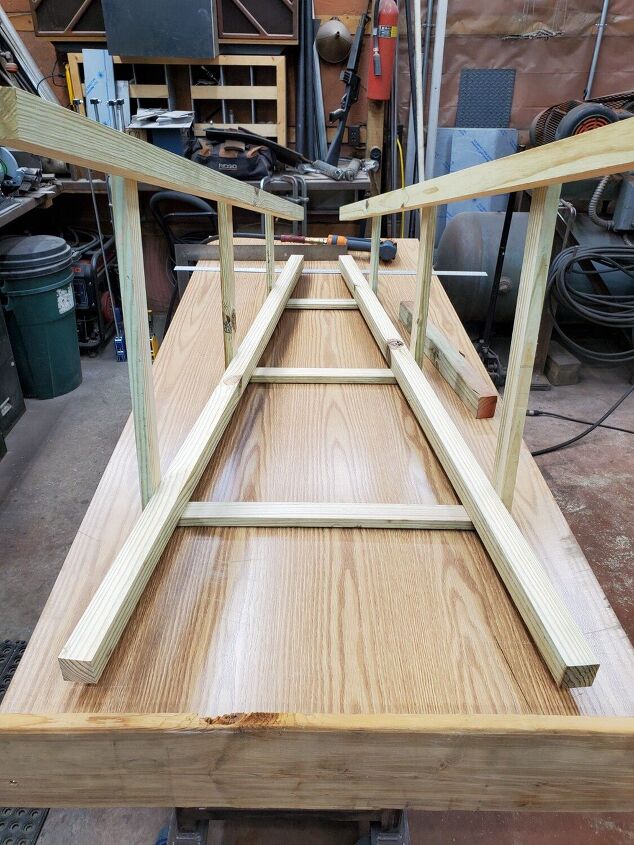
Once all three braces are nailed on it's time to make a second one exactly like the first.
Here is what your two sides will look like when assembled.
Next set them up on your work bench as above, making sure you have them set with the braces on the outside of your trellis.
We measured the outsides of the first two braces to get our longer brace size. That is why you see two difference brace sizes in the cut list at the beginning of this tutorial.
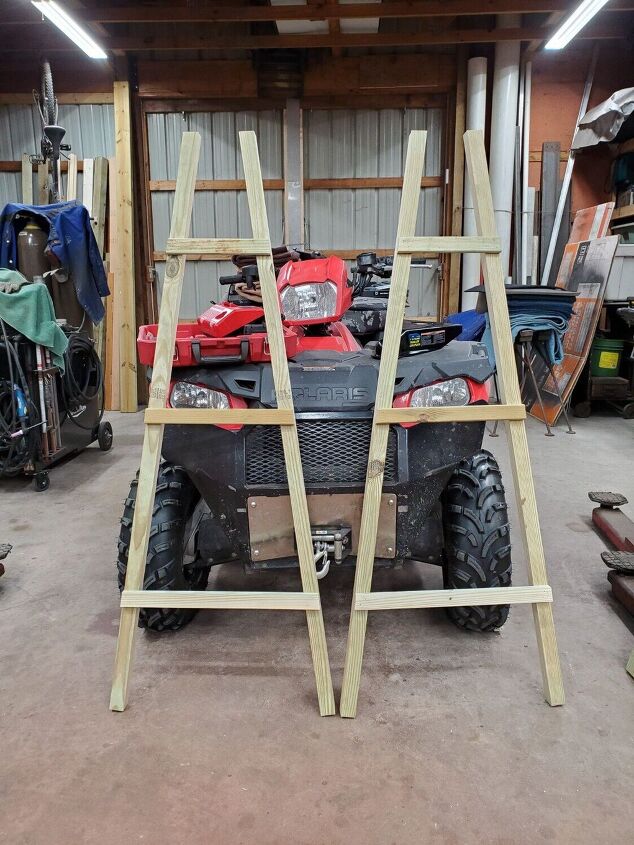
Then you will nail them to your poles and the other braces.
Once the 3rd side is attached flip your trellis and finish adding the braces.
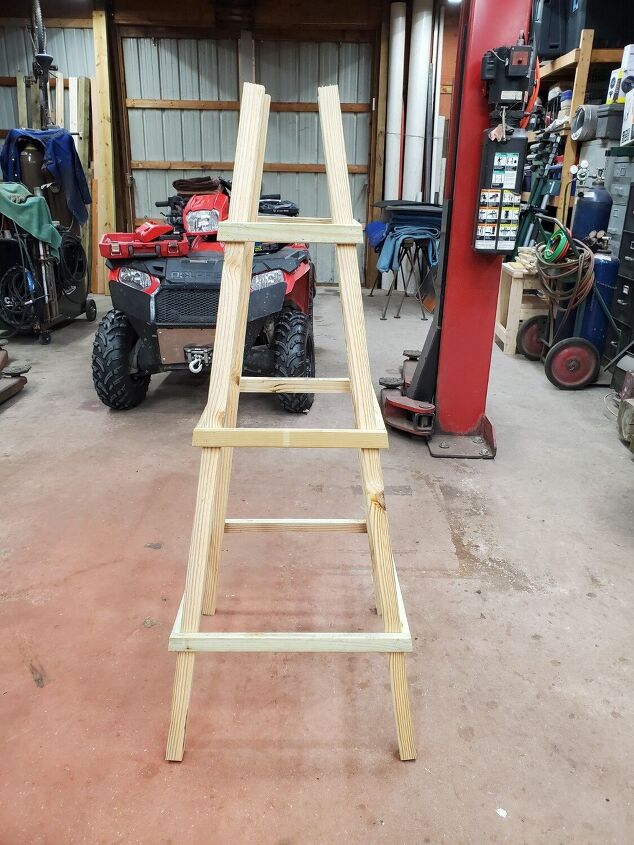
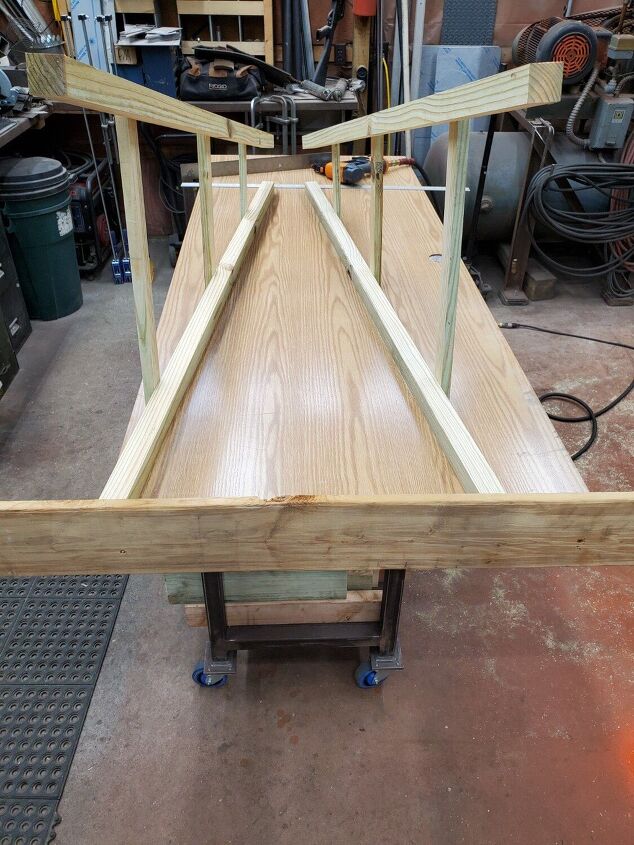
Once fully assembled, it's ready for the top board.

Measure your space from outside pole to outside pole. Ours was 7 1/4" square.
This is where you can get creative and add more decoration to the top. More boards, a finial, a weather vane, would all be cute additions.
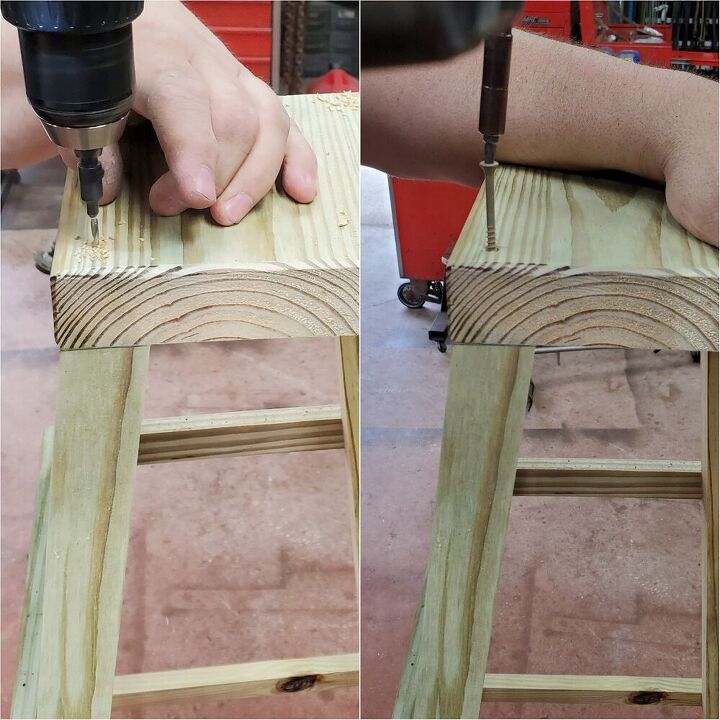
Pre drill 4 holes into the top board and the poles. Then use 4 deck screws to attach your top board.
I decide to stain my trellis with deck stain. After one coat of stain and 24 hours of dry time it was time to set it in the garden.
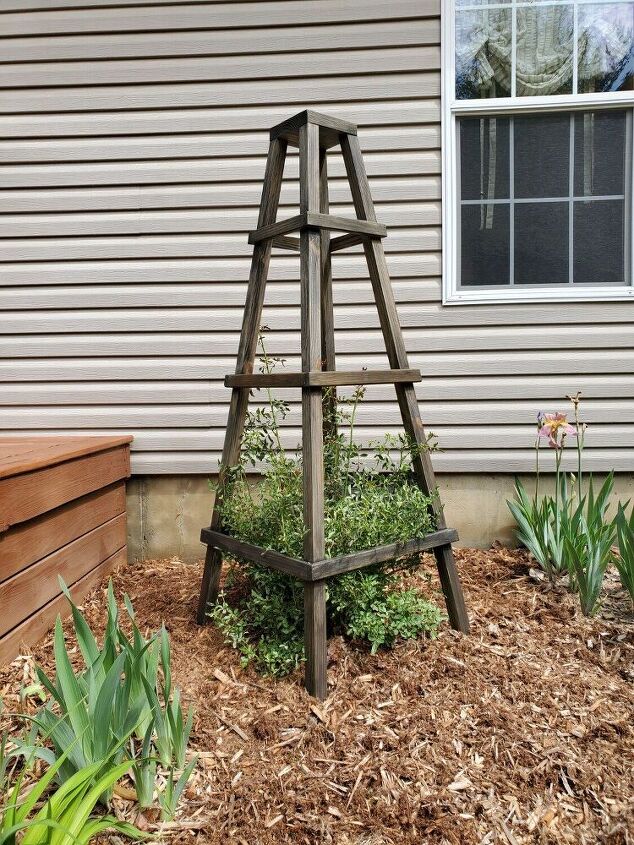
I am so excited this project is done and my Rose bush has a beautiful place to grow and flurish!
Resources for this project:
See all materials


Comments
Join the conversation
-
Lovely addition to a garden💕
-
You did a great job. Very pretty.


Frequently asked questions
Have a question about this project?
How is the trellis anchored into the ground to help prevent it from tipping over in a big wind?
Looks great! Where in the world did you get your treated lumber if it only cost $20 to make??!