


How to Make a Bold and Beautiful Rain Gutter Garden
Learn how to brighten up a plain fence with this colorful DIY rain gutter garden created from an inexpensive vinyl gutter or repurposed old gutters.
A Room with a Much Improved View
After a year of staring out my home office window at a plain fence, I decided to brighten up the space (and clean the window too – lol). I didn’t have much space at ground level in my side yard for a traditional garden. Therefore, I knew I would have to take advantage of the vertical spaces if I wanted to plant a garden. I decided to plant a rain gutter garden. Gutter gardens are a great way to make use of small spaces.
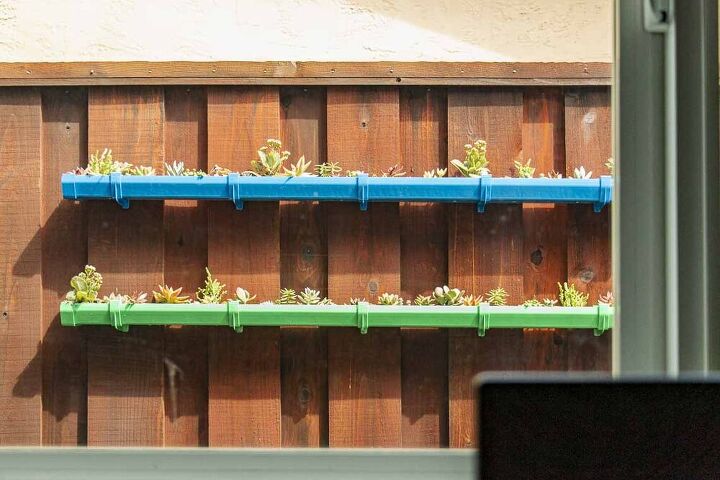
I finished this vertical garden project over a weekend. As many have noticed, the gutters themselves are horizontal. However, the overall garden is supported to grow on a vertical surface (the fence) rather than along the ground, which is why they are also called vertical gardens. When I sat down at my desk Monday morning I was rewarded with this much improved, uplifting view. This was my first time making a gutter garden. I think it was a great idea because it turned my boring fence into a work of art!

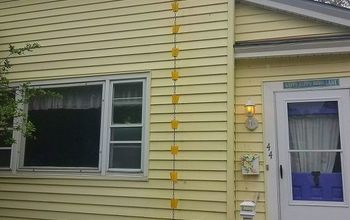
Here's my sad "before" view of the pain fence out the dusty window.
Vertical Gutter Garden Project Overview
The main materials for a rain gutter garden are (you guessed it), a rain gutter and plants. You could repurpose old rain gutters if you have one available or pick up a new one at your local home improvement store. I purchased mine at the Home Depot. In a nutshell, this simple project entail cutting the gutter into two smaller segments, adding paint and drainage holes, mounting the planters to the fence, adding plants and then sitting back to enjoy your garden. I’ve described the materials and steps in more detail below.
Materials
- 1 gutter (I used a 4 in. x 10 ft. White U-Style Vinyl Gutter)
- 4 end caps for that gutter (I used 4 in. White Vinyl End Cap)
- 10 brackets for the gutter (I used Contemporary Vinyl Gutter Bracket)
- Glue (optional)
- Screws for attaching gutter to fence
- Painter’s tape
- Soil
- Shallow root plants
Stain/Paint
- Spray paint in desired colors
Tools
- Measuring tape
- Saw (such as Fine Tooth Hack Saw)
- Fine grit sand paper
- Garden hose
- Respirator
- Safety Glasses (mine contain readers so I don’t need to wear my reading glasses and safety glasses)
- Tarp to protect your space when painting
- Drill
- Large-size drill bit for making drainage holes
- Mounting screws appropriate for your fence and bracket
- Smaller-size drill bit for drilling pilot holes for the mounting screws
- Drill bit for screwing in the mounting screws
- Level
Project Steps
1 – Obtain Gutter, End Caps, and Hanging Brackets
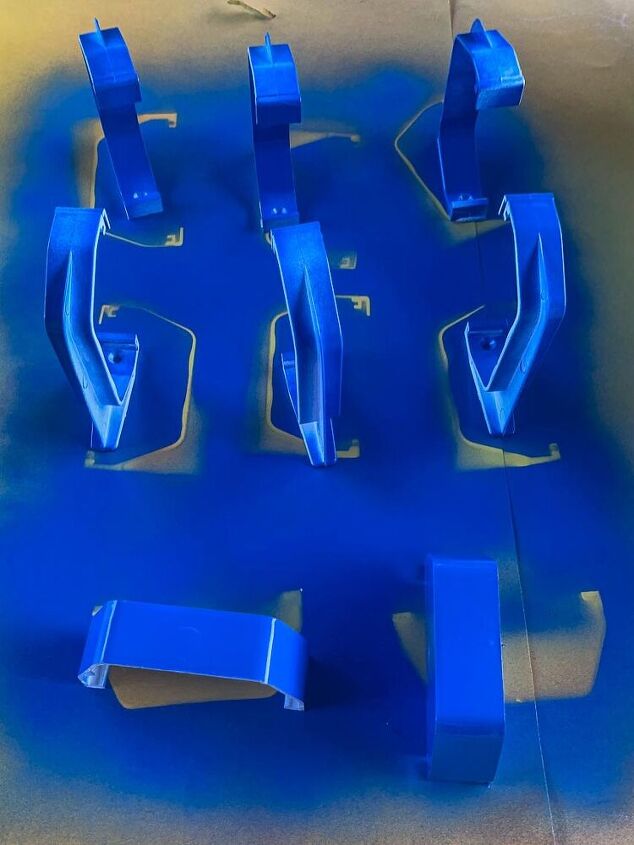
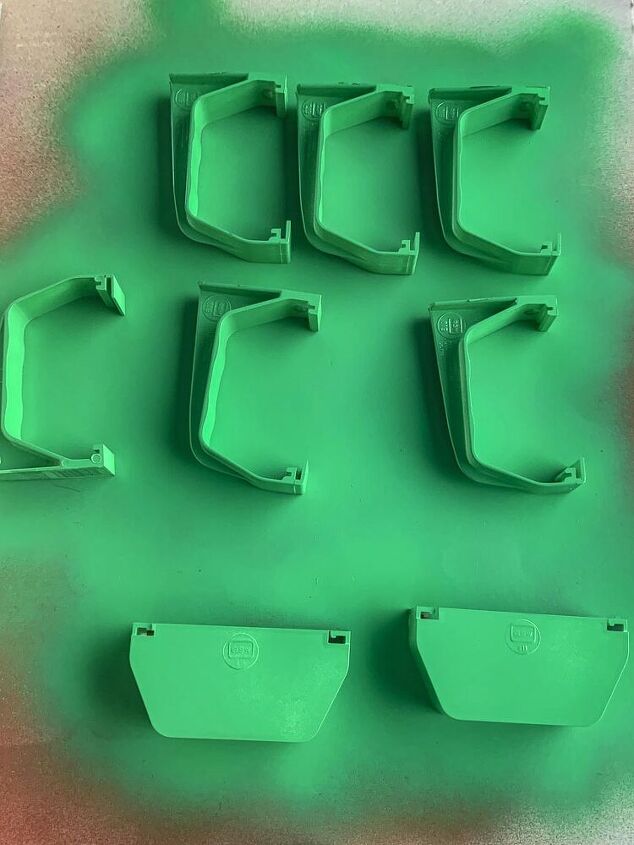
To make the garden I purchased the gutter, matching end caps (to cover the sides of the gutter) and mounting brackets (to attach the gutter to a fence) at Home Depot. Since there are different styles of gutters, make sure you purchase end caps and mounting brackets that are appropriate for your specific type of gutter.
I selected a vinyl U-style gutter from Amerimax. Because I planned to split the long single gutter into two shorter length gutter sections, I needed a total of 4 end caps that fit on my U-style gutter. To attach the gutter to the fence, I picked up 10 exterior hooks.
2 – Cut Gutter to Length
The 10-foot rain gutter did not fit in my car. Fortunately, I was able to cut the gutter to size right in Home Depot (that option was not available at my other local home improvement store).

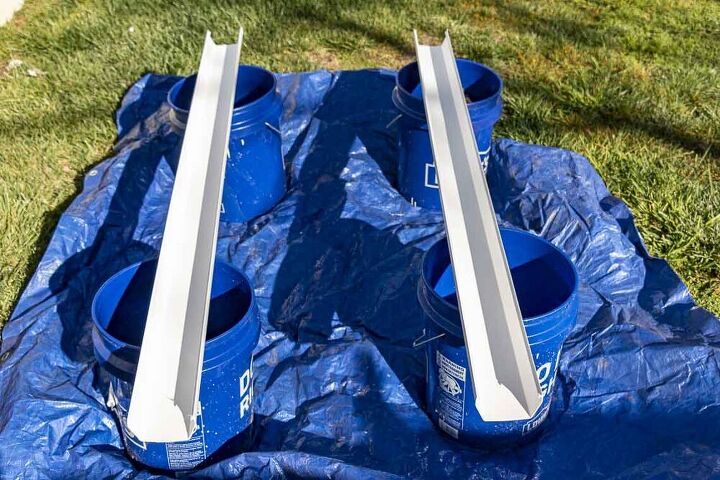
Using the Moulding Cutting Station at Home Depot, I sawed the gutter into two 5-foot sections (which fit in my car!).
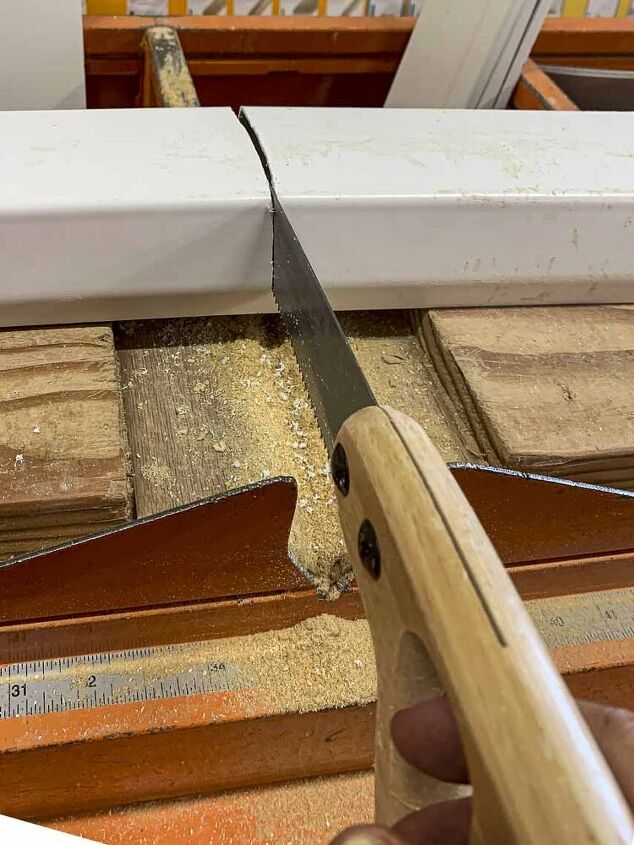
Measure and mark the center point before you cut. If you later find the segments are not the same length, trim one with a jig saw or fine-tooth hack saw.
3 – Clean Gutters (if Needed) and Prep Your Space
If your gutter is dirty, wash it down with hose and wait for the water to dry before painting. The dirt could impact the paint adherence. Also, prepare your space for spray painting. I placed a tarp down on my grass to protect the area from over spray.
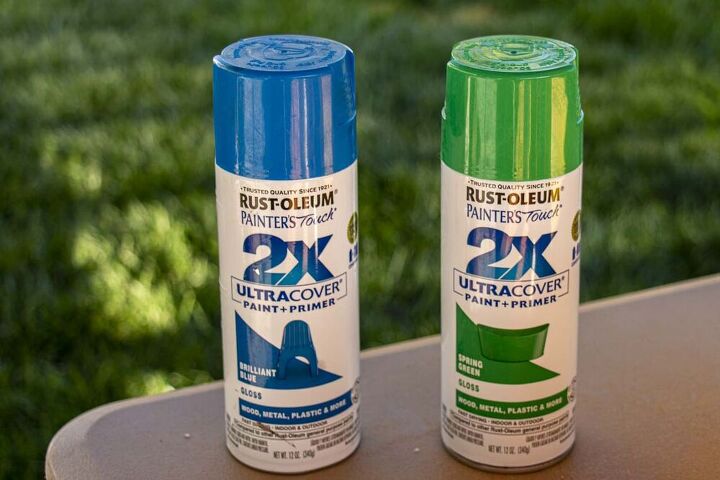
Before applying the spray paint, I shook the spray can vigorously for 1 to 2 minutes, per the instructions on my can. Next, I held the can about 10″ – 16″ away from the surface of the gutter material (the distance recommended on this specific paint can) and covered the sides with a thin coat of paint using an even side-to-side motion.
I applied 3 coats of paint to the gutters, end caps and hangers. This particular spray paint indicates that it should be recoated within 1 hour or after 48 hours (I added the next coat within an hour of applying the prior coat). The paint I used indicates that maximum paint adhesion and durability on plastic is achieved in 5-7 days.
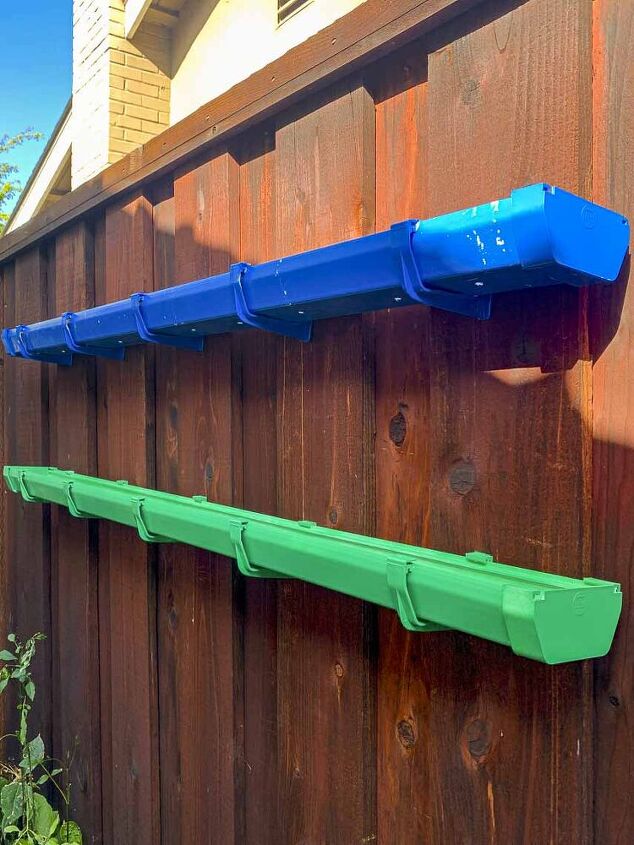
5 – Put on End Caps
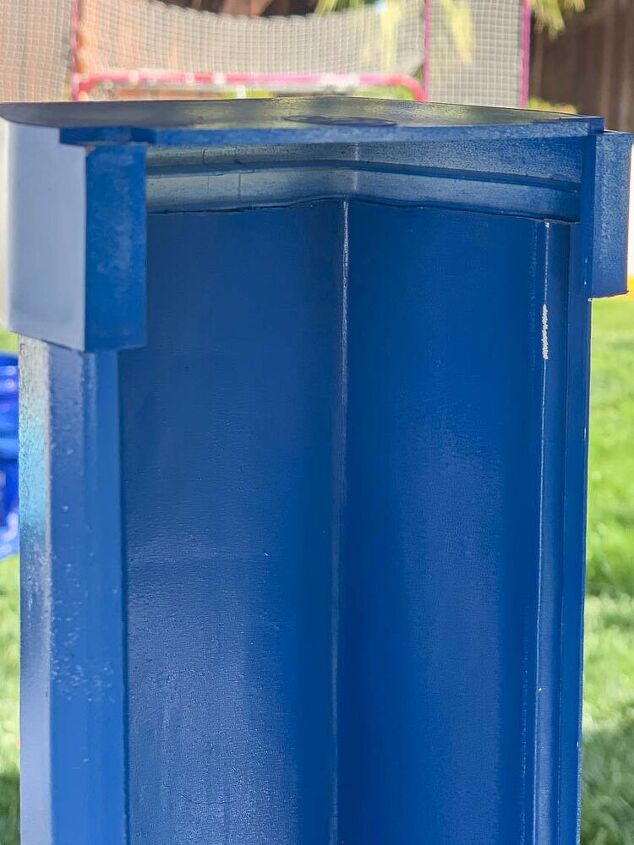
After the paint dries, attach the end caps to the ends of the gutter segments. Mine fit securely, but you could glue them if they feel like they might come loose.
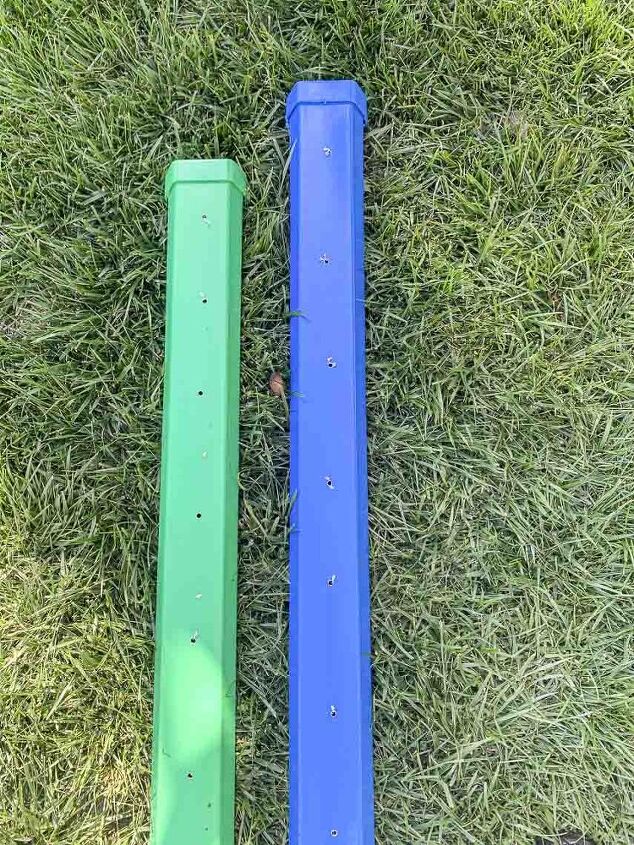
6 – Add Drainage Holes
To allow excess water to drain from the planters, drainage holes need to be inserted in the bottom of the gutter. I did this step after painting the gutters, but I could have done so before painting.
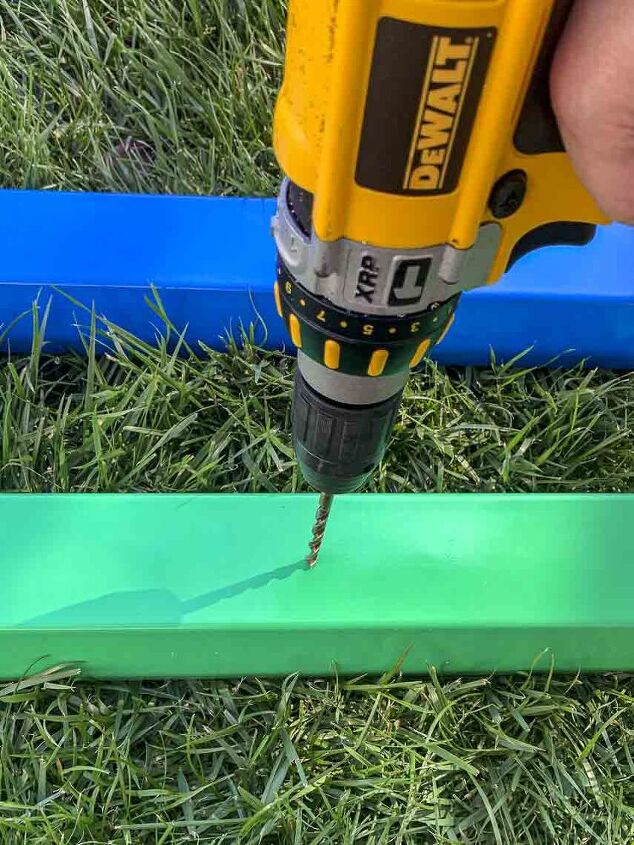
To make the drainage holes, I flipped the gutter upside down and drilled large (approximately pencil-sized) drainage holes in the bottom. I used a larger drill bit and spaced them about every 8 inches down the length of the gutter to help ensure good drainage. Make sure to wear your safety glasses when drilling!
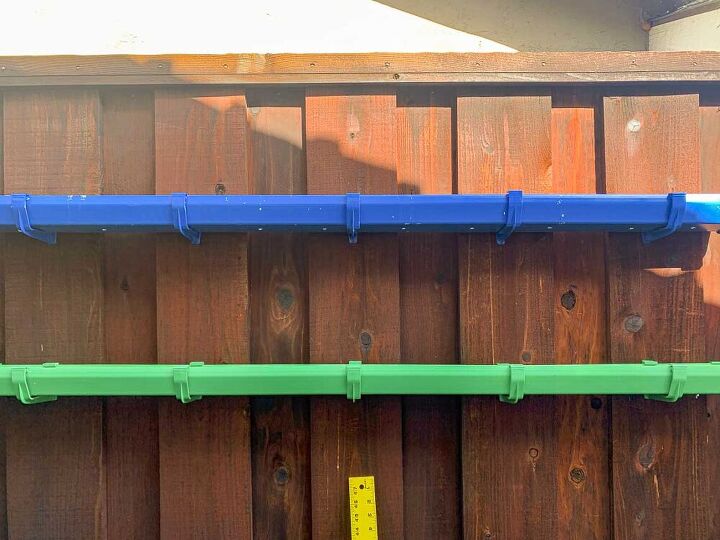
7 – Attach the Gutter Planters to Fence
Determine where you want to hang your rain gutter garden on your fence. Using a level and a straight edge/measuring tape, mark where you want to place the hangers.
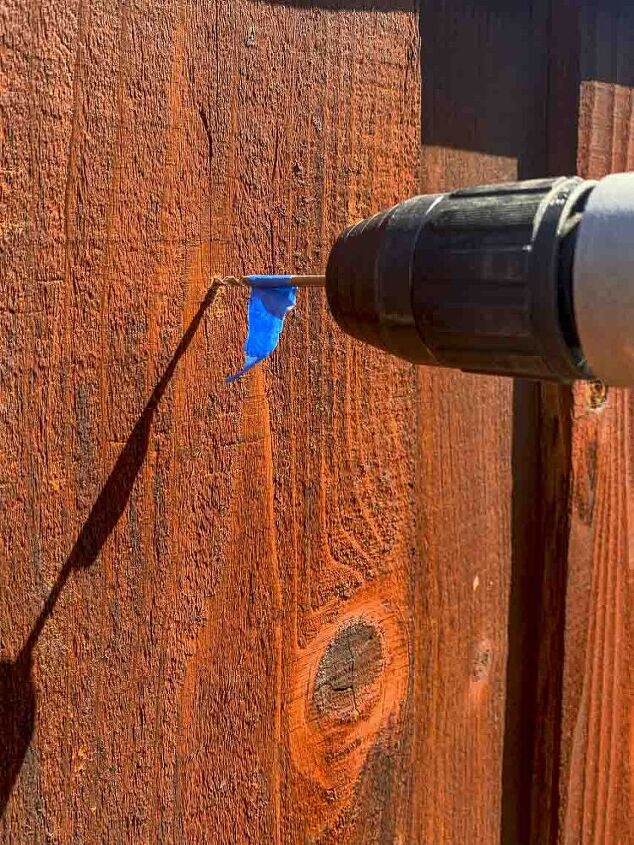
I started by drilling small pilot holes into the fence where the hangers would be screwed into the fence. To make sure I didn’t drill straight through the fence, I wrapped a piece of painter’s tape on the drill bit to indicate where to stop drilling these small holes.
Next, I attached the brackets to the fence by screwing wood screws through the brackets into the pilot holes. I chose a screw length shorter than the thickness of a fence board to prevent the screws from coming out the other side of the fence.
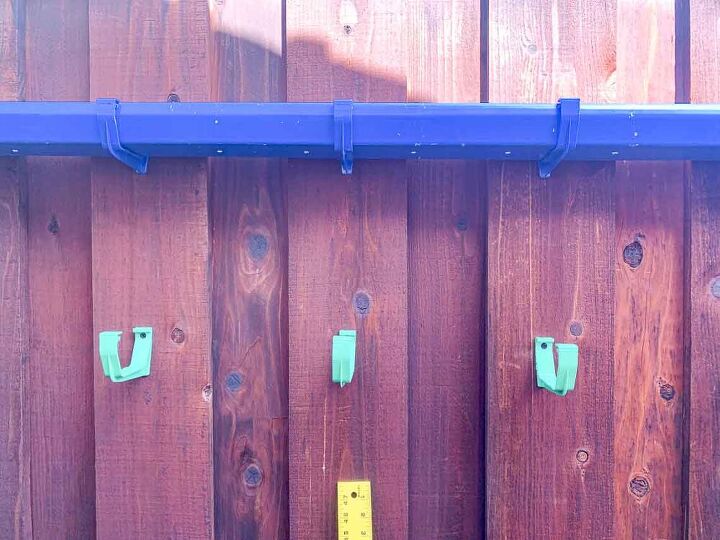
8 – Snap Gutter to the Gutter Hangers
Since I did not wait until the paint was fully dry, I scratched a bit of the paint off with this step. I should have minimized sliding the gutter around in the brackets when trying to secure it into place. By using a paint brush and paint sprayed into a cup, I was able to touch up the scratches. I used a paint brush to avoid accidentally spray painting the fence blue and green!
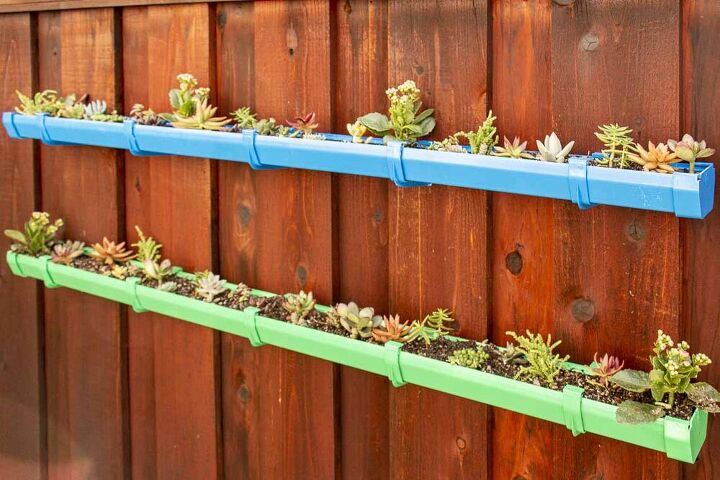
9 – Add Plants
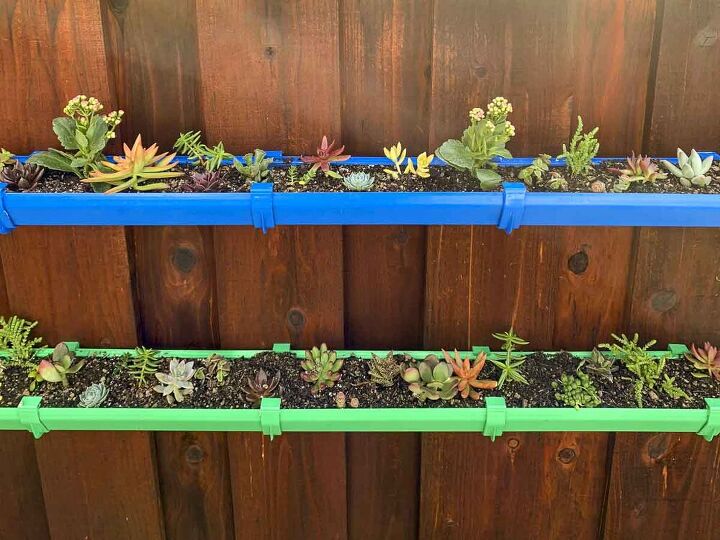
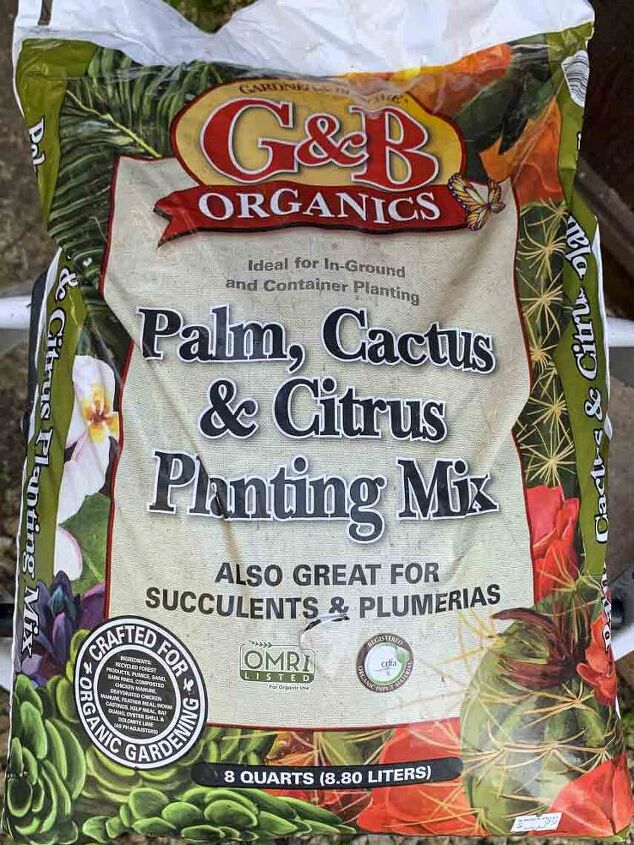
I am on a succulent kick this year. I built this rain gutter garden with the intention of filling it with succulent plants, primarily because I wanted a low maintenance garden. In addition, succulents can create a beautiful garden. Since I was planting succulents, my local nursery recommended a Palm, Cactus & Citrus Planting Mix that also worked with succulents.
To increase visual interest, I selected succulents of various shapes and colors from Home Depot, Lowe’s and a local nursery. This was easy because there is such a wide choice of plants with succulents. These small plants work well in the gutter planter. An herb garden would do well too. Select plants with shallow roots that prefer shallow containers. I was so pleased with my new gutter garden. I love the succulents and the bold, bright colors of my rain gutter planter. My family thought I did a great job too!
Other Types of Gutter Gardening
Gutter gardens are not limited to fences. Some people have placed them on a porch railing or deck railing, made hanging gutter gardens, and even turned them into a privacy screen or stylish space divider by attaching a series of gutters between two wooden posts.
Do you have other gutter garden ideas? Have you created a gutter garden? If yes, what tips do you have for gutter gardeners?
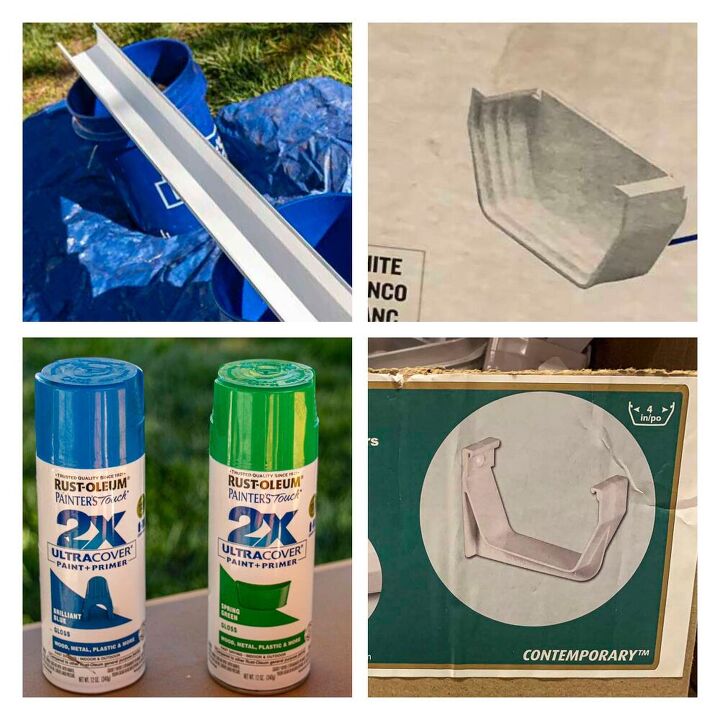
Main Project Materials: Vinyl Gutter, End Caps, Mounting Brackets and Spray Paint.
Resources for this project:
See all materials


Comments
Join the conversation
-
This was so cute and very good instructions.. I may have found new project Thx!!
-
I love the way you put together your article with the photo of the finished project first!
It really caught my interest!


Frequently asked questions
Have a question about this project?
Do you have pets, if so how do you keep them away from? Nice job!
What do you do with the succulents once the weather get cold