


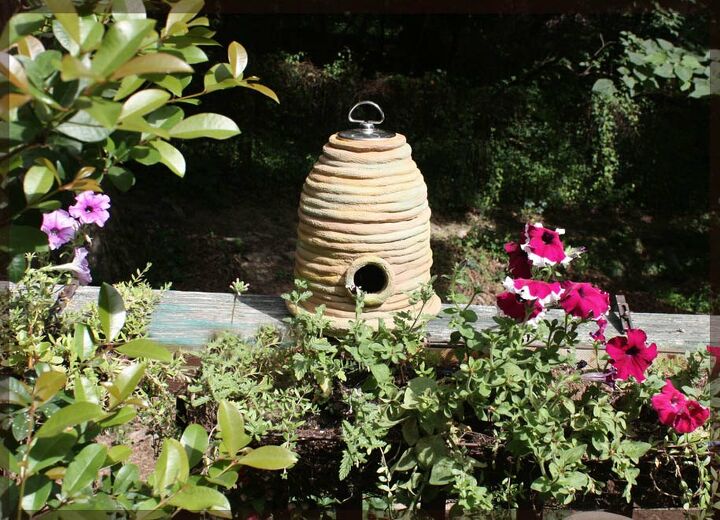
Make a Clay Bee Skep for a Cottage-Style Garden
I like to tempt winged visitors to my garden with this homespun clay hive that resembles an antique straw bee skep. I had no experience working with clay before this project, but I was able to make this easily. If I can do it, you can too!
I recommend Hearty brand air-drying clay if you want to avoid cracks while this dries. But don't worry too much about gaps or cracks in this design if you use a cheaper medium, because the clay will be sealed with thin-set tile cement which will give it a nice durable finish.

Here's what I used to make this decoration:
1) air drying clay (about five pounds);
2) thin-set cement (I used super white glass tile cement);
3) acrylic paint in aqua, yellow, golden brown, dark brown, and white (or, use your favorite garden colors);
AND THESE TOOLS:
4) brushes: one-inch chip brush and half-inch nylon paint brush;
5) masking tape;
6) scissors or craft knife to cut clay;
7) waterproof board on which to work;
AND TO FINISH:
8) Exterior varnish, outdoor ModPodge, or liquid wax like Waverly Inspirations
You'll also need some recycled objects to build a support on which the clay will sit.
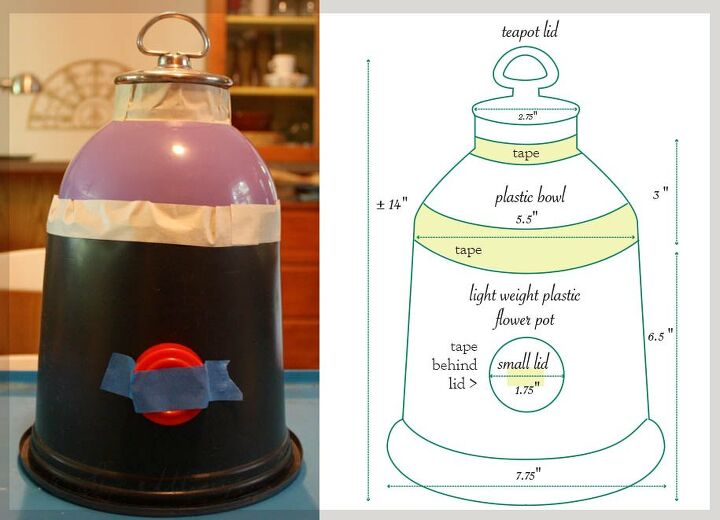
I used a light-weight plastic flower pot and a rigid plastic bowl, both turned upside–down and stacked … topped with a metal teakettle lid to form a roof, all held together with masking tape. I attached a plastic lid from a spice jar taped to the side as a spacer for the opening. My measurements in the diagram are approximate. Build your skep this size, or try a miniature version … whatever suits your display area.
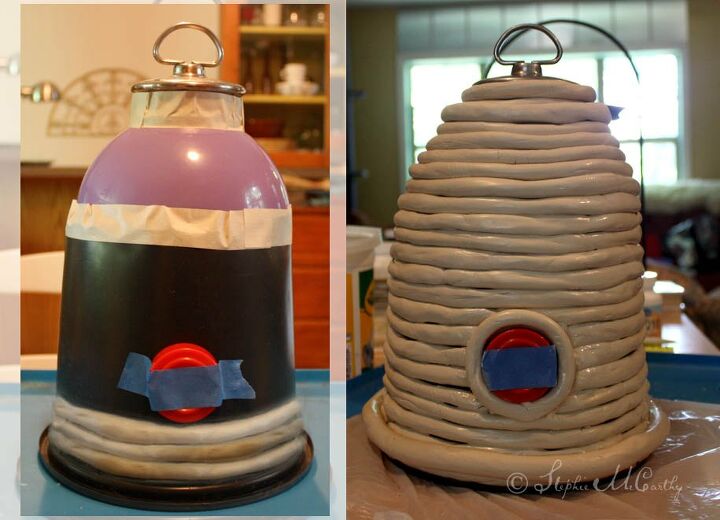
Set aside 1/3 cup of clay, plastic wrapped, to allow for repairs as clay shrinks and dries. Roll the remainder of clay into coils about half an inch in diameter. Apply one coil at a time. Wrap a coil around the opening and add coils horizontally around it as shown. Keep stacking coils to the top.
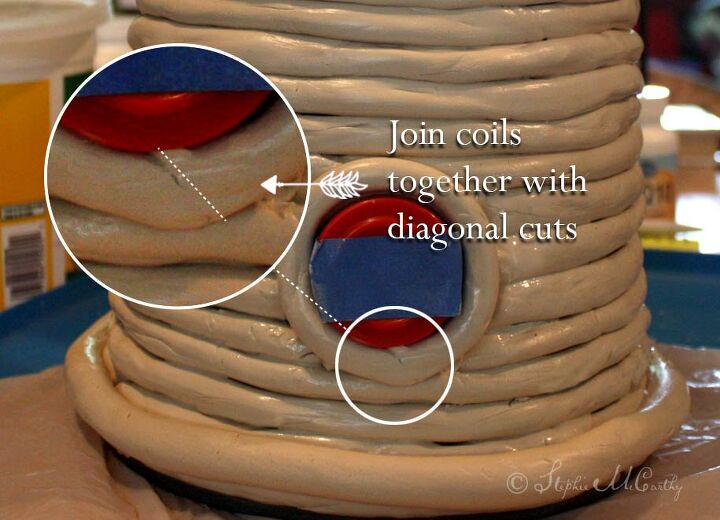
Where ever you want to connect coils, I would recommend making diagonal cuts as shown. Diagonal joins like this will add strength. You can also see that I wetted and smoothed the coils, but did not worry too much about unevenness or gaps. You can use a baby-wipe or a brush dipped in water to smooth your coils.
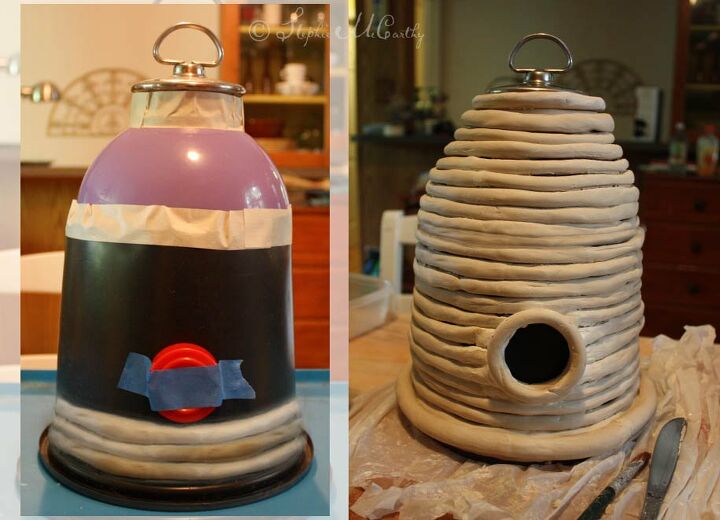
I stopped adding coils just under the edge of the teapot top leaving a metal roof and handle. I made a one-inch thick coil and wrapped the bottom edge. I added a second coil around the front opening so that it stood out well from the surface. Smooth, smooth, smooth … with water.
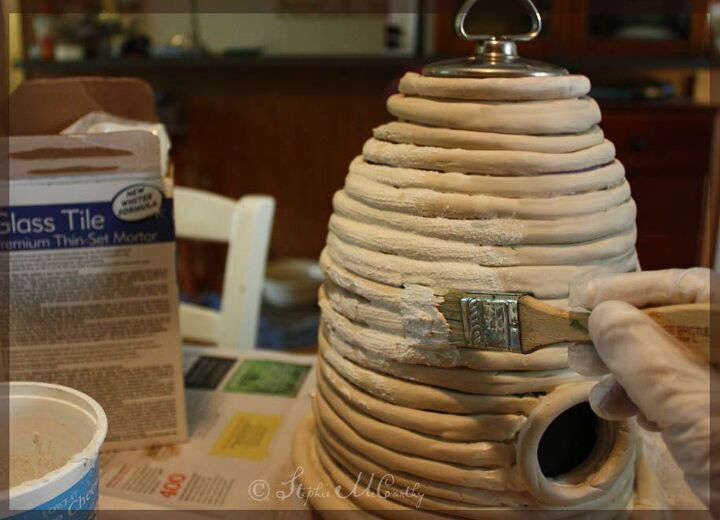
Let clay dry overnight. I used a craft knife to cut around the red lid and blue tape, right through the plastic pot so that I could remove them to make a good sized opening. I repaired cracks with more clay (remember it will shrink). When all clay was nearly dry, I mixed thin-set tile cement with water to applesauce consistency. I used one cup of thin-set to 1/3 cup of water, adding a teaspoon of water now and then as the mixture thickened. I brushed thin-set over the coils with a chip brush to texturize and seal. Allow thin-set to dry for 24 hours.
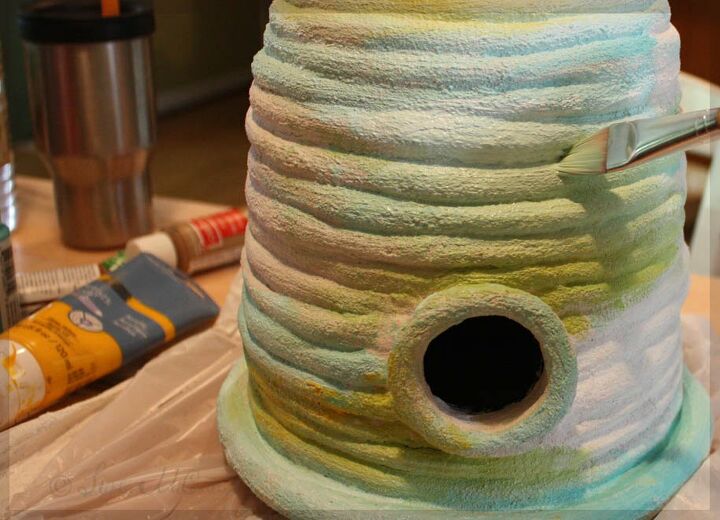
This is a little tip I can pass along as a professional artist … use secondary colors for a rich finish. I painted my hive blue-green first, blending random patches using a one inch brush. I painted between the coils with a half inch brush. Finally I added the gold browns and yellow, blending all colors with both brushes for an antiqued effect.
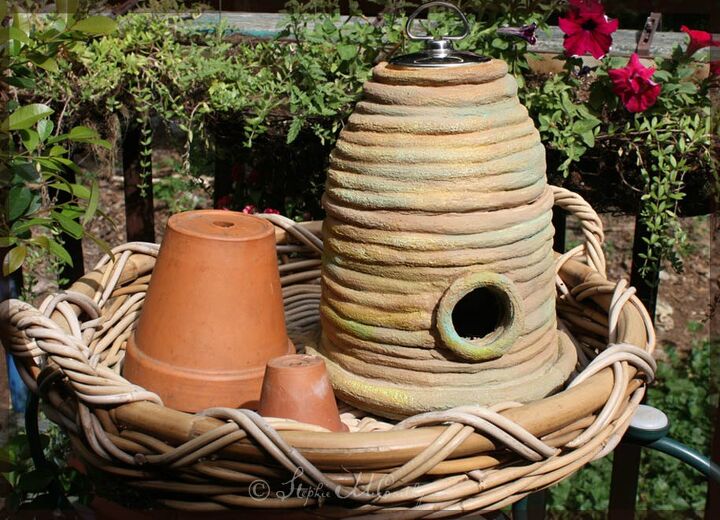
Here's a good view of the finished paint. The green blue peeks through for a weathered effect. You can just as well paint this one-color, but why not experiment with a varied surface. When dry, finish with a varnish or wax of your choice. I like wax.
I bring my skep inside in the winter and place it outdoors in sheltered areas in warmer seasons. If you'd like to see more of my craft ideas and professional artist tips, plus the progress on my 200-year old house renovation, the link to my web archives is here. All my best, Stephie
Resources for this project:
See all materials


Comments
Join the conversation
-
It looks beautiful as an outside decor. Can you seal with varnish and leave outdoors?
-
I love the look of this! Very pretty, but both hubby and I are very allergic to bee stings, like go to the hospital allergic. But I think I will try this and paint the hole black, beautiful and safe! 😃👍


Frequently asked questions
Have a question about this project?
This is really cool and so important for bees! I am wondering if you need to do anything to the interior or are the bees happy with the plastic pot? I don’t know if their little feet will stick.
Do you get yellow jackets or hornets ever? (allergic to both) What keeps the bees from stinging if you are working close to the pot? I want to try this near my vegetable garden. Thank you.
It looks like this is simply a decoration piece, is that right? Did you cut a hole in the "opening" to actually let bees, spiders, etc. to get inside, or is that just the black color of the flower pot that I'm seeing?