


Painting a Plaster Statue

by | Dec 28, 2021 | DIY, Farmhouse Finds
Today’s post is about painting a plaster statue. A friend recently passed along a plaster statue to me that they could not find a use for or room for. The piece had sentimental value but it didn’t fit in with their current decor and style. The statue was made in the late 1960s and from my perspective – it needed some help. Yet . . . I could see that the statue also had potential.
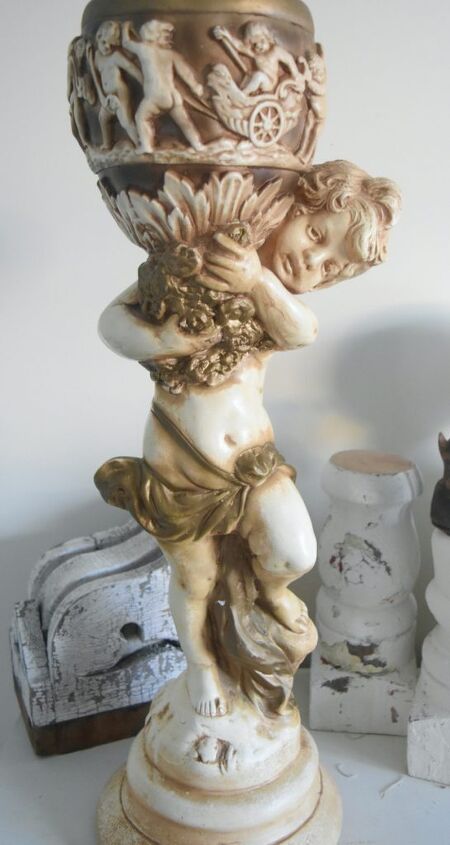
The photo above shows the “before” condition of the statue. So, yes, you can tell from that sentence alone – that I altered the statue. There are people who are heaving a heavy sigh after reading that sentence because they are not happy that the statue was changed. Hear me out before you stop reading. My goal is to find this statue a new home – a home where it will be loved, cherished and well cared for. My years of experience in retail and in selling vintage/antique items tells me – this statue in its current condition – it would be less desirable to customers. Further, very rarely can people see the POTENTIAL in an item. They are looking for items to meet an existing need.
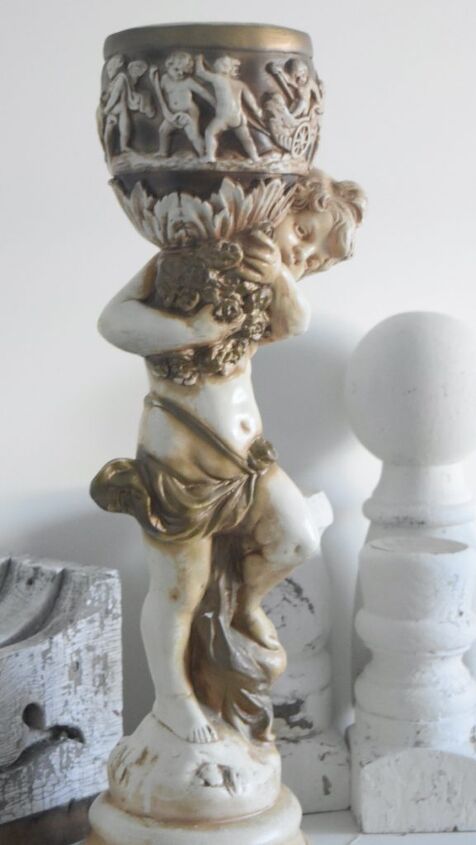
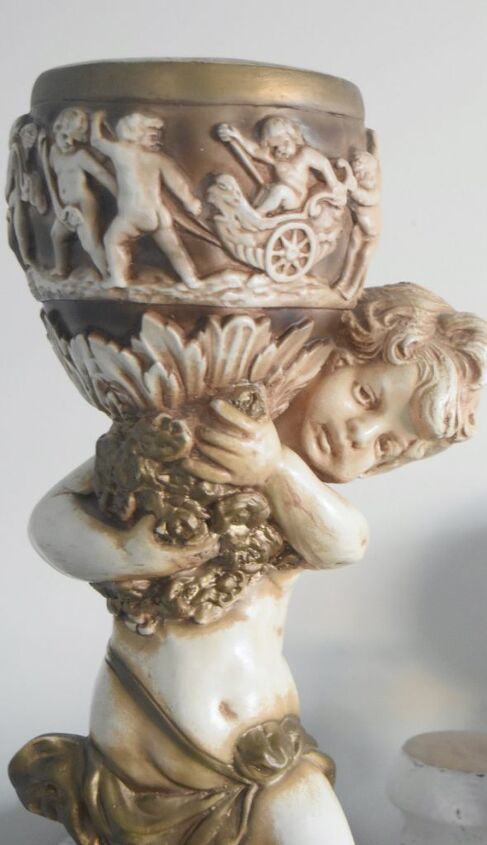
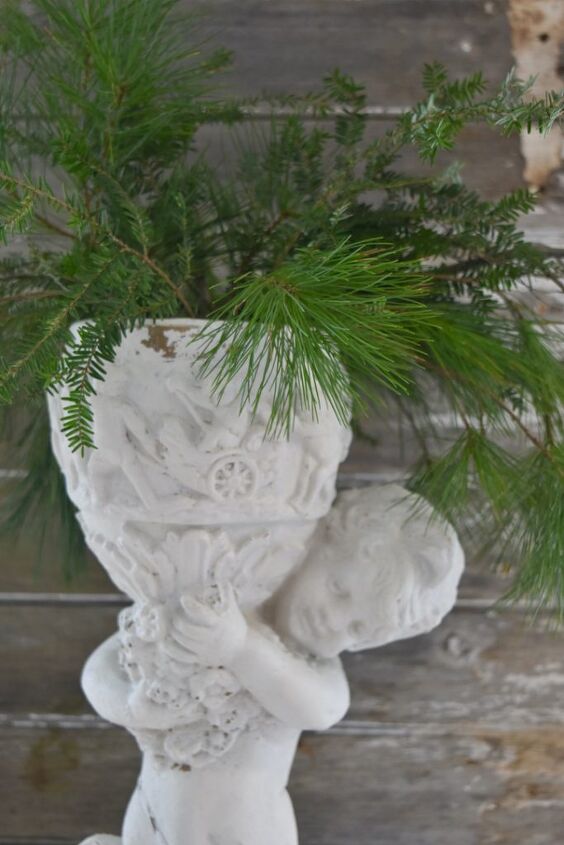
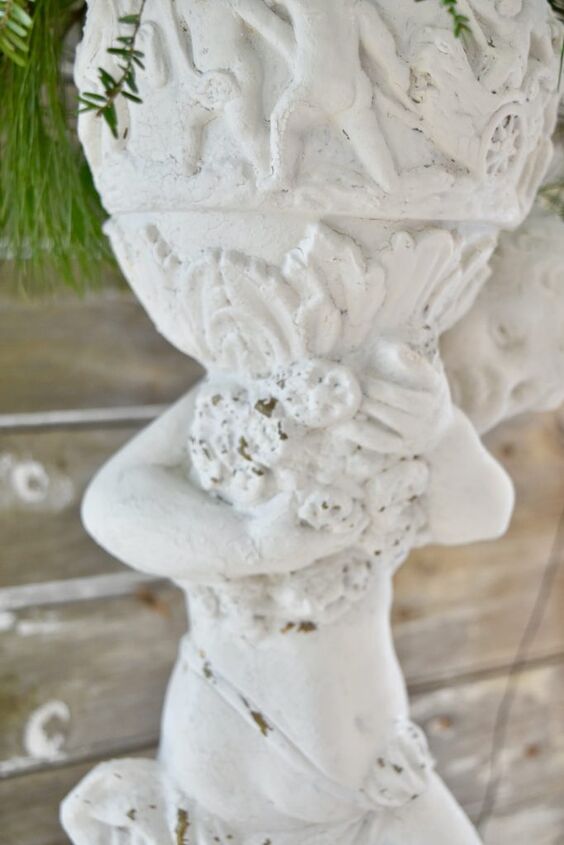
Experience has shown that this European style statue with its gold and brown accents would not be in-demand. HOWEVER – when I looked closely at the statue- there was some hidden potential. If you look past the gold/brown accent paint – the basic form of the statue was really nice. For example, the child has a nice facial expression. Further, this statue actually doubles as a plant stand. (Or it could be used for a flower arrangement). The generous size, structure, and form of the statue had potential. The statue also had some really nice well developed details- just look at the scene on the cup that the little boy is holding. Right. Can you see it yet? Are you still with me? This is when I decided – to paint the plaster with milk paint. I never painted plaster before using milk paint. What the heck? Why not? Let’s try it and see what happens. I used milk paint because I wanted an authentic old world – vintage finish. Crackles with a little paint chipping would serve this statue well. In short – I wanted it to have a new “old look”. Painting a Plaster Statue -During Photos
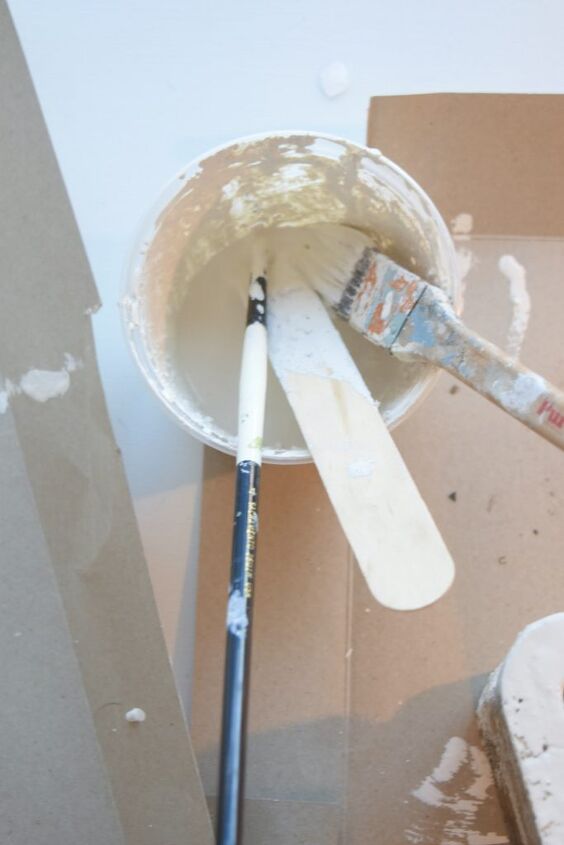
The first thing I did was wipe down the plaster statue using Krud Kutter. The statue was in good condition and clean but it never hurts to wipe down a surface before you paint it. Then I mixed up some Miss Mustard Seed milk paint in the color Farmhouse White and let it sit for 20 minutes to set up. Given the size and intricate details of the statue, I needed to use a couple of different paint brushes. First the statue is more than 2 feet tall – so it’s a substantial size. It also has many carved details. A small 1.5 inch brush was needed for covering the larger areas and an artists brush was needed for reaching very small nooks and crannies.
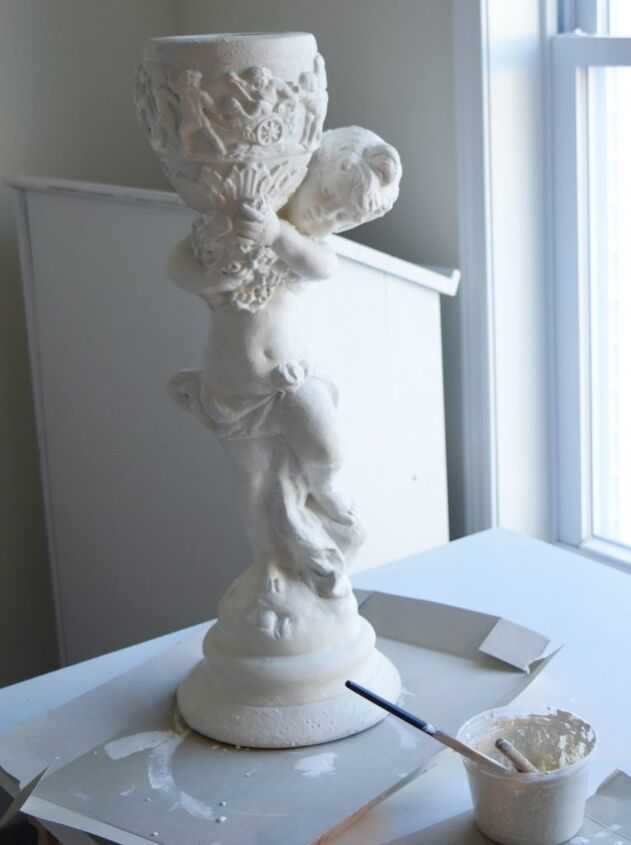
There is nothing remarkable about the statue in this phase. It looks like it has been painted white. The real magic happens the when the paint dries. Also, I used a hair dryer to help things along. I applied two full coats of paint ensuring the statue was completely dry between applications.
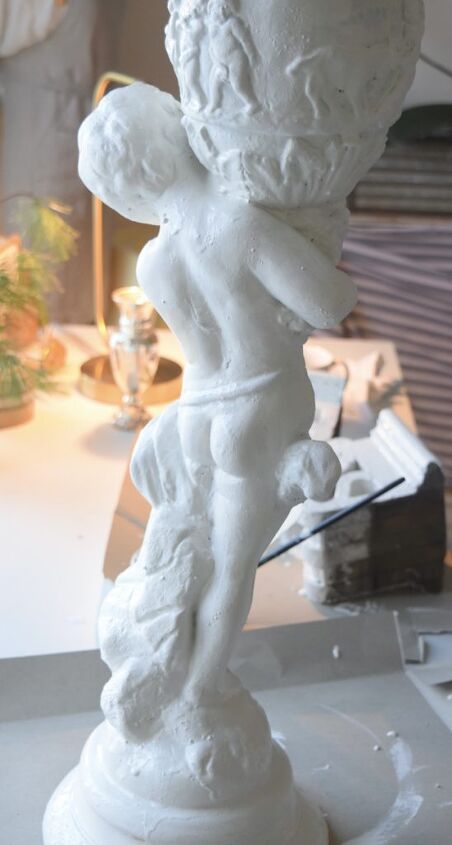
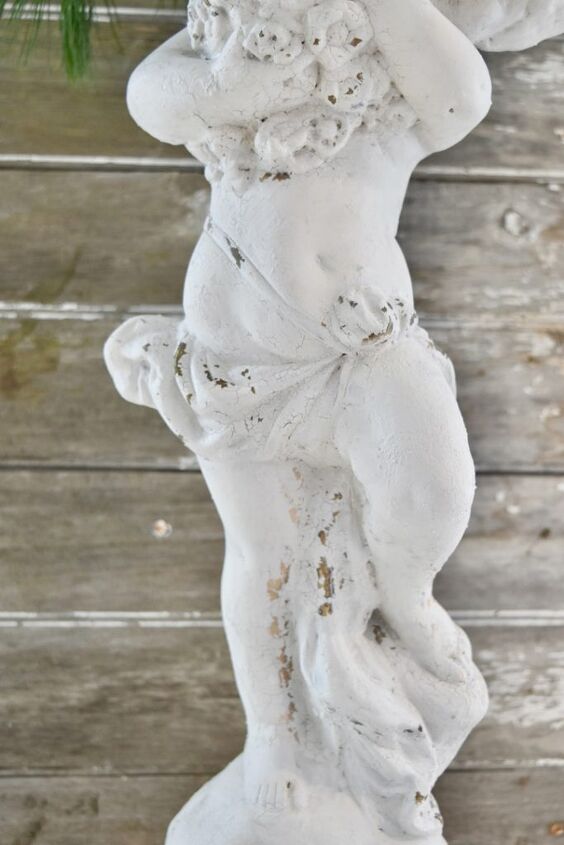
Even in this state, I felt like painting the plaster statue was a step in the right direction. Good bye brown and weird gold paint. Painting a Plaster Statue -After Photos The beautiful thing about milk paint, is that it has its own personality. You can never be 100% sure how it will react when you apply it to a surface. In this situation, the paint reacted just the way I had hoped. It did crackle and create patina. It also did a little flaking off in the areas where the gold paint was used. The result was perfect.
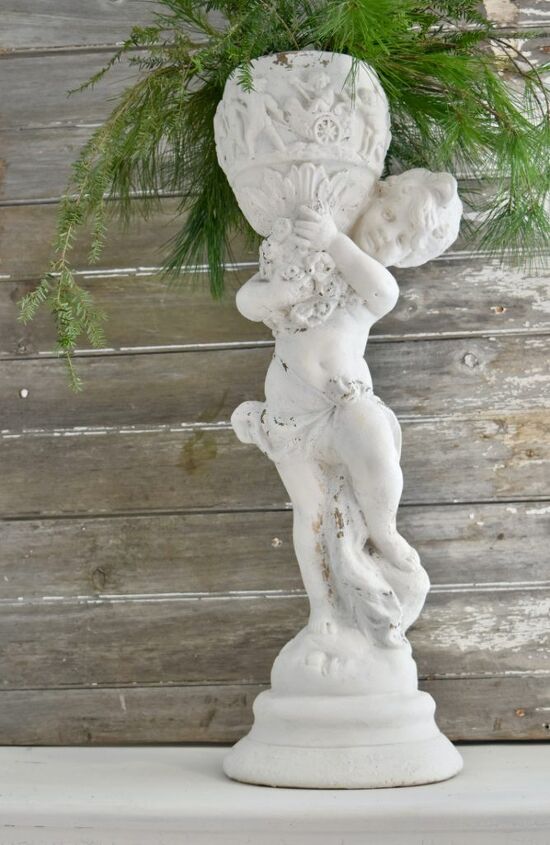
Now this painted statue has an air of old European elegance. The statue would look lovely with a bouquet of flowers in the cup that spilled over the sides. Here we are 4 days into winter and I am already dreaming of flowers. . .
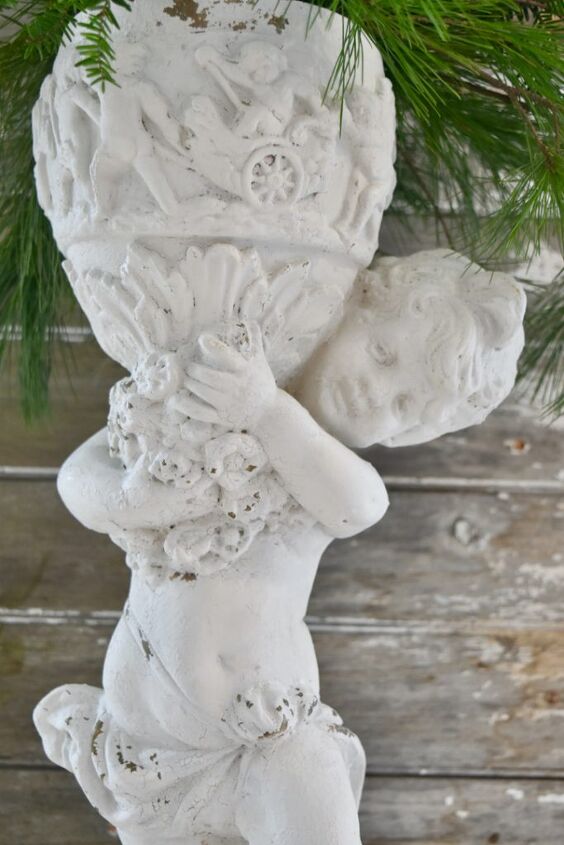
I love how the paint lightly flaked off in the areas where the gold paint was originally applied. That’s exactly what I was hoping for.
As an aside, since a New Year is just around the corner – something about this cherubic statue seemed fitting to work on. It seemed like the right time to breathe new life into this vintage piece. Other Projects with Milk Paint Here are some other projects where I used milk paint that you may be interested in: Flow Blue Side Board Milk Paint and Architectural Salvage Little Cupboard in Milk Paint White Painted Oak Dresser DIY Wooden Finial Ornaments Thank you for stopping by the blog today. Alas, no information was shared about the latest Keurig nor was there a review of candles from Walmart. However, I hope you found something more meaningful and lasting -inspiration to seek out the potential in the things around us. The ability to look at vintage items with fresh eyes. ← Previous Subscribe To Our Newsletter Join our mailing list to receive the latest news and updates from our team. You have Successfully Subscribed! Recent Posts Painting a Plaster Statue Merry Christmas From Sky Lark House Round Up of Christmas Blog Posts 2021 Easy Paper Snowflakes Reflections on the Holiday Season
Comments
Join the conversation
-
What a treasure, it's going to look great with your flowers.
-
It's lovely 👌


Frequently asked questions
Have a question about this project?
Is there anything you way you can seal a plaster statue with so it can be used outside?