


Porch Decoration DIY - Life as a LEO Wife - DIY
I made the cutest porch decoration, an outdoor thermometer, for the patriotic holidays, and it has been pretty popular. All of our friends and neighbors wanted to know where we got it. I loved it too, so I wanted one for this porch theme as well. I actually think I will make one for every season or holiday. If you want to do this as well, make sure you get the thermometers from Dollar Tree before summer is over. I don’t think they carry them during fall and winter.
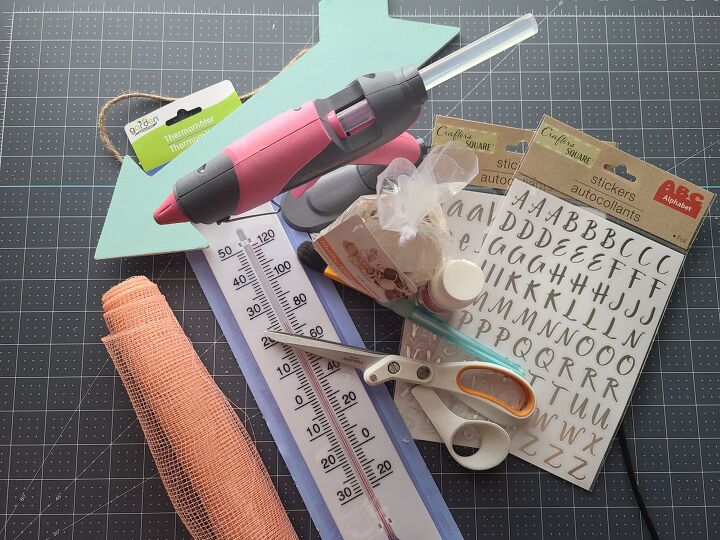
- For this piece of porch decoration you need:large outdoor thermometer (*Dollar Tree)
- super glue, E6000, something like that*
- hot glue gun & glue sticks*
- 3 pipe cleaners*
- 1.5″ to 2.5″ wired ribbon (You can get this from DT, but I used plain white ribbon I had from long ago. I’m not exactly sure where I got it from, but I think it was Hobby Lobby.
- 10″ rolls of deco mesh (Optional-You can just use the ribbon only. Use what’s left from your spiral deco mesh wreath to create a matching piece. DT does have deco mesh, but I haven’t seen it in the coral and teal colors that match the DT sign that I used.)
- coral yarn to cover pipe cleaner on the bow (Optional- DT does have teal yarn, but I used coral that I already had from Hobby Lobby,)
- wood arrow sign for the top of the porch decoration*
- seashells*
- 2 packs of letter stickers- 1 capital, 1 lowercase
- acrylic paint- white & teal*
I'm offering a free customized free PNG (or SVG) and a free printable that you can use on any project for those readers coming from here over to my blog, Life as a LEO Wife. One design in a farmhouse "fresh market" theme, and the other is a customized last name and the year of your marriage or the establishment of your family. I love that so many are coming from Hometalk over to my blog, so y'all deserve a big thank you from me! More info is included at the bottom of this post under the picture of my magazine rack upcycle.
Paint the Arrow for the Top of the Porch Decoration
The wood arrows from Dollar Tree are pretty rough when you get them. It will definitely make it look better if you sand it a little before painting it. I painted my arrow teal, but if you’re using other colors in your design, you should paint it to match. I didn’t have the exact color of my teal mesh, so I mixed a few paints together to match. You can do that to make the perfect color for your sign. Give it two coats, then let it dry.
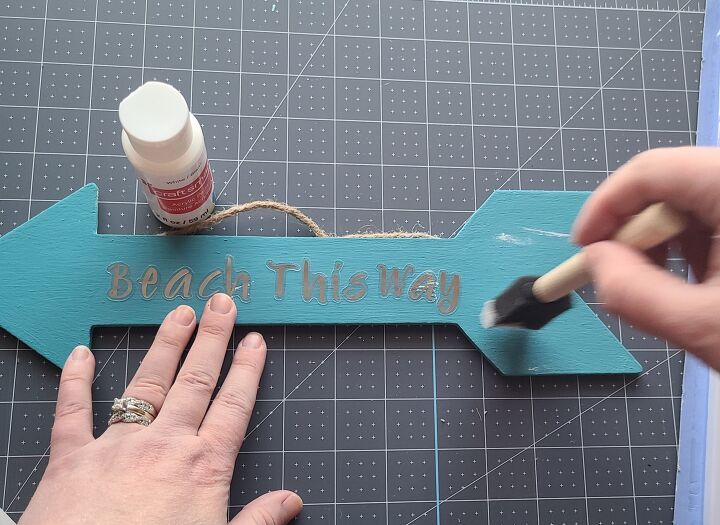
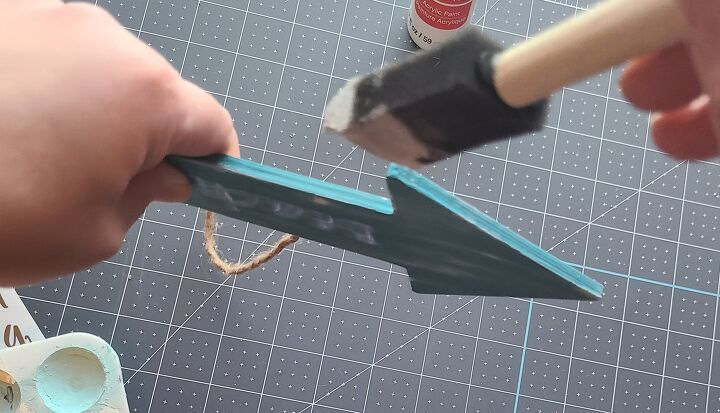
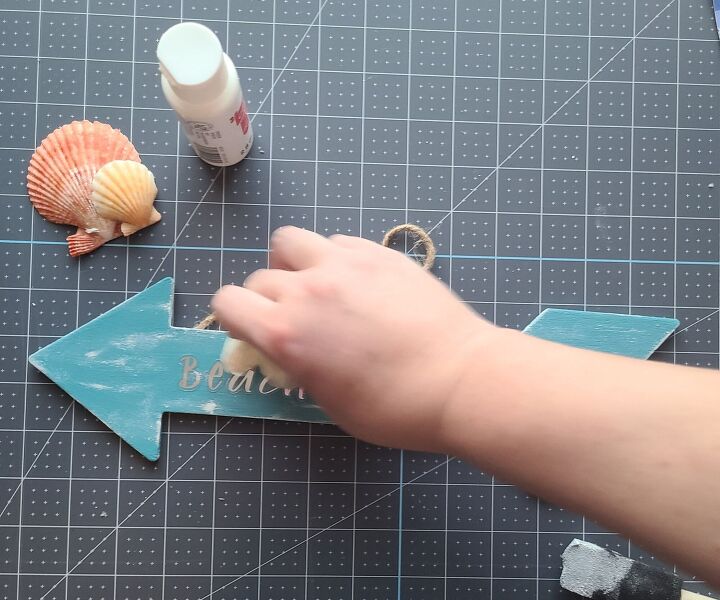
I wanted a little weathered look on my arrow, so I decided to add a little white. Dip your brush in the white paint then brush it almost completely off. Lightly run it over areas of the arrow until you are happy with the look. Next use some crumpled paper to rub over the paint to distress it a little more. I used crumpled up backing from contact paper. I decided to add the white after I had my lettering on because it looked a little plain. You definitely want to do this before you add you stickers.

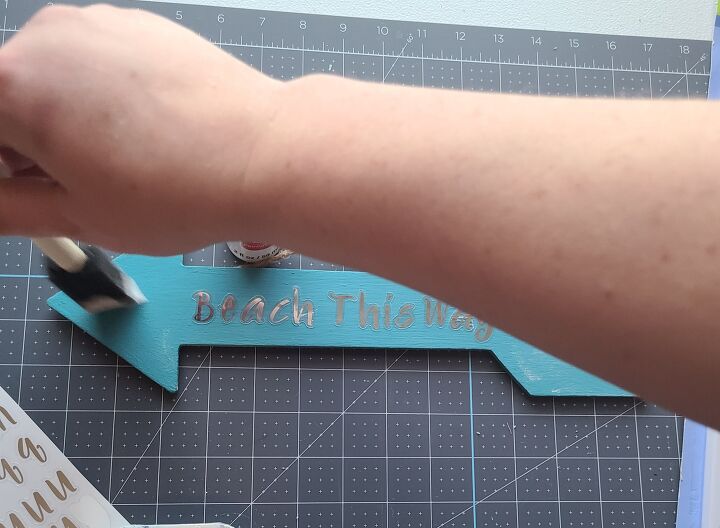
Add Quote
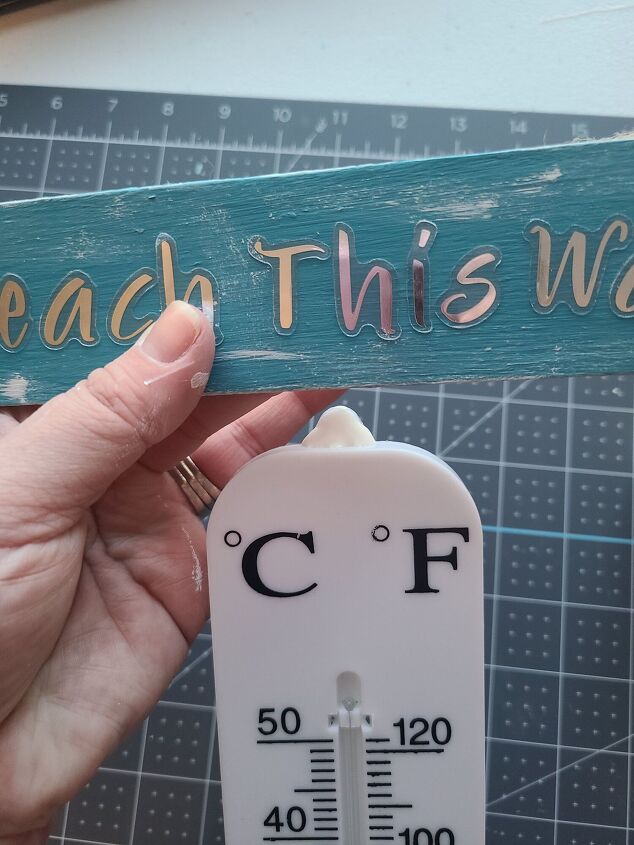
Next you need to add the quote to your porch decor. I chose to have mine say “Beach this way.” I live near the beach, and it is that way, so it made sense, ha. The great part of this DIY is that all of my friends out there without a Cricut can make it too! I picked up these silver letter stencils a while back from Dollar Tree to make a project that anyone can make, and this was the perfect opportunity to use them.
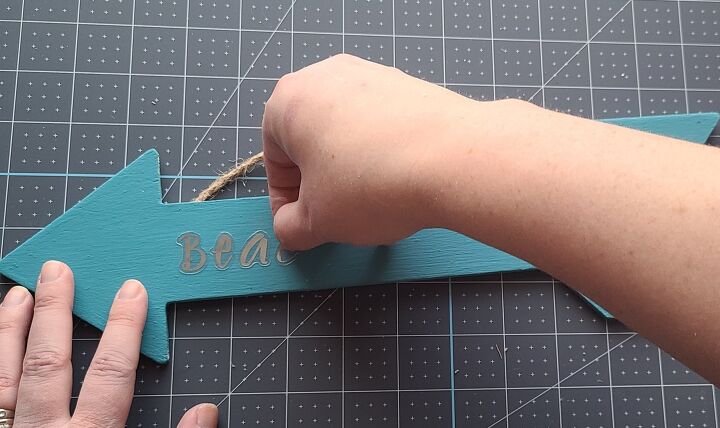
I used capital letters for the first letter in each word so that I would have enough letters to finish the quote. If you don’t want to do that, pick up two packs of lowercase stickers, or if you want all caps, two of those. Begin sticking your letters on, spacing them so that the words stretch evenly, all the way across the middle part of the arrow. I was able to just eyeball it, but you can use a ruler if you’d like to be precise.
Add Embellishments
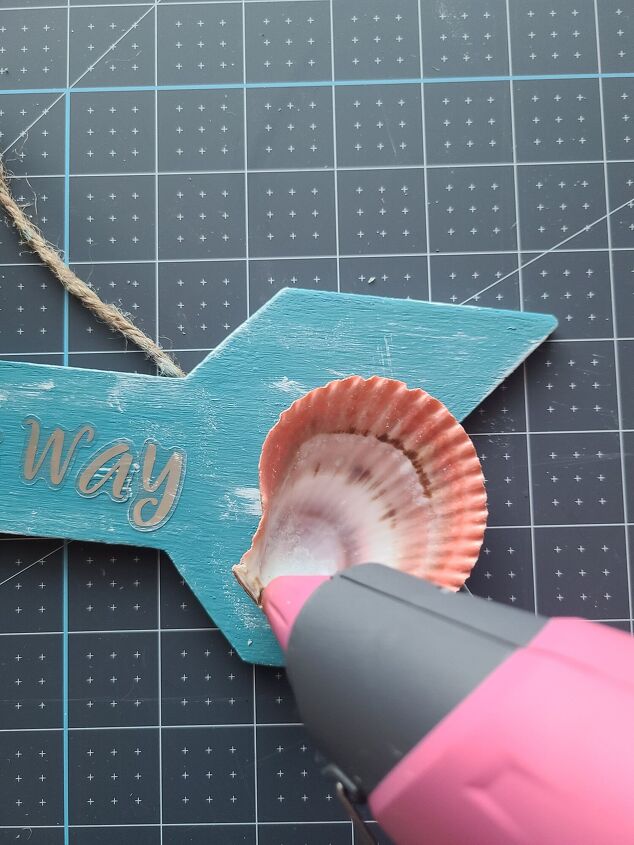
Now it’s time to add your seashells, and any other accessories you’d like, to the sign. I was lucky enough to find a pack of shells that had a lot of coral and melon colors in it, which is perfect for my porch decoration. I chose to add mine to the back end of the arrow. Apply hot glue to the edges of the shell all the way around and press it to the wood. Hold it down for a few seconds to let it adhere better. Next pick a smaller shell and add glue around the edges and overlap your first shell just a bit and press it on. I stopped with two, but you can add as many as you’d like to your design.
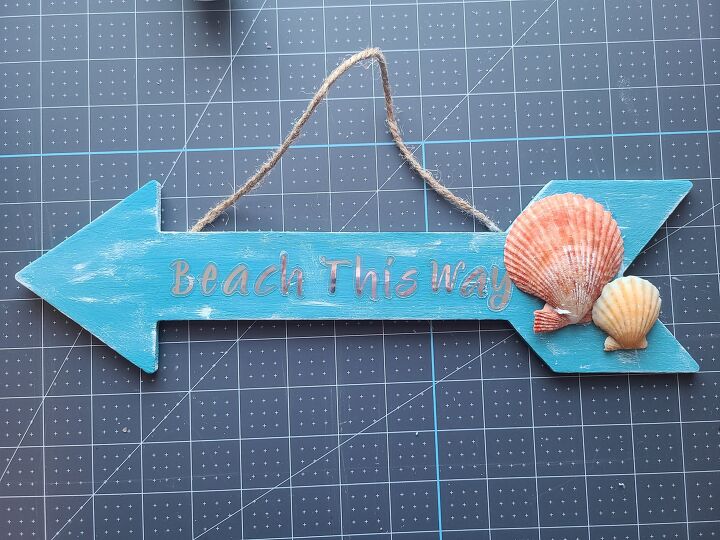
Once it’s finished you will have something like this:
Attach Arrow to Thermometer
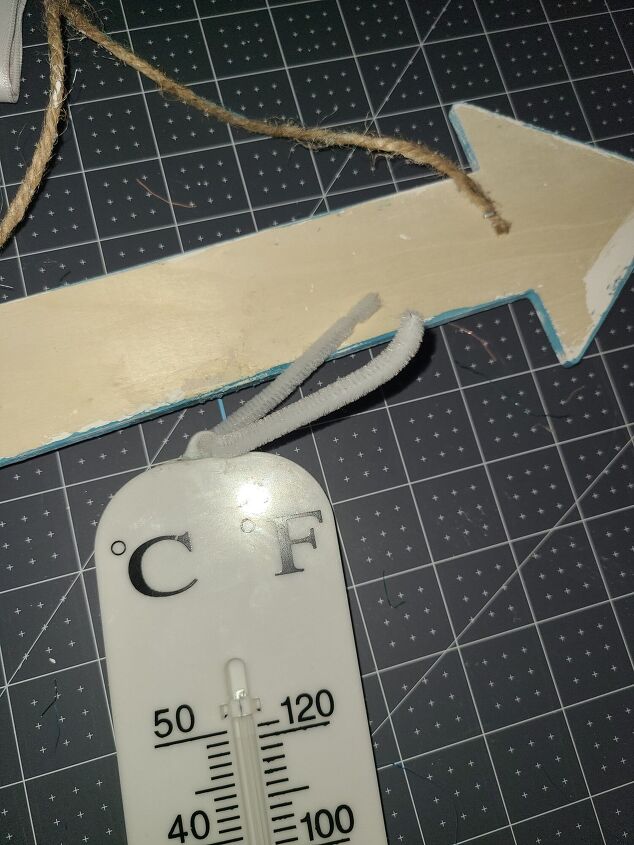
For some reason the plastic used in this thermometer just refuses to allow glue to adhere to it easily. I’ve tried three different Super Glue products, hot glue, E600, Tacky Glue, etc. The two pieces you are trying to glue together just fall apart when the glue is dry. It’s so crazy! This has happened on every single project I’ve done with these large thermometers from Dollar Tree.
First add wood glue or super glue to the top of the thermometer and the bottom of the sign, then squeeze some hot glue on top of that. Press them together firmly and hold it for a few seconds while the hot glue dries. You can also wrap some rope or something lengthwise around the two items and tie it off tightly. This will help hold it tight until the super glue dries. If everything stays together once it’s dry, awesome!! You can skip the next step.
What to do if glue alone won’t hold the pieces together:
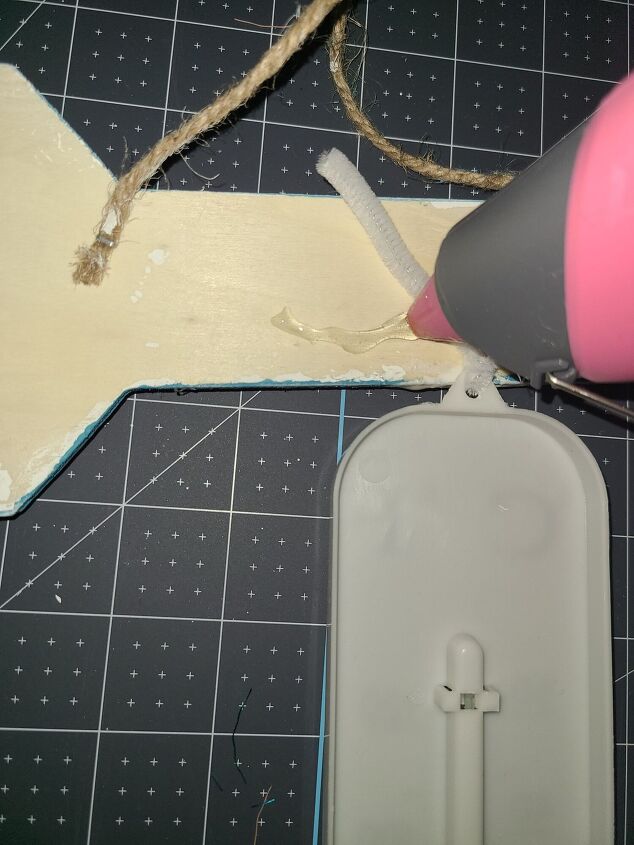
If yours fails to hold like mine, here’s how to get them to hold together. The top of the thermometer has a hole that’s meant for it to be hung from. Put a pipe cleaner through it and twist it closed a few times. Spread the pipe cleaner out horizontally. Carefully add hot glue to the back of the arrow in straight lines, one on the left side of the hole, the other on the right. Be careful not to separate the thermometer and arrow being held together by a hope and a prayer, and lay each side of the pipe cleaner on top of the hot glue, so you now have a straight line of pipe cleaner. The pictures below will probably explain it better!
If you want to add the glue to the thermometer and add the pipe cleaner, make sure you put the pipe cleaner through the hole before adding the glue to the top of the thermometer otherwise the hole will be obscured by the glue. Let the glue dry completely before moving the piece.
Make the Bows for the Bottom of the Porch Decoration
Deco Mesh Bow
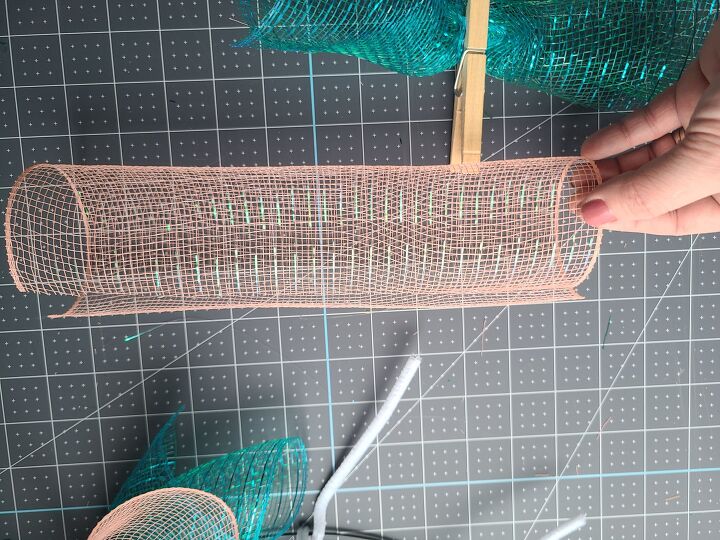
The next step is to make the bow for the bottom. I wanted mine to coordinate with my spiral deco mesh wreath, so I used left over mesh from that project as well as white 2.5″ wired ribbon. If you don’t have the mesh, that’s ok. You can just use ribbon.
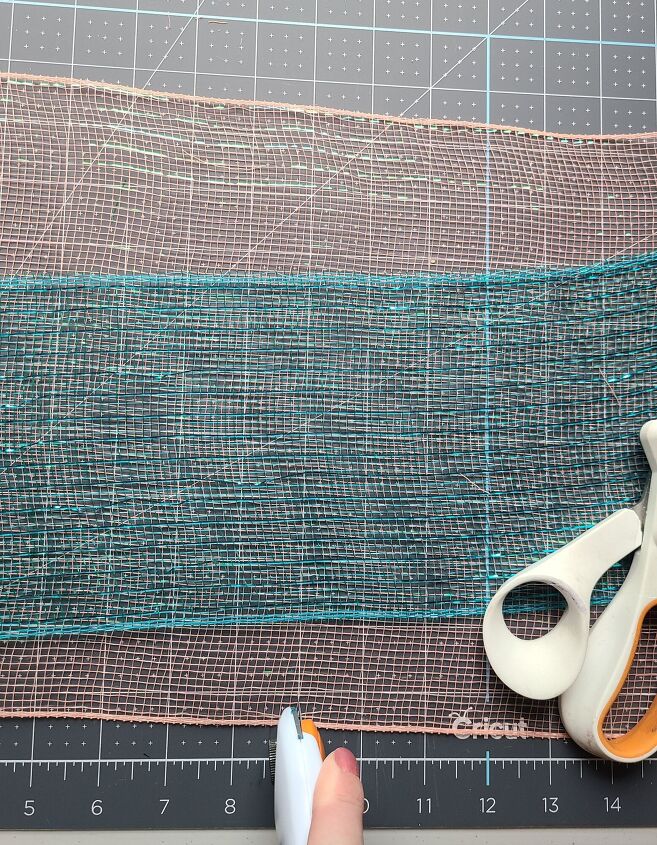
Roll out both colors of mesh together and cut two 7″ pieces of each color. Unfortunately I had to use one roll of 5.5″ mesh so I had to cut four pieces of the teal and combine them. Hopefully you have the 10″ roll you need. The pieces will naturally roll up which is what you want. If the roll is looser than you’d like, roll them a little tighter. If you need more guidance on this read my spiral deco mesh wreath post.
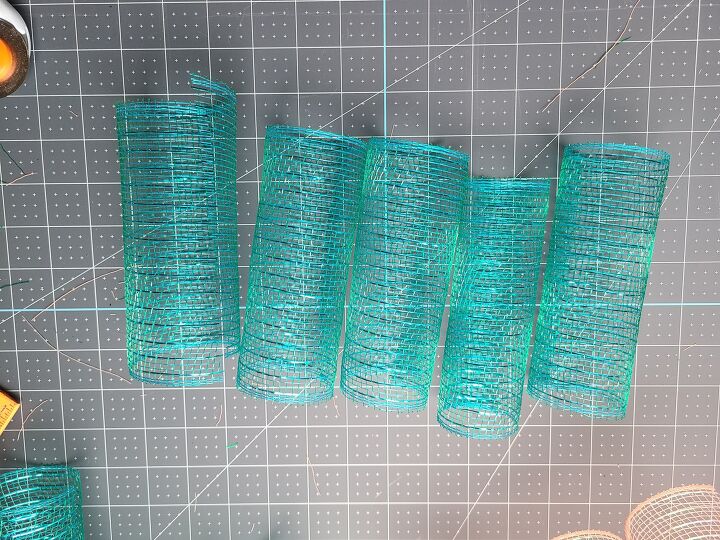
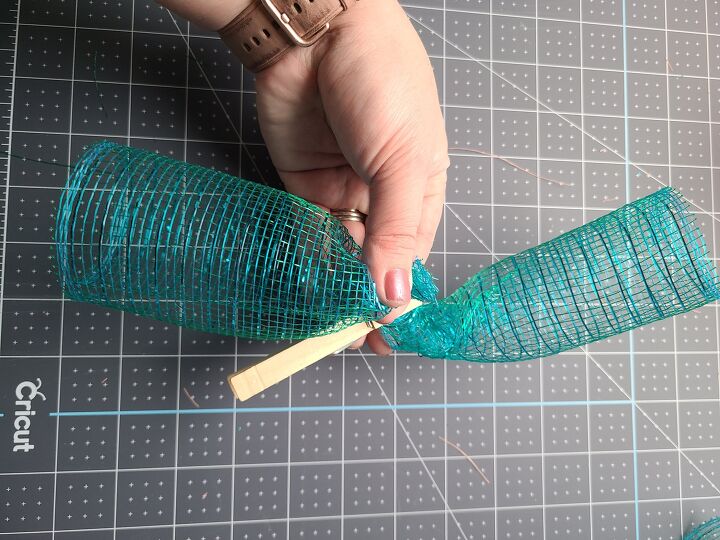
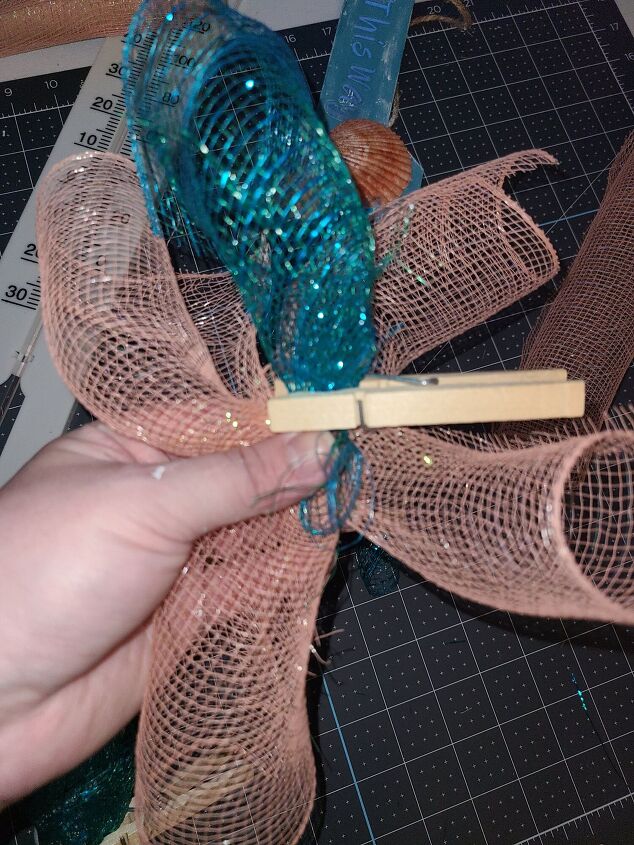
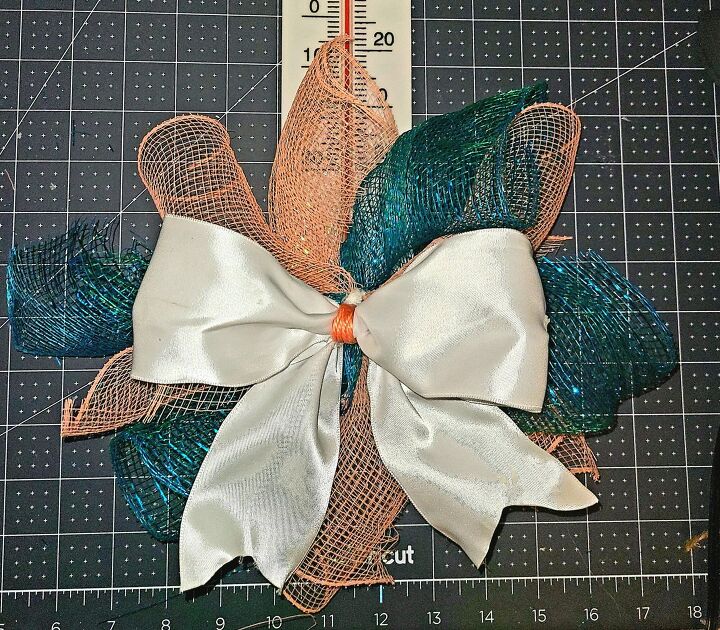
Pinch two rolls of the same color in the middle and cross them over one another diagonally. Next pinch one of the other color and lay it through the middle of the “X” created by the first rolls. You can use a clothes pin to clip the pieces together as you go if needed. Finally pinch your last roll and lay it vertically on top of the bunch. Use a pipe cleaner and twist it around the middle to hold the “bow” together. Since my teal roll was a 5.5″ roll I had to put two pieces together in the middle like you see below. Sorry I didn’t get a picture of the final roll laid horizontally, but you get the picture on how to place the spirals together.

Ribbon Bow
Next make a bow go on top of the mesh “bow.” I give a explanation of how to make a simple two loop bow in my post on my patriotic outdoor thermometer porch decoration. To cover the pipe cleaner in the middle of the bow, add some hot glue to the back middle and wrap your coral yarn around it until it’s completely covered. Add a dot of glue on the back, press the yarn on it, then cut off the excess.
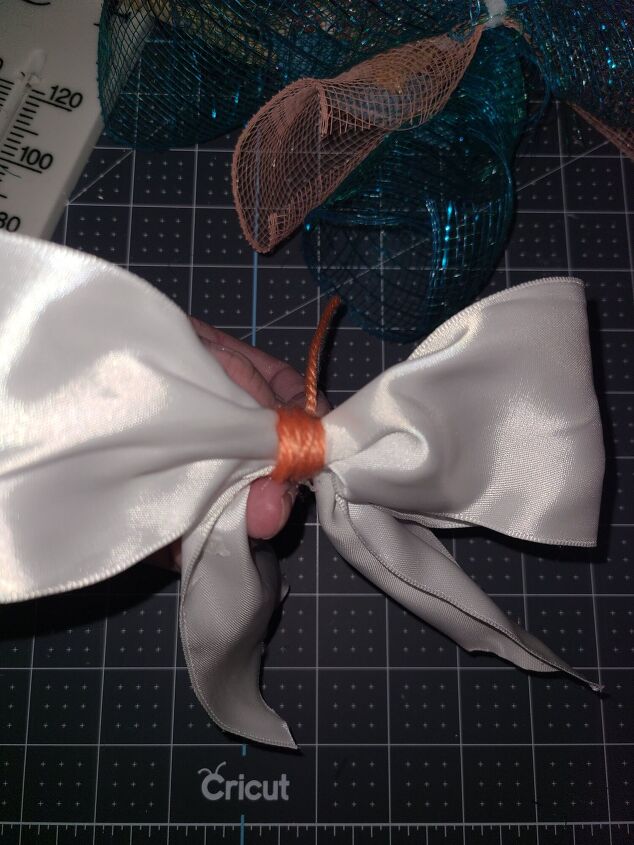
Add hot glue to the back center of the bow and place it on the center of the mesh bow. To attach the glue to the thermometer, add another pipe cleaner to the back of the mesh bow either by hot gluing it on or by twisting it around the one that is already around the bow. Put the pipe cleaner through the square opening at the bottom of the thermometer on each side and twisting it closed in the back.
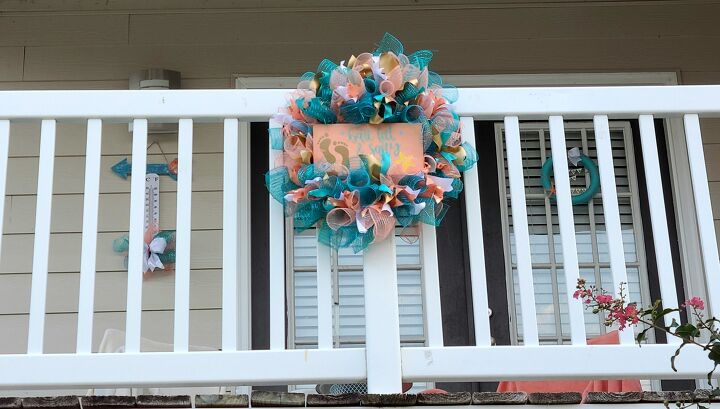
DIY Porch Decoration Complete!
The DIY porch decoration is now complete! How cute is this?!
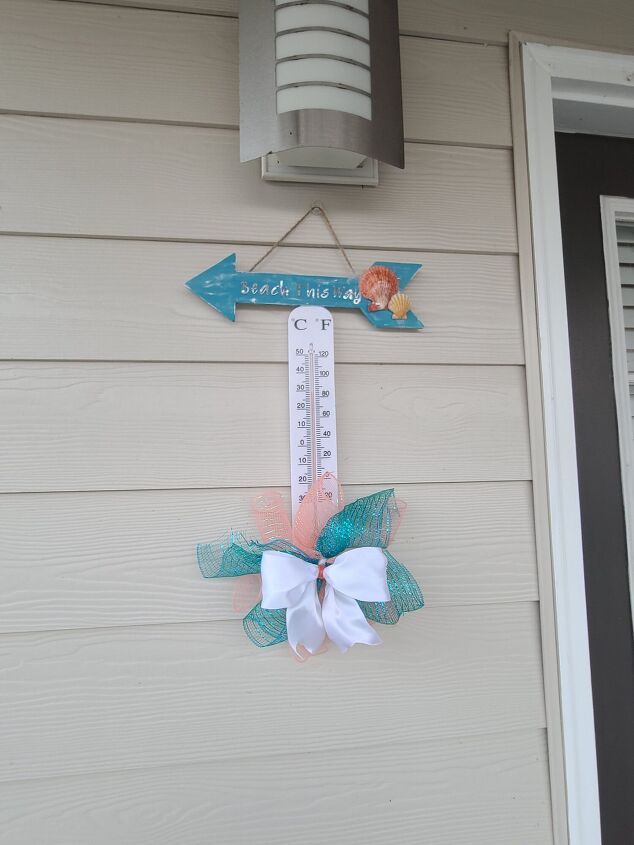
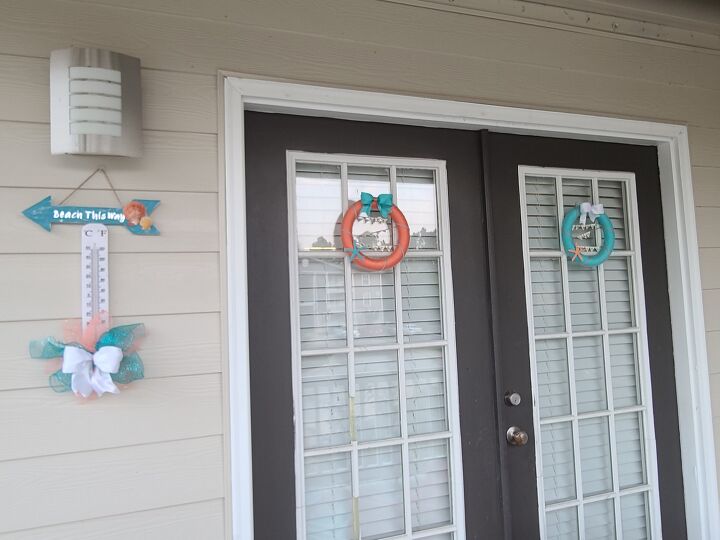
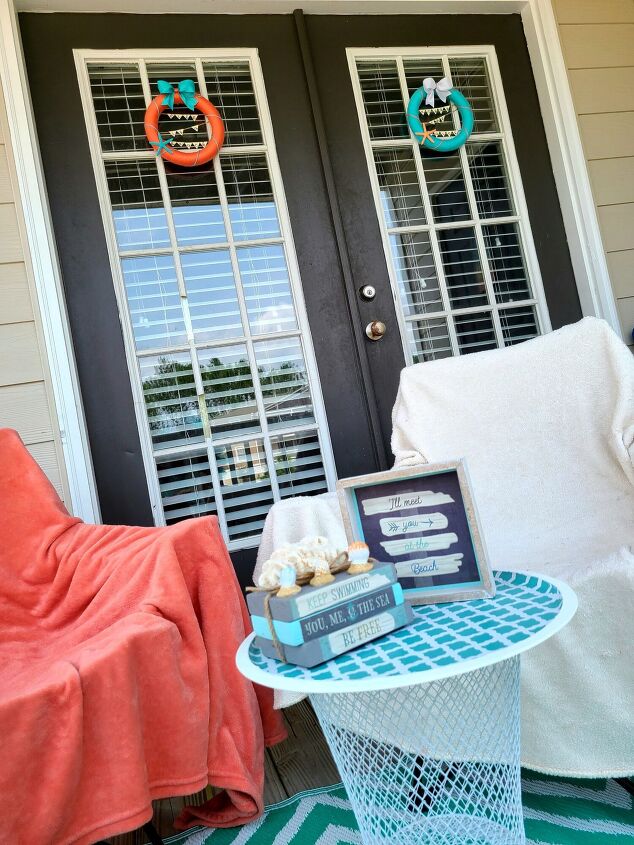
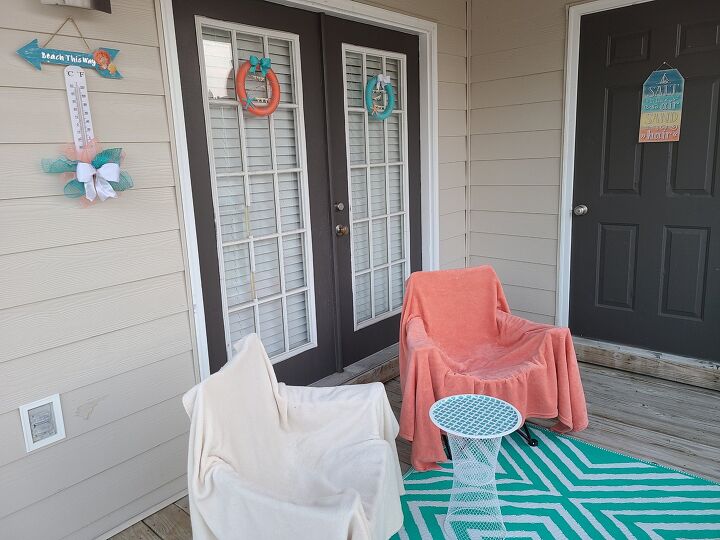
I just love it, and I am definitely going to be making them for every season! I hope that you make one as well. Make sure you tag me on social media when you do. I love seeing the spin you guys put on different DIYs. I added my porch decoration to my balcony next to our French doors. Here’s a small peek at it. I will be adding a post on all of the projects on the balcony tonight or in the morning.
If you like this section of the balcony, make sure you check back for the full reveal along with the tutorials for making everything you see here. To make sure you don’t miss it, enter your email in the subscribe box along the sidebar, and you will get an email each time I upload a new post. Also follow me on social media using the buttons below, and you’ll never miss a thing! Follow me on Pinterest for some great DIY and home decor ideas.
Update
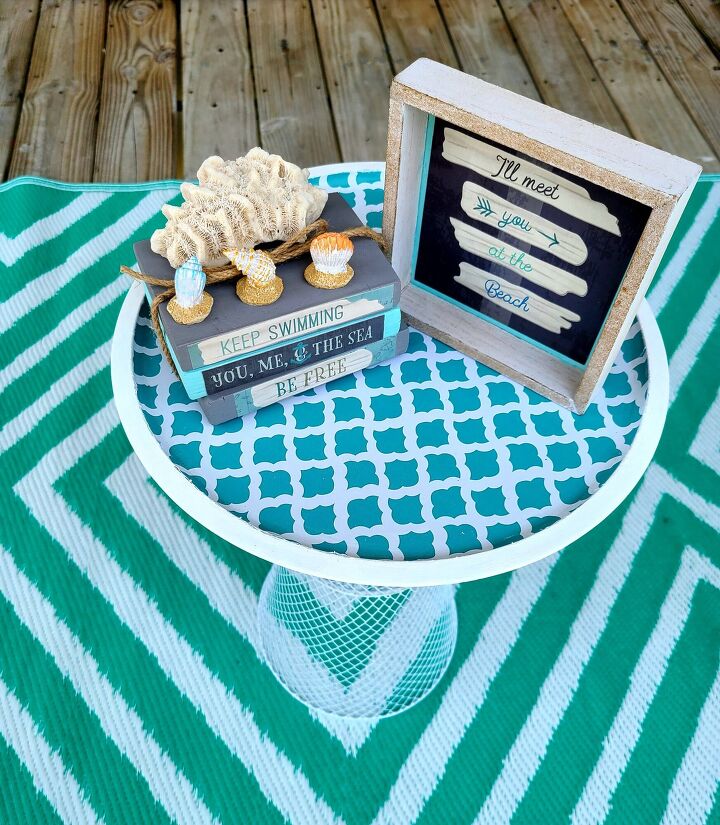
The post on the entire porch makeover is available! Here it is. I hope that you will check it out as it has all of the tutorials for the DIYs that I created for the revamp! I made the two wreaths you see above, a spiral deco mesh wreath, the outdoor thermometer, a side table, and a few signs for the table. The rug that you see was scored from Michael’s for $7!! It was $40. Gotta love a good bargain!
Each week I host three link parties: Happiness is Homemade, You’re the Star Blog Hop, and Traffic Jam Weekend. Check them out for all kinds of amazing posts on DIYs, home and seasonal decor, Dollar Store projects, wreaths, fashion, recipes, gardening, and much more. If you are one of my blogger friends, make sure you submit your posts for the chance to be featured on the next week’s party. It’s a great way to reach a wider audience!
I hope you enjoyed this DIY porch thermometer decoration tutorial! Remember to pin the image below and share this post on social media using the buttons at the end of the post so you can get back to it when you’re ready to make your porch thermometer. Be sure to follow me on social media and via email so you never miss a great tutorial, free printable, or other amazing posts. This post was shared from my blog, LifeasaLEOWife.com, so if you'd like to get the tutorials to any of the projects mentioned here or pictured below, head over there to get them! You'll find me on social media with the name @LifeasaLEOWife.
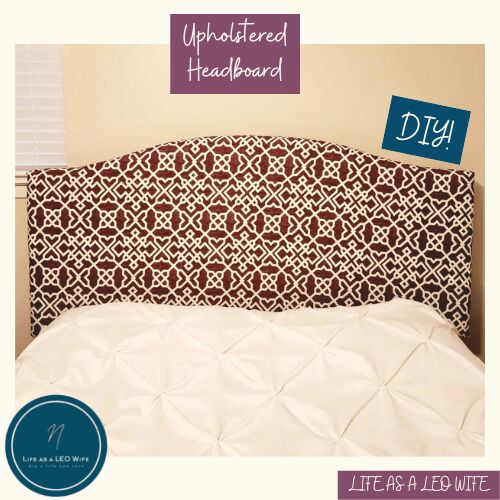
DIY Upholstered Headboard Tutorial
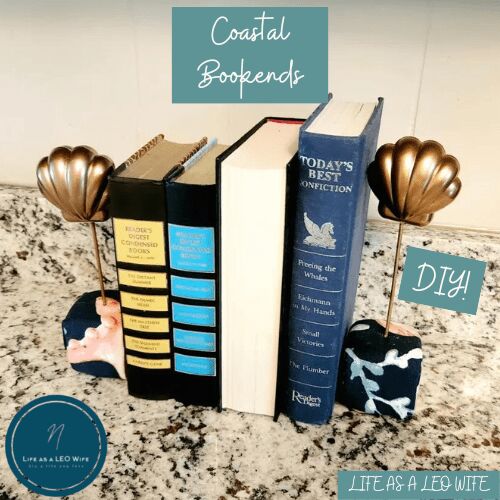
Coastal Bookends or Tabletop Decor from Dollar Tree Supplies

How to Make a No Sew Pillowcase: Save Time & Money with This Method!
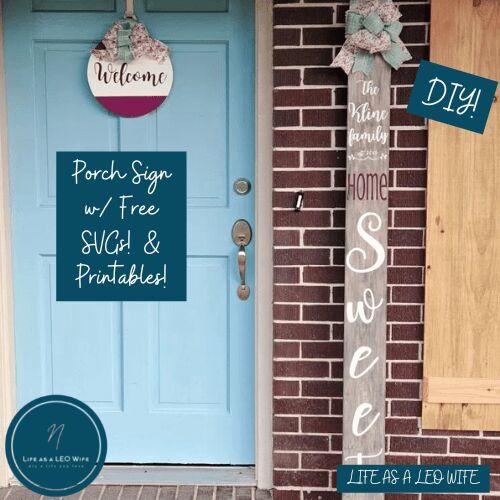
Make a DIY Porch Sign with Free Print or Cut Files!
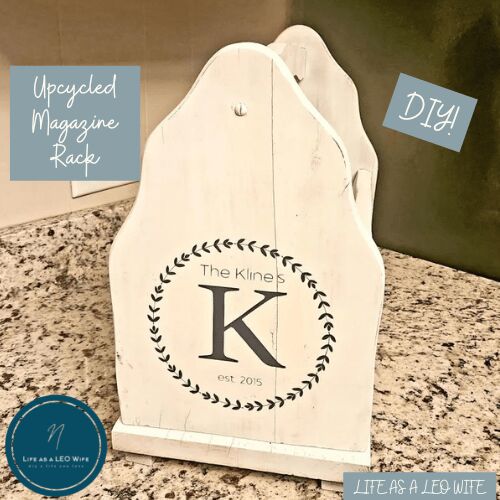
Upcycle a Magazine Holder into a Kitchen Staple w/ free SVGs & printables!
Now let's talk about my free offer. You can see our family name SVG on the photo above. I used it on an upcycled a magazine holder that I turned into a Kitchen Staple w/ FREE farmhouse SVGs or free printables to use on any project! There's another farmhouse SVG on the opposite side of the rack. Head over & visit this magazine rack tutorial, sign up for new post updates (so that I'll have your email address to send your file to), and leave me a message in the comments and let me know that you'd like your free SVG or PNG (works exactly like an SVG, it's just downloads easier for most people). You can let me know what your last name and marriage year is in the comments, or you can leave it off and I'll contact you via email where I will ask what name and date. I'm only going to do this for a few days, so visit me soon! If I get too flooded with requests, I will have to stop doing this, so again, visit as soon as you can!
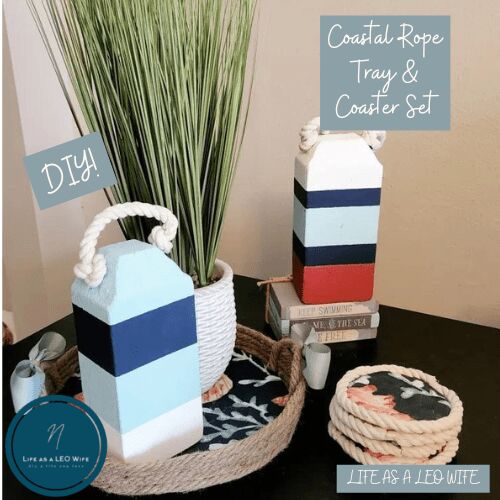
Coastal Rope Tray and Coasters
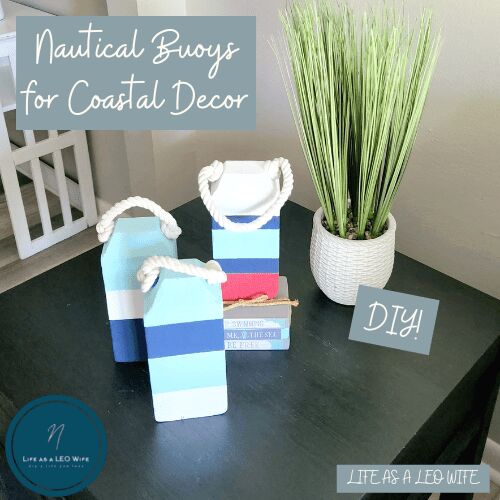
Make DIY Nautical Buoys from Dollar Tree Items!
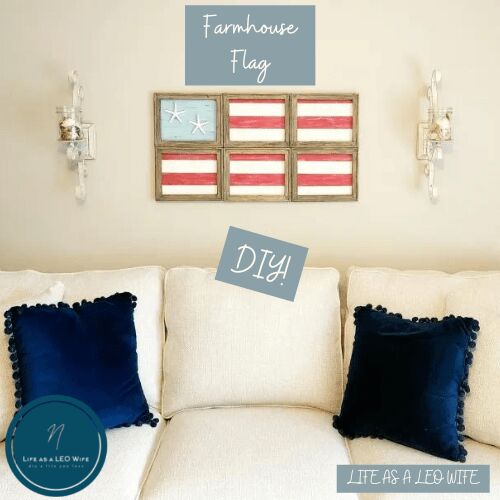
Make a Gorgeous, Patriotic Flag Perfect for Farmhouse Decor
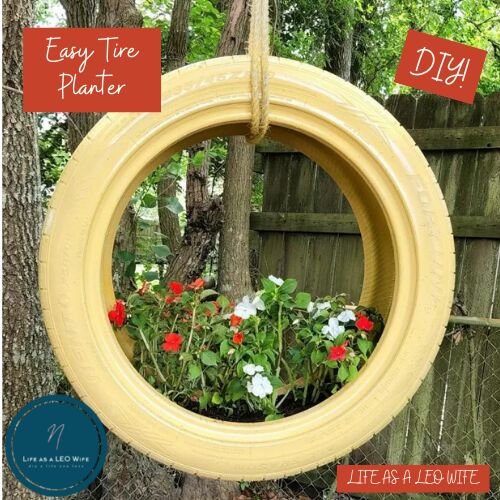
Turn an Old Tire into a Beautiful Planter in 3 Easy Steps!
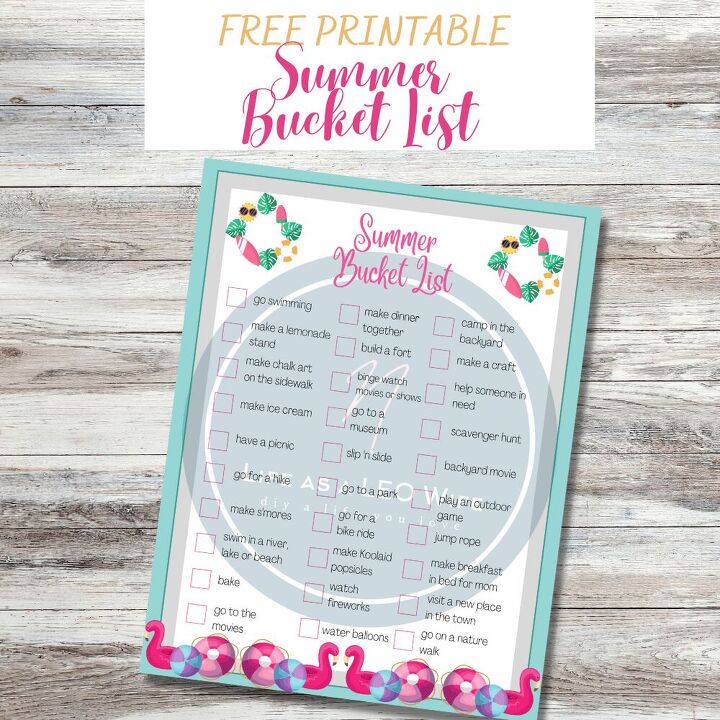
Free Printable Summer Bucket List

Comments
Join the conversation
-
NIKI I absolutely love this. I literally have an outdoor thermometer on my $ Tree list because mine finally broke. I am definitey going to follow your lead and make it extra special. Thanks a bunch.


Frequently asked questions
Have a question about this project?