


Before and After Garden Shed
Looking for ways to spruce up your garden shed? Wait until you see how amazing the garden shed looks after a total makeover.
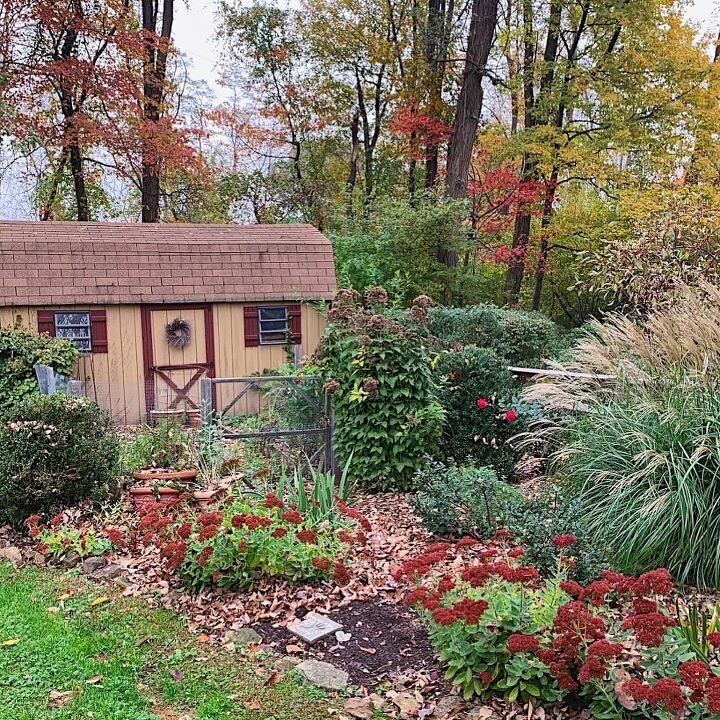
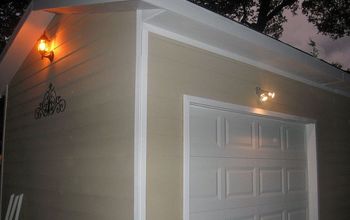
For years, our garden shed was such an eyesore.
We bought it over 15 years ago before we renovated our home.
So the color scheme and style matched our home before the renovation.
Because the garden shed was looking pretty shabby, and not in a good way, I decided to give it a total makeover.
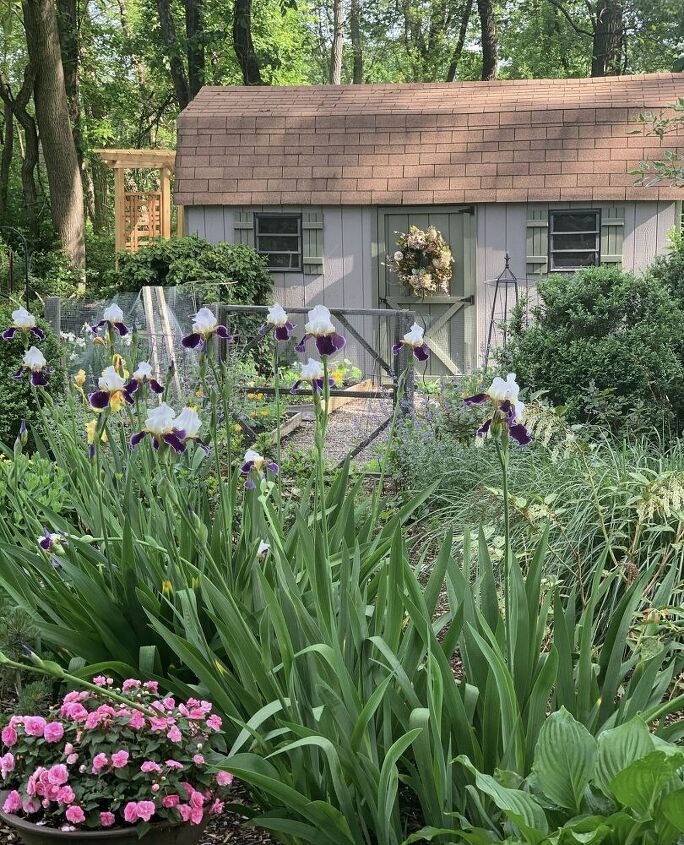
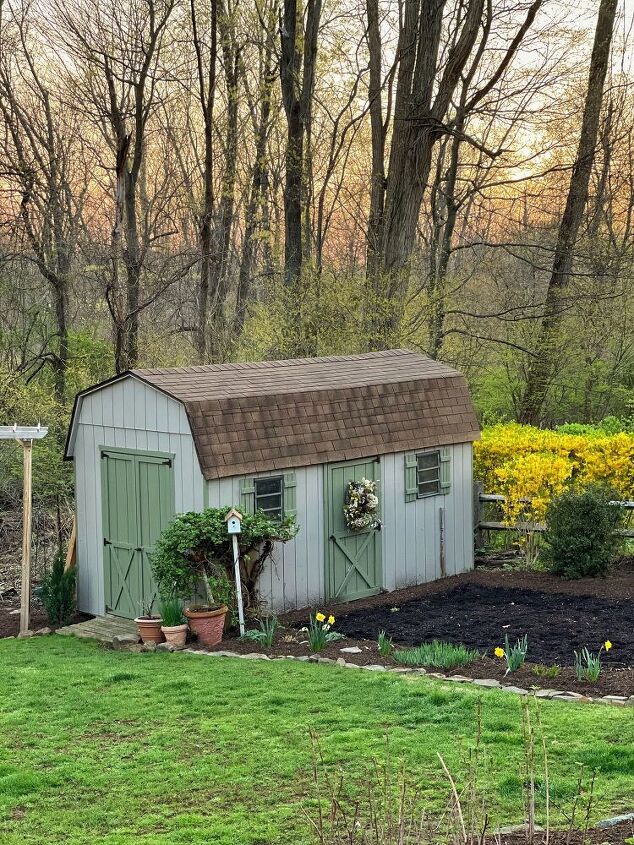
And what a huge difference that makeover made!
The garden shed was no longer the eyesore it once was.
Because the colors I chose to use blended in with the rest of the landscape to make it look more neutral with the gardens.
So if you’ve got a garden shed like me that looks a bit disheveled, consider painting it before replacing it.
Just painting it made a tremendous difference.
This year, we decided to take the makeover up a notch and I can’t wait to show you how it looks!
How to Makeover an Eyesore Garden Shed in 7 Easy Steps
While painting a sprucing up a garden shed can make a huge difference, a makeover can go well beyond just sprucing up and painting it.
Here’s how to do it!
Step 1. Clean It Up
Sometimes a simple power washing will spruce up a garden shed without painting.
But if your garden shed is peeling, looks dingy and needs a total overhaul, cleaning it up is the first step.
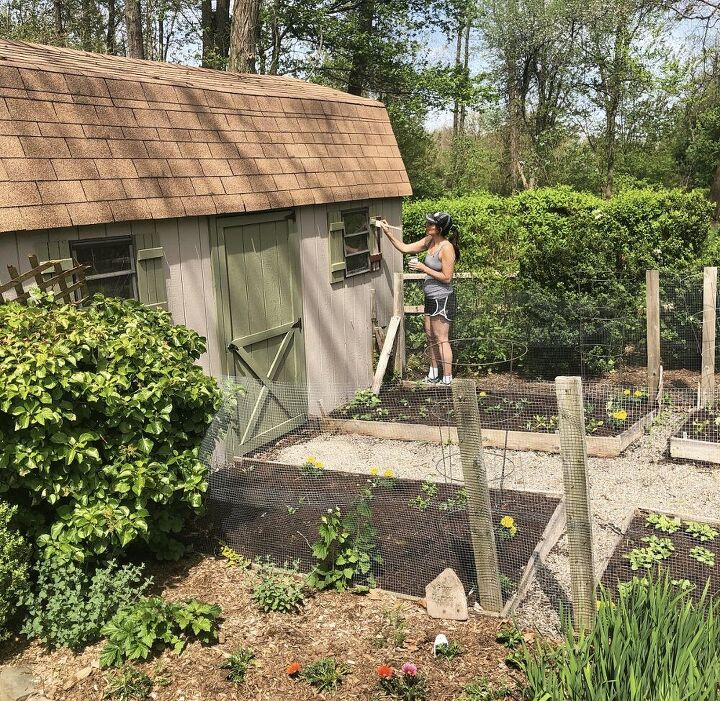
Step 2. Paint It
After cleaning the garden shed both inside out and out, I painted it.
And If you love the colors I used, you can get them HERE.
Step 3. Add Fencing and/or Hardscaping
If you want your garden shed and surrounding gardens to have a little more personality, consider adding some fencing or hardscaping.
Hardscaping adds organic texture and dimension. I love a good rock border or stepping stones as a pathway.
I’ve added hardscaping both from rocks we purchased and several from those found in our rocky soil.
If you’ve got an existing garden or want to add some quaintness to the garden shed, adding a fence is the way to go.
Whether it is decorative or functional, a fence adds character and makes it look like a cozier, more inviting space.
Plus, fencing is pretty reasonable if you DIY it.
Step 4. Add a Garden
To my garden loving heart, the garden shed is another place to add a garden.
Add some foundation plantings or a full garden like I’ve done.
For years, my vegetable garden was located in front of the garden shed because it is the sunniest spot in the yard where I could fit it.
But the garden shed is also a great backdrop for a quaint cottage garden or some other type of outdoor space.
There are no rules – do what you love!
For me, I’m changing this garden from a vegetable to a cut flower garden.
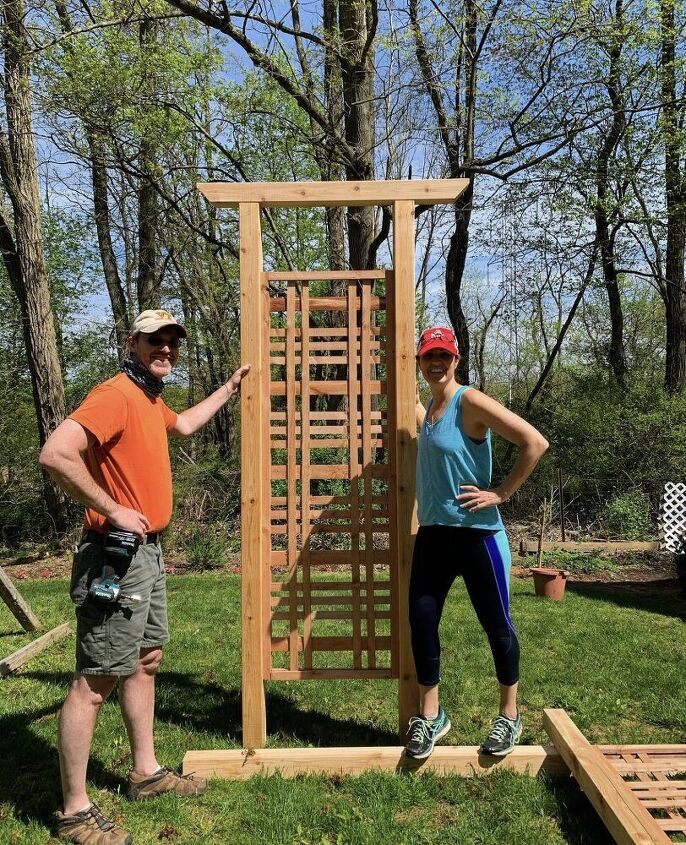
Step 5. Add an Arbor or Other Structure
Adding an arbor or other structure next to or near the shed is great for vertical climbers like roses, hydrangeas, wisteria, or even ivy.
Climbing plants help soften hard lines and add more character.
Last year, we added this arbor that my husband built so I could have a structure for my new wisteria vine.
But a word of caution about climbers.
Having climbers grow up the side of a structure can damage the structure and provide easier access for pest entry.
So proceed with caution.
We plan to add another structure over the shed door to give my climbing hydrangea and wisteria more room to grow off of the garden shed.
Step 6. Add Garden Decor
Tucking in birdbaths, birdhouses, feeders or maybe a fountain are important to help make the garden come alive.
It invites birds and pollinators because it provides shelter, food and water.
But also consider adding some window boxes that you can plant and make pretty during the growing season.
Windox boxes are a great way to soften the hard lines around the windows and add quaintness to a garden shed.
But make sure you keep them hydrated!
They can dry out easily so if you don’t want to handwater daily, consider installing a drip irrigation system.
Step 7. Add Finishing Touches to the Garden Shed
I love a pretty garden sign or a wreath for a door, don’t you?
Consider adding some door decor or decorative shabby signs to add a little more character to the garden shed.
I need to update my wreath this year and I think I’m going to make a living wreath out of small clay pots and succulents.
More on that later.
Since most sheds are not close to an electrical source, consider adding some solar lights for mood lighting.
And there are lots of great options and styles out there to choose from to light up the backyard.
So don’t miss that opportunity to make your garden shed a focal point in the backyard.
My Garden Shed Makeover 2.0
Because cleaning and painting my shed took a good weekend, I wanted to live with it for a season to get a feel for how I wanted to make it better.
With my garden shed looking quaint and pretty, the vegetable garden in front of it looked terrible last year.
We built it 15 years ago after renovating our home, so the cedar we used was starting to fall apart.
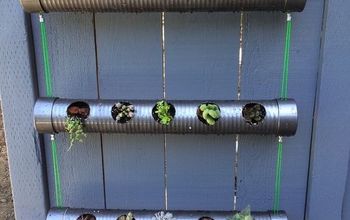
Since the vegetable garden was totally falling apart, I decided to start a new raised bed garden using these self-watering planters in another area of the backyard.
And with the relocation of the vegetable garden, that opened up the area in front to the garden shed.
My New Cut Flower Garden
After looking back at last year’s cottage gardens and how they grew, I decided to challenge myself and grow different flowers in 2021 by starting seeds indoors without a greenhouse.
And the perfect spot for it?
In front of the garden shed.

How We Made the Shed Garden Prettier Than Last Year
Now that the vegetable garden was removed and it is ready for my seedlings, we needed to build a new fence to protect the plants from critters.
Because there is a resident groundhog who lives under the garden shed.
And we’ve got rabbits.
Not to mention my dogs have been trampling through there quite a bit since dismantling the vegetable garden.
So the new garden fence will be functional, but I also want it to fit within a cottage garden vibe.
I wasn’t sure what kind of fence I wanted.
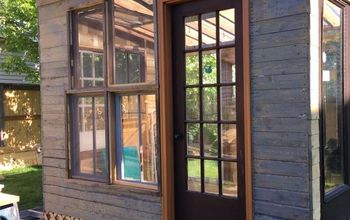
Chris built a gorgeous arbor from cedar last year that sits directly next to the shed that leads to my potting bench.
I decided I wanted the fence to coordinate with it and the overall look of the garden shed.
So I chose this white cedar fence and had it made because most local places were sold out of the ready-made panels I wanted.
And we only needed a few to enclose the new flower garden.
Before ordering the fence, we measured it to determine how much fencing was needed.
It’s a good thing Chris is good at this stuff, so he does all that for me.
When we got the fencing home, he re-measured everything.
Then we planned out where the fencing would start, stop and locate the gate.
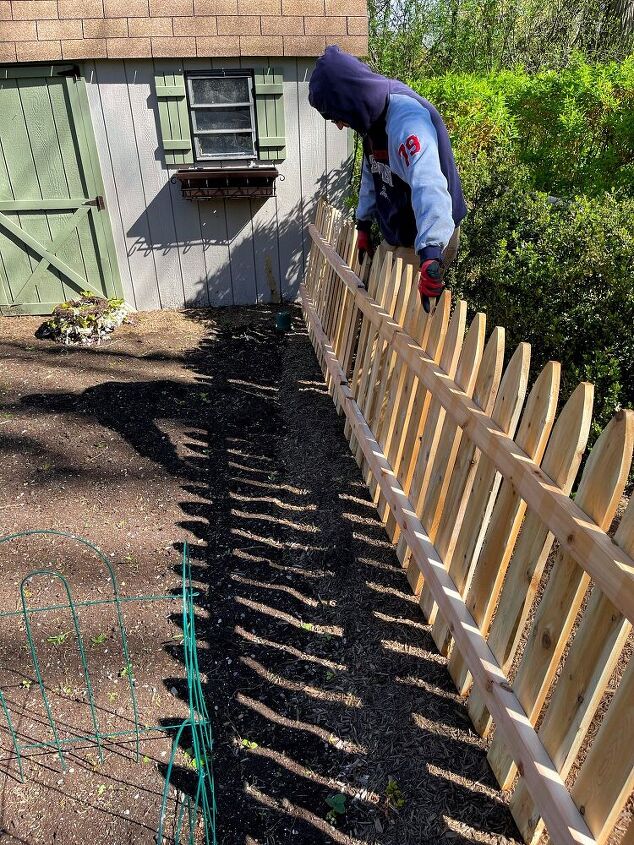
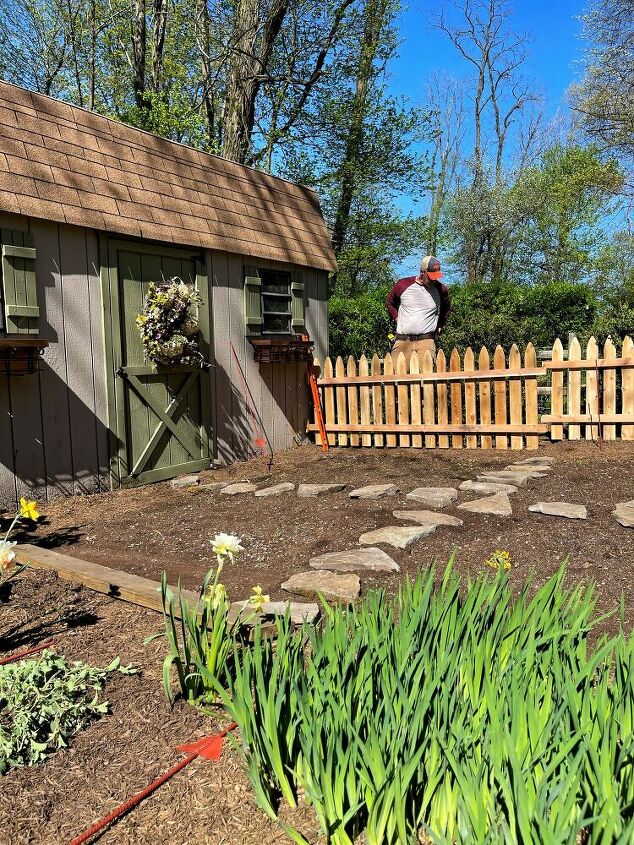
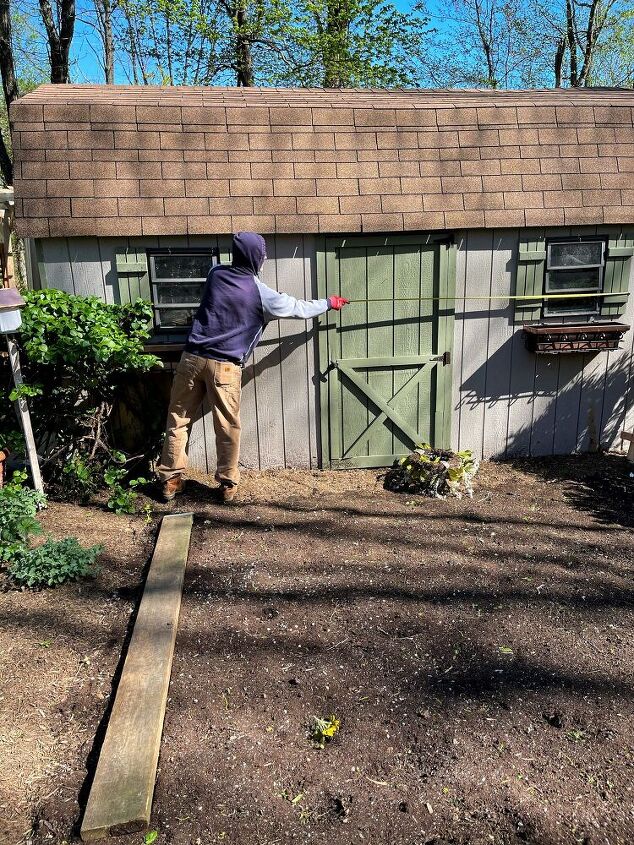
To help install the fence he purchased rebar and pounded them in the ground so the fence had something secure to attach to.
In addition to the rebar, he installed some blocks that he attached to the shed to provide a spot for the fence to have a strong connection with the shed.
Both the rebar and the blocks will add to the stability of the picket fence.
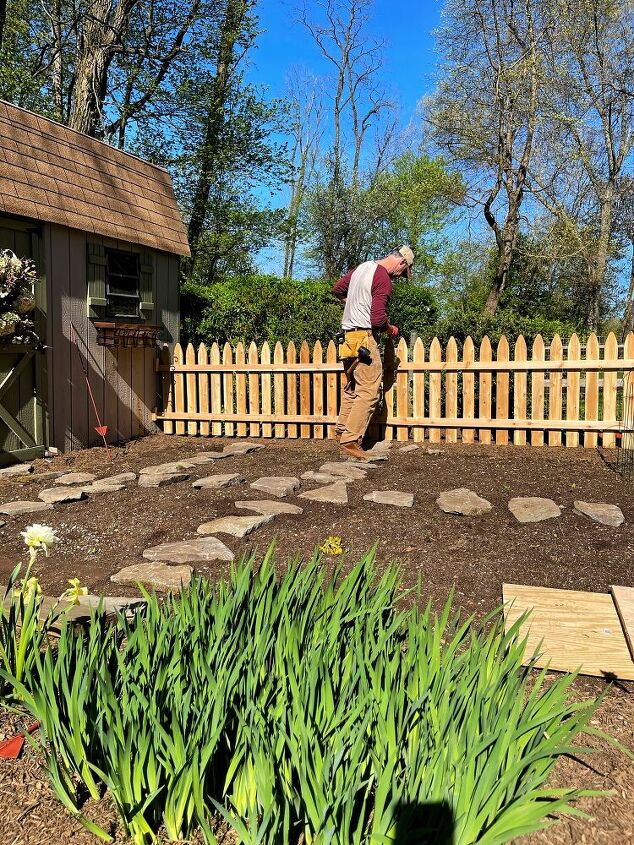
As an aside, he is standing on boards because we are trying to keep his weight evenly distributed while installing the fence.
Evenly distributing his weight in my garden will help keep that soil from becoming compacted.
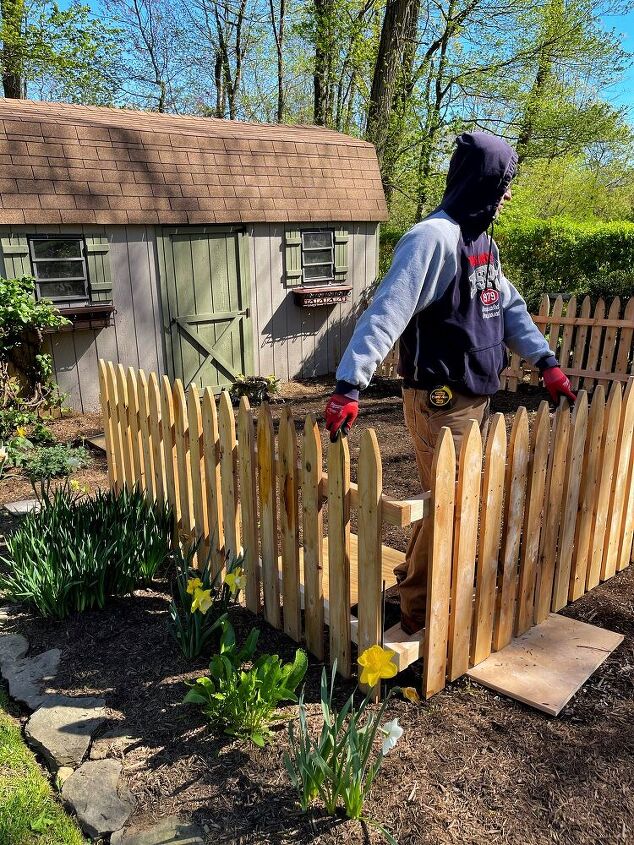
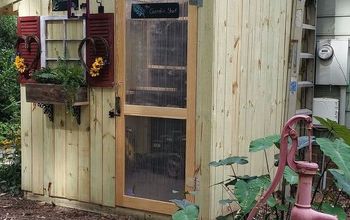
When he was done installing the fence panels, he cut the gate and installed that as well.
We centered the gate on the door to the shed.
When he finished installing the gate and building the fence, he attached chicken wire to the inside and dug about 12 inches into the ground.
This added measure will help keep animals from squeezing through the slats of the picket fence.
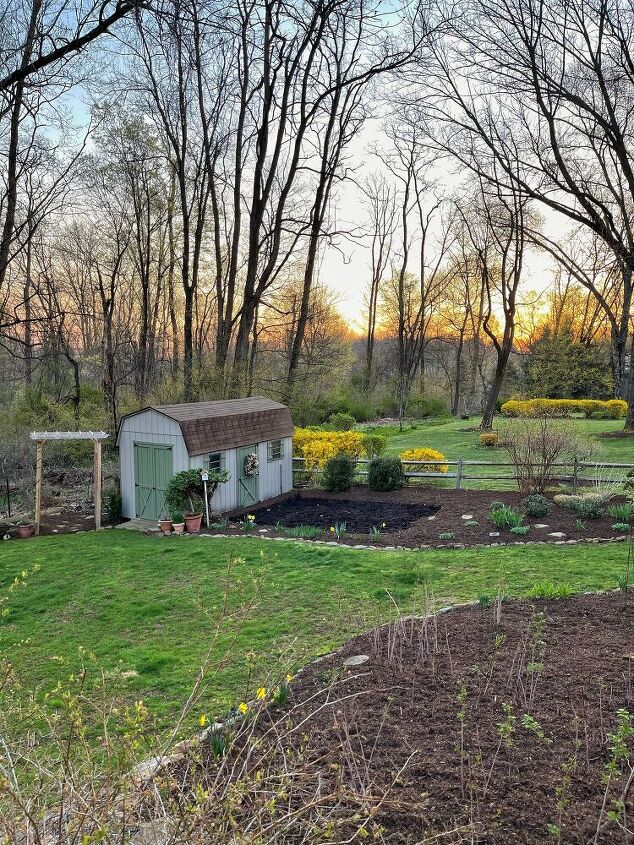
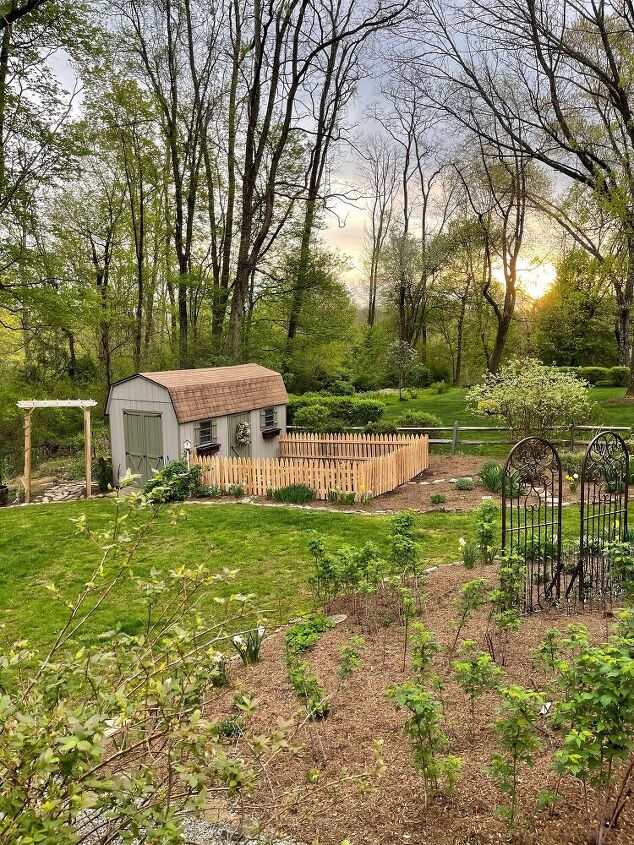
While Chris was working on the fence, I was installing stone borders and paths around the backyard gardens.
We purchased a pallet of stone and I moved the whole thing by myself!
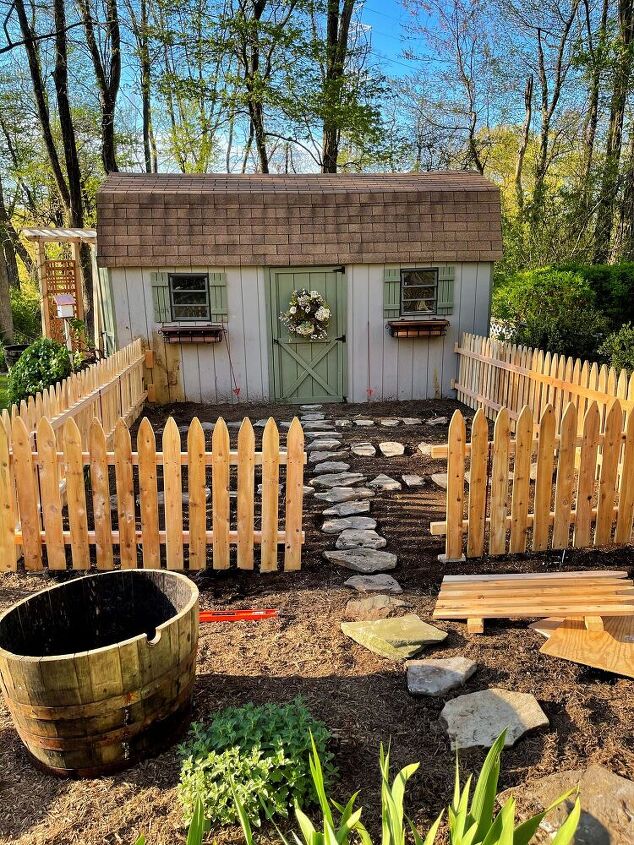
I wanted stepping stones in the new shed garden, so I added these stepping stones to make it easier to walk around and work without compacting the soil.
Don’t they look so pretty?
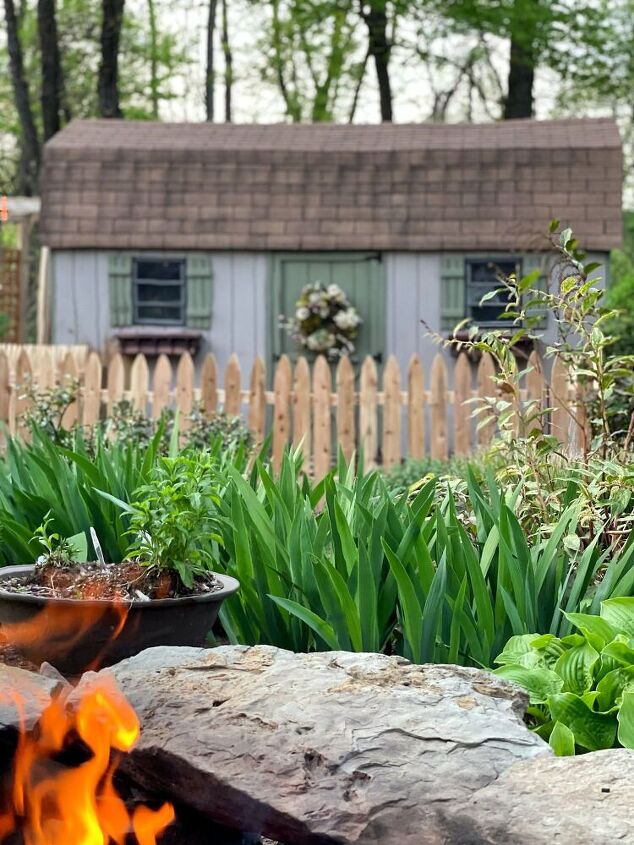
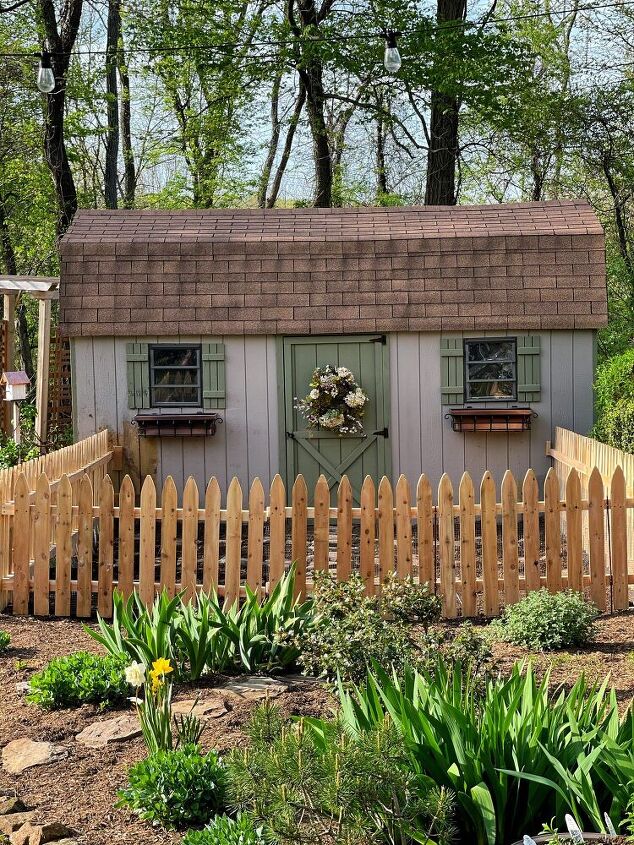
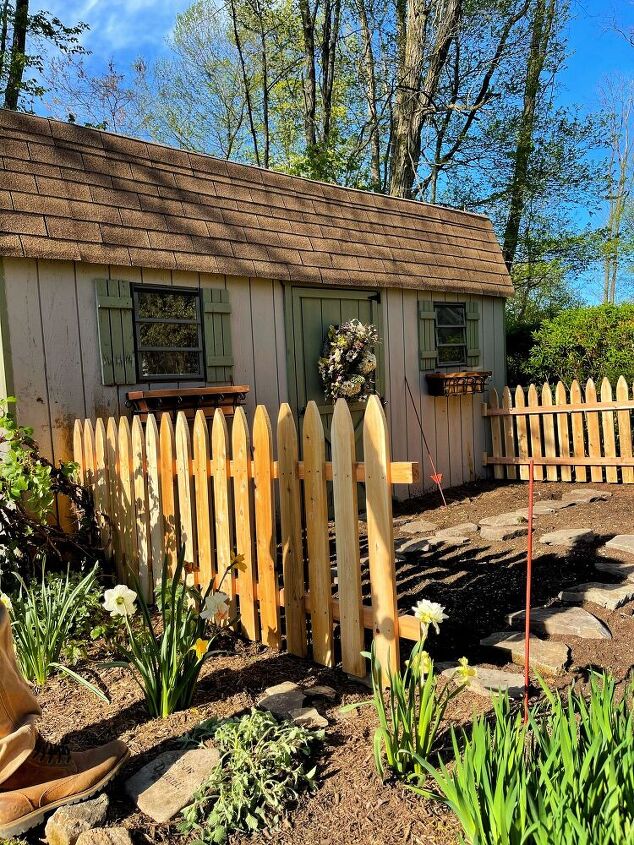
The fencing and the stone made such a dramatic change to the overall look of the shed.
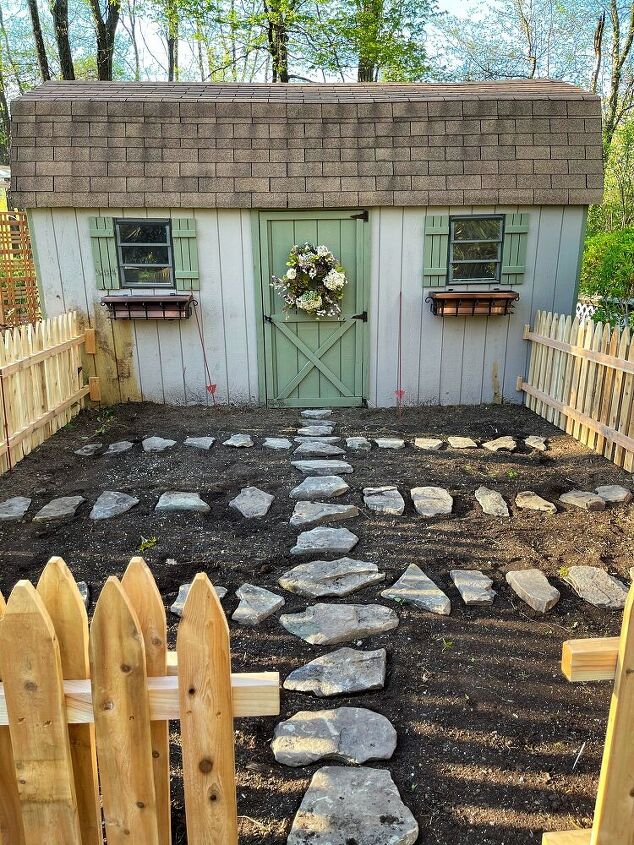
It’s hard to believe what it looked like before!
In addition to the fence, we added these beautiful copper window boxes from H Potter.
They look so pretty with the garden shed don’t they?
I can’t wait to plant them!
Although my garden shed makeover took two years, I’m so glad I didn’t rush it.
It was more manageable breaking it up the way I did so I wasn’t spending my whole summer working on improving the shed garden.
Phase 2 of this project was a little more involved, took a little more time and I’m still not done yet!
The garden and window box still need to be planted, I want to make a new wreath for the door and add a cute garden shed sign I found at Homegoods.
All in good time though.
For now, I’m really happy where this makeover is going.
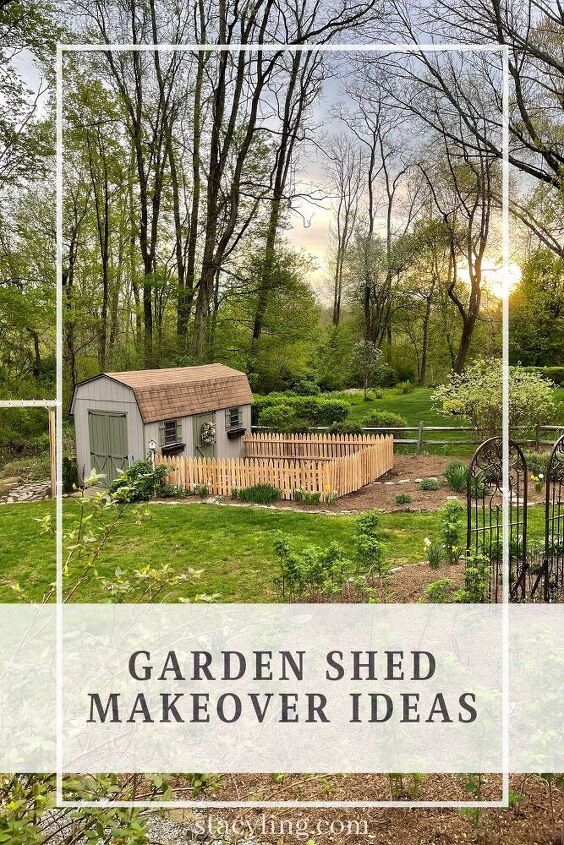
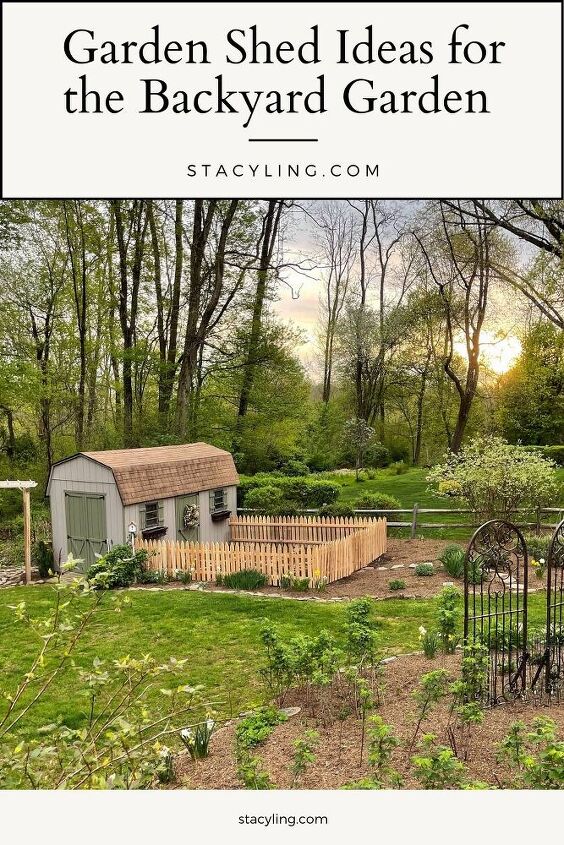
Pin and Save It For Later
If you like this post, please share and pin it on Pinterest. (If you hover over the image, the Pinterest button will be in the upper left corner.)
I’ve created the below-custom pins for this post.
For more garden tips, tricks and inspiration, CLICK HERE.
Subscribe to the blog and gain access to information not available to the public.
Thanks so much for stopping by.
Enjoy a beautiful day! xo

If you like this post, please follow me @bricksnblooms on Pinterest, Facebook, Instagram, and Tik Tok. Subscribe to my YouTube Channel. Or join my Facebook Group.
Resources for this project:
See all materials


Comments
Join the conversation
-
Simply beautiful! Such a satisfying project.
-
The before was too cluttered with plants , etc.


Frequently asked questions
Have a question about this project?
Love the fence. Was it expensive to have it made? I’m curious what your plan is for keeping the groundhog from tunneling into the garden? I have one under my shed (which is probably more than one) and he has tunneled in every garden I have, flower, herb and vegetable. And my gardens are not even next to me shed. He’s way too smart for a have a heart trap. I have tried and I’m tired of trapping opossums instead. Ideas?
Hi very cute but where are the copper window boxes from. I can’t seem to find them. I’m not very good with the internet