


How to Remove a Tile Backsplash From a Kitchen

Updating a kitchen with a busy mosaic glass tile backsplash? Learn the best way to remove a tile backsplash with a mesh backing from drywall.
For more simple and budget-friendly DIY project ideas, be sure to follow us on HomeTalk and visit our blog!
Do you love watching HGTV? Me too!
In fact, my husband and I tend to watch it almost every day. One of our favorite shows is Flip or Flop. Lately, my husband has been saying he’d love to start flipping houses…
He says doing DIY projects is relaxing. Hard work, yes, but relaxing nonetheless. I’m not sure I agree, but I digress!
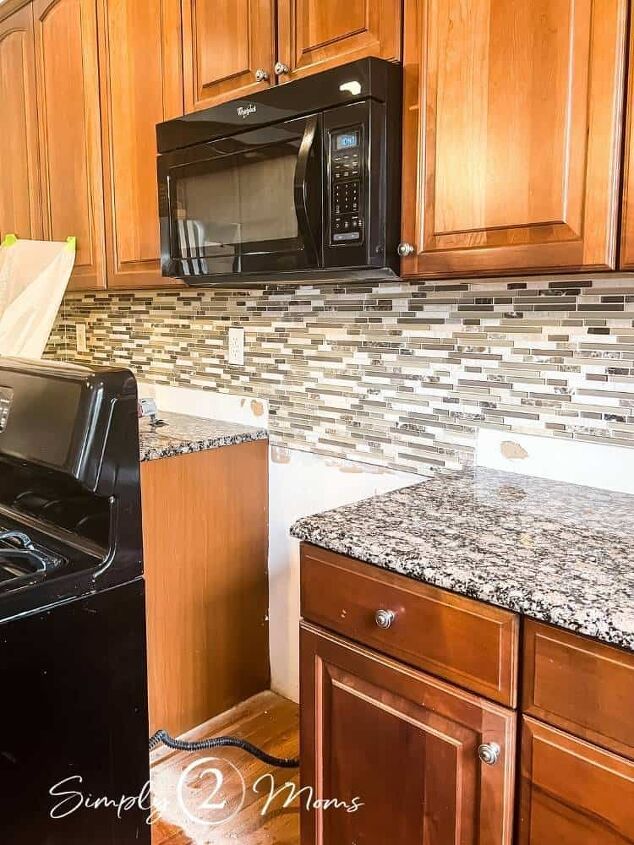
When Flip or Flop began airing, one of the popular styles of tile that Christina would often choose was a mosaic glass backsplash. It always looked so nice in those white kitchens during the reveal! So when we decided to put in a tile backsplash about 6 years ago, my husband really liked the idea of doing a similar backsplash in our home. And I was so excited to get a tile backsplash that I didn’t push for what I really wanted. I still suffered from “stay at home mom guilt” when it came to spending…
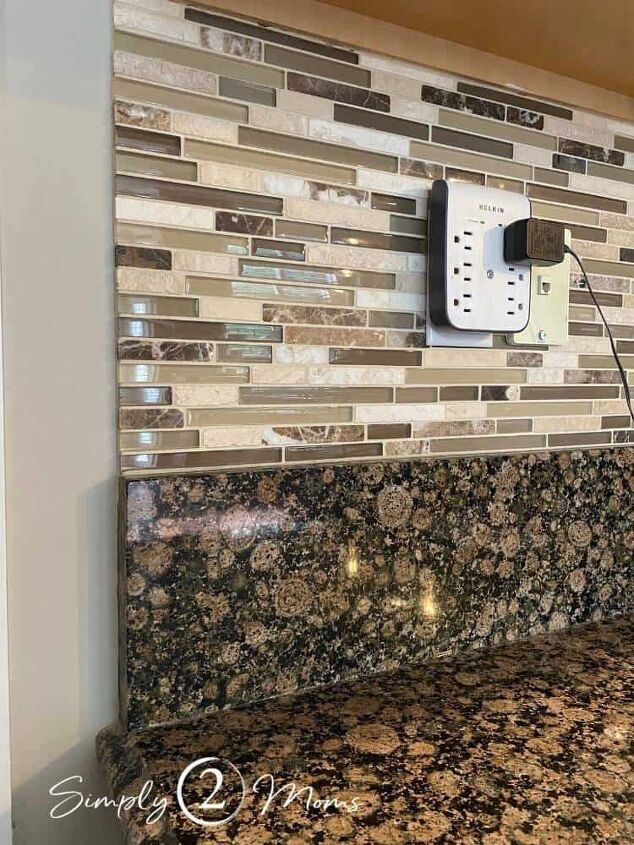
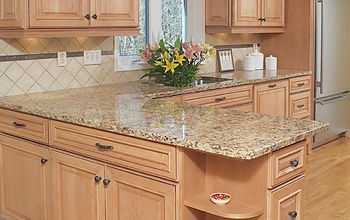
Living with this backsplash has been an amazing lesson about the importance of speaking up! Yikes. To be fair, the colors blend perfectly with our old Baltic brown granite counters. But could it be any busier?
Not to mention, it made our cherry kitchen cabinets look even darker.
We’ve lived with the kitchen like this for a while now, but when we decided that we were going to stay in our home instead of downsizing, some renovation projects were added to our list.
Starting with the kitchen.
I shared my complete kitchen renovation plan a few months ago, and the first big project is removing the mosaic tile backsplash.
Tools Required to Remove a Tile Backsplash
- Utility knife
- Oscillating Multitool
- Flathead Screwdriver or Pry Bar
- Hammer or Mallet
- Construction Paper Roll or Drop Cloth
- Heavy Duty Plastic Drop Cloth
- Shop Vac
- Dry Wall Patch Kit
Step 1: Turn Off Electricity
Most kitchen backsplashes have electrical outlets and light switches in them.
Protect yourself from electrocution by turning off the circuit(s) to that area.
Use a plug-in lamp to check each outlet to confirm it isn’t live before beginning.
Step 2: Protect Surfaces You Plan to Keep
Since we are replacing the counters, we weren’t concerned about protecting them.
If you’re planning to keep your counters, be sure to protect them with a drop cloth.
You might also want to protect your floors with either cardboard, floor protection paper, or a drop cloth because this project does get messy!
Step 3: Remove the Granite Backsplash
For decades, the style was to use the counter material to form a backsplash.
It does a great job of protecting the drywall in the kitchen if you don’t have a tile backsplash on the walls.
But newer homes tend to have a flat counter surface and then either use the counter material all the way up to the bottom of the cabinets or have a tile backsplash.
The look is cleaner without that 3 to 4-inch lip.
We’re planning to replace our counters, but even if we weren’t, we would still remove the granite backsplash and have the entire backsplash area be the same material.
Start with a utility knife to cut or scrape away the caulk sealing the granite onto the countertop.

Removing the granite backsplash was actually very simple. We used a flat head screwdriver and a hammer to lift the piece of granite away from the wall after breaking the silicone seal. You could also use a rubber mallet instead of a hammer.
Start at an exposed edge of the backsplash to reduce the chance of damaging the counters. Work your way around the piece of granite, gently prying it from the wall. You’ll feel it loosen and it just pulls right away from the wall. I was surprised that we didn’t need to do anything along the edge where it met the tile.
As you can see, despite being careful, the adhesive pulled the top layer of paper from the drywall. No worries! This is an easy fix with some drywall joint compound or a drywall patch kit if you haven’t worked with drywall. We decided to wait to do any repairs until after removing the glass tile backsplash.
Step 4: Remove the Tile Backsplash
We decided to hang construction plastic drop cloths in an attempt to contain dust.
Have your shop vac handy too!

We did lots of research on how to remove a tile backsplash before starting to remove it.
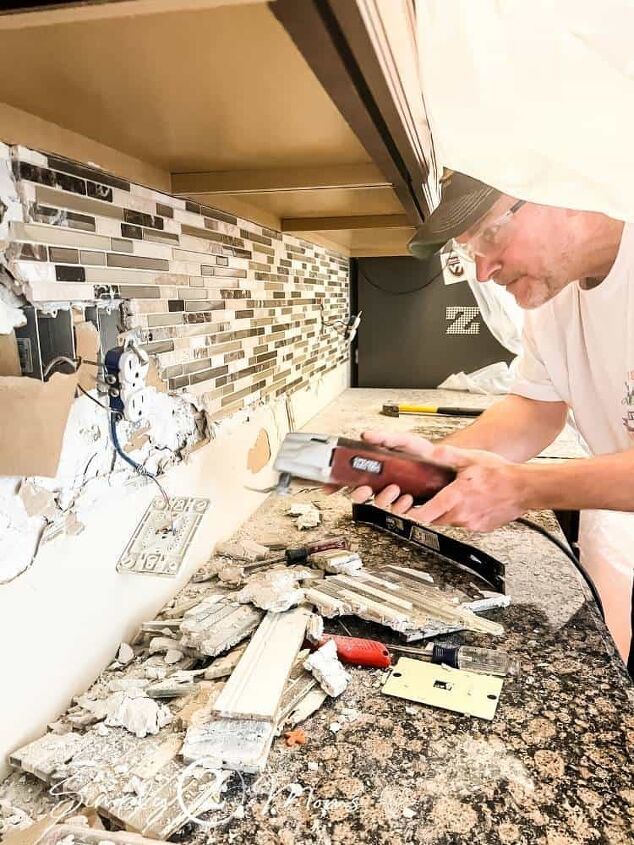
Our plan was to use an oscillating tool to cut the grout lines, then carefully remove the tiles. Some experts also suggested using a mallet or hammer to crack the longer tiles. My plan was to have amazing photos showing you how we managed to remove the tile without damaging the drywall. Talk about how it was tedious, but “just stick with it and you’ll be able to do it too!” It turns out that removing mesh-backed glass mosaic tiles is a very different beast from removing other types of tile. Especially when that tile was installed by professionals…
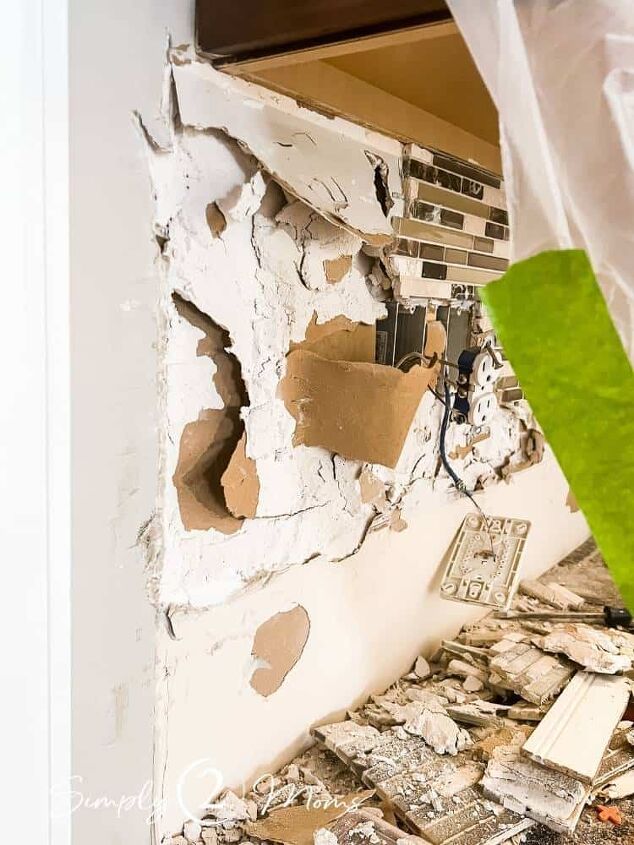
We were only one foot into the task of removing the tile and it was pretty obvious that the techniques we planned to use weren’t working. It was safe to say that some drywall joint compound or a patch kit weren’t going to be sufficient! My husband persevered and kept trying.
After all, it was only our first try. Maybe removing a tile backsplash was one of those things that you got better at after a few tries?
My husband has so much more patience than I do! He gently broke (how’s that for an oxymoron?!) the larger tiles. Cut through the grout lines. He did everything the experts suggested.
And it quickly became obvious that the amount of drywall repair was going to be massive. You see, it’s important to have a smooth base for new tile, so new pieces of drywall would need to be installed in some places. We had to ask ourselves if the amount of time spent trying to carefully remove just the tile was worth it.
You probably know where this is going…
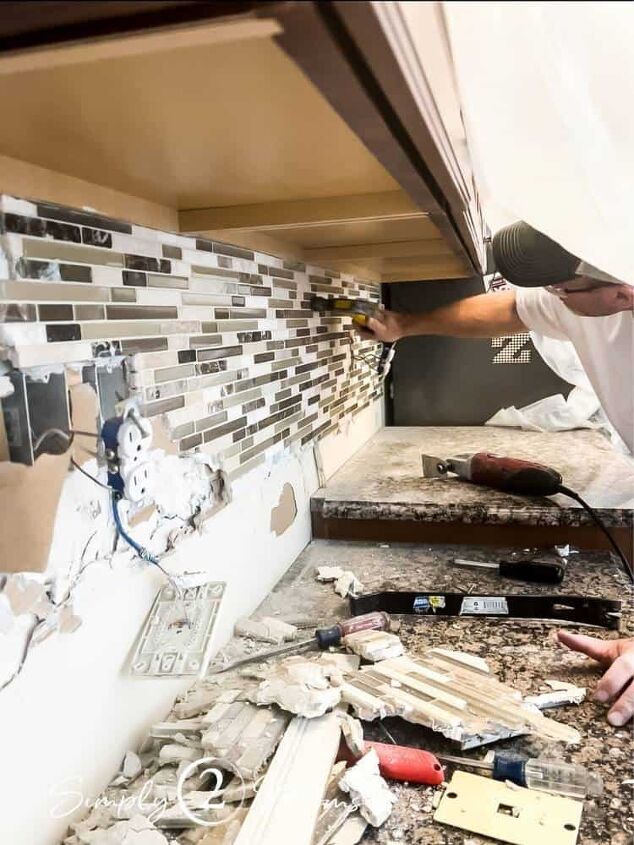
My husband quickly found a better use for that oscillating tool.

Cutting the tile out along with the drywall took so much less time! At first, he tried cutting out large sections, but they were so heavy. Smaller pieces were definitely the way to go.
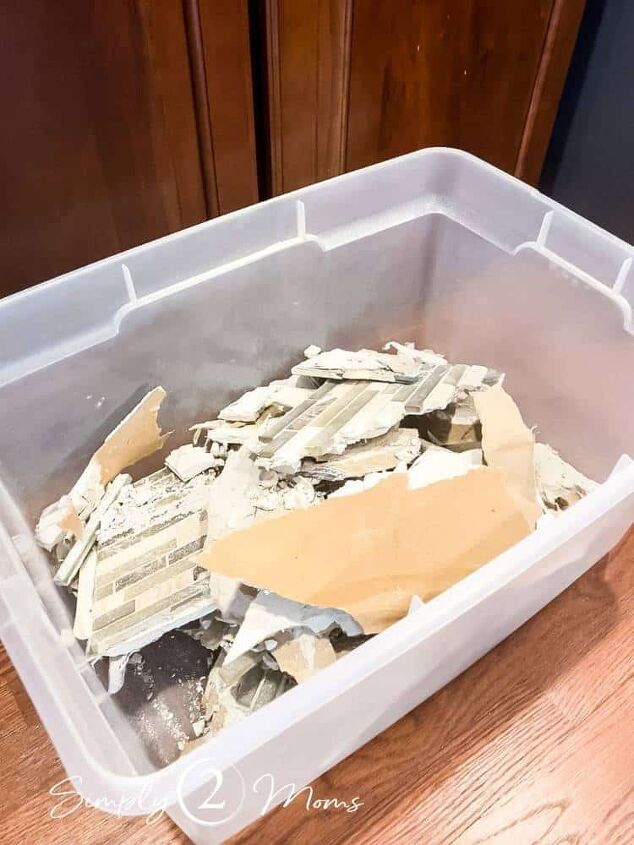
A large plastic tub made it easy to transport the pieces of tile and drywall out to the van to take to the dump. At first, my husband thought it would be easier to only cut out the tile. If you look closely in the next photo, you can see how he left the drywall that the granite had been attached to along the left wall.
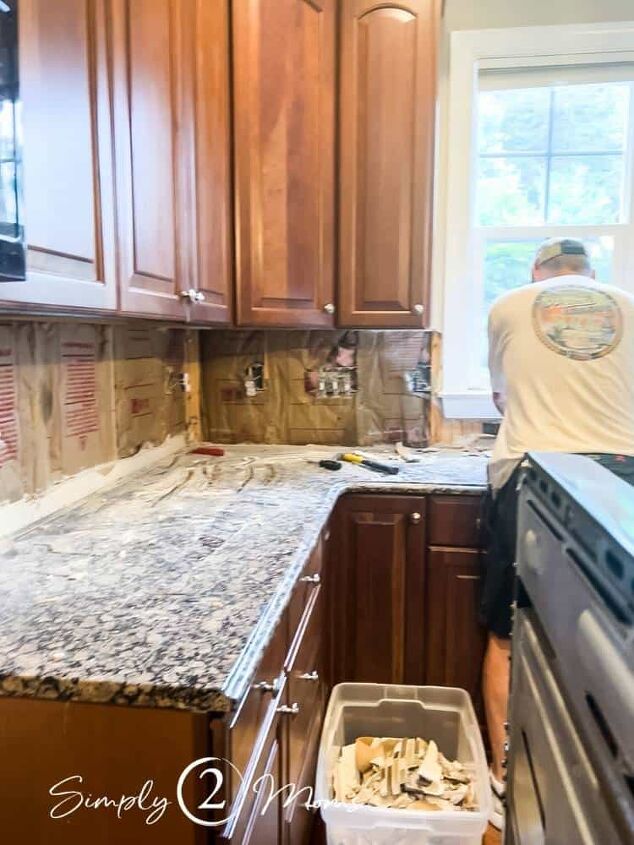
Along the last wall, he decided to cut the drywall all the way down to the counter because it was damaged in the back corner. It turns out that it was actually easier to install the new drywall along that back wall because there was less of an issue with smoothing the seams. He recommends going ahead and cutting the drywall out all the way to the counter if you’re removing a mosaic tile backsplash like we did.
Step 5: Install Drywall or Cement Board
Now that we were done removing the tile backsplash and the drywall, it was time for a fresh start.
We decided to use cement board instead of drywall as the base for our new tile backsplash.
Cement board is more waterproof than drywall and it’s also less likely to warp or break down.
Since there’s definitely water in the kitchen, it seemed like the best option.
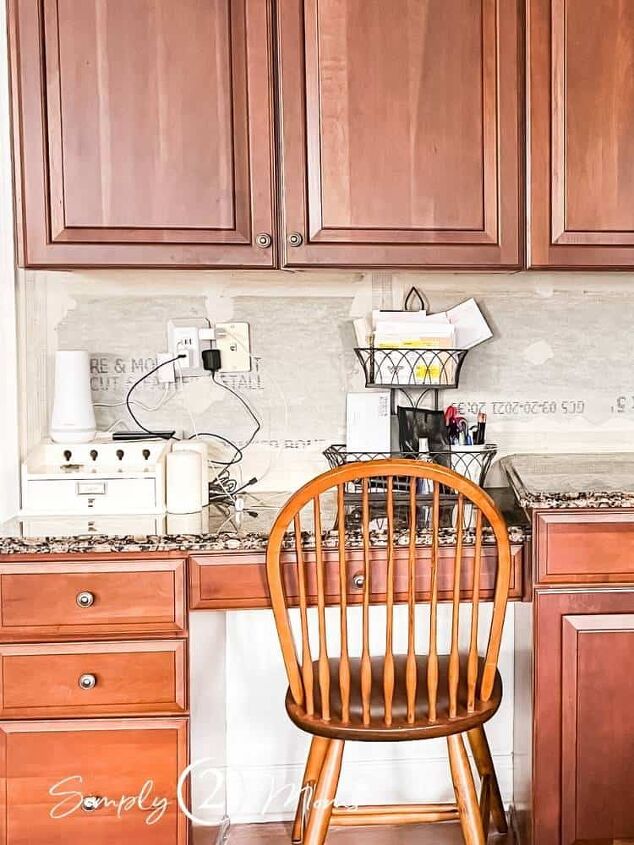
The kitchen looks so much brighter already with the granite backsplash removed!
In fact, the busy pattern on the counters was less obvious too without it carrying up onto the wall.
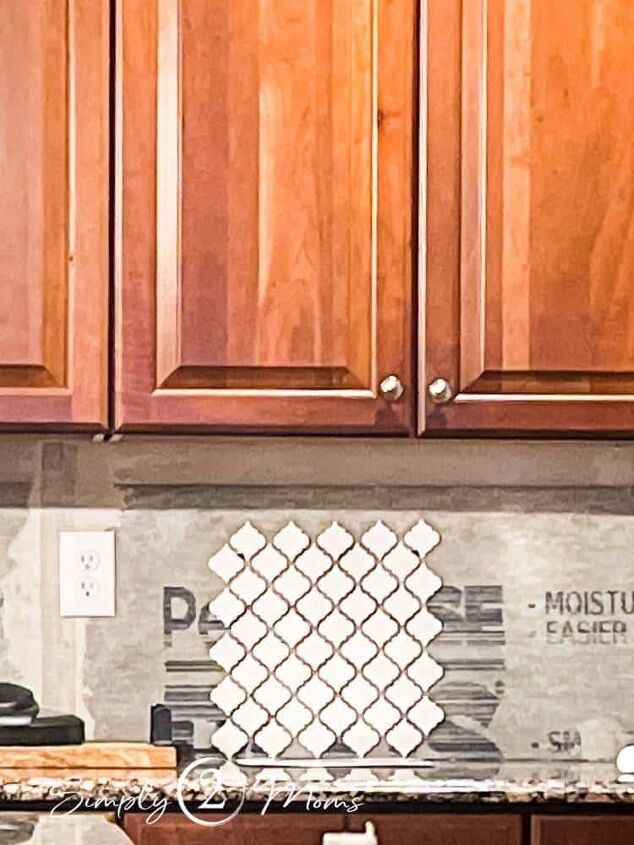
We’ll be installing these matte white lantern tiles with white grout once the new counters are installed.
Be sure to subscribe so you can see how the rest of the cherry kitchen renovation turns out!


Frequently asked questions
Have a question about this project?