


How to Install Luxury Vinyl Tile- a Great Affordable Flooring Option!

Do you want an updated floor but can't stomach the price tag! I'm sharing with you today how we installed LVT flooring in a bathroom. The price point was amazing and very simple to do it ourselves! It ended up costing just over $1 a square foot which is SO good for this high end look we achieved.
This is what the bathroom looked like when I first started helping my friend redo it, a couple months previous to the floor she had replaced the vanity, ripped out the yucky old tile, and put the wallpaper on the walls.
We stopped there with the renovation because flooring is expensive and such a huge decision.
We finally decided that this small bathroom was the perfect place to try our hand at installing peel + stick Luxury Vinyl Tile.
Here is the video tutorial I took in real time as we worked on the project.
The best part about this tile is that you can cut it with just a utility knife + a straight edge so you don't need many tools or anything fancy to install it! Total win!
Make sure you watch this video for lots of tips + tricks for installing this budget friendly flooring.

My biggest tip for this project is to use spacers. We used 1/16" spaces for this floor project.
The instructions on the box says that spacers are optional, but I feel like they were worth the extra effort. This being a geometric pattern I feel like the grout lines are really obvious, as well as it's obvious if your pattern isn't straight or square.
The spacers really helped with this.
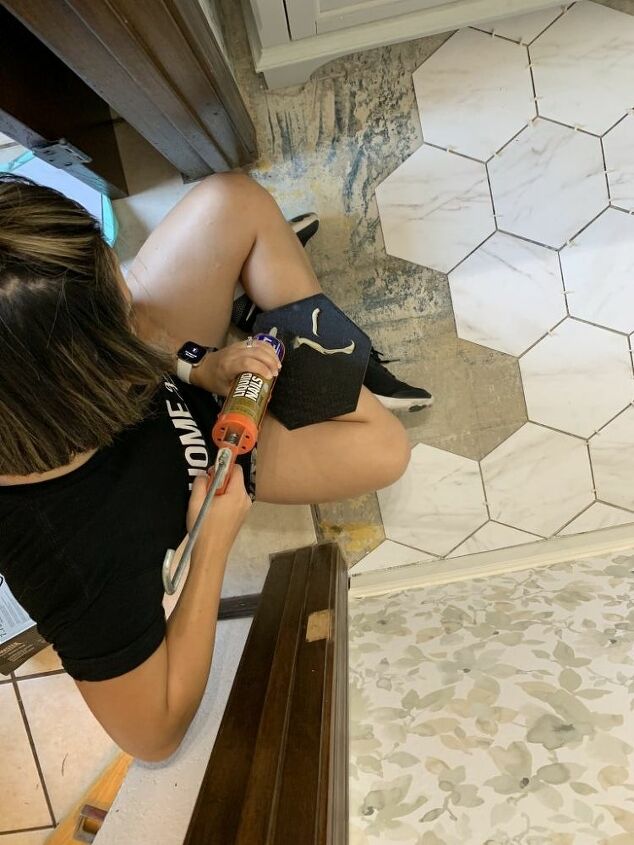
This tile by Stainmaster says that it is peel & stick but from reading the reviews on the product we realized that we better be careful and glue it down with Liquid Nails.
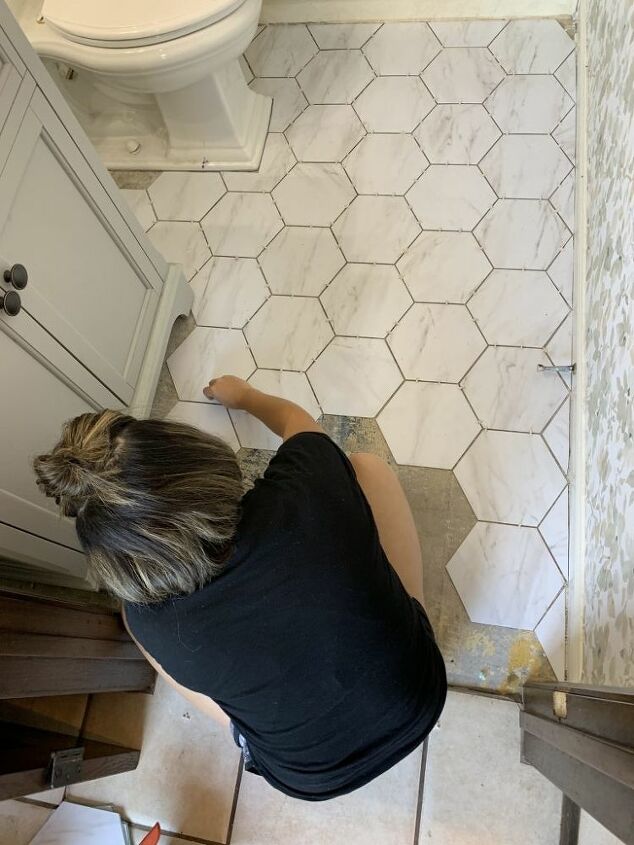
One last tip when installing a stone like tile is to make sure that the grain or pattern of your stone whether it be real or faux is all going in the same direction. I chose to have my grain go in the direction of traffic from the doorway to make it easier on your eyes.
Little details like that set apart a high end looking DIY job and an amateur.
Make sure you watch the video for our grouting tips for this project!
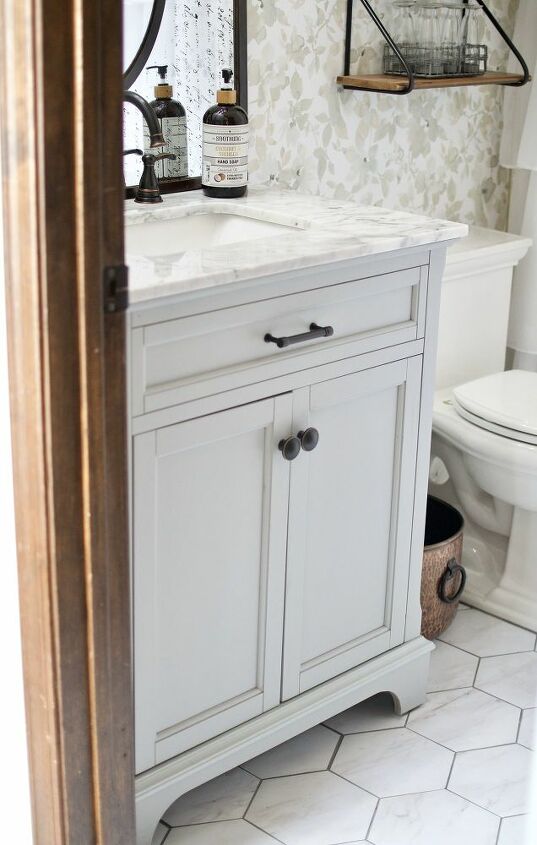
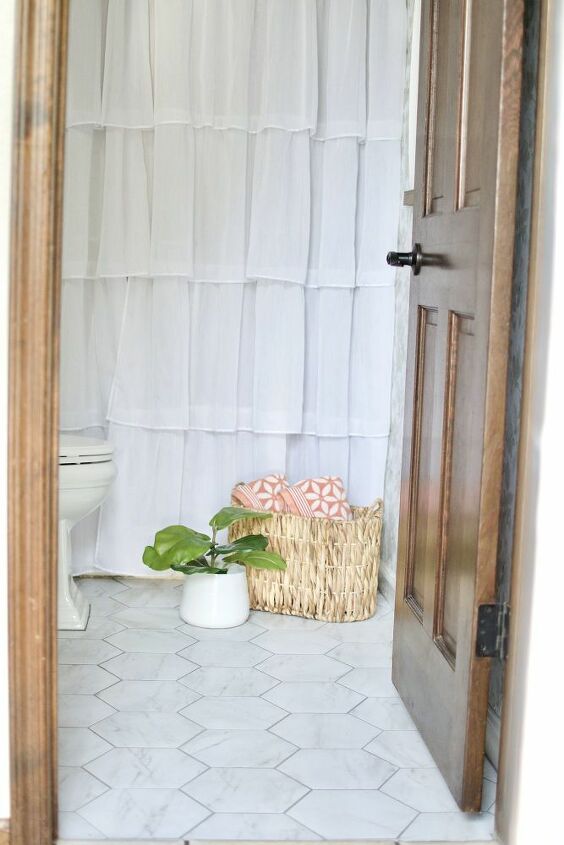
This is what her bathroom looks like now with the new flooring. Such an amazing high end transformation!
Resources for this project:
See all materials


Comments
Join the conversation
-
That is absolutely gorgeous! You did such a good job. I've never seen the Luxury Vinyl tile in the hexagon pattern so appreciate your letting us know about it. It looks like marble and the grout color is perfect. Great job! Thanks for posting it.
Sue
-
Another question about where you got the hexagon shaped tile. The link you provided doesn’t take us to a hexagon tile. Thank you.


Frequently asked questions
Have a question about this project?
Is this like what you used? https://www.lowes.com/pd/Style-Selections-1-piece-7-3-4-in-x-9-in-Groutable-Grecian-Marble-P/1000515111?cm_mmc=shp-_-c-_-prd-_-flr-_-google-_-lia-_-229-_-vinyltileandaccessories-_-1000515111-_-0&placeholder=null&ds_rl=1286981&gclid=Cj0KCQiA5vb-BRCRARIsAJBKc6JEYNaMPNN0z-hFBcq0mdlejEzqYYorPjpyZ4O6FMOQ_5YKR9DqonkaAlH_EALw_wcB&gclsrc=aw.ds
Can you put this over linoleum flooring or do you have to remove the flooring first?
I’d love to know how the grout has held up over time? I’m debating between LVP tiles or porcelain for a diy bathroom makeover.