


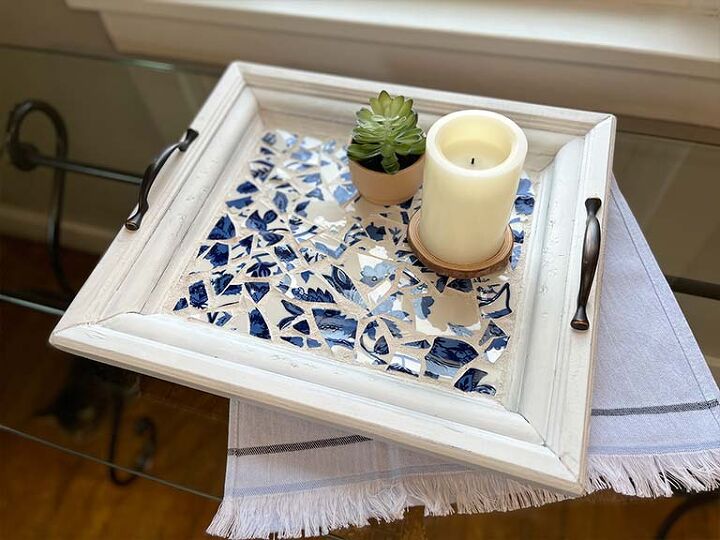
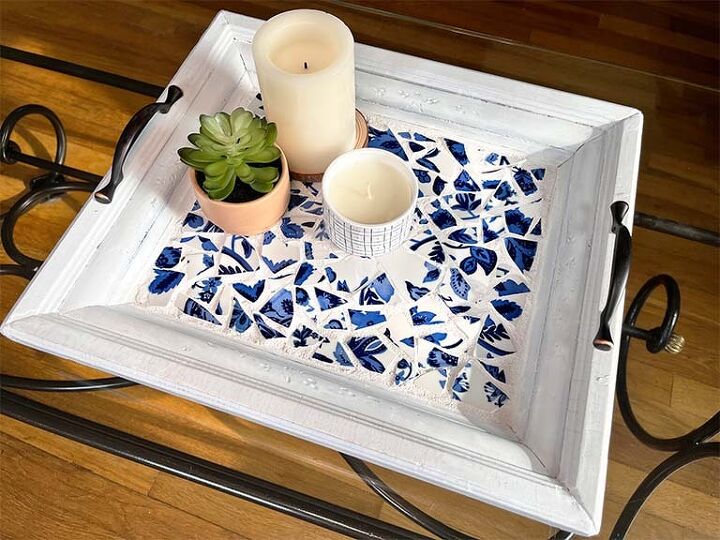
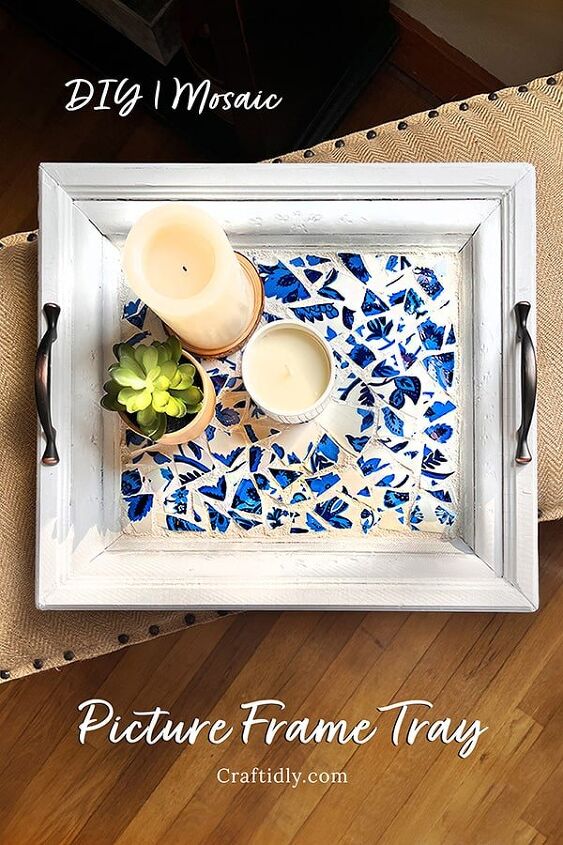
DIY Mosaic Picture Frame Tray

Visit the dollar store, thrift store, or search around your home for a few colorful ceramic plates (chipped or broken ones are even better) and a wood picture frame to make this gorgeous serving tray!
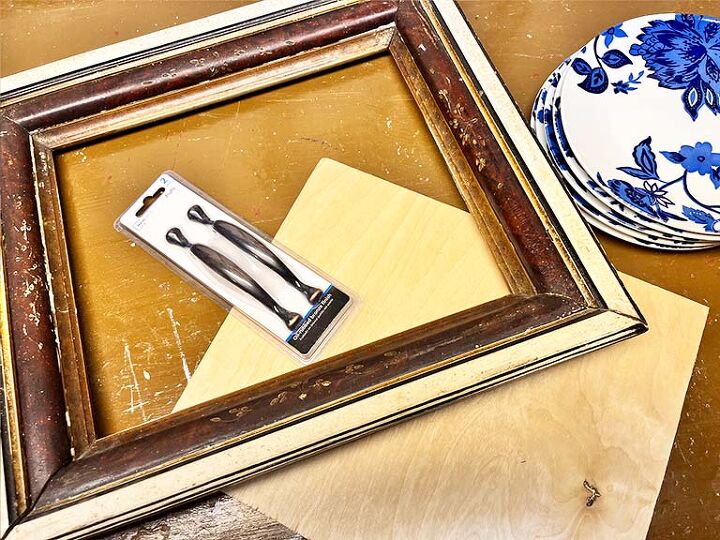
I have had this ugly old wood frame in the basement for quite a while and I thought it was time to turn it into something useful and beautiful!
I've always wanted to try my hand at making a mosaic. Lately, there have been so many beautiful mosaic table tops showing up in my Pinterest feed but I've been hesitant to take on such a large project.
I've also never used grout or made a mosaic before so I thought this small tray would be a great starter project. The process was actually surprisingly easy.
Check out the video and steps below for more detail!
How to Make a Mosaic Picture Frame Tray
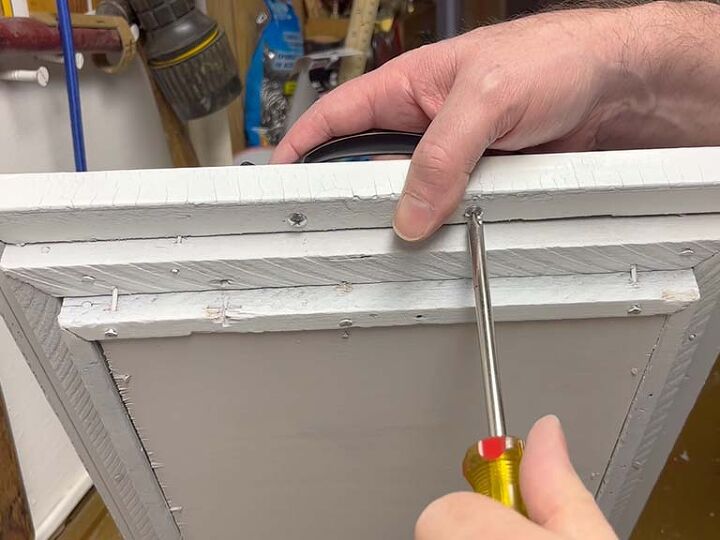
To get started, you'll need to remove all of the hardware from your wood frame and nail a wood board or craft plywood to the back to give your tray a solid base.
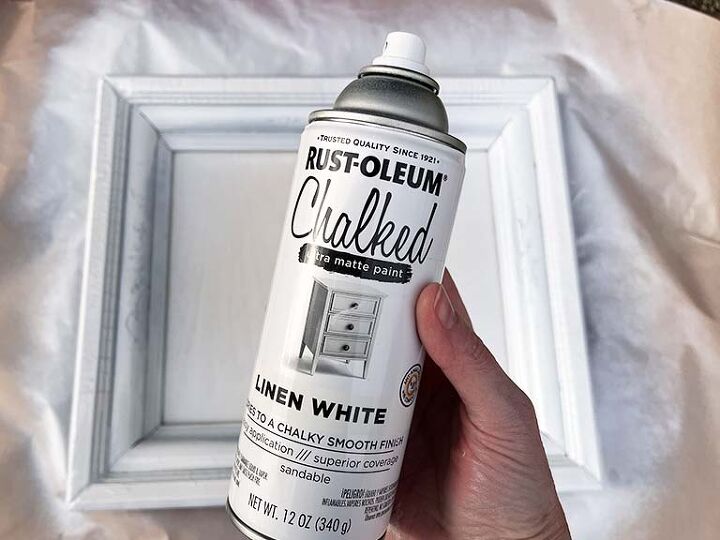
Next, paint if needed. I'm using spray paint but use whatever paint you have on hand.
Add handles.
See the video below for more detail.
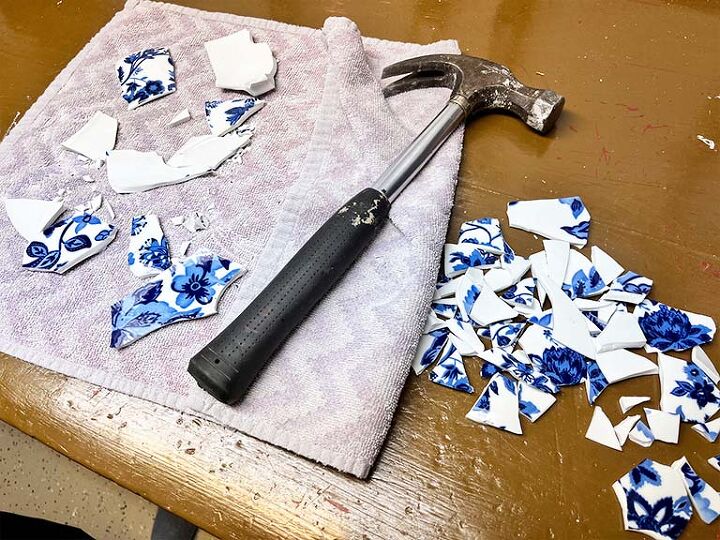
Now for the fun part, it's time to break a few plates!
The best way I found to break plates is to cover them (front and back) with a thick towel. Simply fold a towel in half and place your plate in-between. Use a hammer to break the plate into small pieces. You can also use a handheld tile cutter. Wear safety glasses when breaking or cutting glass!
Throw out any curved or thick pieces from the rim of the plate. You'll want to use flat pieces to avoid big curves and dips on your tray's surface.
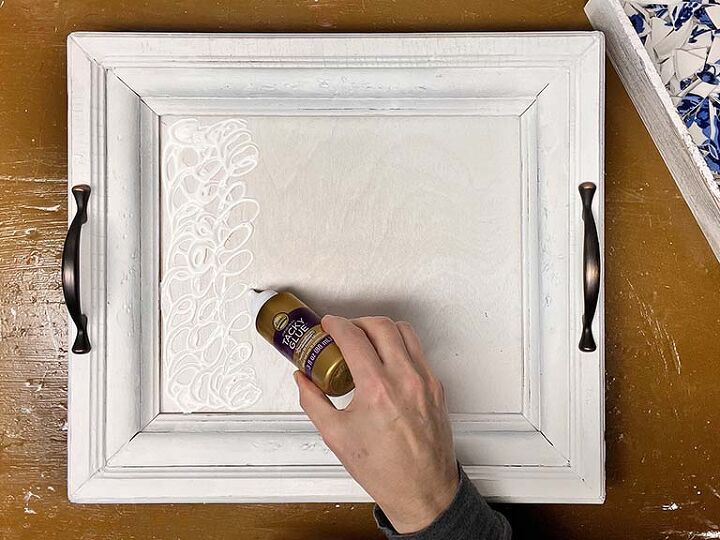
To make a mosaic top for your tray, start by spreading a good amount of craft glue over the whole surface. Craft glue will hold your mosaic masterpiece in place!
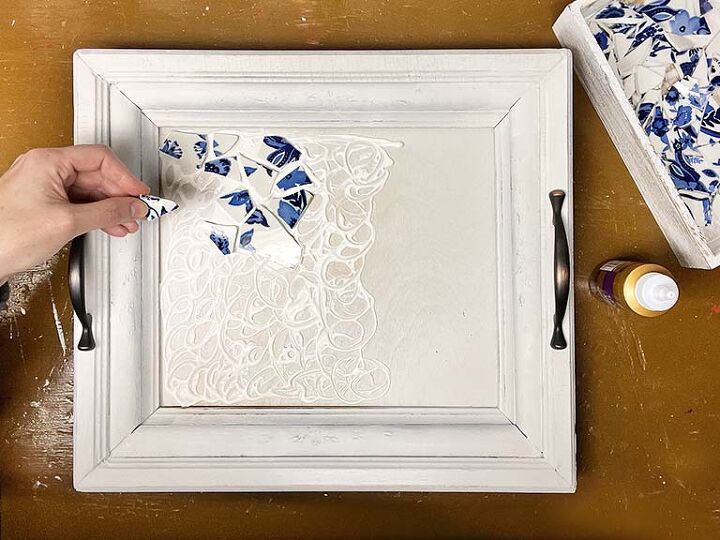
Next, begin arranging the pieces like a puzzle. Leave 1/4 to 1/2-inch space between and remember to leave space around the edges. Please be careful handling broken ceramic pieces, they are sharp!
Let the glue dry completely before moving to the next step.
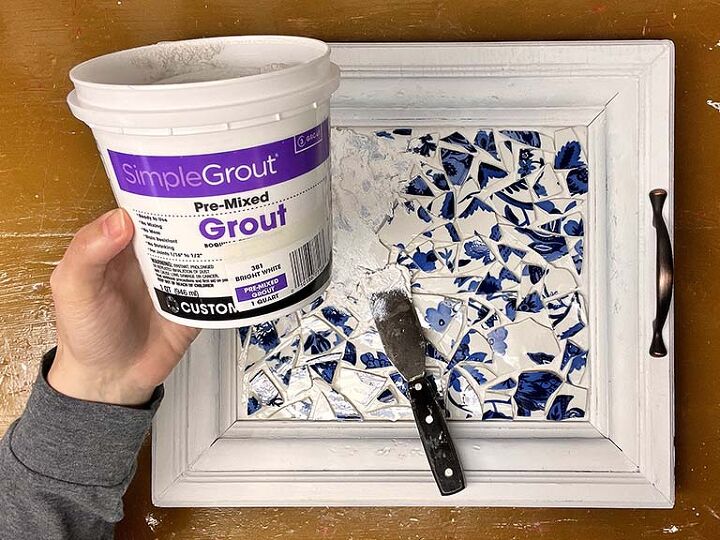
Smooth grout over your mosaic using a putty knife. Make sure to push enough grout between the tiles and don't worry if you get a build-up in the corners; you can remove that with your putty knife later.
See the video below for more detail.

Once you have your tray grouted, use a damp sponge to remove any excess grout from the surface. Wring out your sponge well, in clean water, and change out the water when it gets murky. I had to change out the water about 4-times. And don't dump the water down the sink. Take it outside as it may clog pipes.
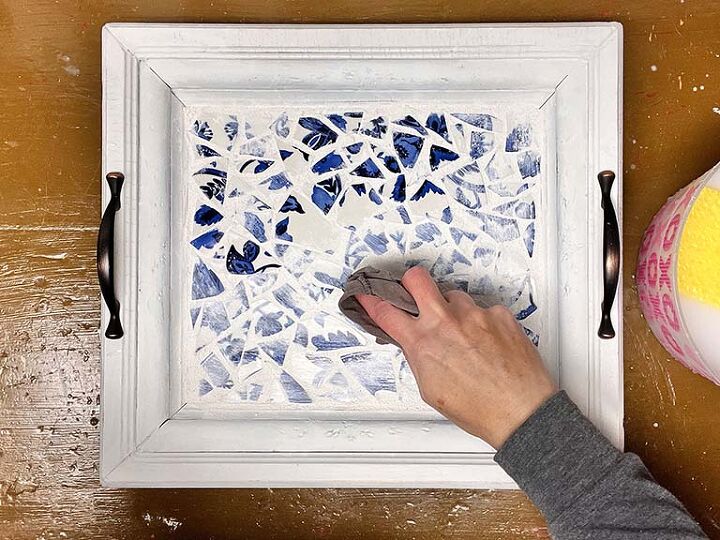
Last, use a soft cotton cloth to remove any residue from your mosaic pieces before letting the tray/grout dry for 24-hours.
DIY Mosaic Picture Frame Tray Video by Craftidly.com
For additional details on the project and more DIYs, visit Craftidly.com
Resources for this project:
See all materials


Comments
Join the conversation
-
Very creative. Thanks for sharing your idea.
-
Beautifully done & very unique. Love it! TFS ♥️.


Frequently asked questions
Have a question about this project?