


Gardening - "Flower Tots" Made From Upcycled Toddler Clothes

4 Materials
$2
2 Days
Easy
Recycle those baby clothes into adorable planters. Save those tiny outgrown clothes and recycle them into a memorial planter. Great for gifts to make memories of those days gone by. I've filled these with plants and given them to those who have lost a loved one instead of the ordinary planters from florists.
There are no two that are exactly alike, and they are so cute. These hold up super as long as you do not put them outside in the elements, but even then, if they have several layers of mix they are really super sturdy.
I keep them on the patio where they are somewhat protected from constant rains which I am sure will help their longevity!
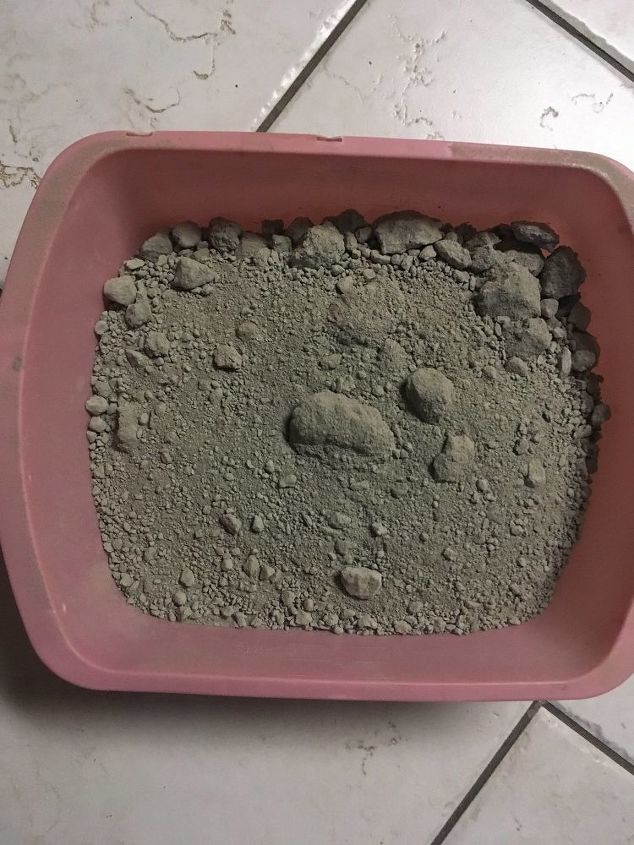
I am using portman cement and sand for this project,
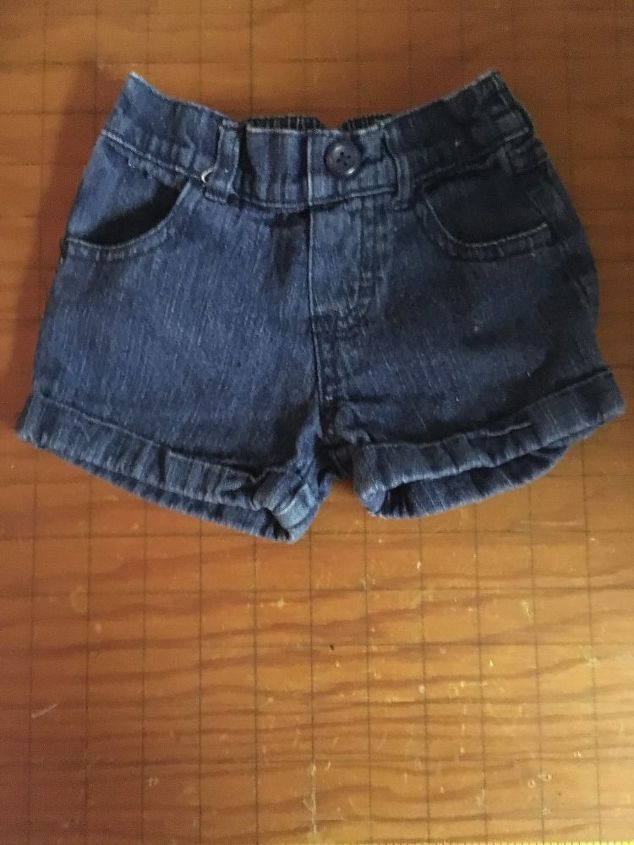
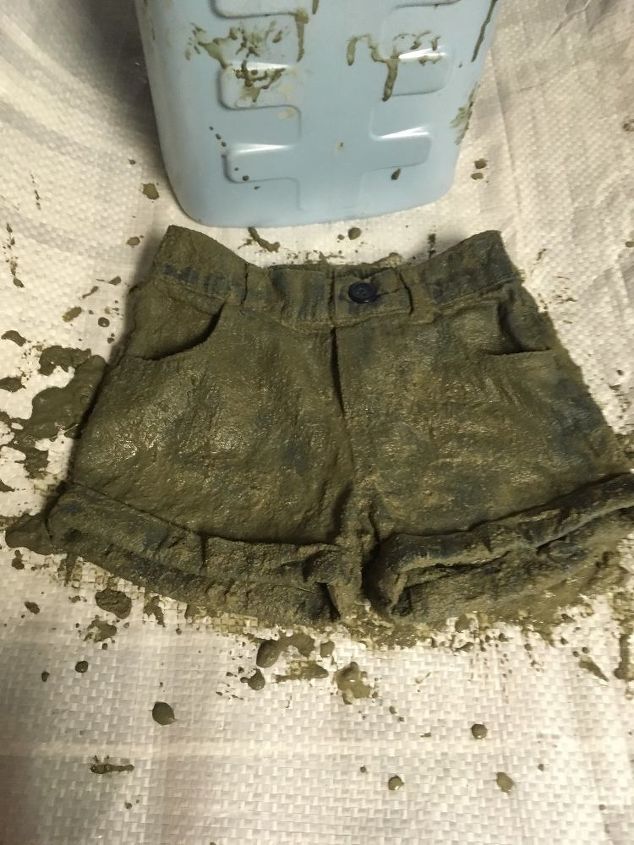
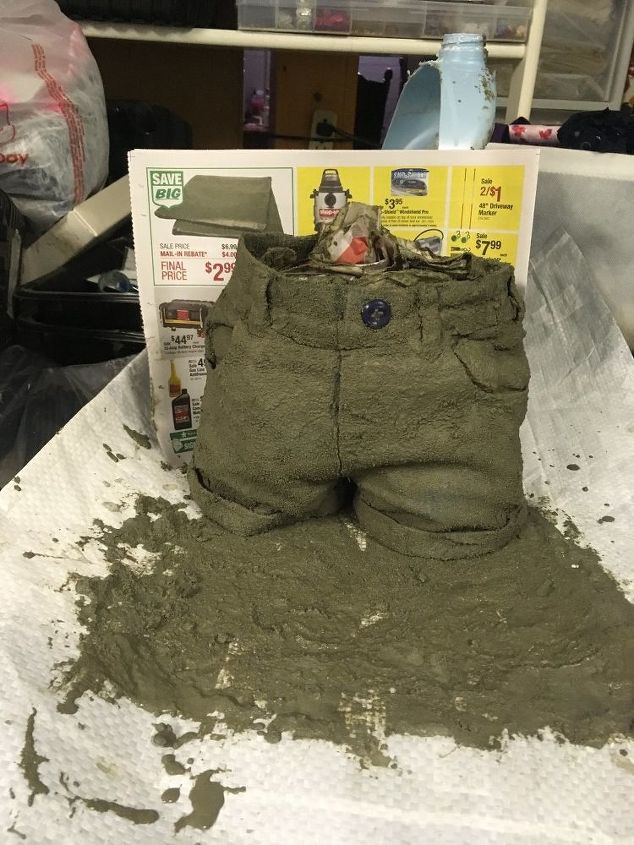
Here is a tiny pair of shorts that I am going to make into a planter. You can use anything you want that will allow the slurry to adhere to the surface. Shoes, boots, hats and clothing items. I have found that synthetic fabric does not work since the slurry will not adhere. Cottons and denims have been the best for me.
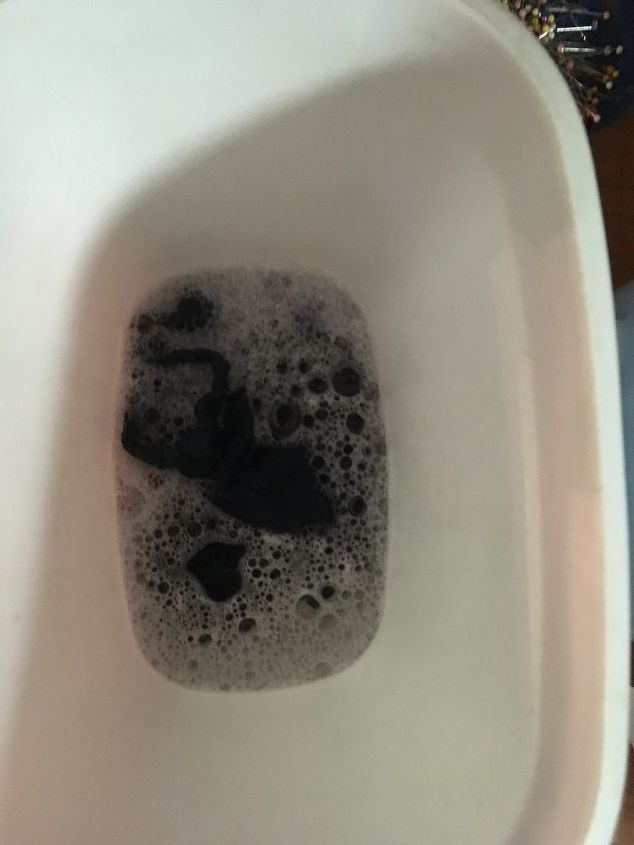
The first step is to soak the item in water to saturate the fabric so it will absorb the concrete mix. After I am sure the fabric is completely saturated, I ring out as much of the water as I can.
I am using portman cement and sand for this project with a 1 to 3 ratio.
My next step was to make a slurry of the powder and 3 parts sand and enough water to make a thin mix about the consistancy of cake batter.
A slurry is a watery mixture of insoluble matter.
Do not add too much water, since you want it thick enough to stick to the fabric and harden.
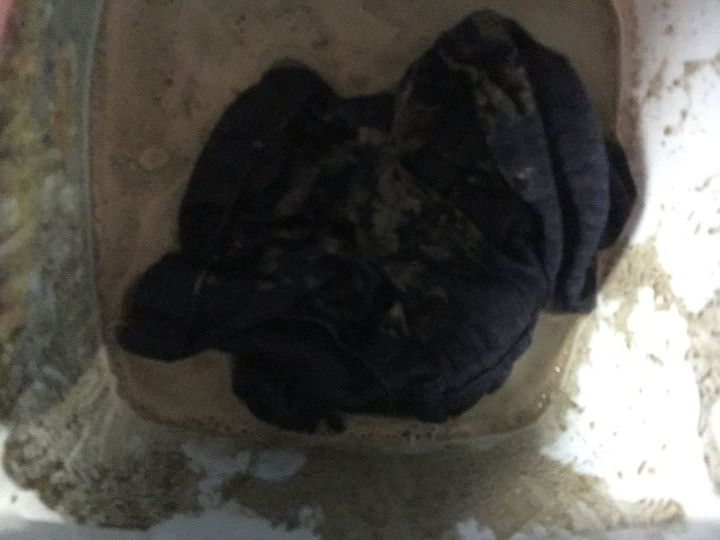
After the mix was completely mixed, I than put the shorts into it making sure that the inside is also exposed to the mix. Now the wait begins. I know this is always the favorite part of anything we do right?
I allowed the shorts to soak for several minutes to make sure that the fibers were really absorbing the mixture. Do NOT go off and forget this project in the making, since you do not want it to set up before you shape them.
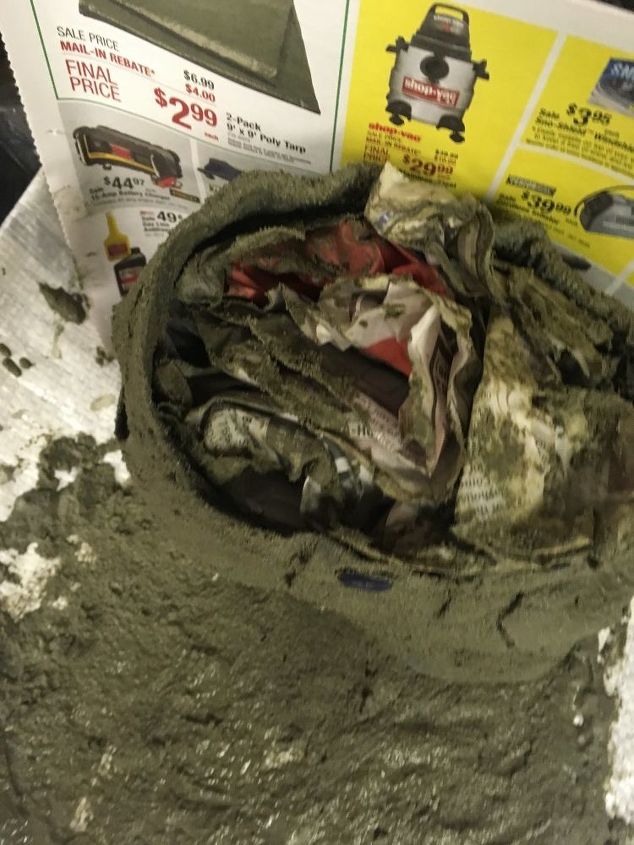
After the material had absorbed most of the mixture, I laid it out and straightened the shorts out to get the shape I wanted. At this point I clean any areas I do not want coated such as buckles or buttons.
I used plastic bags to stuff the little legs to give them shape. In the past, I have also used crumbled up new print for the same purpose. I had the plastic bags handy, so that is what I used. I do prefer the news print though since it helps to absorb some of the moisture better and is stiffer for more shaping. For larger items such as the items show below, I used chicken wire to make a form inside the legs for shaping and strength. If you desire to make a bottom to the legs, you can at this time fold the legs under. For these shorts, I left them open.
Once the cement mixure is applied, the two become one, and cannot be separated. Use your creativity. I have folded cuffs up on the bottom of slacks for extra strength after the initial dip in the slurry. Form it how you want it to harden.
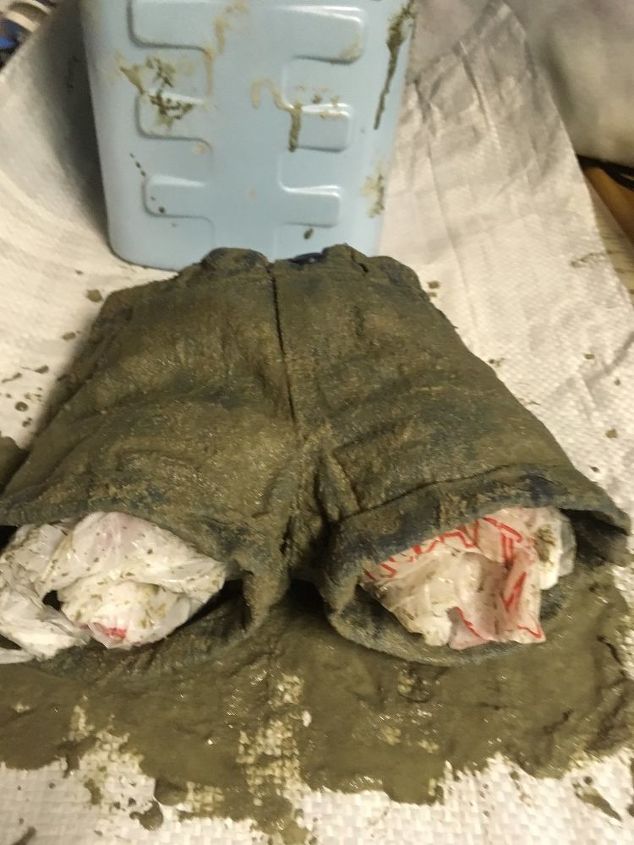
Here is a picture of the shorts after being stuffed with the plastic bags.
After these are dry I removed the plastic bags and went ahead and stuffed them with newsprint . I will "paint" on another layer of the slurry to add extra stiffening to them so they will stand on their own so I can plant flowers in them. The method of "painting" I used was to dip my gloved hand into the slurry and lather the whole project . I even filled the pockets and any creases with the mix. All this adds strength.
Remember to coat the inside as well to give strength.
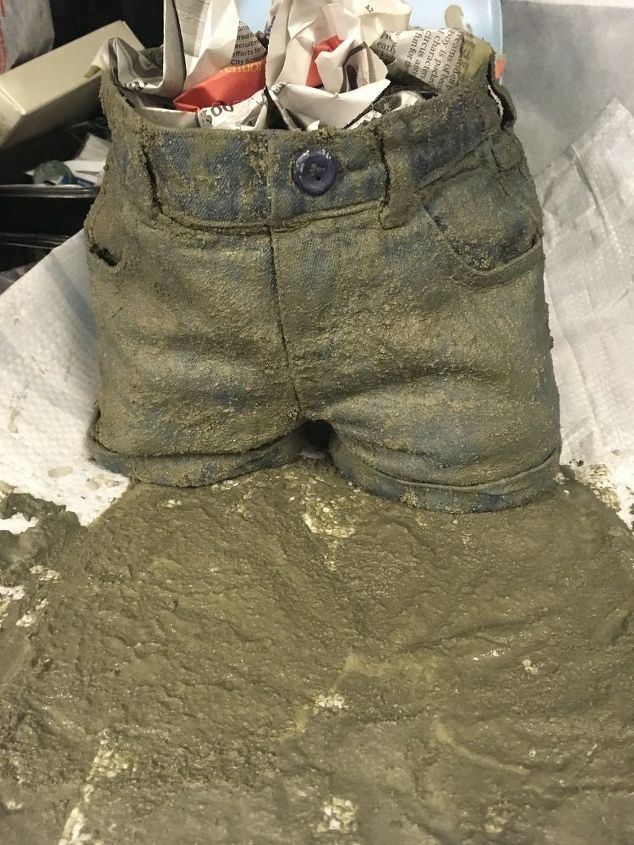
The plastic bags worked for the first layer of mix but after I added another layer, they were too heavy for the plastic to support them. If you have plenty of newsprint, skip the step of using the plastic bags. I have even left the crumbled newsprint in the bottom of the legs to serve as plugs to keep the soil from falling out.
Here they are after the second layer of concerete slurry. I have made these items in the past and they turned out really hard and held up great.
Remember to "paint" the inside also. The more layers, the harder it will ended up. For a longer item, I usually tuck some of the leg portion up into the leg to serve in holding the potting soil in... there is enough cracks usually to allow for good drainage.
Even the ones that were left outside over winter, still are hard!
I just have to wait for them to cure out really well for a week or so before filling with flowers. Once they harden I will fill them with plants. I am thinking of using sedums for these. If you like begonias, these work great for begonias since they thrive on the lime in the concrete and grow great!
Stuffed and waiting for them to dry.
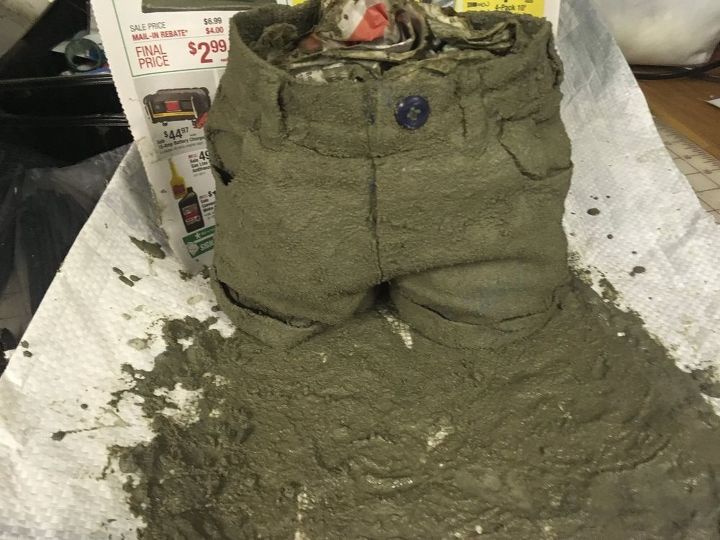
Here is a front view with them standing up. These shorts now show two layers of the slurry mix. The more layers that are applied will serve to make them harder and harder.
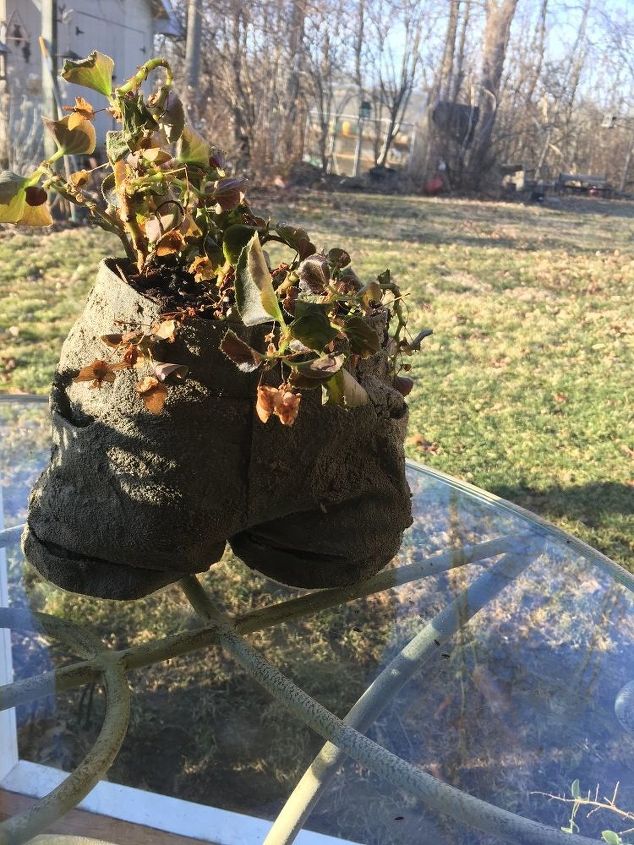
Since I had begonias that I have over-wintered, I when ahead and planted them in this flower tot. I simply love the way these look. Eeryone who sees them really likes them. Let me hear what you think.
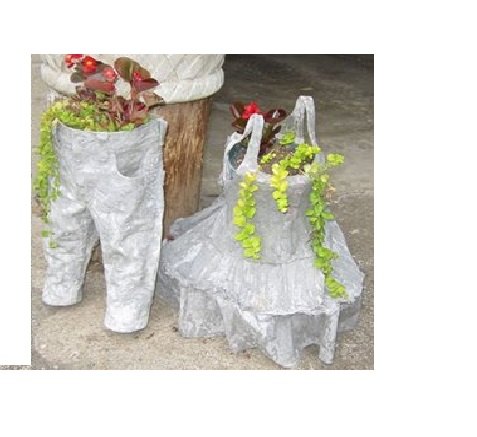
Here is a set I made a couple of years ago and they are still doing great as you can see and they have not been in a protected area. The more layers of slurry that is added, the harder ththe time this took was hard to calculate since most of the time was in the waiting. It only took a few minutes to mix up the slurry and apply it. Waiting was overnight. Actualy stuffing and putty the slurry on took a rough 30 minutes. For this reason I am saying it took 2 days because of the drying/curing time.
Resources for this project:
See all materials


Any price and availability information displayed on [relevant Amazon Site(s), as applicable] at the time of purchase will apply to the purchase of this product.
Hometalk may collect a small share of sales from the links on this page.More info
Comments
Join the conversation
4 of 29 comments
-
Very, very cute !! I love this idea and will be trying to make my own. Thanks for sharing.
-
Really luv this very cute idea. Wut a way to display ur kids/grandkids clothes forever and w beautiful flowers too...


Frequently asked questions
Have a question about this project?
Love this! Tried it last wk, but was told i didnt need sand as i used Quikrite cement, it didnt harden enough plus i didnt add more after.. Do u have any tips for me.
Frustrated in Ont 😬 Lol
Thx
Thanks for sharing. I like the idea. I was just wondering, I dont like the way it looks on the outside, all concrete like. Is it possible to just coat the inside of the jeans to keep the color and still have the hardened pot?
How did you make the " WHITE "ones ? The others were dark.