


Homemade Eco Wood Stain

3 Materials
$1.50
3 Days
Easy
I had made a previous post where I used a natural stain that made fresh wood look like barn wood and there were a lot of questions about the stain so I thought I would do a post on how to make your own stain from items found in your kitchen. I went out to look for a cheap wood table to use for my tutorial, i really wanted to illustrate what difference a good stain could make to a simple pine table. I wasn’t able to find any in the stores that would work so I quickly whipped one up the other night. The video is about wood staining but I threw in the pictures about how I made the table for anyone interested in making one themselves
Building the Table:
Step 1: Gather your supplies
Building the Table:
Step 1: Gather your supplies
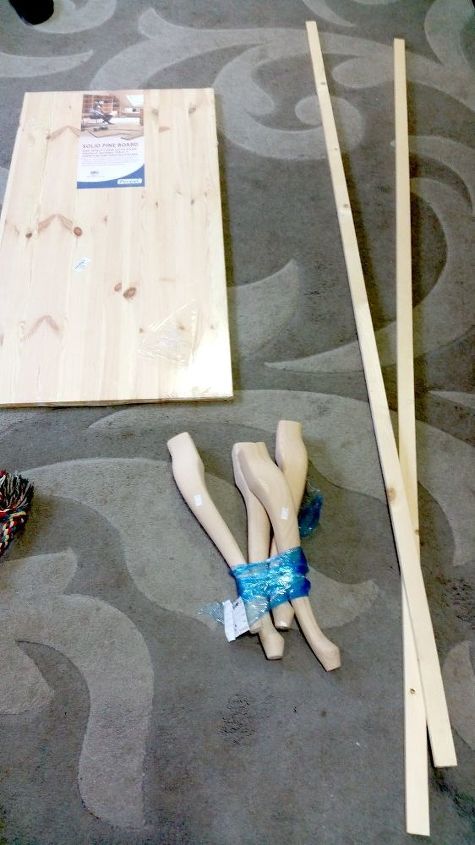
I went to my local hardware store and got a wood board, some two inch wood strips, four legs and a bunch of little L brackets. I already had wood glue and wood screws.
I cut my wood so that with the legs the under frame would come in 2.5 inches from each side i did this by taking the width of the top (w) minus 2.5 from each side (so w-5) minus the width of the legs (which was 2.25) so W-5-4.5= the size of the wood I needed to cut. And then i did the same formula for the length. I cut two of each size.
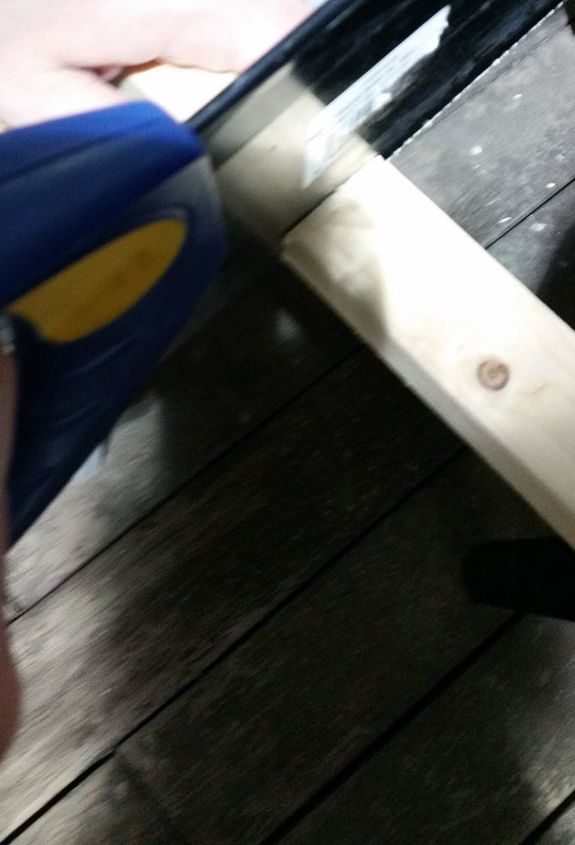
Here I attaching the first piece using an L bracket. I will be the first to admit that there is better ways to make a table, but that if you want to make a table in an hour this works great.
Here’s the second piece of the frame, I just went around attaching each leg to each piece in this way. It was a little shaky, but i knew it would stabilize when I attached it to the top.
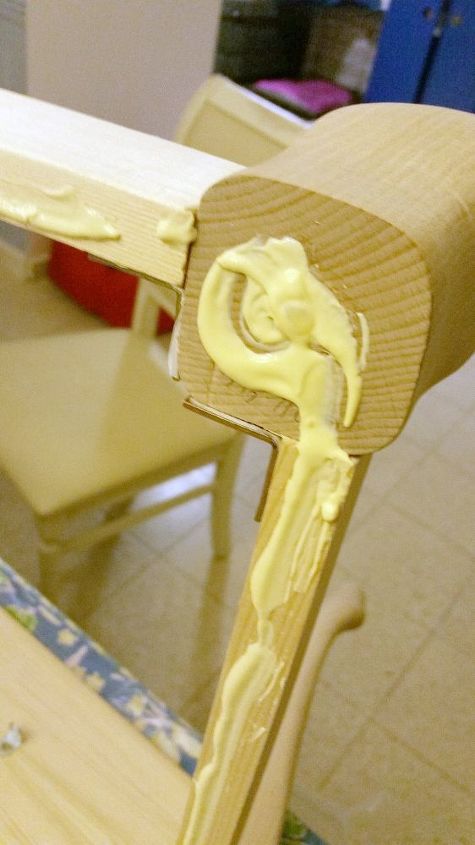
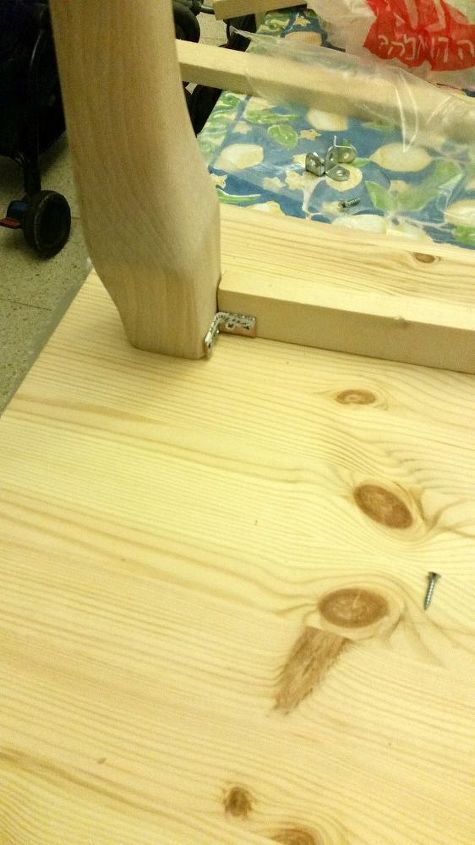
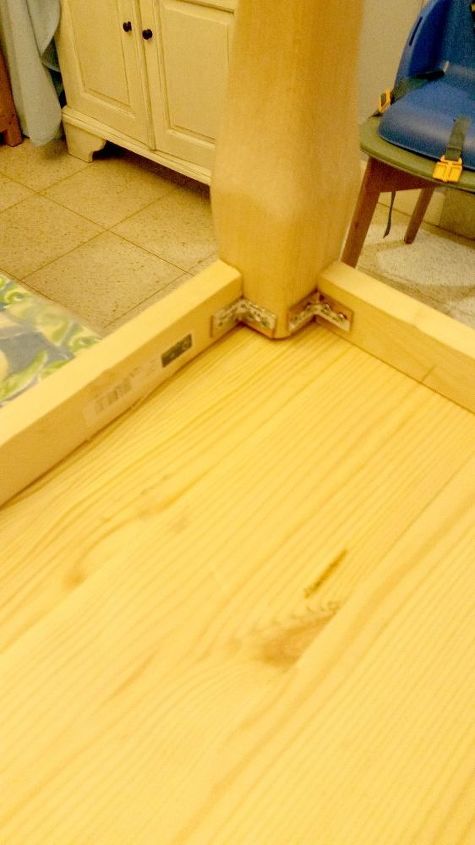
I added wood glue all around the top of the legs and frame before I attached it the top, this keeps everything nice and tight. I then attached the top using 4 L brackets on the inside of the frame. Last step in the table is wiping up any wood glue that squeezes out from the cracks when I screwed the top on.
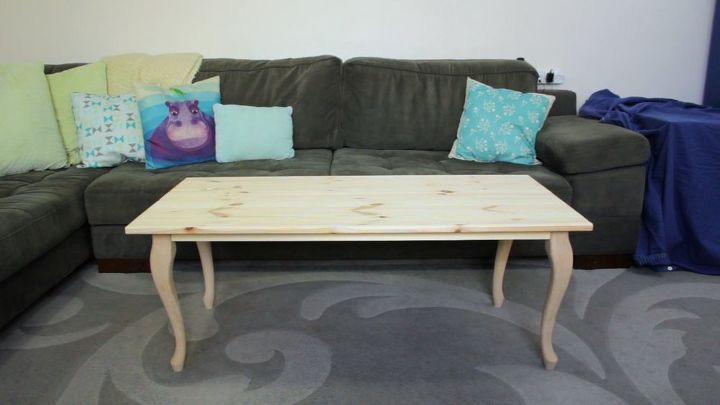
Now here’s the table before. You’ve probably seen a lot of cheap pine wood tables that look similar to this. I actually find the lines very elegant, and with a little stain, this table will look much more expensive.
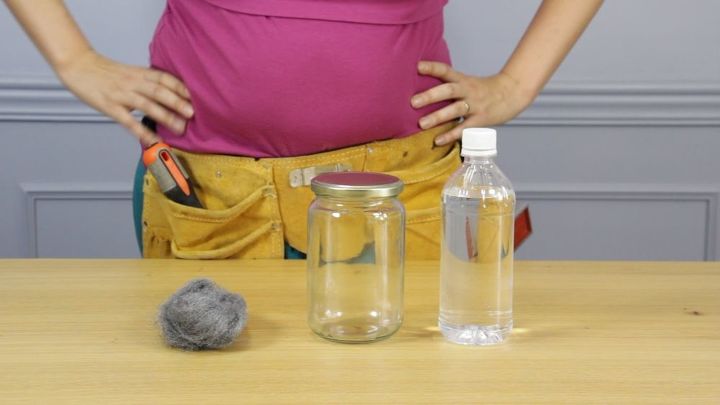
All I used for the stain was vinegar and steel wool.
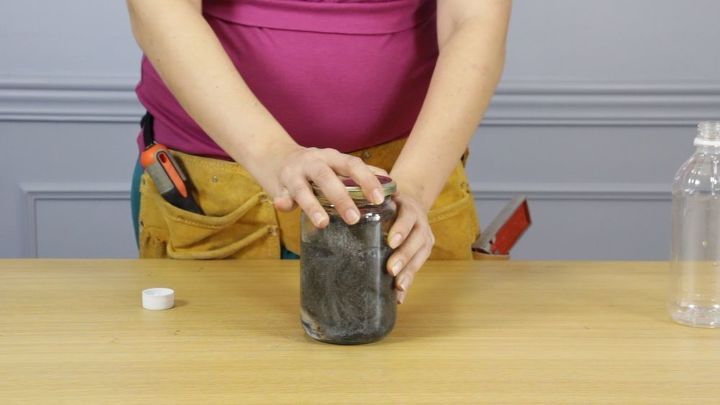
I added the steel wool to the jar and then poured the vinegar over. I let it sit for three days. You MUST open it once a day as the making of the stain produces gas, from the terrible smell i can guess sulfur, and if you let the stain just sit for three days the pressure in that jar could cause it to either explode or be impossible to open.
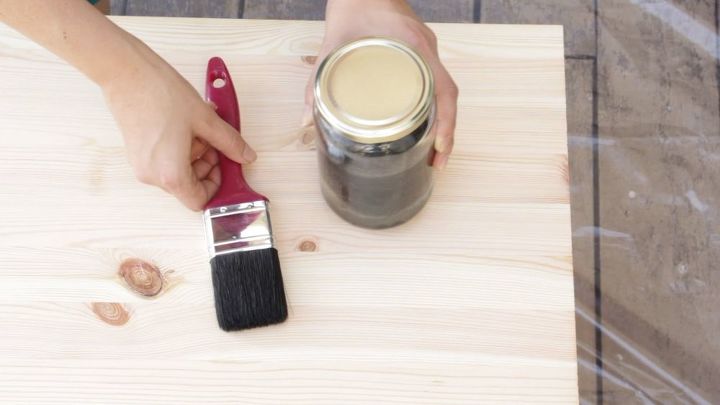
I added the stain making sure to carefully cover it evenly.
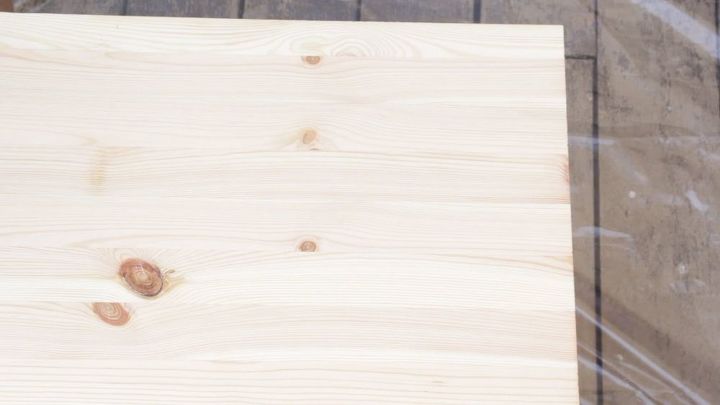
Here’s what I started with.
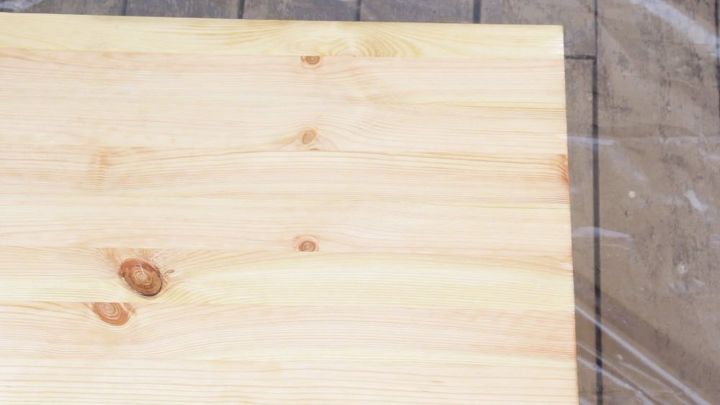
This Is after one coat.
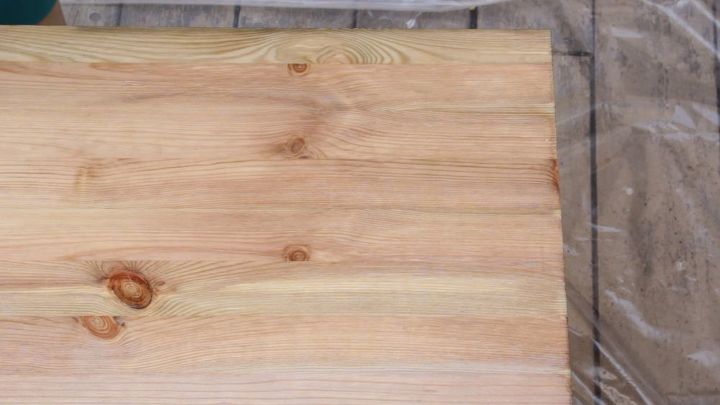
This is after two coats, I went for three layers but you can stop at whatever color you like.
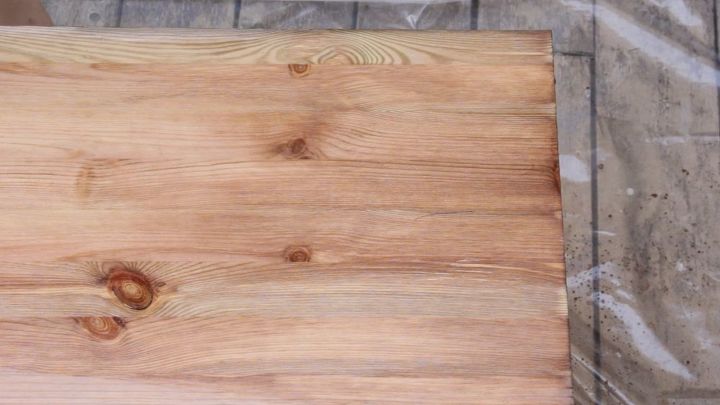
This is after three coats. Also remember that it will still get a little bit darker in the days after you have stained it.
In this picture the legs look like they are a different color that the rest of the wood but in real life it doesn’t look like that.
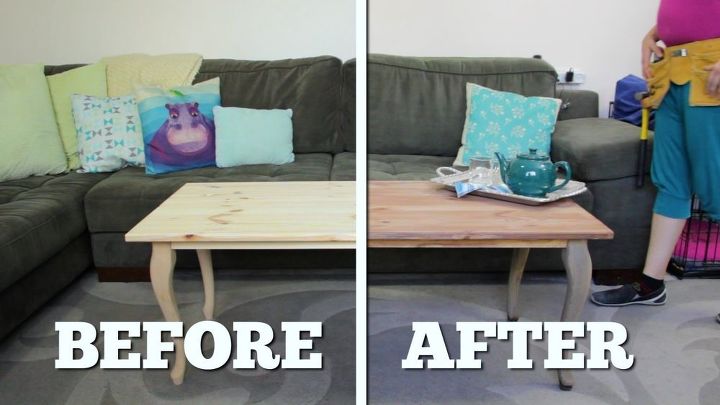
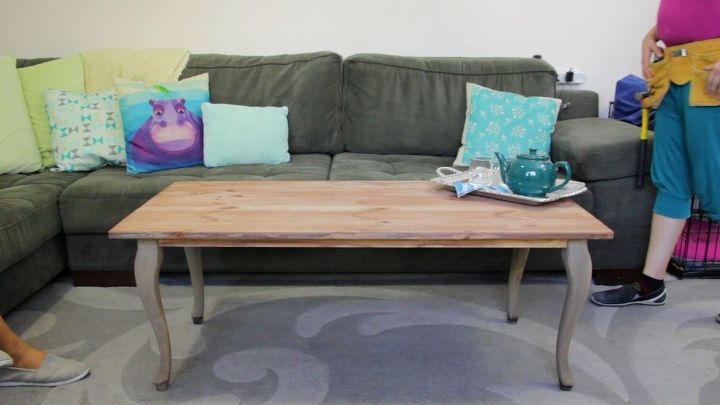
Look at the difference that a good stain makes!
{
"id": "3601163",
"alt": "",
"title": "",
"video_link": "https://www.youtube.com/embed/xtA-3akkaUg",
"youtube_video_id": "xtA-3akkaUg"
}
{
"width": 634,
"height": 357,
"showRelated": true
}


Any price and availability information displayed on [relevant Amazon Site(s), as applicable] at the time of purchase will apply to the purchase of this product.
Hometalk may collect a small share of sales from the links on this page.More info
Comments
Join the conversation
2 of 26 comments
-
good work
-
I love the color of the stain on your very nice table.


Frequently asked questions
Have a question about this project?
your table is so nice! my question is ...
‘how long of a time frame did you wait between coats of stain?