


Christmas Wreath

I have absolutely loved this project. I am so pleased with it! I have had my old wreath for about 10 years and it was starting to fall apart. I had a clear picture in my mind of what I wanted instead, and below I'll explain how you can make it too.

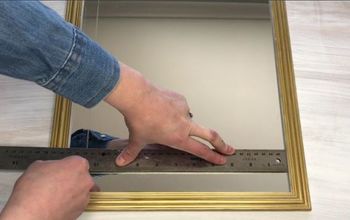
First you need to make your base. For this you'll need a large sheet of cardboard, scissors, a Stanley knife, string, a pen, a pin and a tape measure.

First, measure the width you want the wreath to be and mark both ends. Also make a mark halfway. I wanted this to be a big kinda show stopper one so I've gone for 20 inches. Excuse the baby- she's in a fair few of these pics- my little (non) helper ;-)

Next, tie string around a pin as shown.

Measure the string to be the same length as the width of your wreath and tie the other end to a pen (make sure to cut the string bigger so the amount used to tie around the pen doesn't come off the desired length- measure the string once tied at both ends to check before you proceed).

Put the pin in the halfway mark made earlier and draw a circle using the string as a guide for length.

Next, repeat the above steps to draw another circle approximately 5 inches smaller. At this stage you should have something that looks like this.

Cut it out with a Stanley knife and you should have something that looks like this. If you wish, draw around this one and cut out a 2nd layer. This will give you a more sturdy base.

Now the fun bit! This is what you'll need for this stage- your 2 circle templates, glue gun, spare glue sticks, tinsel, firefly battery lights, decorations of your choice.

First use the glue gun to stick the 2 circle templates together.

Use the glue gun to make a section with glue to stick the tinsel to.

Stick one end of one of your lengths of tinsel to the glue and then wrap the tinsel around the cardboard and stick the other end with more glue.

Repeat until the whole wreath template is covered as shown.

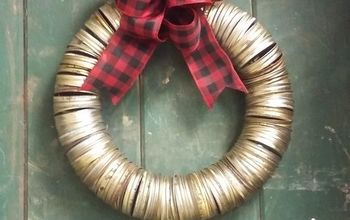
Next stick on your big bow at the bottom, or whatever main feature decoration you've chosen.

Next I chose to position and stick the medium bows.

Next I chose to position my candy cane decorations (they were tree decorations but I pulled the top bit off that had the string on). Put hot glue along each candy cane as shown.

Repeat until all candy cane decorations are in position. You should have something that looks like this.

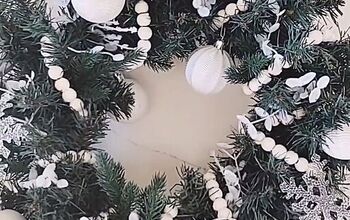
Next I added all the baubles. Same process- add hot glue to each bauble and stick them in position.

Next I added the red and white glittery balls. I put a large section of hot glue in a patch as shown and then kind of 'sprinkled' them on. I tried to make sure there was a roughly equal amount of red and white in each cluster.

Finally add your lights. Use a large blob of hot glue on the back of the wreath to stick the battery case (make sure to leave the side you open facing outwards so you can access it to change batteries). Wind and stick the light wire evenly around your wreath.

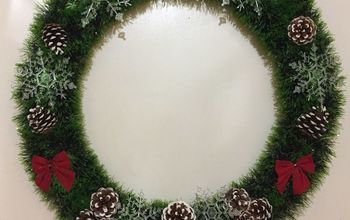
There you have it! A home made wreath for a fraction of the cost of a similar one bought. I really am chuffed with this one :-)
Comments
Join the conversation
-
Gotta make this!!!! . Simple and beautiful!! Thank you for sharing 💕💕


Frequently asked questions
Have a question about this project?