


How to Make Simple and Easy Fabric Pumpkins
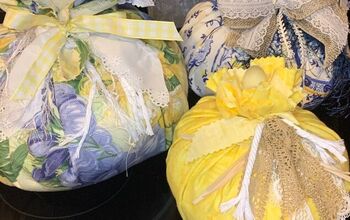
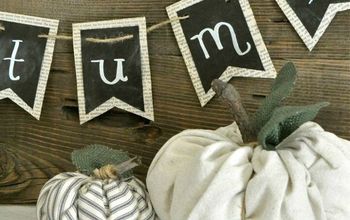
DIY fabric stuffed pumpkins with natural stems. You will love this easy and fun craft I created from old clothes and bedspreads.
Fall is in the air, and that means pumpkin season is too! Instead of buying an overpriced pumpkin from the grocery store, why not make your own? It’s easy and much more affordable. This blog post will show you how to make beautiful fabric pumpkins using simple materials you already have at home. So get your crafting hands ready, and let’s get started!
First, start by cleaning the closet and finding a few old pieces of clothing you don’t wear anymore. Then, if you don’t have any, you can visit the local thrift store and pick up a few as I did. Or, you can use some scrap fabric you may have lying around.
Choose an assortment of fabrics and textures in colors you like. I like the stretch jersey knits. They are effortless to work with and mold very well.
I have even bought beautiful old chenille bedspreads to make pumpkins. The Chenille gives such great texture and pattern to the pumpkin.

Old plaid flannel shirts are also fun to work with and create a warm and cozy look for your pumpkin.
The first step in making a fabric pumpkin is to create a circle for a pattern.
By following these guidelines, you can easily make your elegant pumpkins! First, start by cutting out different size circles for each pattern. I use brown grocery store bags to create my patterns because they’re durable yet lightweight.
I made 6″,8″, 10″ and 12″ circle patterns.
Next, you will want to cut out circles in the selected fabrics.
Creating a running stitch to make your fabric pumpkins is easy.
Secondly, you will create a running stitch around the circle’s edge. This is a simple in-and-out stitch that you place about 1/2″ from the edge.
I use embroidery thread and these DMC embroidery needles.
I find the regular thread to be too thin, and it breaks easily.

There is no need for this stitch to be perfect, as you will never see it when you finish the pumpkin. I move very quickly when creating this running stitch around the edge of the fabric.
Gather the fabric around the circle, like in the image below.
When sewing around the edge, leave one end of the thread to pull. Then, gather up the fabric to create a pouch.
Filling the Round Pouch to Create a Fabric Pumpkin
I like to add a handful of rice or dried beans to the bottom of the pouch. This gives the pumpkin a bit of weight and makes it more substantial.
Next, you will Stuff your pumpkin with polyfill to your liking. I like mine rather full and plump, so I add quite a bit of the stuffing to my pumpkins.
However, you don’t want to over-stuff the pumpkin as you need to be able to close the circle on the top.

Closing Up The Fabric Pumpkins
Put the needle back on the end of the embroidery thread and pull the string as tight as you can. ( you can see in the image how close I have drawn the thread).
Now keeping the thread as taught as possible, start sewing from side to side to close the circle up as tightly as possible.

Creating the Ribs in the Fabric Pumpkin
Using the embroidery thread and the heavy needle, thread a long piece of embroidery thread onto the needle and tie a knot on one end of the line.
Insert the needle in the center of the bottom of the pumpkin and push the needle through to the top of the pumpkin.

Wrap the thread around the side of the pumpkin and come up through the center on the top.
Wrap the thread around the side of the pumpkin about two inches from the first thread. Poke the needle through the bottom again and up the center to the top of the pumpkin, and pull tight.
Continue to do this around the entire pumpkin. I typically have 6-8 ribs, depending on the size of my pumpkin.

Finishing Touches on Your Pumpkins
My favorite part is adding natural stems to make the most realistic-looking pumpkins.
You may ask, where do I find these stems? I always cut the stems off my pumpkins every year before I throw my pumpkins away. However, you can also find them lying on the ground at the pumpkin patches, in the grocery stores bins, or you can buy them.

Decorating your pumpkins is where you can use your imagination. First, select a variety of stems, leaves, moss, and anything else you would like to add to your pumpkins.
Using the hot glue gun, attach your stem and decorative items.

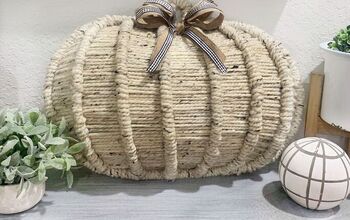
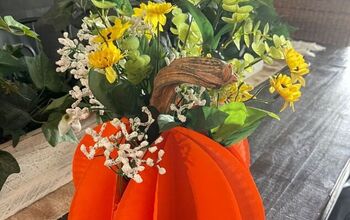
Fabric pumpkins.

P.S. The Estimated Cost and How Much Time Take are for four pumpkins




















Frequently asked questions
Have a question about this project?