


DIY Pumpkin Carving With A Drill
If you are looking for a pumpkin carving projects that’s easy, a little different, and can double for great fall decor as well, pumpkin drilling is for you. You can place these all around the garden and light them with candles (careful!) glow sticks, or even those dollar store led stick up lights. While I think this is safer than using knives to carve, still be very careful using power tools, and know how your drill works and how to keep yourself safe. And if your arm gets tired, give it a rest or take turns… We drilled the pumpkins first, then scooped them afterwards. It seemed to give more stability to the pumpkin while you drill. Yes, your drill bits will get goopy… Just un-goop, and move on. :) However, if you prefer to scoop first, more power to ya! Here’s your tutorial on how to drill pumpkins!

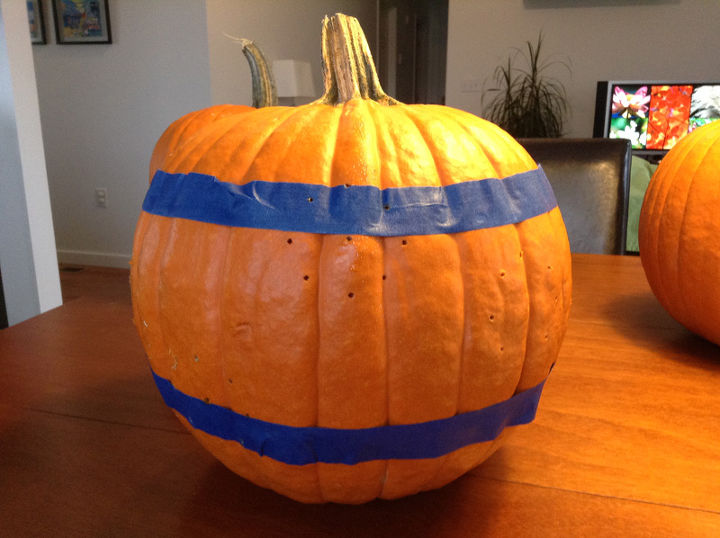
Step One: Create a pattern and use painters tape to help you mark it onto your pumpkin. We used dry erase marker to make the initial marks, then punched with a skewer to make it easier to get the drill going in the right place.
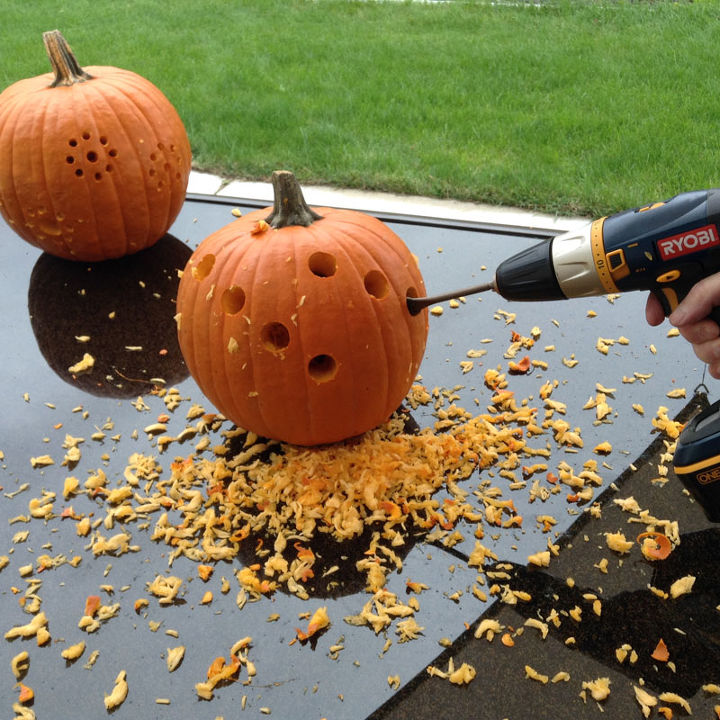
Step Two: Using various sized bits, we drilled straight into the pumpkin at the pre-marked spots. It helps to have someone hold the pumpkin while another person handles the drill.

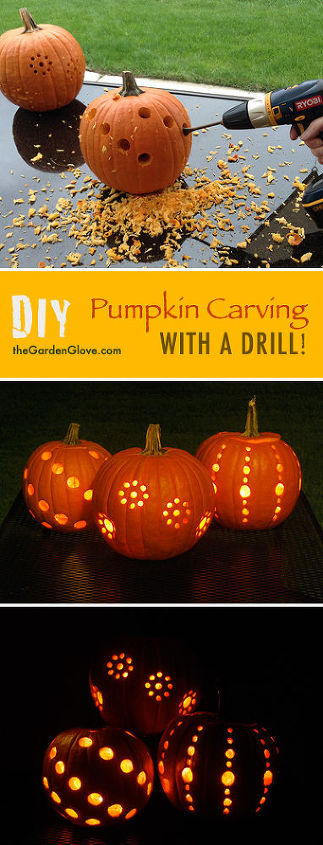
This is a super fun project! Just make sure you are safe with the drill. More details on our blog. Stop by and check it out!
http://www.thegardenglove.com/diy-pumpkin-carving-with-a-drill/

Comments
Join the conversation
-
Cut the bottom of the pumpkin instead of the top...."lid" wont fall in or need tooth picks to hold in place. Place candle on a plate, lite it, set pumpkin on top!!
-
Triphobia activate!!!


Frequently asked questions
Have a question about this project?
Another person asked about scooping the seeds, and you answered, "That's in step 3" but there is no step 3 that I can find. Could you just please tell us if you scooped out the seeds?
What kind of drill bit did you use to make the round circles? Does it have a special name?