
How to Paint Your Front Door
Minnesota in the spring is tricky. We’re at that in-between where it’s almost warm enough to start outside projects and then, out of nowhere, snow comes roaring back in. Real spring is right around the corner though so now is the time to get ready for some home improvements like painting your front door.
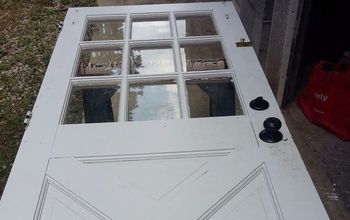
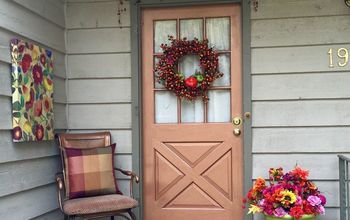
One of the quickest and easiest ways to boost your home’s curb appeal is by giving your front door a fresh coat of paint. My front door hadn’t been touched since we built our house 20 years ago. The once vibrant red had faded, leaving it looking dull and dingy. It was time for a change.

I decided to try Front Door Paint by Modern Masters, which I picked up at Menards. This paint is available at most big-box stores and is made specifically for front doors. I chose a bright yellow, but I was a little worried about how well it would cover the old red paint. I went ahead anyway, and I’m glad I did!
Before painting, proper prep work is essential. Here’s what I did:
Clean the Surface
I mixed dish soap with water and scrubbed my front door thoroughly. It was shocking how much dirt and grime came off, even though we power wash our house every year! Rinse the soap off. Any leftover soap residue can prevent paint from adhering properly.

I gave the door a light sanding, making sure to get into all the crevices. The goal wasn’t to strip the paint entirely but to create a slightly rough surface for better adhesion. Wipe the sand dust off with a damp rag (do not skip this part).

I decided to tape off the hardware instead of removing it. Next time I would remove the hardware. I think it would have made for a neater finish.

Small angled brush (I used a 1.5-inch Purdy brush)
Foam roller (I used a 4-inch foam roller for a smooth finish)
Painters tape (if you don’t remove the hardware)
Mix the Paint Well – Once you think you’ve stored the paint enough. . . Stir it some more. You want to make sure the pigments and binders are mixed well.
Use the angled brush to paint any recessed or detailed areas first. My door has indented rectangles, so I carefully trimmed those out.

Once the details were done, I used the foam roller to apply an even coat to the rest of the door.

Apply Additional Coats as Needed – My red door required three coats of yellow paint for full coverage.

While this paint dries fast, waiting a bit longer before closing the door ensures a flawless finish.

One of the best things about Front Door Paint is its quick drying time. Unlike regular latex paint, which can take hours to dry and might stick to your weather stripping overnight, this paint dries in an hour! That means you can get your door painted and locked up before bedtime without worrying about the door sticking to the weather stripping.

This project took about five hours from start to finish, including cleaning, sanding, and painting. But the results? Totally worth it. My front door looks fresh, bright, and updated—all for the cost of a single quart of paint.

If you’re looking for an easy and budget-friendly way to enhance your home’s exterior, I highly recommend tackling your front door next!
If you found this helpful, please share this post on Pinterest, Facebook, or Instagram! Tag me so I can see your front door transformations. Let’s inspire more people to give their homes a fresh new look!

Want to try the same products I used? Check out my Amazon affiliate links in the description. Every purchase supports my blog at no extra cost to you!

Comments
Join the conversation
-
Wow, big difference. Very springy. I love it.
My door is black and I like it for lots of reasons. Things show up better on a black background but I love your door.
Thank you for opening my imagination wouldn’t take too long to paint a door for each season.
You have a wonderful day. stay safe.


























Frequently asked questions
Have a question about this project?