


DIY Wallpaper Hack Using Washi Tape (Rental Friendly!!)

I recently gave our very vanilla military housing powder bath a makeover with "washi tape wallpaper." We moved into our temporary military housing about 2 months ago and began setting up house but we are desperate for color and character in our very neutral home. We will only be residing in our home for 6 months so anything we use to decorate must be very removable! I have been on the lookout for temporary wallpaper and there are some great options out there- but at $60 for 2 square feet I'm just not willing to commit to the price for a six month stay. So, in the end I decided to make my own wall treatment with washi tape.
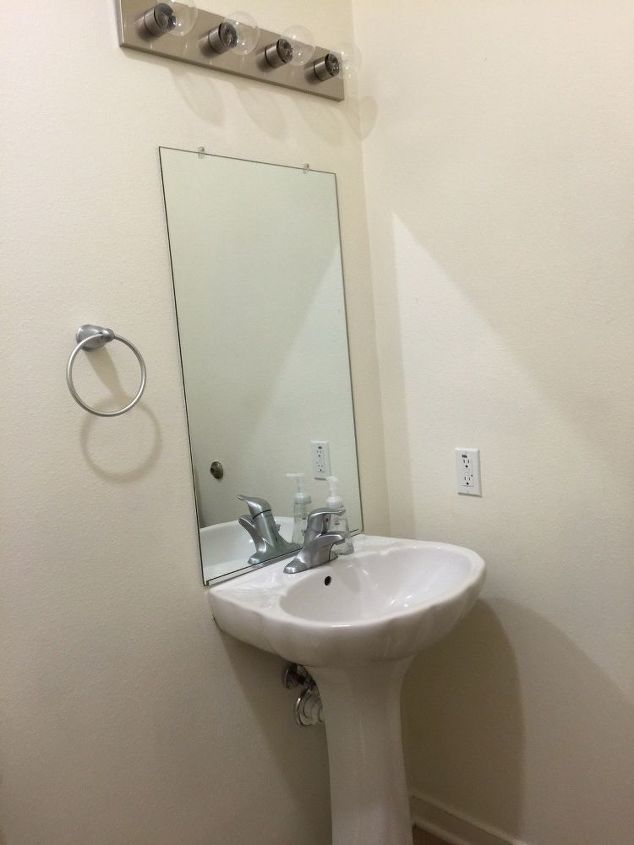
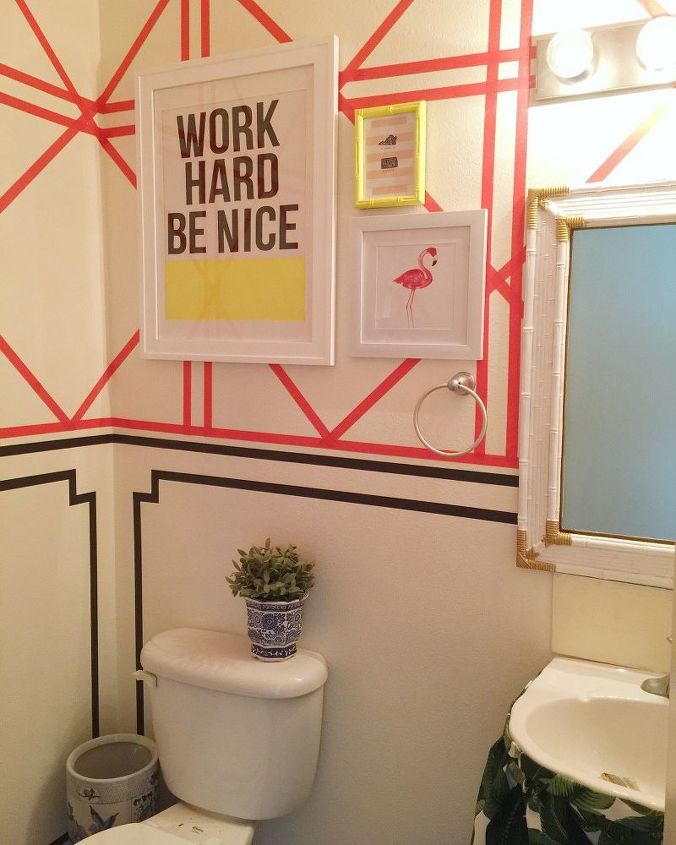
Here is a photo of our bathroom pre-wall treatment. My style is a little preppy, a little traditional and a little hollywood regency and decided that on the top half of my wall I wanted to do a cane pattern and the lower half was to be a faux picture frame moulding.
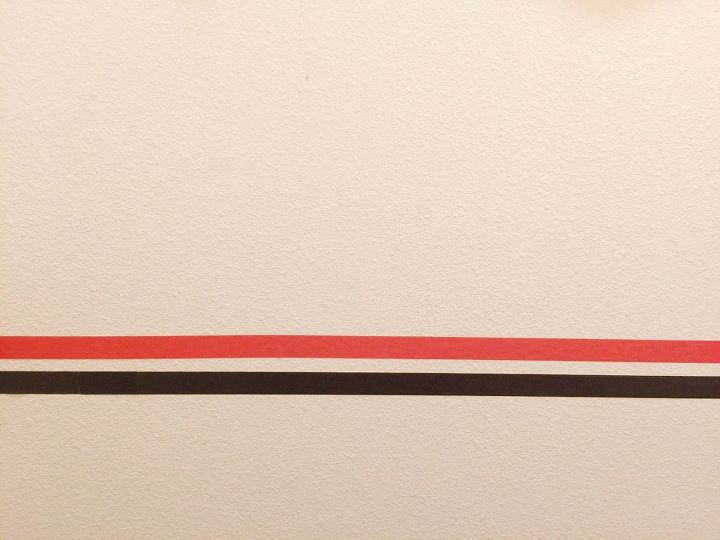
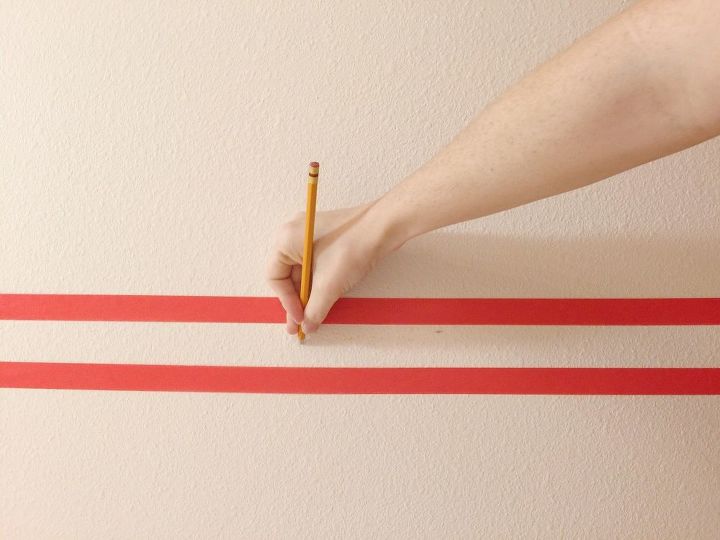
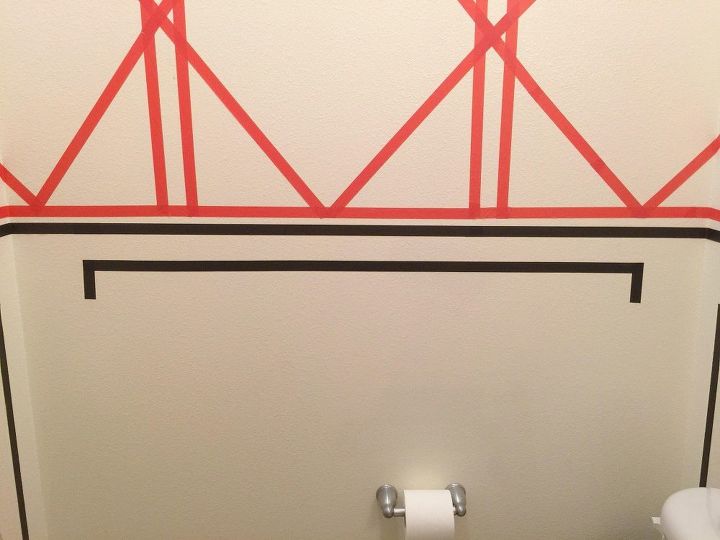
The first thing I did was measure the height of the walls and calculate the circumference of the room. I had decided that I wanted a large cane pattern so with the calculated circumference I broke the wall into equal 26"x 26" squares. I only wanted the cane pattern to be two 26" squares tall so I measured that length from the ceiling and taped my
"mid line" in coral tape around the whole powder bath. Under the coral tape, I taped a black washi tape line around the room to be a faux chair rail.
You will also want to put a piece of coral tape at the very top of your wall all the way around as well, I placed mine about .5" down from the ceiling as that made the top block of the cane pattern exactly 26".

Next, I moved around the room marking a tick mark every 26" with a pencil, then I taped vertical coral lines from ceiling to the mid line on either side of the tick marks about .5" away.
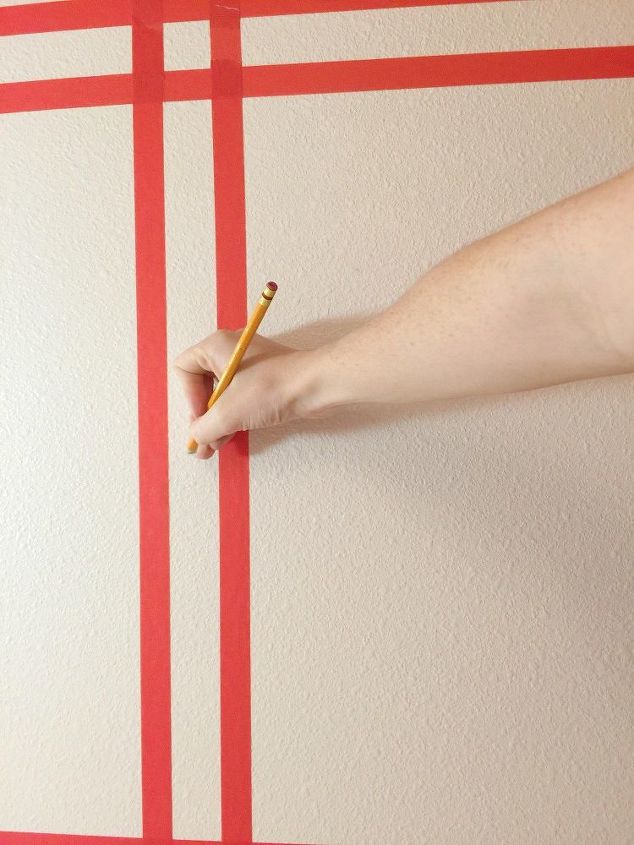
I then marked tick marks where my horizontal tape needed to be. Starting at the mid line I measured 26" up the horizontal tape lines. I continued to do this around the room and then taped the lines using the same procedure used for the vertical tape lines.
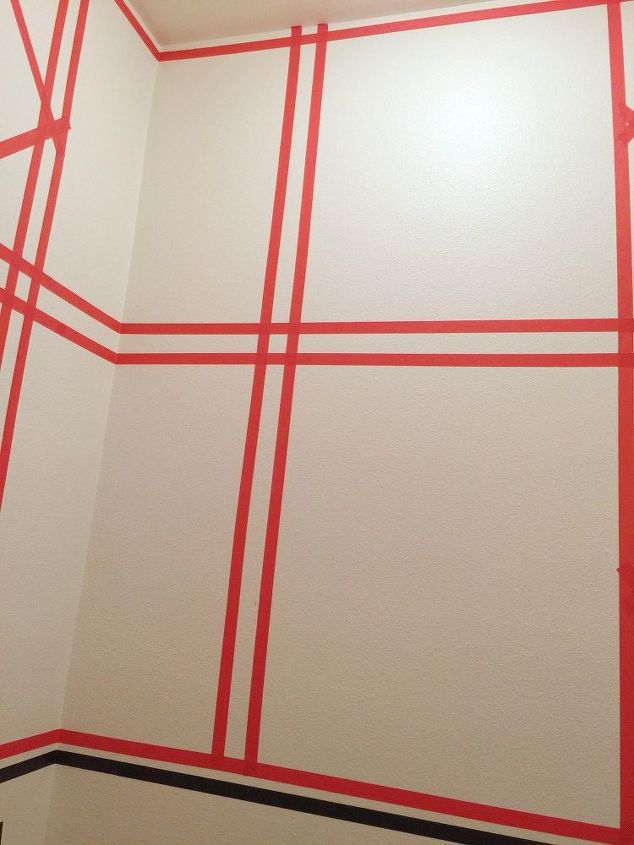
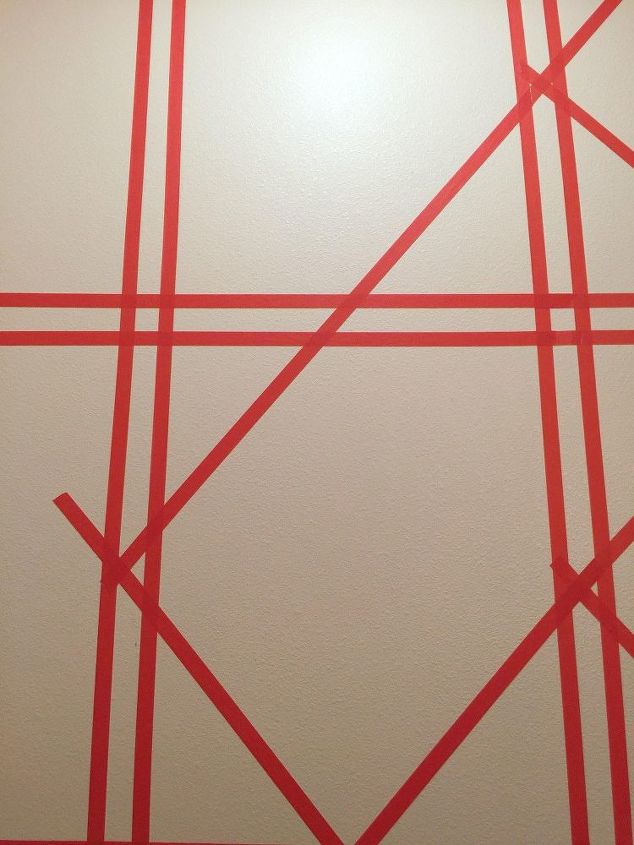
This is how the walls look when the "grid" as I call it is all in place. Sorry about the weird angle, it's a powder bath so it's hard to get a picture in such a tight squeeze.
Next I marked the "mid point" of each side of the squares- I marked the negative space in between the tape lines, as this is where the diagonal tape lines will intersect.
At this point I began to apply the diagonal pieces. I started by adding a little tape at the bottom of the pattern to get my bearings on the pattern, then started to add longer pieces in the middle. I want to point out that it is totally okay to layer pieces- it doesn't affect the overall look.
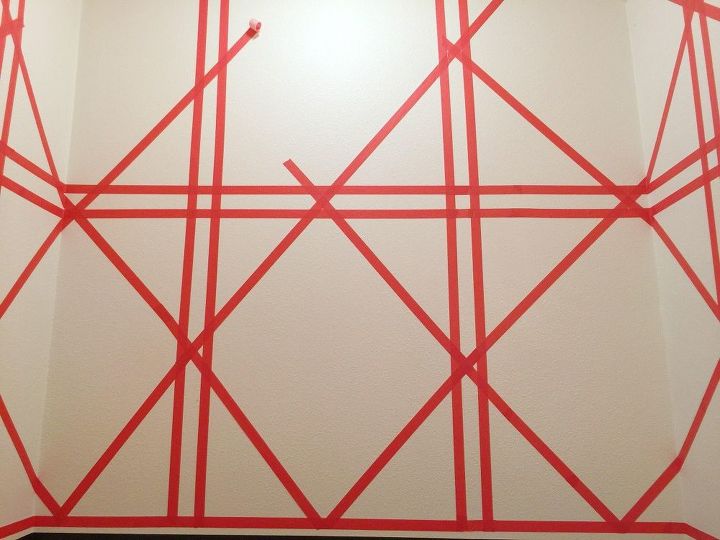
I continued to move around the room adding all the diagonal pieces. The great thing about this project is that it is totally forgiving and the tape can be repositioned at any time.
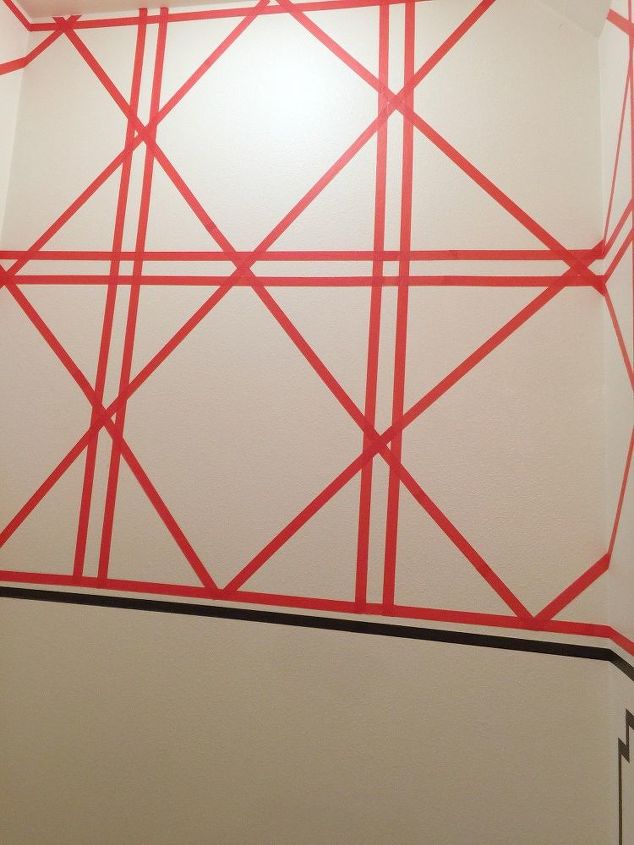
After I finished the cane pattern on the upper area of the wall I started taping the faux picture frame moulding. First I taped the top of the box. Then I cut 8 small equal pieces, applying two to each side of the top of the box, leading downward.

I then added one more to each side facing outward.
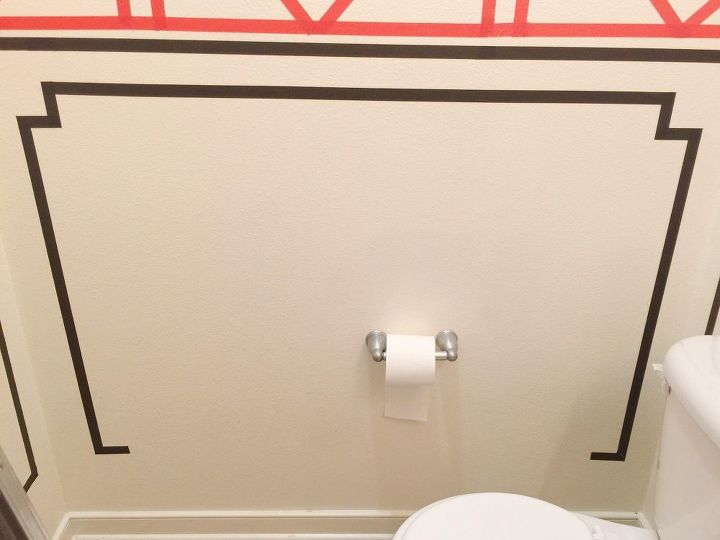
I added two long pieces of tape pointing down, and two more of the small pieces leading inward.
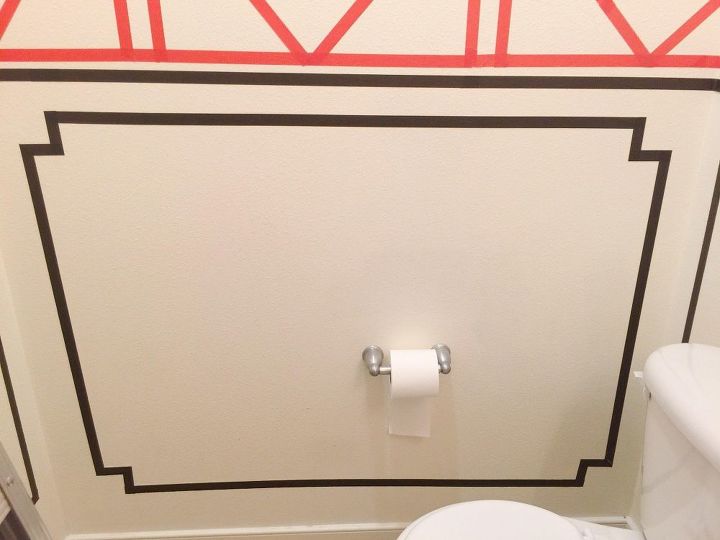
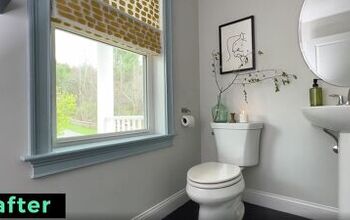
I added the bottom piece of tape too the faux picture moulding to complete the look. I'm so excited about the way the walls look and I could not be more excited to decorate the rest of the bathroom and share the final look!
Comments
Join the conversation
-
I love this! You are very patient. Out of curiosity are you a Math Teacher?
-
Looks great! How did you attach fabric around sink?


Frequently asked questions
Have a question about this project?
I love the way you decorated........it is so pretty. The sign??????? Work hard be nice......why in a bathroom??