


Shower Tile Installation Tools (QUICK TIPS)

5 Materials
Today you’ll get five tool recommendations that will make shower tile installation easier.
I got these from my Bathroom Repair Tutor co-founder Steve.
If you’re new to HRT, Steve is a 14 year veteran of bathroom remodeling.
He’s awesome at tile work and does high-end bathroom installations.
So you’d better listen when he talks…just kidding, but seriously, I listen!!!
Here’s a story: years ago I did my first bathroom remodel.
All was good during the first day.
But then I ran into a wonky shower window and made some goofy tile cuts.
To this day I cringe at some of the tile work in that bathroom.
I’m pretty sure the project would have been better had I used the tools in today’s tutorial.
Here’s the supply list you need
Laser Level
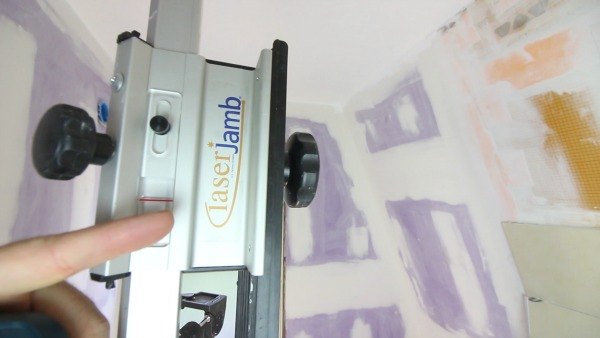
Laser Jamb
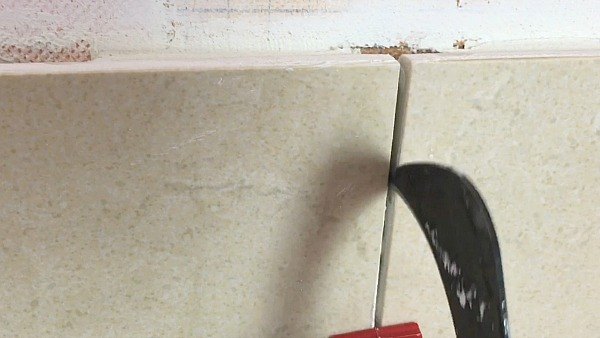
SeamClips
Horseshoe Shims
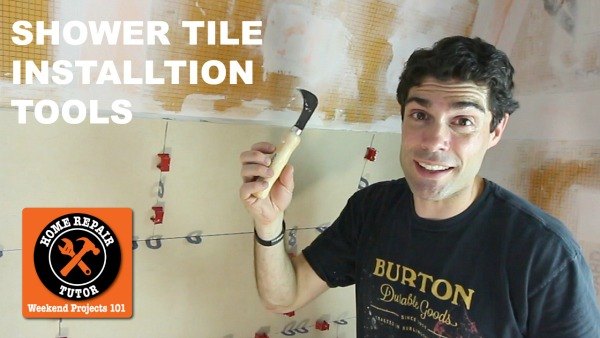
Carpet Knife
Well, I guess that spilled the beans.
But why do you need these tools?
I’ll explain…
I got these from my Bathroom Repair Tutor co-founder Steve.
If you’re new to HRT, Steve is a 14 year veteran of bathroom remodeling.
He’s awesome at tile work and does high-end bathroom installations.
So you’d better listen when he talks…just kidding, but seriously, I listen!!!
Here’s a story: years ago I did my first bathroom remodel.
All was good during the first day.
But then I ran into a wonky shower window and made some goofy tile cuts.
To this day I cringe at some of the tile work in that bathroom.
I’m pretty sure the project would have been better had I used the tools in today’s tutorial.
Here’s the supply list you need
Laser Level
Laser Jamb
SeamClips
Horseshoe Shims
Carpet Knife
Well, I guess that spilled the beans.
But why do you need these tools?
I’ll explain…
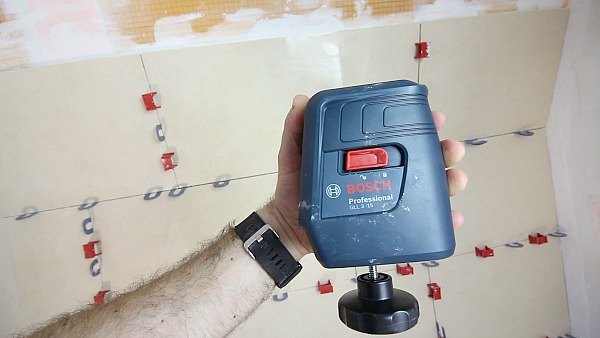
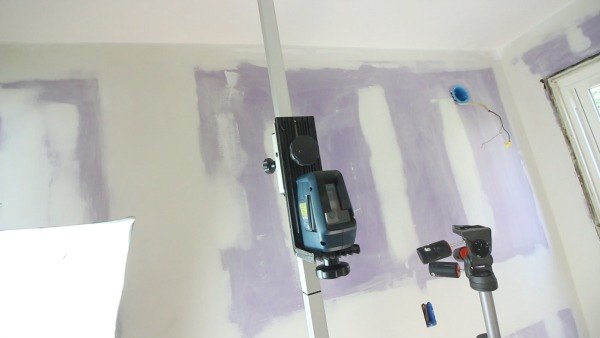
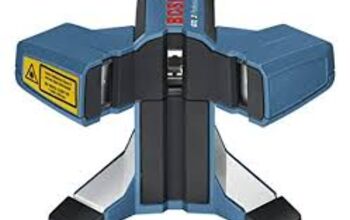
Here’s the Bosch laser level Steve recommends.
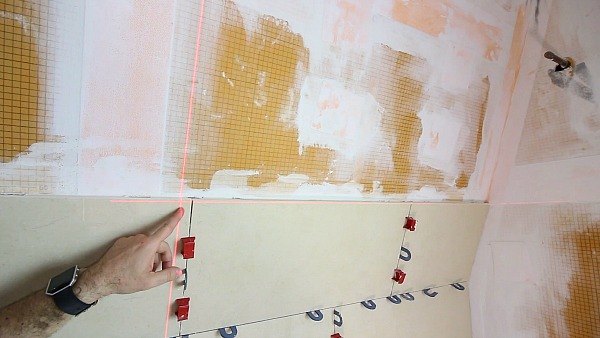
So you can line up the vertical tile joints with each other as you move across the shower wall.
The first time I saw Steve use this tool I was like ‘what the heck is that?’.
One is on the floor and the other on the ceiling. It uses pressure to hold itself in place.
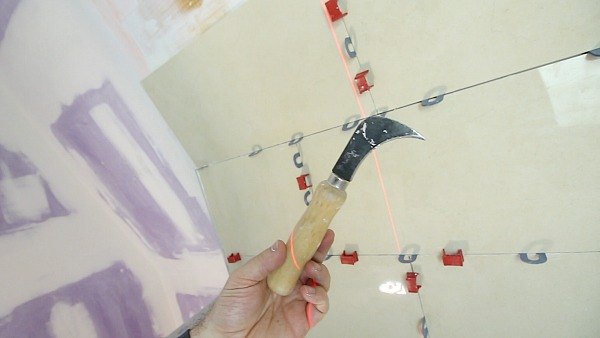
After editing hours and hours of tiling videos for Bathroom Repair Tutor one thing became clear: the carpet knife is a must.
Also, when you use a carpet knife to remove excess thin-set it’s not a bad idea to have a damp sponge nearby.
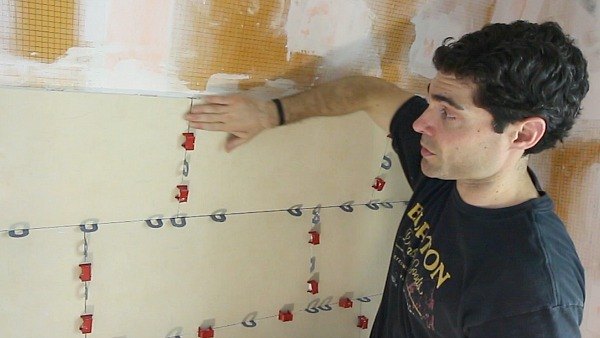
Attention to detail is everything when tiling and Tuscan SeamClips help you stay on track.
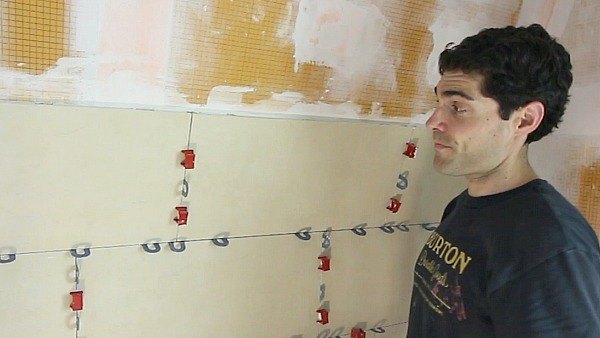
Horseshoe shims are great for this.
{
"id": "3552659",
"alt": "",
"title": "",
"video_link": "https://www.youtube.com/embed/DlEBATK-zTk",
"youtube_video_id": "DlEBATK-zTk"
}
{
"width": 634,
"height": 357,
"showRelated": true
}
Well, what do you think?
Comments
Join the conversation
2 comments
-
Too much info for the DIY! A regular level is prefect for the DIY and something they probably have. Regular tile spacers work just as good. A popsicle/craft stick works great in removing excess thinset. DIY's want to save money not spend it on some thing they may only use once. That's why they do the jobs themselves and they come out looking great with basic tools.
-
Hey nice DIY. New here. I see you used normal cross line one here. Can you tell, should i go with just normal cross line one or Laser levels dedicated for tiling ? Just like Bosch GTL2 & Bosch GTL3. I just want a simpler solution.


Frequently asked questions
Have a question about this project?