


DIY Magazine Holder
45 Minutes
Easy
Do you need a DIY magazine holder?
We built a simple DIY magazine holder to keep that reading material secured. This project was completed using scrap wood from our shop pile. This DIY magazine holder project took about 45 min.
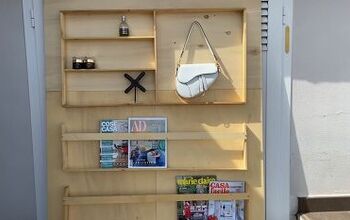
First, we measured our DIY magazine holder to the length and width of the tallest/widest magazine we subscribe too (House Beautiful), and added extra space to drop the magazine into the DIY magazine holder with ease.
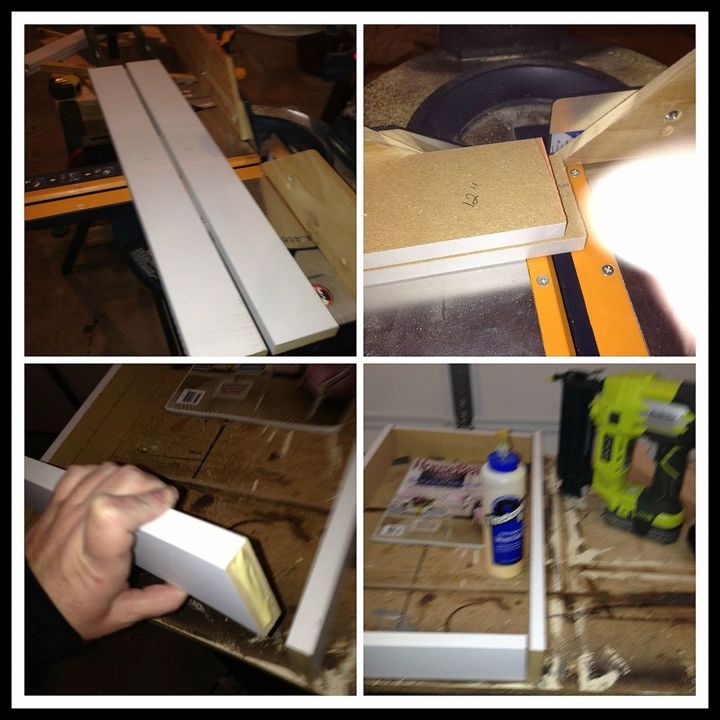
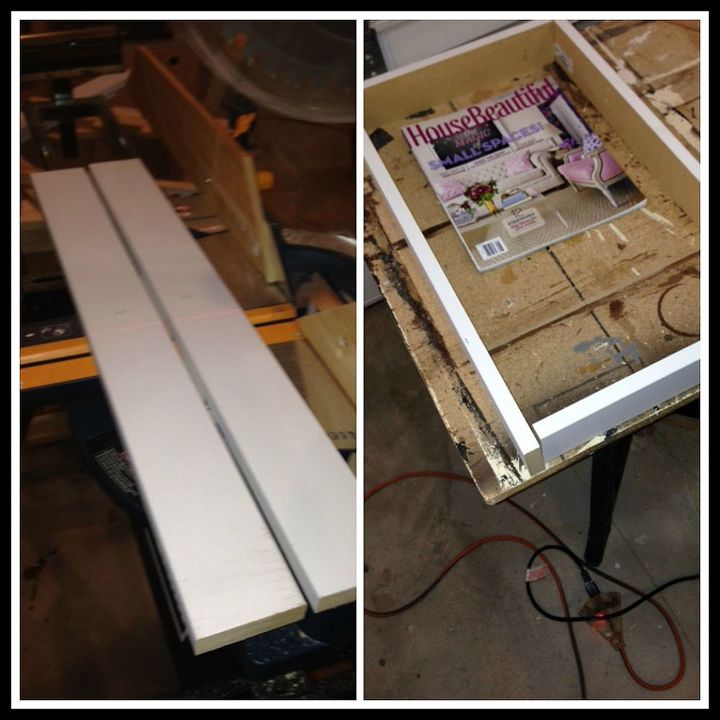
Next we started cutting. Cut 4-1×3’s (2-1×3′s for the sides at 20 ½ “Long, and 2-1×3’s for the top and bottom of the square at 12” Long). We used Titebond glue and our Ryobi nail gun to secure them into a square which will form the DIY magazine holder.
Then, we started to design the front DIY magazine holder. We cut ½” flat pine scrap at 12” long for the bottom of the rack. The next cut was a 1×2 cut 12” long for the top of the front holder to keep the magazines from falling out. We completed the design by adding three spindles cut 6 ½” long and spaced them 2 ½” apart starting from each end, and centering the middle spindle.
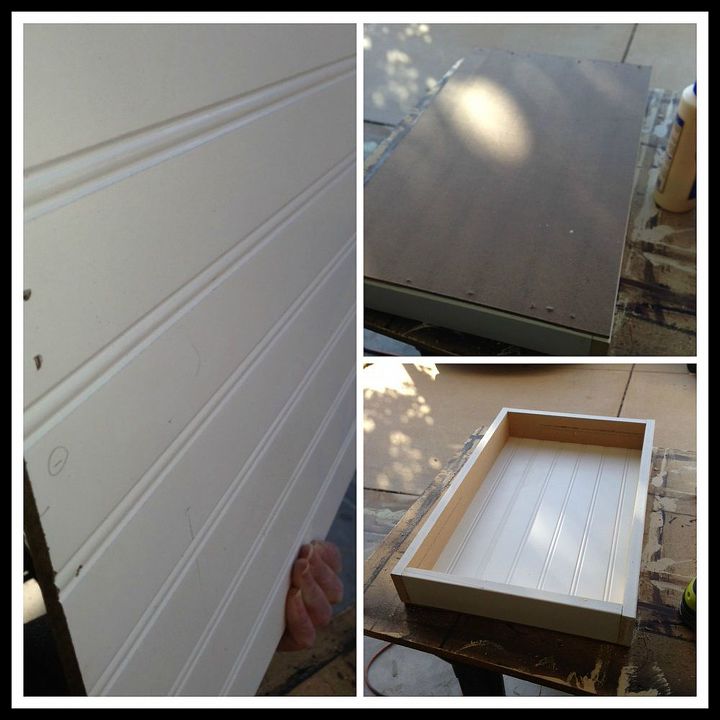
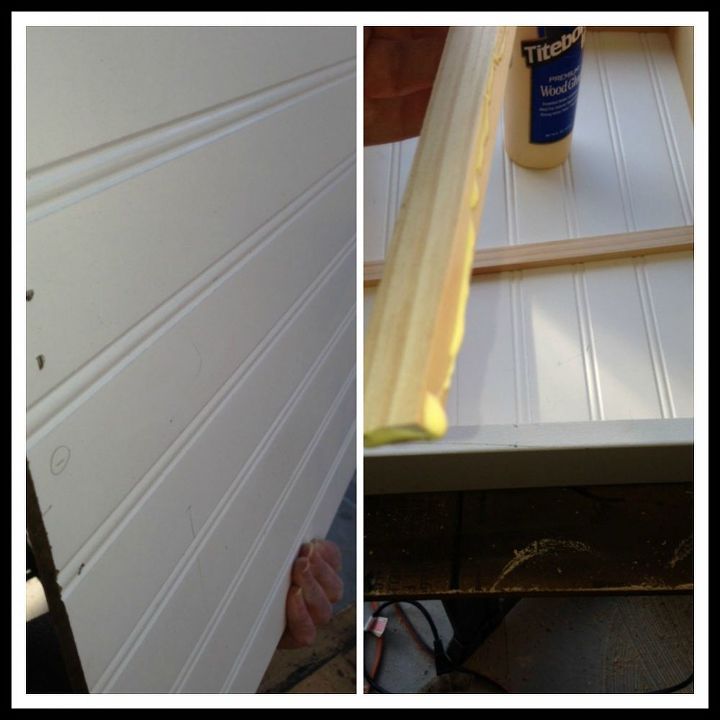
Finally, the back of the DIY magazine holder was constructed using a piece of bead board painted white, left over from another build. We cut the bead board for the cover the back of the magazine holder to 20 ½” Long by 13 ¼” wide. We attached using our Ryobi nail gun – 3/8” nails, before nailing we added a bead of Titebond wood glue for that extra holding power ;-)
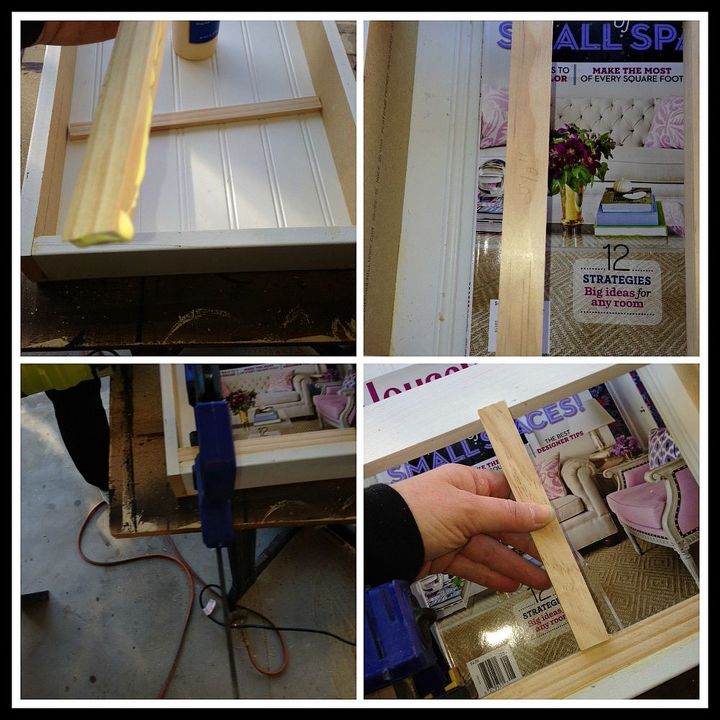
To finish the look we added a piece of cove molding we had left in our scrap box. We simply measured to each end (top pieces are 13 ¼” long and the sides cuts are 20 ½ Long). Cut each side of the cove at a 45 degree angle to give that finished picture frame look.
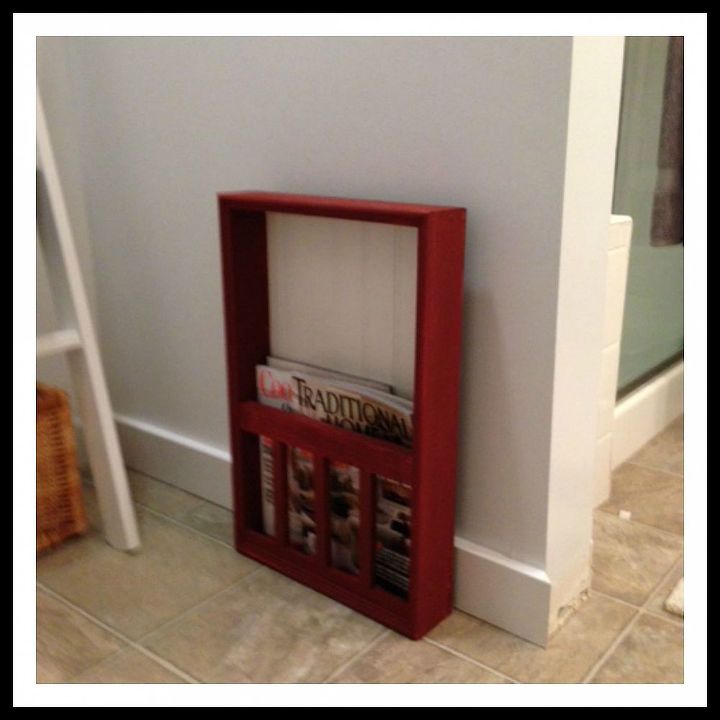
Completing the project we primed and painted the frame as shown above with Annie Sloan Empress Red chalk paint, leaving the bead board white. We choose the red color to match a barn wood frame given to us from Reclaim Renew (shown below) we wanted the two pieces to be the pop our grey and white room needed. We hung by drilling two holes through the bead board and attached to studs in our wall. Make sure you go over the screw heads with a little white paint so they blend into the piece.
This was a quick project that cost us nothing but time. Every piece of wood in this little QT is from our scrap pile, the same scrap wood pile we made our Rustic Wood Frames and Towel/Dowel Rack projects that were featured on Bob Vila Nations. Keeping all this extra wood is handy for small projects, and way better than tossing into the trash.
Check back tomorrow and see what else we can produce from this pile of scrape wood that’s slowly disappearing! Please find us on Facebook and give us a like to grow there - and we so appreciate all of you reading our Articles on Hometalk! Happy New Year everyone!
Linda :-)
We built a simple DIY magazine holder to keep that reading material secured. This project was completed using scrap wood from our shop pile. This DIY magazine holder project took about 45 min.
First, we measured our DIY magazine holder to the length and width of the tallest/widest magazine we subscribe too (House Beautiful), and added extra space to drop the magazine into the DIY magazine holder with ease.
Next we started cutting. Cut 4-1×3’s (2-1×3′s for the sides at 20 ½ “Long, and 2-1×3’s for the top and bottom of the square at 12” Long). We used Titebond glue and our Ryobi nail gun to secure them into a square which will form the DIY magazine holder.
Then, we started to design the front DIY magazine holder. We cut ½” flat pine scrap at 12” long for the bottom of the rack. The next cut was a 1×2 cut 12” long for the top of the front holder to keep the magazines from falling out. We completed the design by adding three spindles cut 6 ½” long and spaced them 2 ½” apart starting from each end, and centering the middle spindle.
Finally, the back of the DIY magazine holder was constructed using a piece of bead board painted white, left over from another build. We cut the bead board for the cover the back of the magazine holder to 20 ½” Long by 13 ¼” wide. We attached using our Ryobi nail gun – 3/8” nails, before nailing we added a bead of Titebond wood glue for that extra holding power ;-)
To finish the look we added a piece of cove molding we had left in our scrap box. We simply measured to each end (top pieces are 13 ¼” long and the sides cuts are 20 ½ Long). Cut each side of the cove at a 45 degree angle to give that finished picture frame look.
Completing the project we primed and painted the frame as shown above with Annie Sloan Empress Red chalk paint, leaving the bead board white. We choose the red color to match a barn wood frame given to us from Reclaim Renew (shown below) we wanted the two pieces to be the pop our grey and white room needed. We hung by drilling two holes through the bead board and attached to studs in our wall. Make sure you go over the screw heads with a little white paint so they blend into the piece.
This was a quick project that cost us nothing but time. Every piece of wood in this little QT is from our scrap pile, the same scrap wood pile we made our Rustic Wood Frames and Towel/Dowel Rack projects that were featured on Bob Vila Nations. Keeping all this extra wood is handy for small projects, and way better than tossing into the trash.
Check back tomorrow and see what else we can produce from this pile of scrape wood that’s slowly disappearing! Please find us on Facebook and give us a like to grow there - and we so appreciate all of you reading our Articles on Hometalk! Happy New Year everyone!
Linda :-)
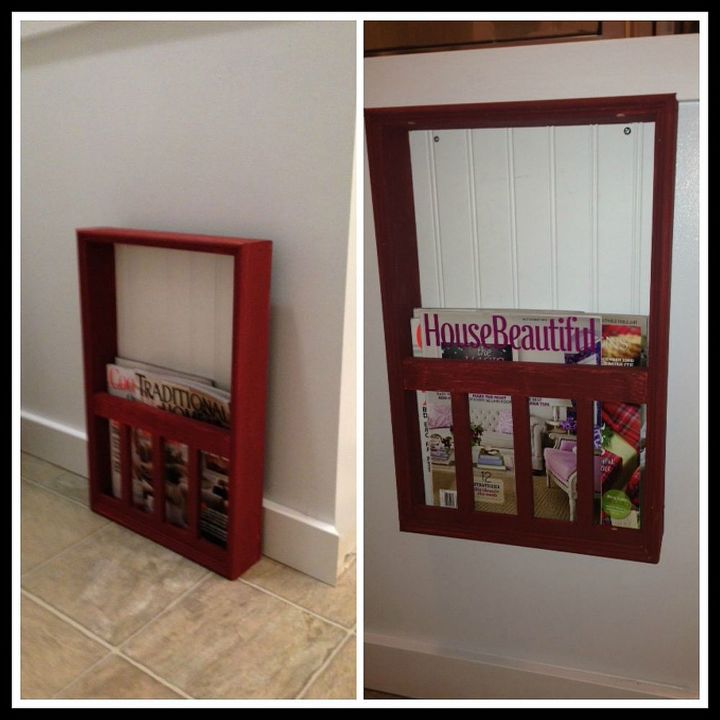
Finished Magazine Holder for Master Bathroom.
We started by cutting MDF for our magazine holder - simple straight cuts.
I measuring the wood for our holder using the largest magazine we had.
Once I found the magazine I added bead board to the back of the frame we put together.
After adding the bead board, I added the front wood pieces all measured the same length and cut to fit the size we needed. This can be done with a simple miter box and saw.
Installing the pieces for the front of the holder.
Finished magazine Holder

Want more details about this and other DIY projects? Check out my blog post!
Comments
Join the conversation
3 comments
-
My bathroom needs this ,thanks.
-
So glad you enjoyed the post Marlene


Frequently asked questions
Have a question about this project?