


Refinished Octagon Table

by
Zest it Up
3 Materials
$50
1 Day
Medium
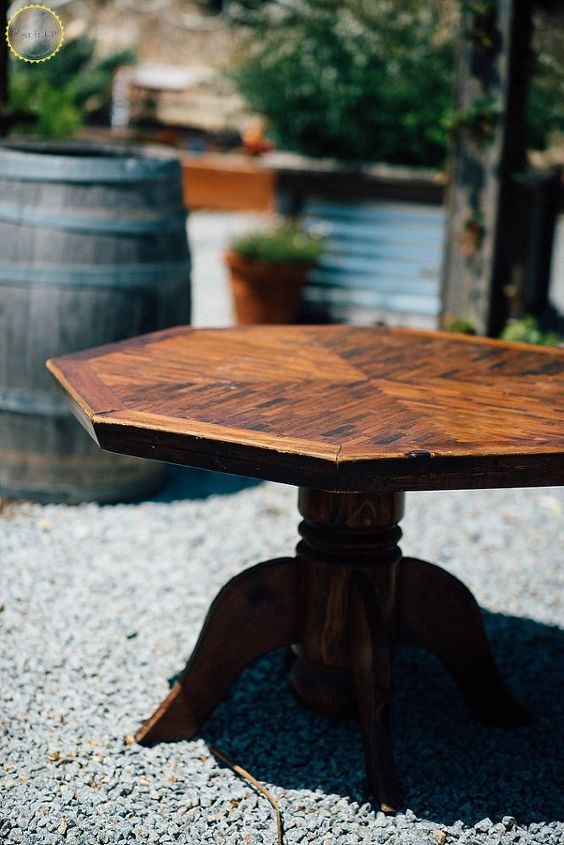
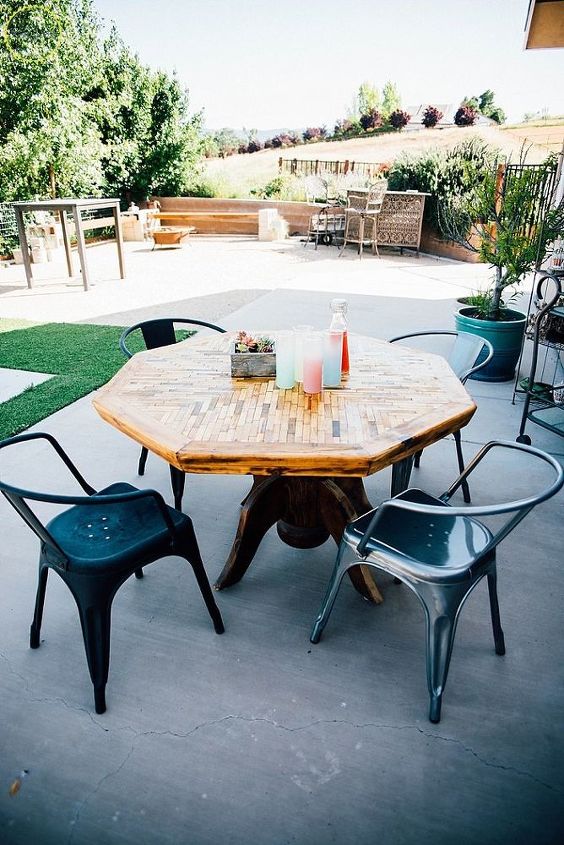
I am soooo darn excited to share with you my new treasure from the swap meet. An octagon beauty with all the loveliness of inlayed wood grain that a girl could ever want!
Walking the stalls of our outdoor swap meet in San Luis Obispo, I first saw the sexy curves of this table’s base. I made a beeline for it. Honestly, I didn’t really have a natural spot in my home for another table…but for such a thing of beauty, I was more than willing to puzzle out a use. I decided that for the steal of $35, I was going to dare to use it for my patio. It would make such a gorgeous picture, and I loved that my family of 5 would enjoy it along with tons of giggles and good food this summer.
Photo Cred: Anya McInroy
Supplies
- sander
- sandpaper (medium grit and fine grit needed)
- wood filler and spatula
- rag
- Spar Varnish, satin finish
- sponge brush
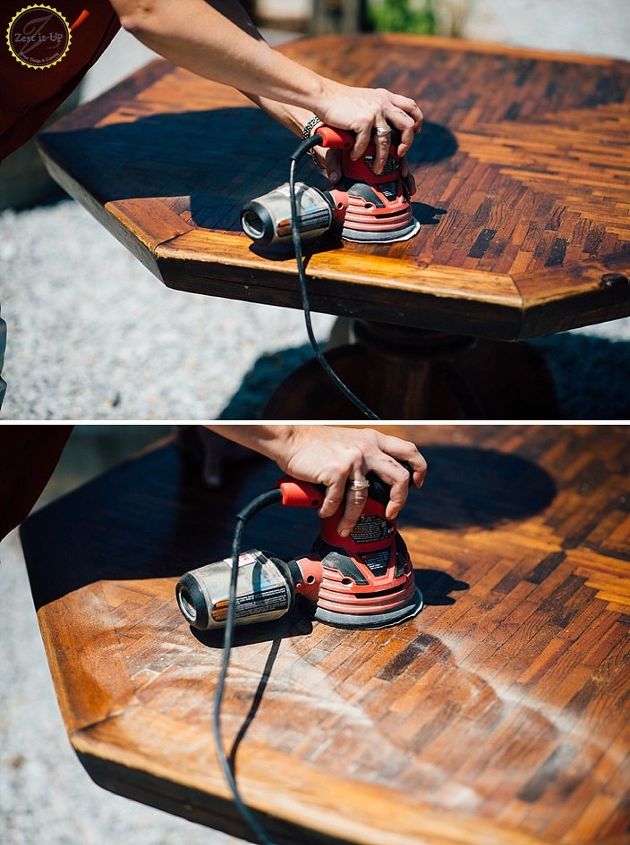
Since some of the inlay was needing a bit of wood filler in the cracks to keep it “weather proof”, I decided to sand the old finish completely off. When seeking out to weatherproof a piece of wood furniture, you merely need to roughen up the surface a bit in order to make the Spar Varnish stick. But, in my case, I wanted to get down to the naked wood. If that is your goal, then start with a coarse sandpaper that will have the grit to quickly work through the layers of old varnish and stain.

Once my table was essentially naked, I used a fine grit sandpaper to smooth the surface to a “baby’s bottom” finish. Next, I grabbed some wood filler and began filling any cracks in the inlay. Basically, I didn’t want any puddles of morning dew to form in the cracks while my table resided outside. My mission was to keep water from raising havoc!
Warning: Filling tiny cracks can become an obsessive preoccupation!
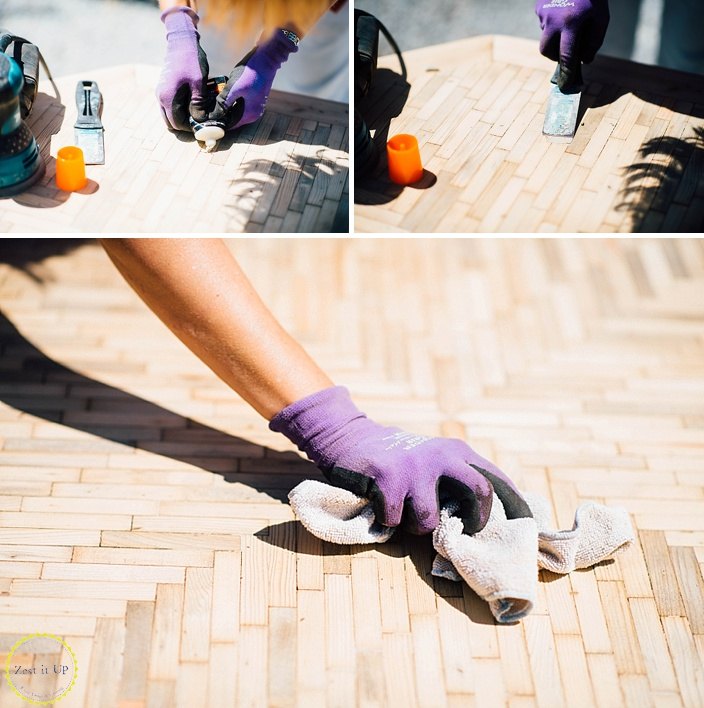
Once the filler is dry, go over the surface once more with a fine grit sandpaper. Then, get your surface dust-free with a rag. Time to Spar Varnish. If this product is new to you, I am excited to be sharing with you about it! It is one of my favorites. It is actually the product that they use on boats to protect them from sun and sea. If it can protect a boat, then I feel confident that my table is in good hands. In fact, I have a wooden outdoor L-shaped bench that I used this stuff on 4 years ago and it still does not need recoating!
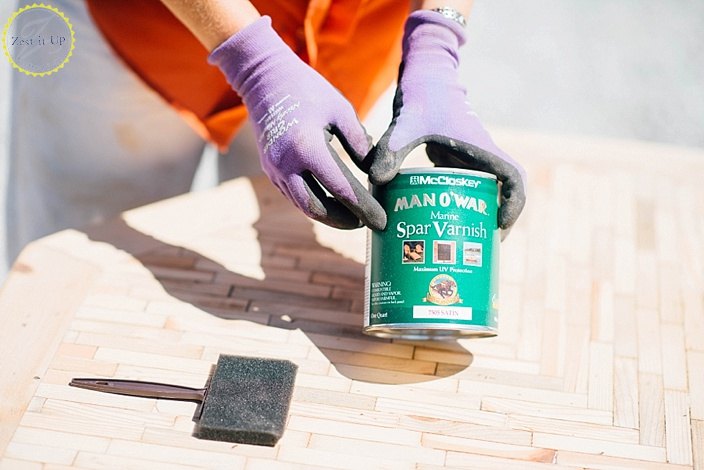
With this product, make sure to not shake it, or you will have lot’s of tiny bubbles in your finish. Using a sponge brush, gently spread a thin coat of the Spar Varnish. This is a job of patience, y’all.

You must let the first coat dry for 24 hours before you lightly sand it and give it another coat. I like to give at least a total of 3 coats to a piece of wood furniture before it takes up residence outside. With a bit of patience and know-how, your furniture will look gorgeous for the long-haul.
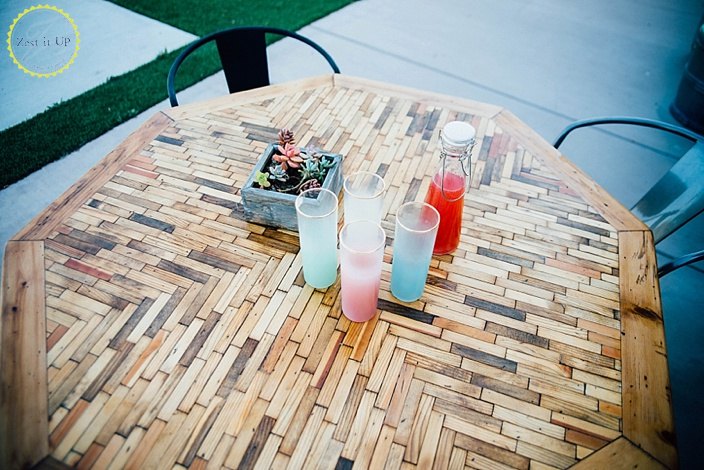
I don’t think I could be more in love with the beauty of this refinished wood! Hearts and stars in my eyes for sure!
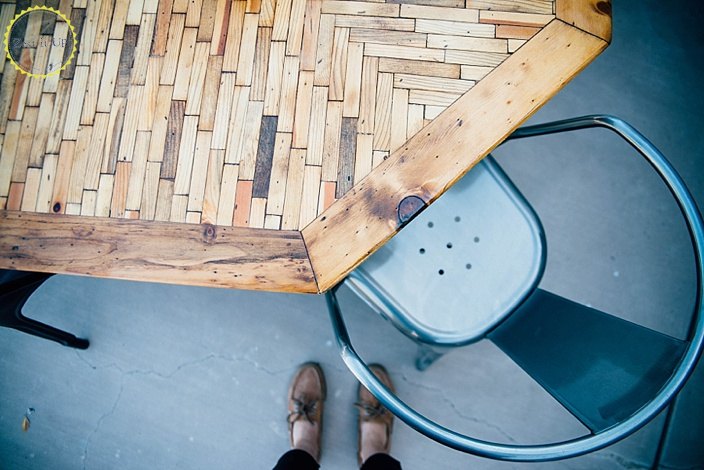
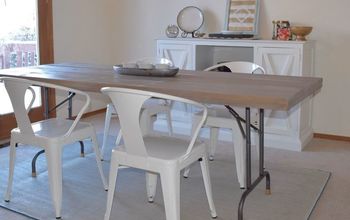
Pulling up some Tolix chairs, we are ready for some lovely alfresco nights!
Cheers to great finds and a little furniture upcylce!
xoxo,
Chanda
Want more details about this and other DIY projects? Check out my blog post!
Comments
Join the conversation
2 of 20 comments
-
Great job ! It’s perfect .
-
Love this!


Frequently asked questions
Have a question about this project?
Did you accent stain a few pieces and edging? Or was that the random wood colors coming through.
Did you accent stain a few pieces and edging? Or was that the random wood colors coming through.
Did you varnish the underside too, or just the top?