


Add More Storage: DIY Custom Cabinets for a Bathroom
In my quest to completely makeover our main floor bathroom, one step of many, I added a bunch of storage cabinets to replace a useless tub. But not just any cabinets, ones that have a unique look to them.
Now, before you think I'm ridiculous for going from full bath to powder, know we have other full bathrooms. This house used to be a two flat. And this is right off the kitchen, we don't need a tub there. Awkward.
We needed more storage, not more tubs. The point here is to show how one can expand storage in a room by making custom cabinets.
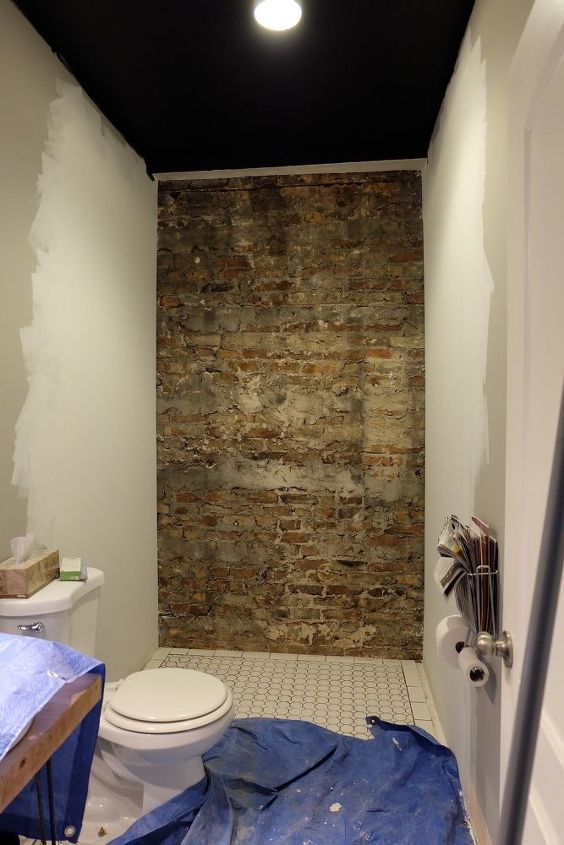
Here's after I took the tub out and discovered the 1890's brick wall hidden behind the tacky tile. Super cool look and I opted to leave it exposed. So then came the cabinet design:
The entire premise of this is that you have the ability to change things in your home and make stuff more workable for your needs plus also look cool too, not just solely be functional. Things don't have to be boring!
Again, this project is only one part of a complete bathroom redo -- please come on by the blog to see how the whole project unfolded by clicking the link at the end of this post below the materials.
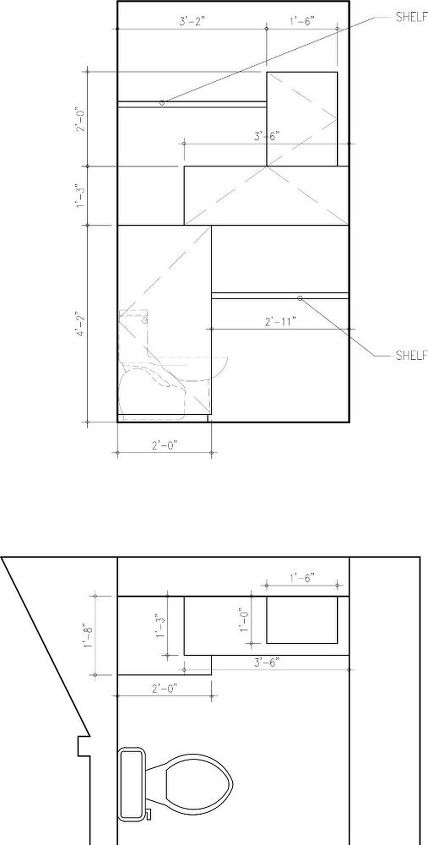
You don't need fancy software to do this, just a pencil and paper and some great ideas; I created a design and a plan.
And then oh, right, yes, I had to build them too. Yikes. So that part of getting started took a while, getting past the fear of trying to build nice cabinets without rock star carpentry skills.
Since this was the last element required for the whole bathroom redo (check out the vanity I made early in the process here!), the husband was itchy for me to wrap it all up.
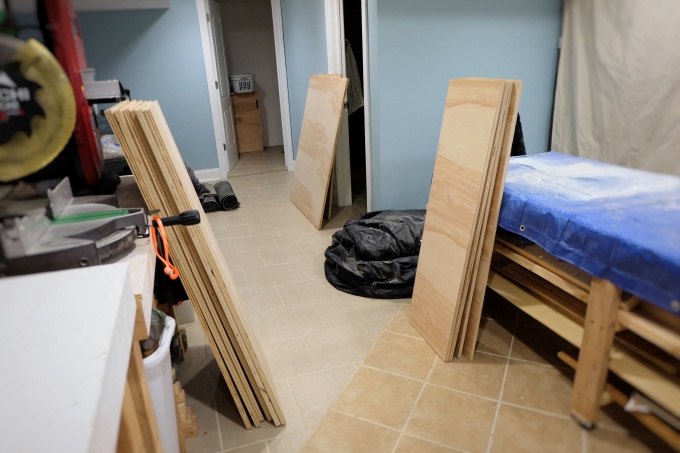
How did I do this with no table saw? I bought the wood at Home Depot where the friendly guy cut most of it for me. My materials list will be below for you.
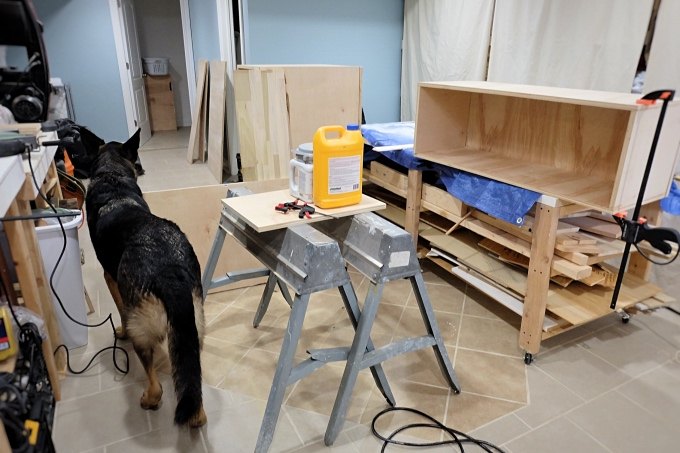
So it was set to work time assembling the cabinet boxes. Finn dropped by to inquire why I was not upstairs petting his tummy instead.
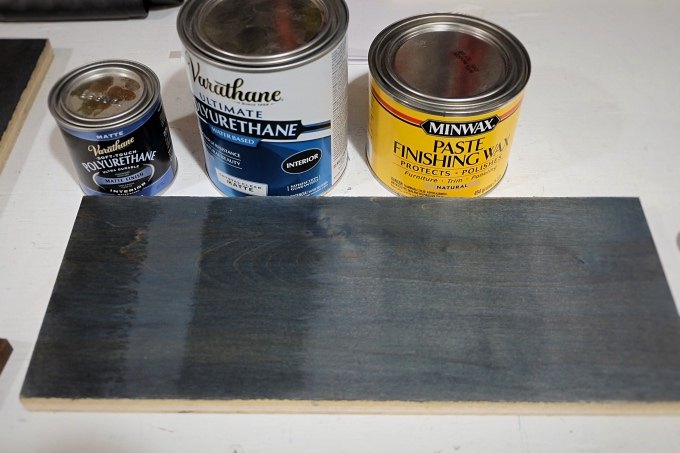
The boxes went together relatively quickly so then it was time to test stain and sealers. I used stain I had from our kitchen cabinet project by PureColor and went with paste wax to seal.
Be sure to come on by my blog, Flipping the Flip, for the two part series on this project and get all the nitty gritty details! The link to the second part is below.

I stained the decorative trim elements in Kona stain by Varathane. Here we see everything drying. Fascinating, right? Watching stuff dry? Heh.
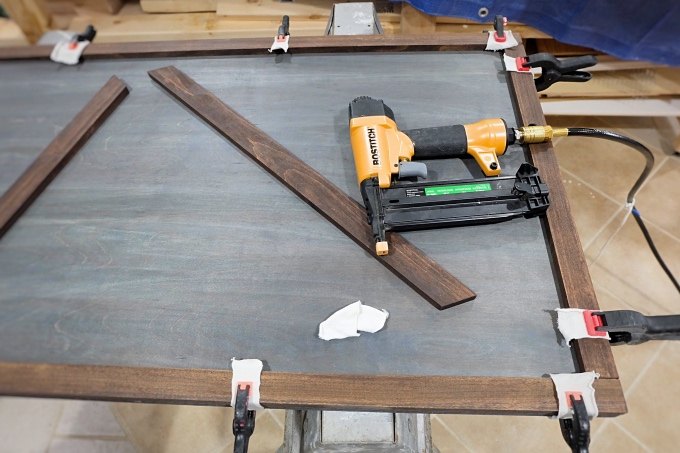
Next I cut the decorative bits per my design, stained the ends, then attached them to the doors from behind, inside the doors so there would be no nail divots. Gorilla glue was also my friend here.
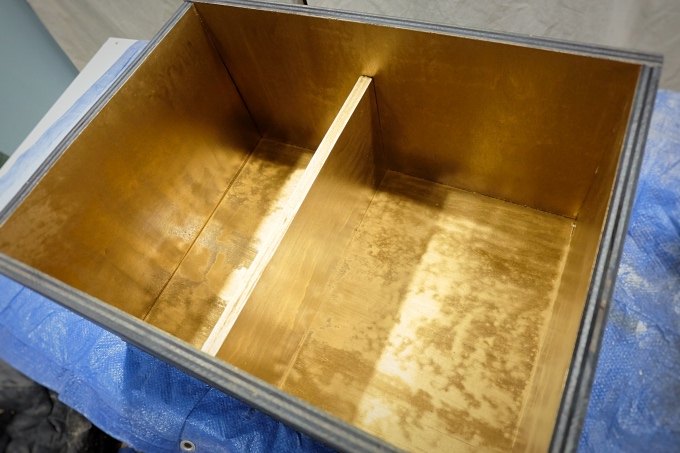
My sweetheart Mike was the one who decided the insides of the cabinets should be gold to match the wallpaper (you gotta come by the blog at least to see the wallpaper). I doubted this decision but alas, he was right, that clever guy! Came out pretty darn cool.
This was one coat of oil based gold paint on the unprimed plywood. Looks like gold leaf, yeah? Neat!
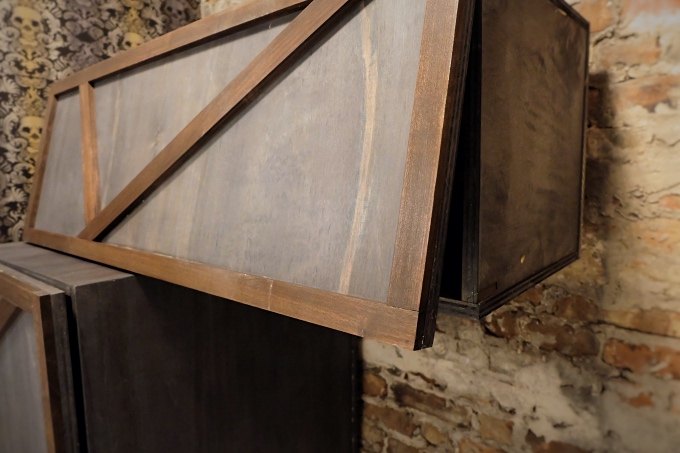
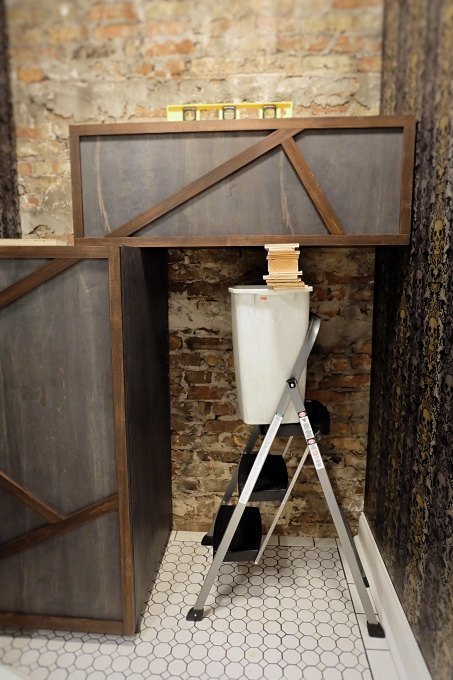
Final assembly was next, putting on the doors and getting it all in the room.
Among a slew of other things, I screwed up this door, putting it on upside down and it overhung the edge therefore would not close. But nothing was going to slow me down now.
Not even a lack of helping hands. Don't try this at home.
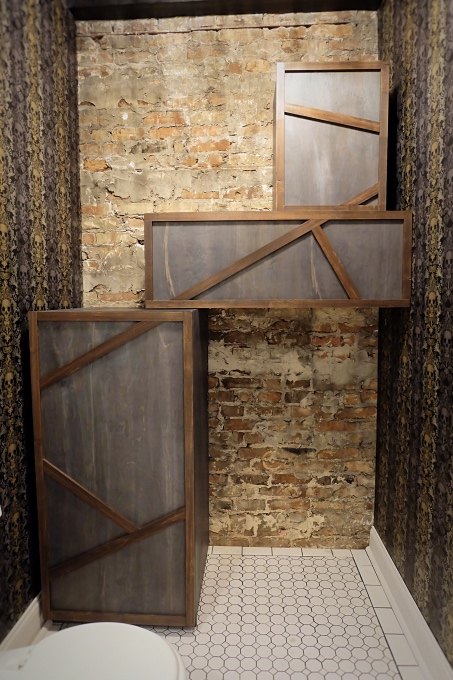
All the doors went on, all the cabinets went in, and I am finally, after four long years, are near complete on this whole bathroom redo!
The bathroom is now way more functional as a powder with ample storage than as a full with a wasted bathtub. And the cabinets look cool too! Makeover redo near complete, yay!
Be sure to click the link below for great tips along with all sorts of other fun stories over on my blog!
Resources for this project:
See all materials


Comments
Join the conversation
-
MOST people have only ONE bathroom, I dont think I could do this for that reason, and I think that the majority won't be able to.
-
I love it!! Very creative!


Frequently asked questions
Have a question about this project?
I don't understand exactly whats going on. Can you take a picture of the whole bathroom together
Are they NEVER going to bath o shower?
Your creativity clearly isn't for the masses, but I love to see what other people come up with,even if it might not be my taste. There's always a part of a project that translates into a glimmer of a new idea. In this case, that brick wall is everything and all those rich colors really speak to me! And then there's Finn, cause who am I kidding?? He's the star of the show!!