


Nine DIY Projects That Will Change Your Home in a Matter of Minutes

Is your home in need of some added style? Try out as many of these nine DIY projects as you want. Each of them is really simple to carry out, with a minimal list of materials and very little time needed. See how much fun you can have while you add some special touches to your home.
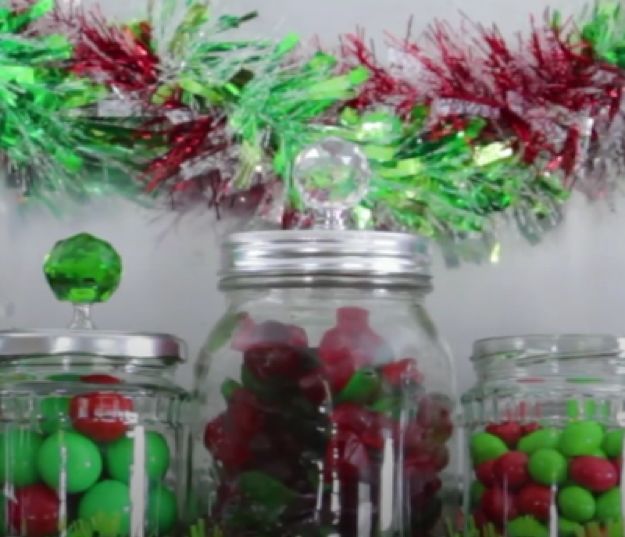
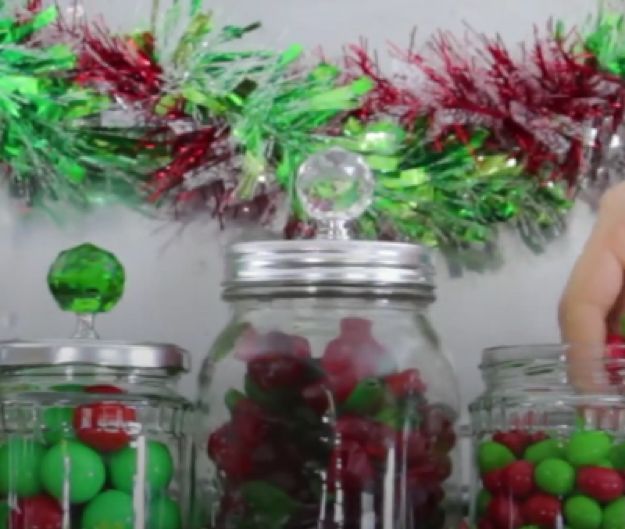
Candy Jars
Tools and Materials
- An empty jar
- Drill
- Doorknob
- Spray paint (optional)
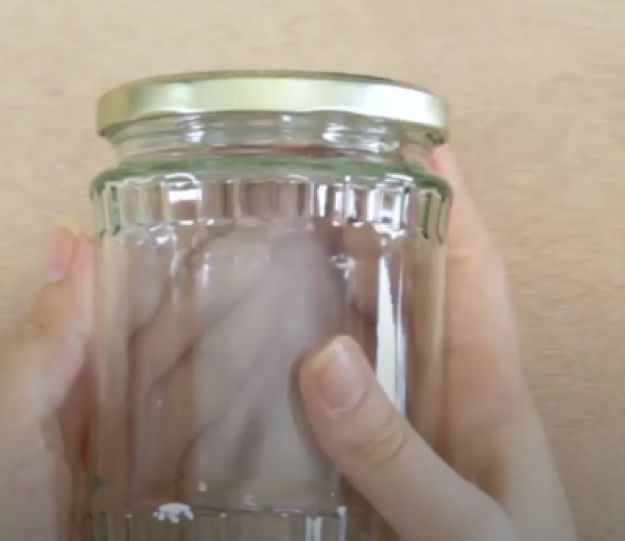
Step 1: Gather Your Materials
The main item here is the jar, and it is also worth looking for an attractive doorknob. You might want to use spray paint for the lid, especially if you have a few jars with lids of different colors.
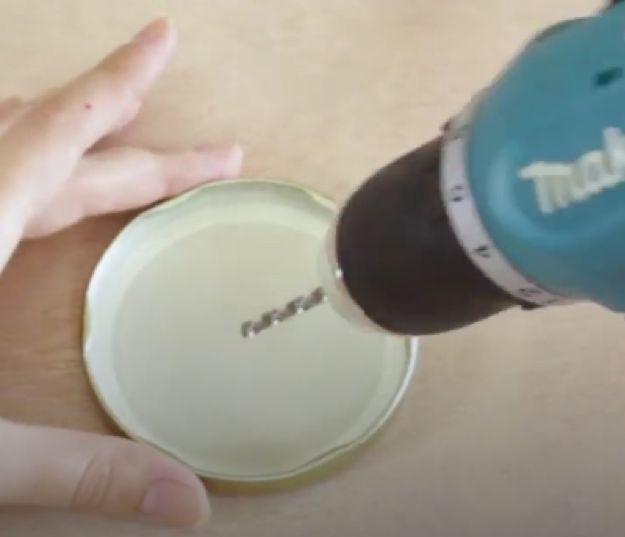
Step 2: Drill a Hole in the Top
I drilled a small hole in the lid, to allow me to attach the doorknob in the next step. It's important that you check how big you need this to be before starting.
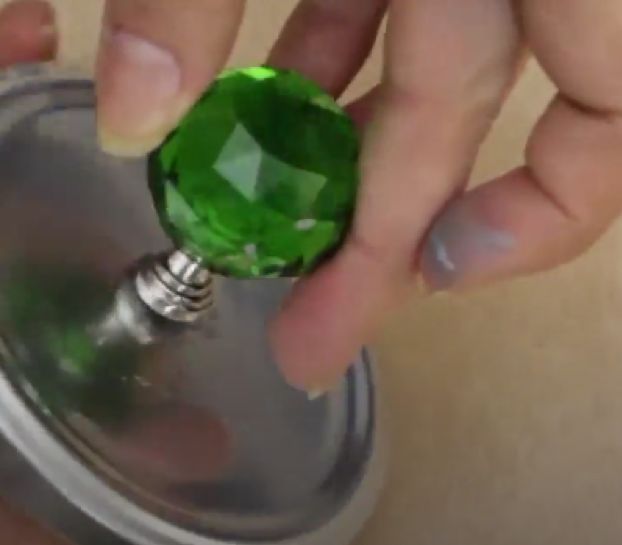
Step 3: Attach a Handle
My next step was to attach the doorknob, to use it as a handy handle. You should be able to do this by adding a screw to the underside of the lid and then screwing in the handle on the top.
Step 4: Fill with Candy
I used this jar to store candy. Of course, you can use it for other things if you prefer, but I think that it looks perfect with pieces of candy in it, or perhaps some fairy lights to add some holiday cheer to your mantlepiece.
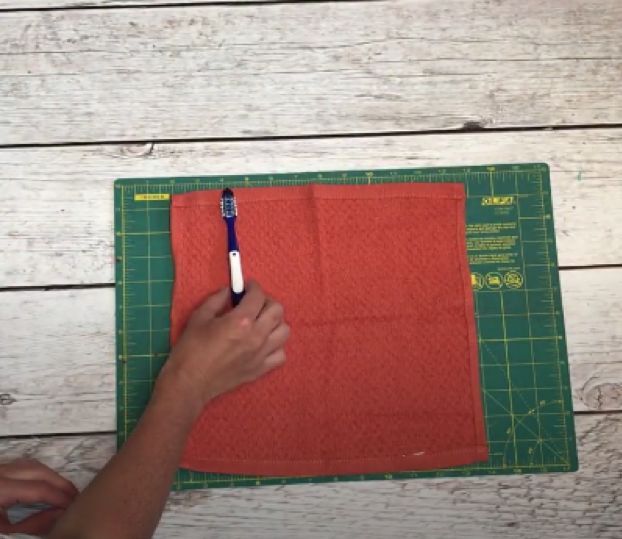
Toiletry Roll
Tools and Materials
- A washcloth
- Measuring tape
- Sewing machine
- Toiletries

Step 1: Gather Your Materials
All you need to get started are a few simple items. A washcloth is the starting point, and I chose a color that goes well with my bathroom.
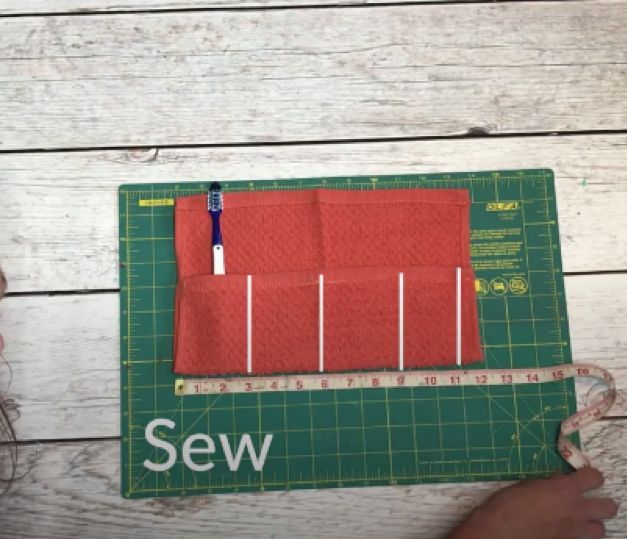
Step 2: Measure and Sew
I folded the cloth over and then measured out some lines so it was split into four equal compartments. You can manually sew the lines that you mark if necessary, but using a sewing machine is so much easier.
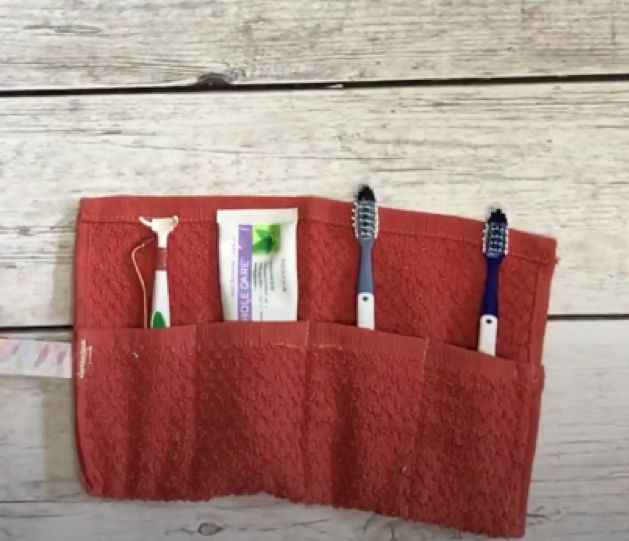
Step 3: Fill with Your Toiletries
The roll is now ready for you to use. I use it to store toothbrushes, a razor, and toothpaste. It's ideal for anything you might need on an overnight trip away from home, and it will fit neatly into your bag!
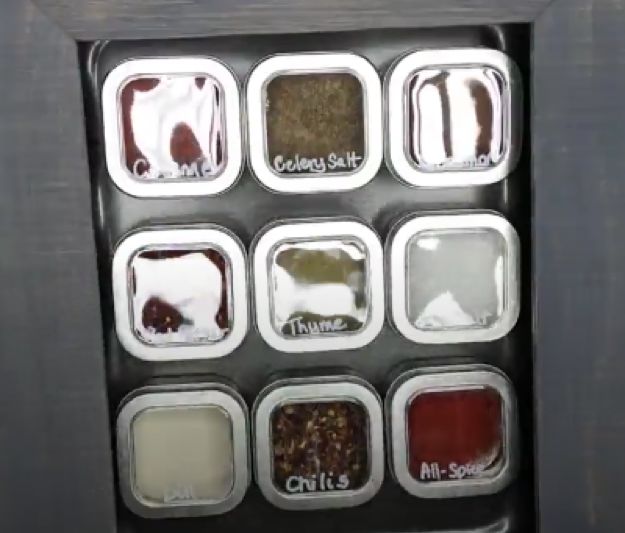
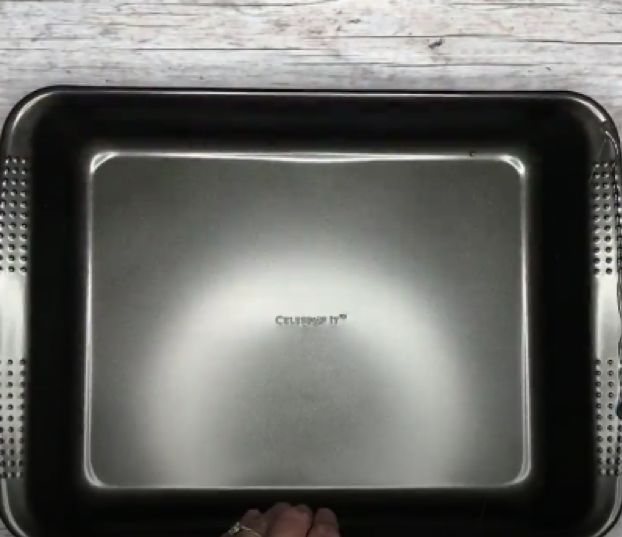
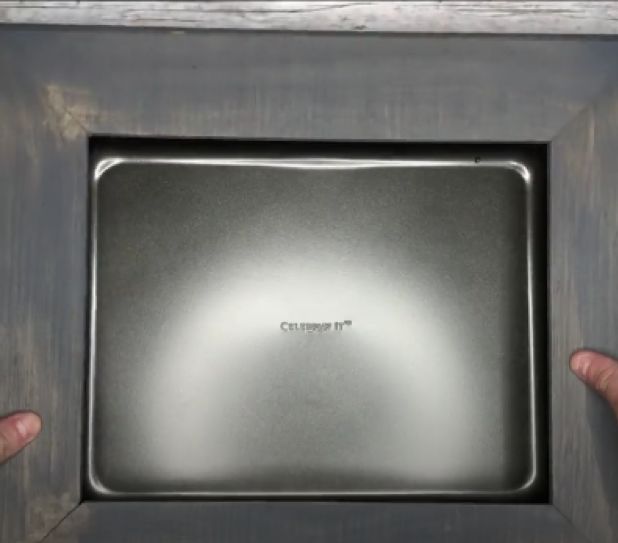
Magnetic Spice Rack
Tools and Materials
- Baking sheet
- Small tins
- Magnetic strips
- Marker
- Scissors
- Glue
- Hanging wire
Step 1: Gather Your Materials
Getting the right size of baking sheet and tins is the key to making this a success. These materials shouldn’t be expensive, but you may need to shop around a bit to find the ones that you like.
Step 2: Glue on the Frame
First, I glued a cute frame onto the sheet, which can be done by applying a line of glue around the outside. It was then ready to attach the spice jars using the magnetic strips.
Step 3: Fill with Spices
The final steps were to put the magnetic strips onto the tins, mark the names on the front, and attach them to the baking sheet before hanging it all from the wall. The end result is a classy and practical place to keep your favorite spices.

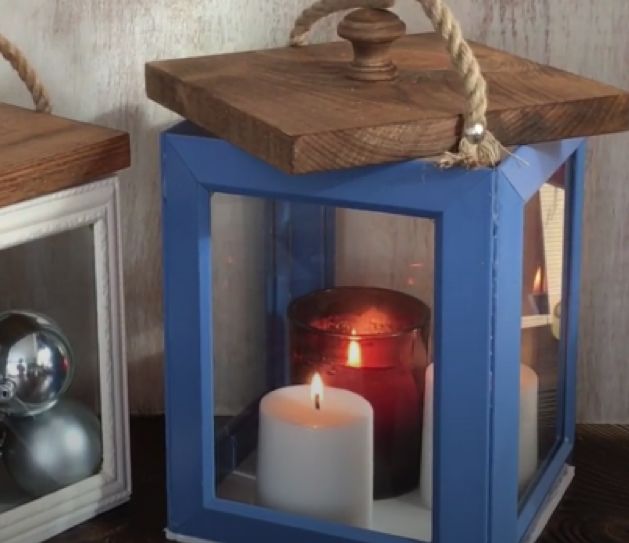
Frame Lanterns
Tools and Materials
- Picture frames with removable backs
- Spray paint
- Glue gun
- Foam boards
- Nails
- Rope
Step 1: Gather Your Materials
You will need four frames for every lantern that you are going to make. The rest of the materials are pretty simple, but I would definitely suggest jute rope for a more rustic finish.
Step 2: Remove the Backs
I used a butter knife to take the picture frames apart. This left me with four of the front pieces with glass still attached for each lantern I planned to make. You should paint them your chosen color and then let them dry before moving on to the next step.
Step 3: Attach the Frames
Use the glue gun to put the frame together in the form of a lantern. Using the rope to make a handle adds a wonderful finishing touch.
Step 4: Insert Candles
Your lantern now ready for you to add your candles. I also added chunky wooden lids to give them even more of a rustic style.

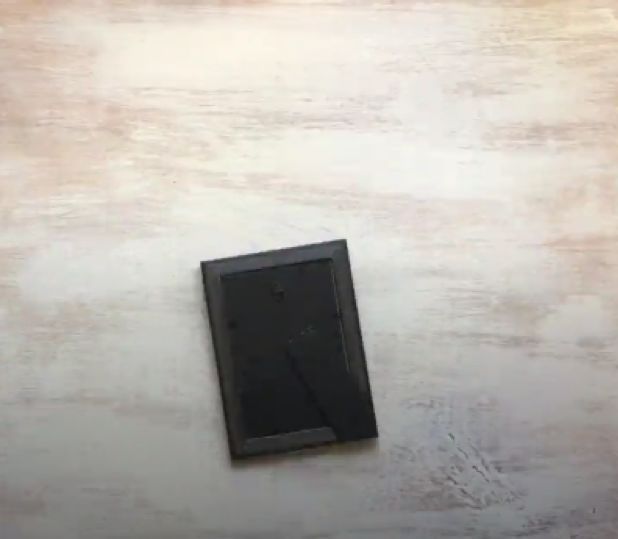
Doormat Décor
Tools and Materials
- Rubber doormat
- Spray paint
- Sandpaper
Step 1: Gather Your Materials
You will want a rubber doormat that is in good condition and has an attractive design. I used blue spray paint and fine grit sandpaper for this project.
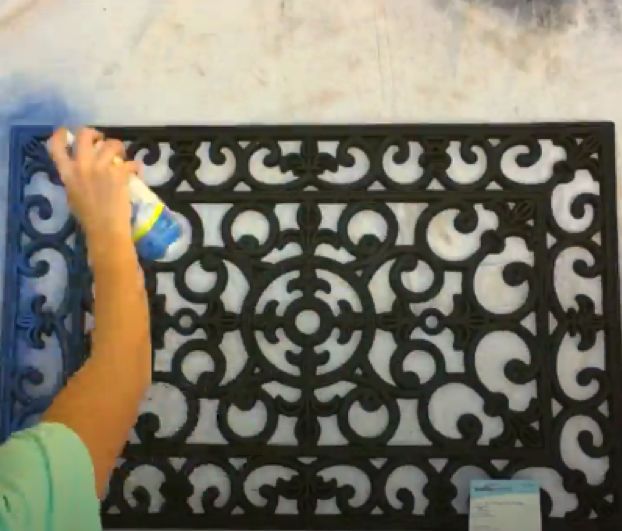
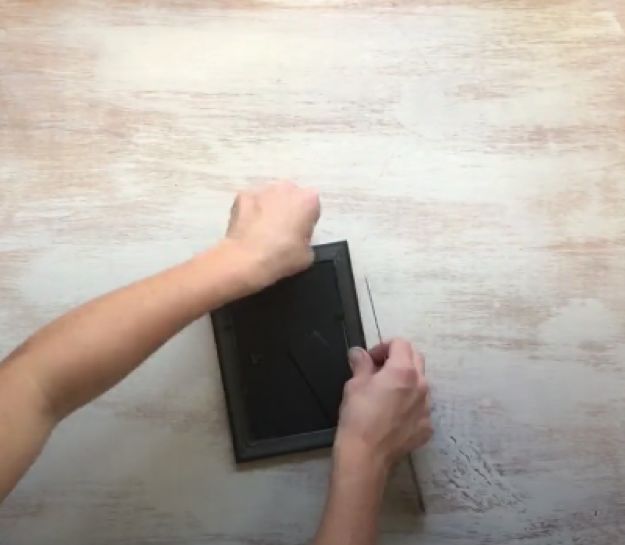
Step 2: Paint the Door Mat
I carefully painted the entire mat. It is a good idea to start on the outside and work your way in.
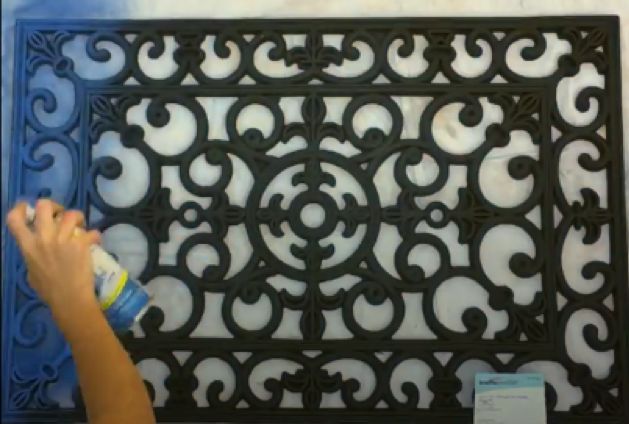
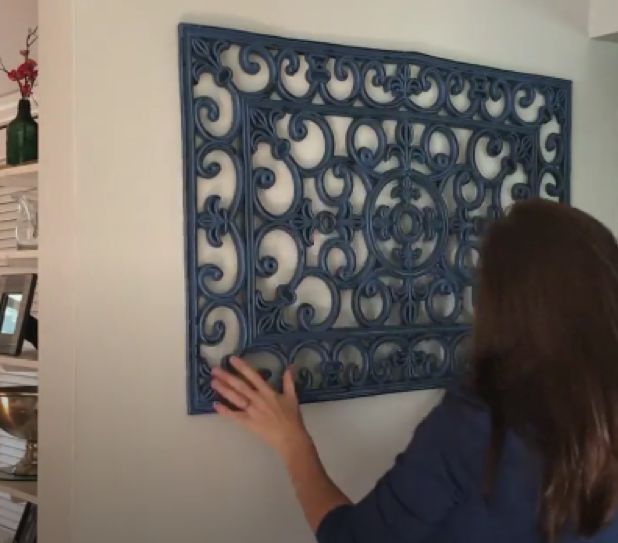
Step 3: Hang and Enjoy
Your DIY wall art is ready to be hung once it is dry. Look for a space where it gets a chance to shine and really grab the attention it deserves.

Cake Stand
Tools and Materials
- Glass candle holder
- Glass saucer
- Glue
- Spray paint
Step 1: Gather Your Materials
The most important point here is that you need to find a saucer and candle holder that fit together nicely. None of the supplies should cost you more than a few dollars.
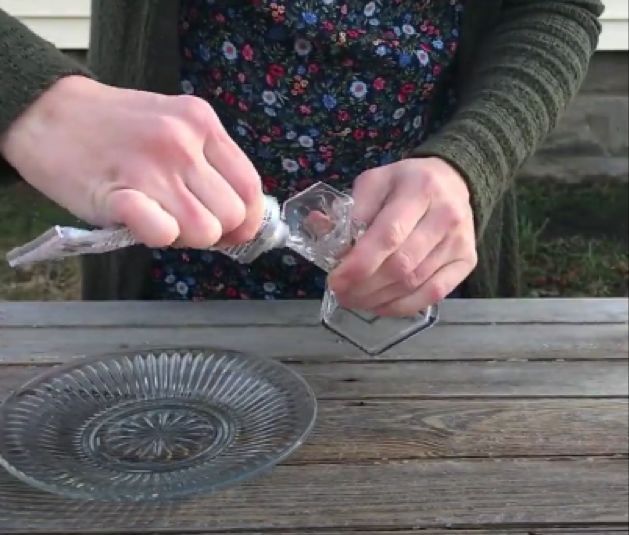
Step 2: Attach Base to Plate
Using the glue, simply attach the saucer to the candle holder. Be sure to take a moment to check that the saucer is facing the right way before you do this.
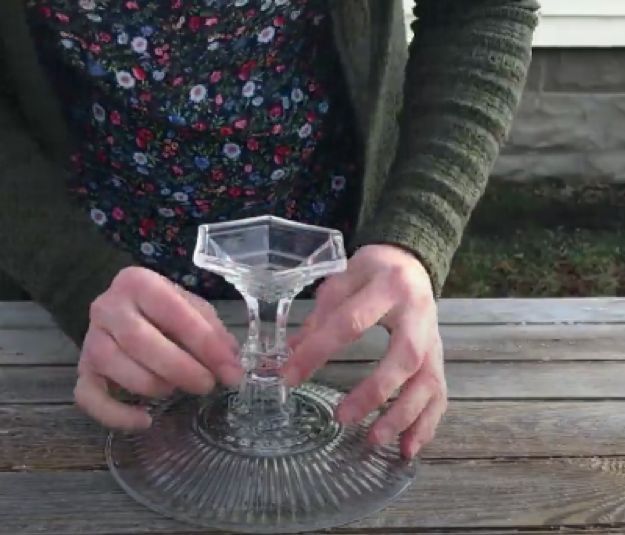
Step 3: Paint and Seal
Now, spray paint the holder, taking care to cover the entire object. After doing this, I let it dry and placed it in my kitchen as a soap holder. It would work equally well as a cake holder, though.
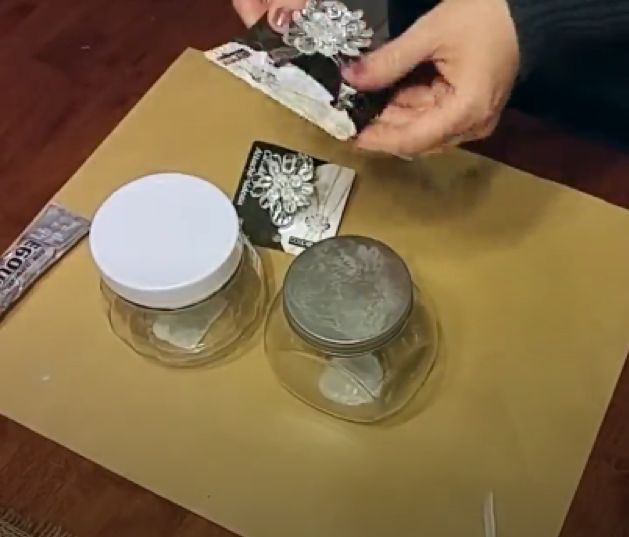
Storage Jars
Tools and Materials
- Glass container with lid
- Glue
- Spray paint
- Decorative piece

Step 1: Gather Your Materials
I looked for nicely sized jars and also for a decorative piece to go on top. I choose some neat curtain clips for the latter.
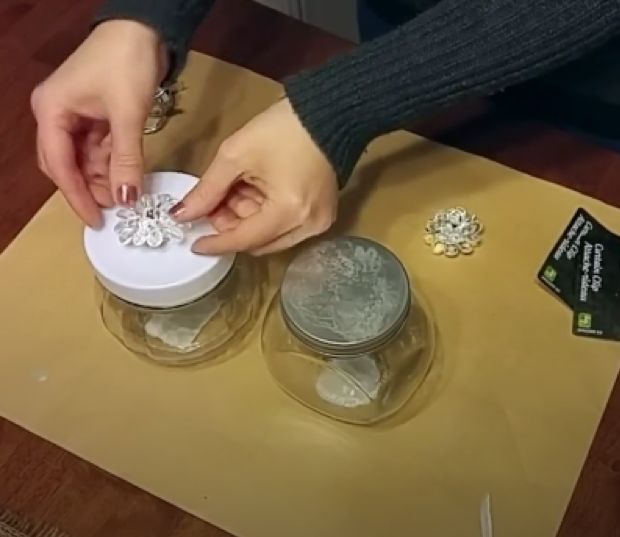
Step 2: Decorate
The next step is to glue the decorative piece onto the lid. You can then paint it the color that you prefer. I chose colors that go well with my bathroom.
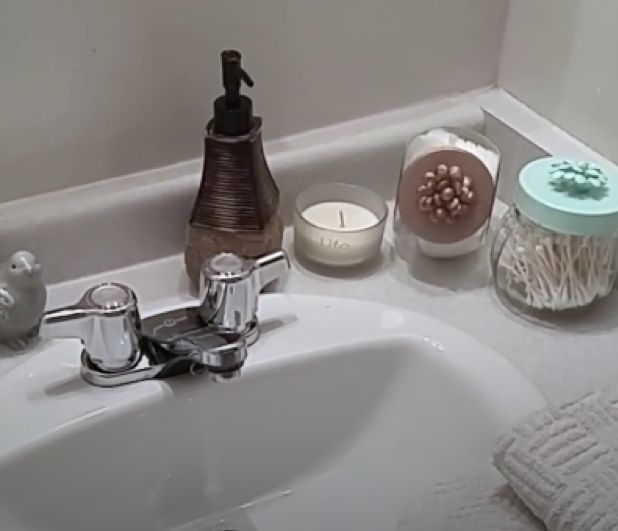
Step 3: Fill and Enjoy
You can now fill the storage jars with whatever items you want to keep in them - they are perfect for storing little things like cotton buds.
Tattoo Dishware
Tools and Materials
- Light colored dishware
- Temporary tattoos
- Sponge
- Water
- Sealer
Step 1: Gather Your Materials
I suggest using white or very light dishware for this project, as it allows the tattoo to stand out more.
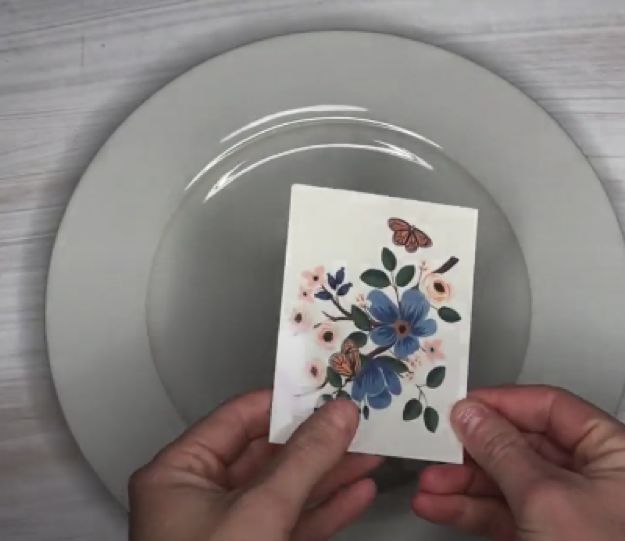
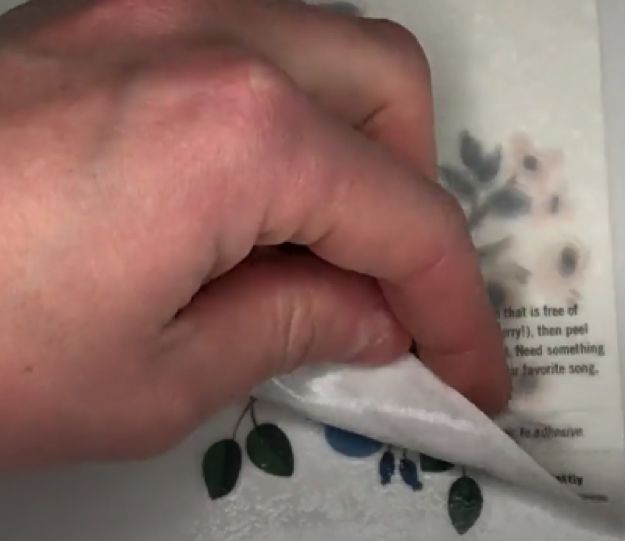
Step 2: Apply Tattoos to Plate
This is very easy to do. You will need to peel off the protective film, press the tattoo on with a sponge, and then remove the backing.
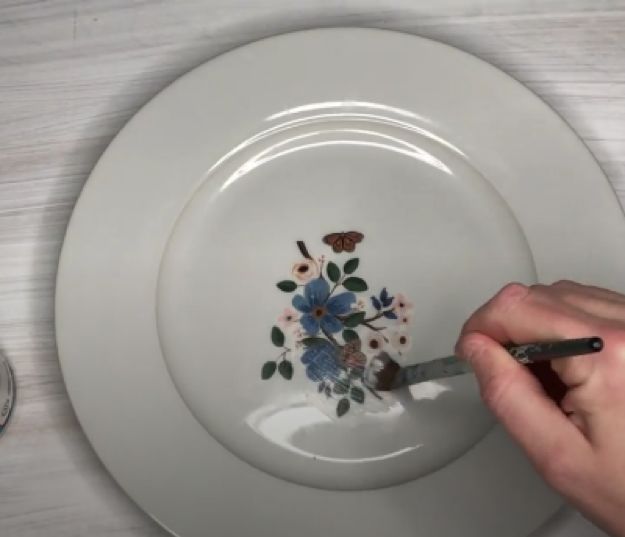
Step 3: Seal
After the plate has dried, seal the tattoo with one or two layers of sealer. It is now ready to use or to display.
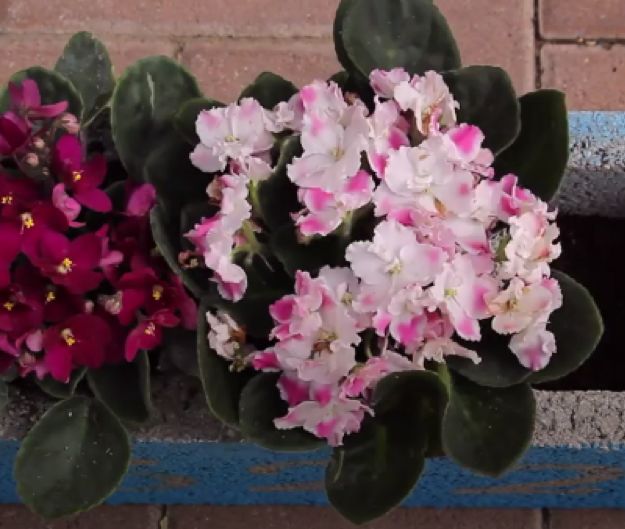
Cinderblock Planter
Tools and Materials
- Cinderblock
- Spray paint stencils
- Spray paint

Step 1: Gather Your Materials
Choose stencils that are going to give you the design you are after. The paint color is also important, as you need to take into account where the planter is going to go.
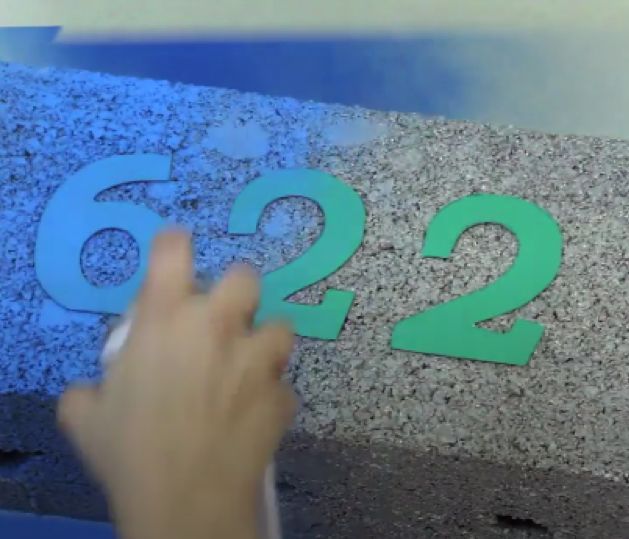
Step 2: Decorate the Cinderblock
Use your spray paint and stencils to decorate the block in the pattern of your choice. This is a chance to get creative and use words or images that reflect your style.
Step 3: Fill with Dirt and Plants
You can now put the plants into place. These blocks have holes that are perfect for this, so you just need to choose the perfect flora that complements your color scheme.
These nine DIY projects are perfect for anyone who leads a busy life but still wants to add a creative touch to their home. Choose which ones you most like the look of and give them a try!
Tell us in the comments below which of these projects you would like to try first, and show us if any of them have been successful!
Get the step by step instructions here:


Frequently asked questions
Have a question about this project?