


Hugelkultur Pallet Raised Planter

by
Vicky Chaney
8 Materials
$30
6 Hours
Easy
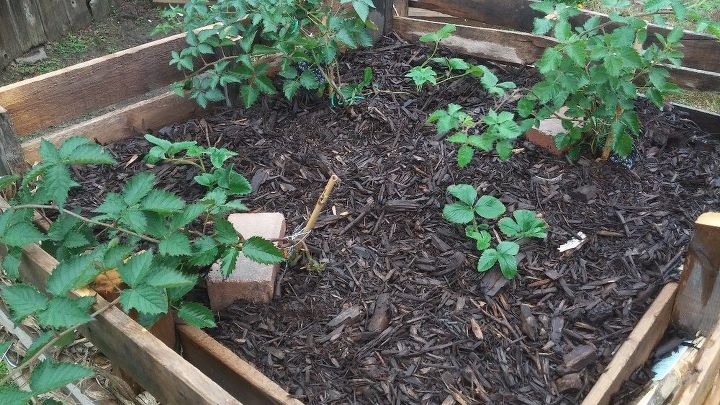
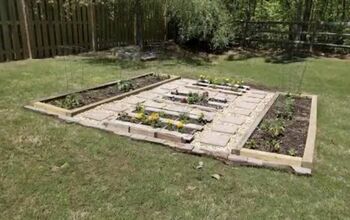
The spring bog/summer desert corner of my yard is now growing blackberries and strawberries! Hugelkultur is a Scandanavian way of planting in mountainous and rocky regions. By mounding old wood, branches and organic debris, covering that with upside down sod, and a thin layer of soil. Then usin every square inch of planting space. Creating it traditionally in a tall mound so you don't break your back planting and maintaining the garden. See note at the end of instructions for more information.
We have a southeast corner of the yard that floods every spring and bakes into cracked clay in summer. Our house was the first built in our subdivision, so it's the lowest grade. We have a plan for a permanent fix, after a couple of years of pinching pennies. And now...we are saving by growing our own berries on the edge of that same corner!
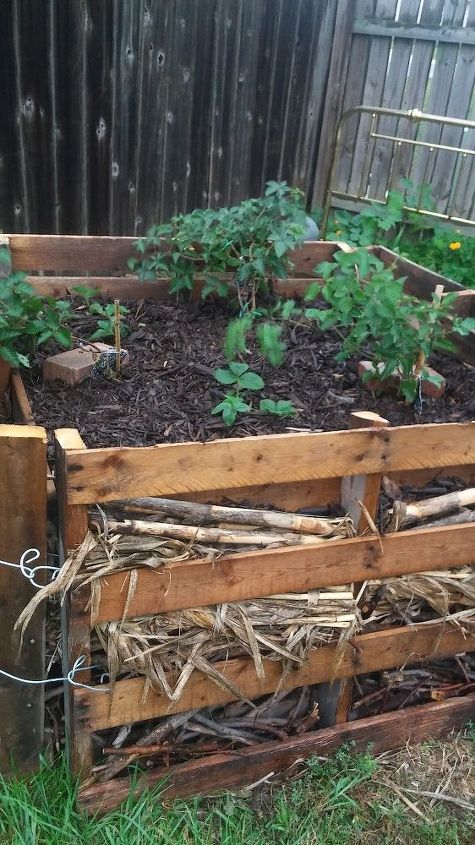
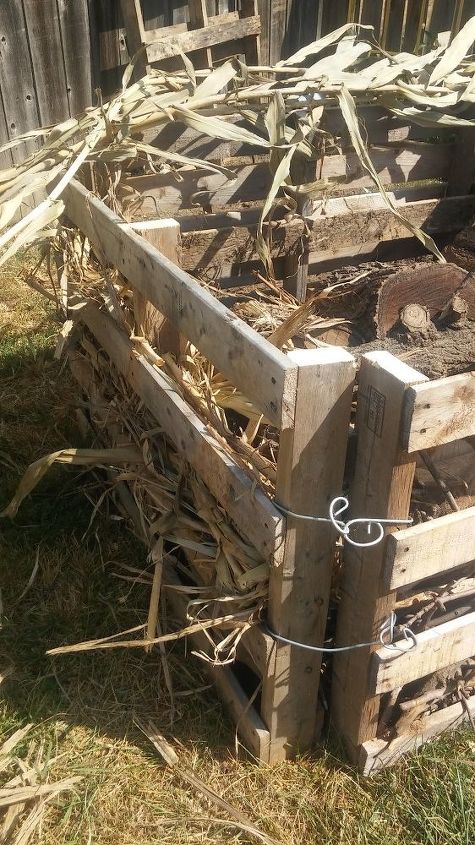
Place 3 pallets in a "U" formation and secure with baling wire above first board and about 2/3 way up at each corner to where the top will be when cut. Be sure and wear gloves, goggles and protective, clothes with good coverage when cutting wire and metal. Insert wire through 2 adjacent corners and twist together on the outside of the vertical corner boards. I used pliers to curl ends so they don't scratch anyone. I placed similarly sized pallets opposite each other, do as you please. Eyeball where you want to cut top couple of boards off to be able to access plants, weed and tend-it's usually not possible to cut exactly even all the way around unless all 4 pallets are alike. That's not possible when scavenging like we do. So I settled for 2 and 2 on opposite sides being "close". Not once did I measure anything. ANYBODY can do this! DO NOT CUT until the planter is complete. It's much more stable, easier and safer. Always have a stable cutting surface and wear gloves and goggles when using power tools! Last fall my wonderful husband asked a tree service (and the homeowners) if we could have the wood when he saw them cutting down a neighbor's tree, to make room for an addition. We could, if we hauled it off-site. They had cut it sized for firewood. It was late on a cold, rainy day and they gladly agreed to let us have it - if we had it ALL gone by morning (even the tiniest branches). We paid for that material with backbreaking manual labor! Most of the tree became firewood, but it was a mild winter. Some was left over and already seasoned. We don't waste anything around here. So I decided to try something new I'd read about-hugelkultur! Set logs inside "U" shaped pallets, being mindful of where 4th and last pallet will go! This can take a couple of tries, I recommend placing largest first. When all the logs are in, secure 4th pallet wall with baling wire to make a box (again, just above first board and about 2/3 way up to where the already cut top board will be). To make "walls" of planter box, fill in between pallet boards. Criss-cross and push down largest branches first (cut to size as needed with hand saw). Fill in from bottom to about halfway to where top will be, after you cut top 2 boards off. I filled up the rest with bamboo left from previous year's garden. The bamboo was seasoned or left in the elements to dry in a raised, well-ventilated area. This helps make them less likely to have disease or insects. Place branches, kindling and bamboo as loosely as you can without compacting. They will settle and you need airflow into the planter for root development. You can shore up with sand, then kindling if soil starts leaking out.
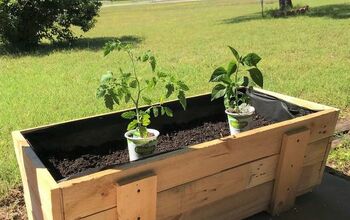
Now I eyeballed the height I wanted the planter to be, just below my elbows. This way I can reach the middle from each side, with ample wiggle room around edges to mow the weeds. The location gets lots of sunlight in spring and early summer. It's under the mid- to late-summer afternoon canopy of another neighbor's deciduous tree to prevent sunburn. Safety note: Check to make sure there are no nails or fasteners where you want to cut. If there are, remove or cut slightly up or down from spot. You can seriously hurt yourself sawing into metal or into a knot in the wood where a branch used to be, and mess up your saw. With all safety gear on, I placed safety collar of reciprocating saw against board and cut all sides (cut tops can be made into wall shelves). Then I filled the planter to the top of logs with kindling and then sand. For the next layer, mix soil and amendments per requirements for plants you are using. If planting blueberries, soil needs to be more acidic (pine needles are NOT a good way to do this). I mixed compost, peat, sand, mulch and soil in our wheelbarrow, then topped up planter to bottom of the highest board. It will settle and can be topped off as needed, but do not tamp it down. You need air pockets to promote decomposition of logs and organic matter. Do not use plastic in anyway to line planter. You need airflow for healthy decomposition. Plus roots need air or they can drown just like people. First-remove any and all less-than-perfect leaves and stems from plants and dispose of affected leaves away from planter (don't toss them in and perpetuate plant problems). Dig in plants with adequate spacing for MATURE plant size. I underplanted blackberries with strawberries to maximize space usage and food production. Plus-that's what I found on sale. Mulch 2-3 inches over entire surface. Then make circular moats a couple inches from main stems around each of plants. This will allow for watering roots without decreasing stability of plants. Water regularly until plants are well-established. Increase frequency of watering when windier, hotter and drier. Decrease when cooler, wetter and damp. Yellowing leaves may indicate overwatering or nutrient deficiencies. Browning edges might mean underwatering. I will fertilize with homemade compost tea as needed and look forward to picking berries with the grandchildren. https://www.permaculture.co.uk/articles/many-benefits-hugelkultur
Comments
Join the conversation
2 comments
-
Great work!
-
Thank you.


Frequently asked questions
Have a question about this project?