


"Stick" With These End Tables!

3 Materials
$20
3 Days
Medium
I recently refinished a coffee table and wanted to change up the end tables so they looked a little more cohesive
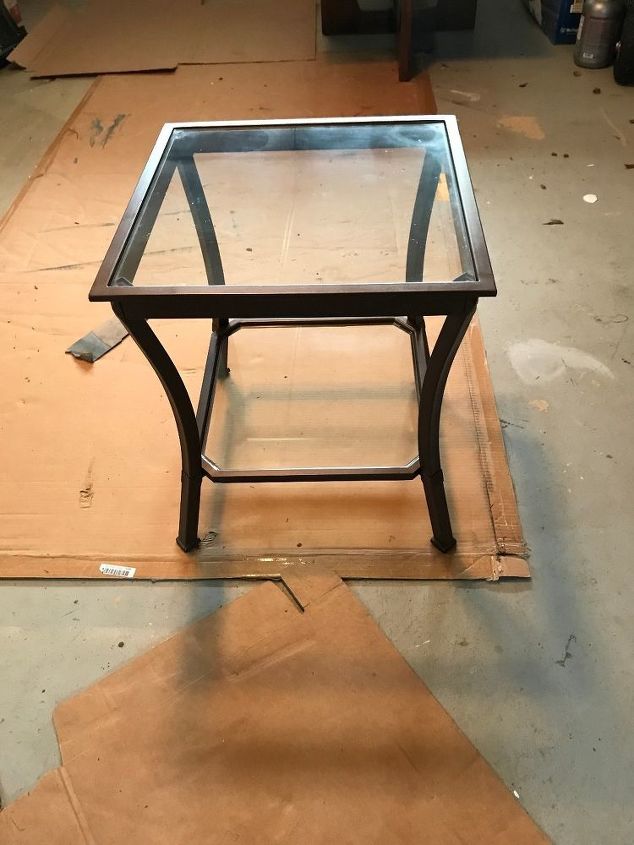
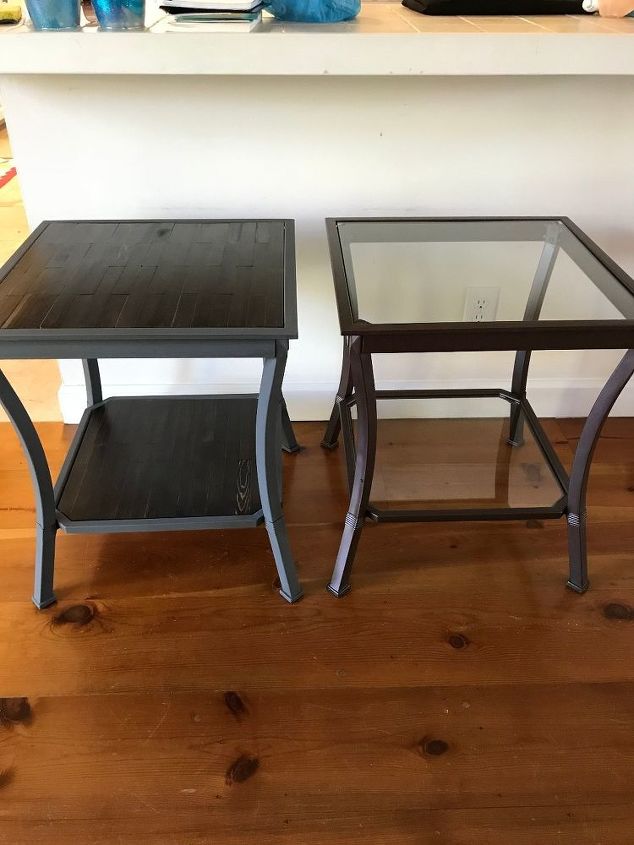
Here we are before. There are two of them, but for the purpose of this tutorial, I'll only show the one. I did learn some things in the process that made the second table much easier.
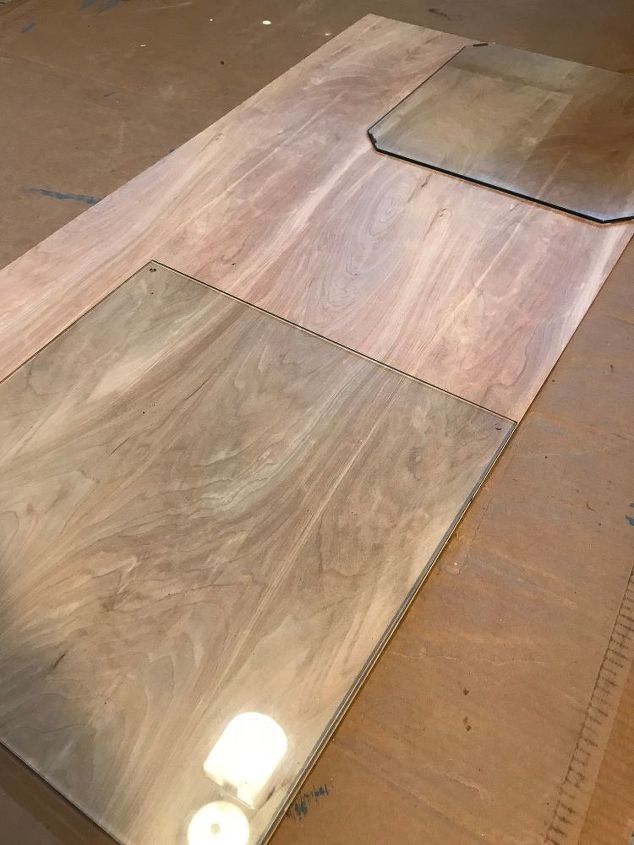
I traced the glass onto a sheet of luan and cut out the new shelves. I saved the glass thinking if I didn't like the end product, I could always take it back to where I started.
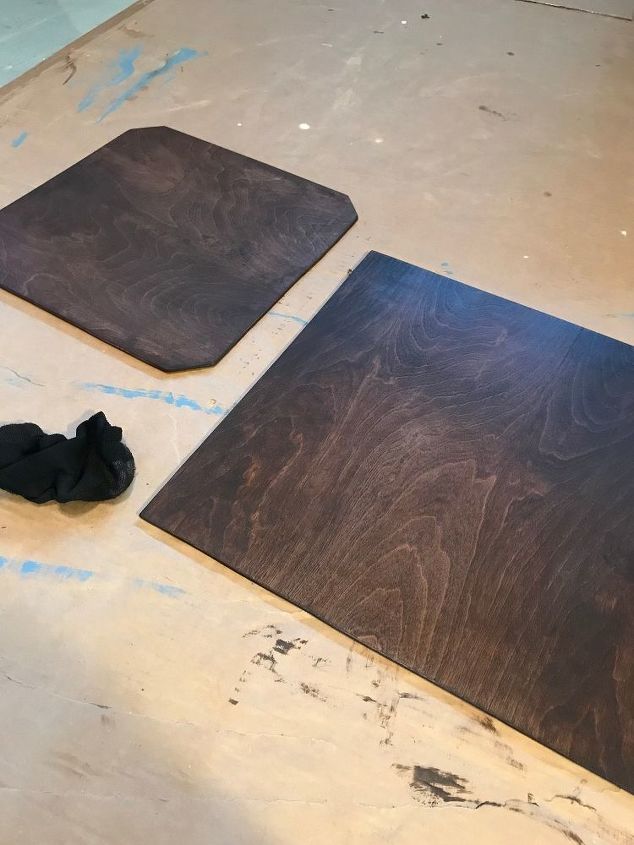
I stained both sides of the luan the color Kona, using a rag to wipe on and wipe off.
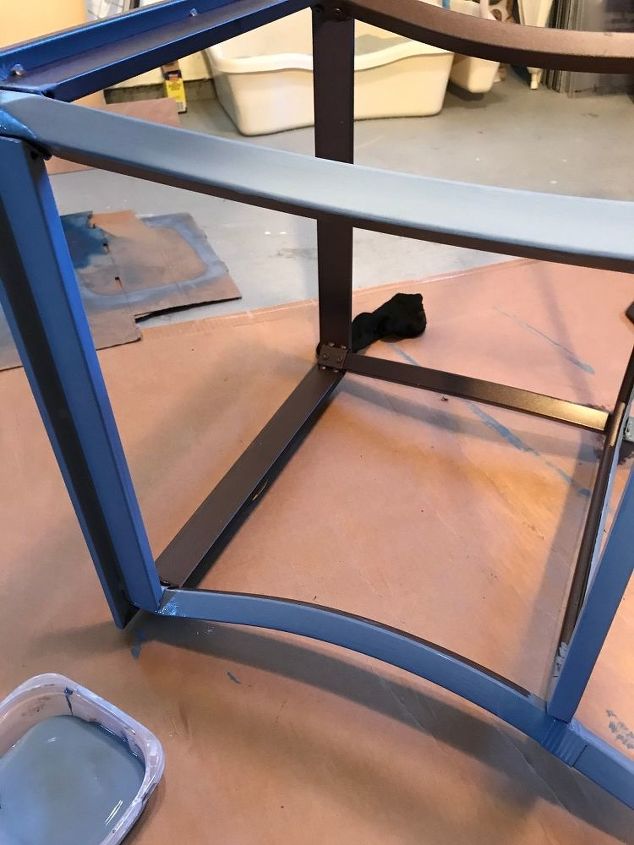
The frames got a couple coats of the same chalk paint I used on the coffee table. Once dry, I rubbed on and rubbed off a coat of antiquing wax, and topped it with a single coat of matte polycrylic.
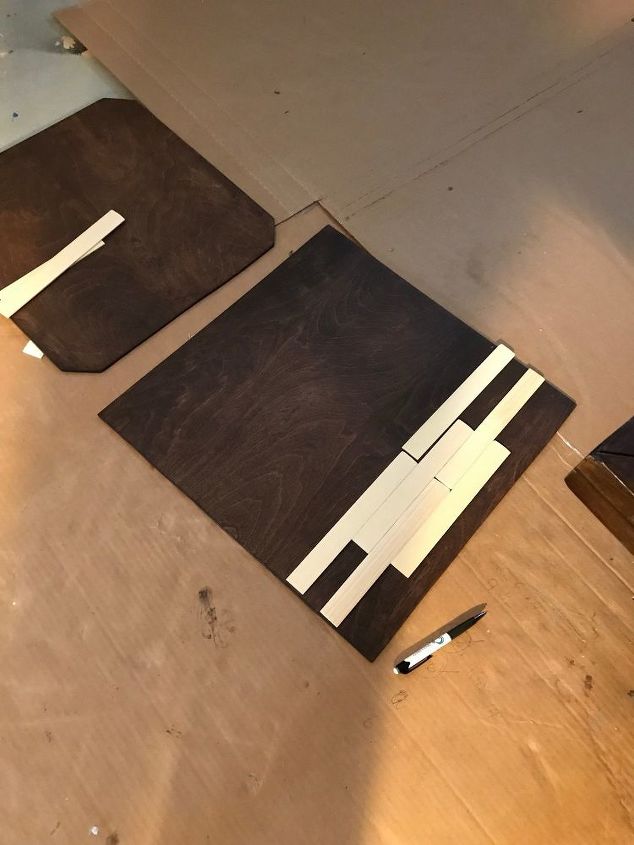
Math has never been a strong point- at all! My plan was to top the luan with paint sticks so I needed to figure out how many of what size I needed for each shelf. I cut the tops off of the paint sticks which left them 9 inches long. Turns out, for the top shelf, two 9 inch paint sticks were the perfect length, so I used 9 inch mixed with 4 1/2 inch to alternate the pattern. The bottom shelf was smaller and an irregular shape so I had to do some more math :(
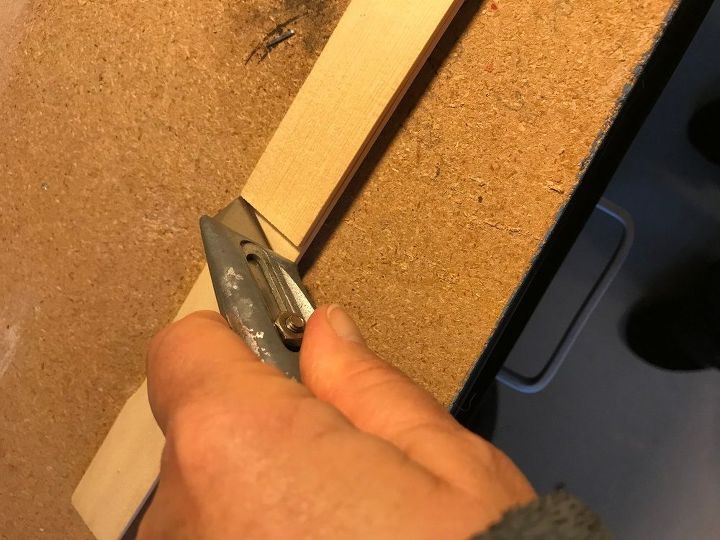
For the first table, I used a utility knife to cut each paint stick. I scored them a few times and they snapped right off. It honestly took a lot less time than you might imagine, maybe about 40 minutes, but it was tedious work. For the second table, I gathered up my measurements and my paint sticks and took them to my dad's house. I taped about ten at a time together and cut them with a chop saw. WAAAAAY faster!
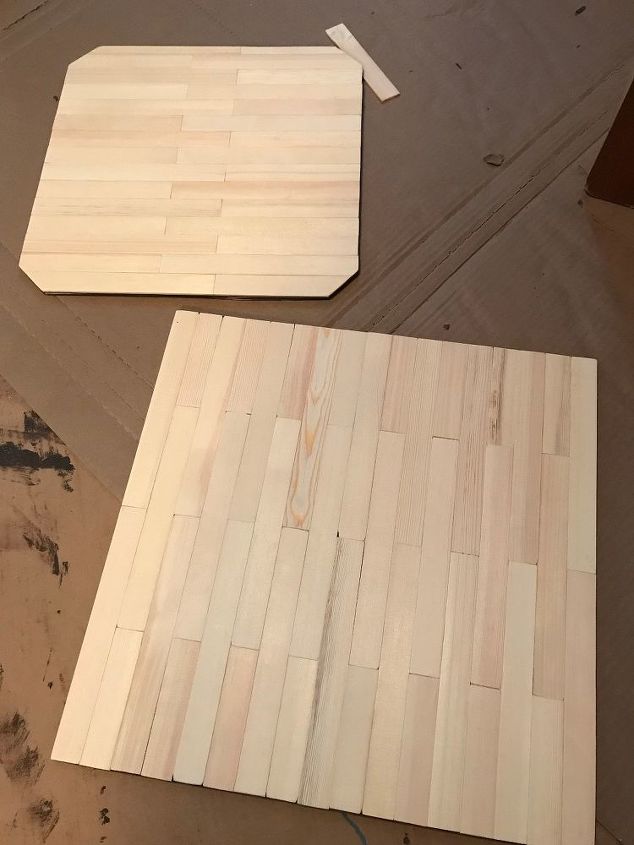
Once glued to the luan using wood glue, I stacked heavy objects on top of everything and let it all sit overnight to dry.
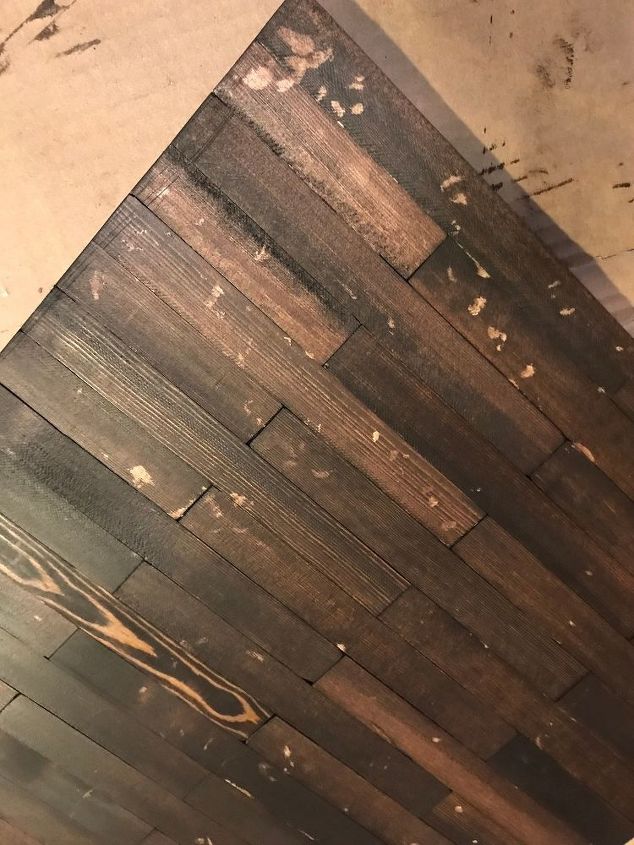
I did a light sanding before I stained and here you can see how messy I was with the glue. This was easily fixed by sanding the spots and re-staining. To apply the glue, I had used a small paint brush and slathered it on the back of each paint stick. As I'm telling my parents about the tables, my mom says "why don't you just put the glue on the board and then put the sticks down". I stared at her for one stupified moment, unable to grasp my own idiocy. For the second table, I did exactly that, and yes, it was both easier and neater. STILL learning from my parents ;)
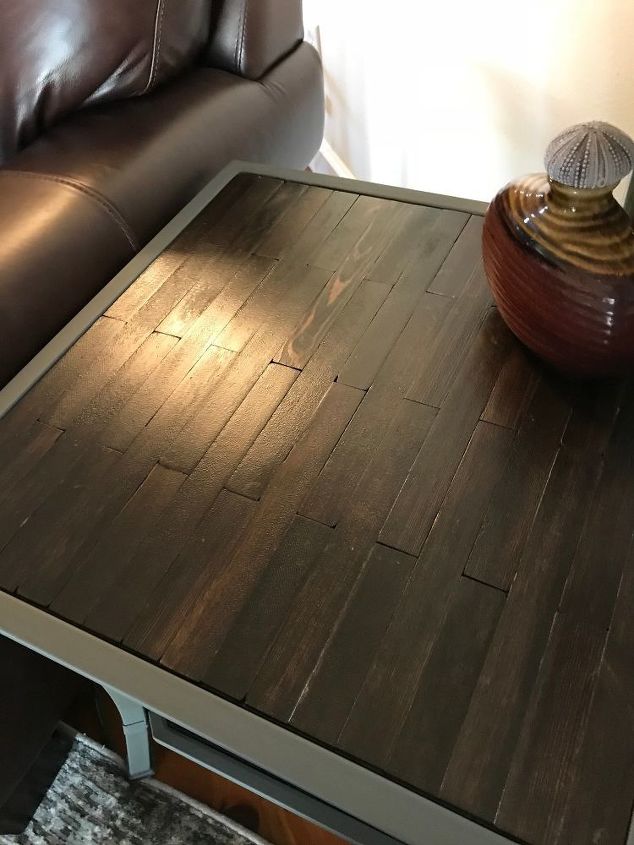
I finished the top with two coats of satin polycrylic. Not too shabby!
The before and after!
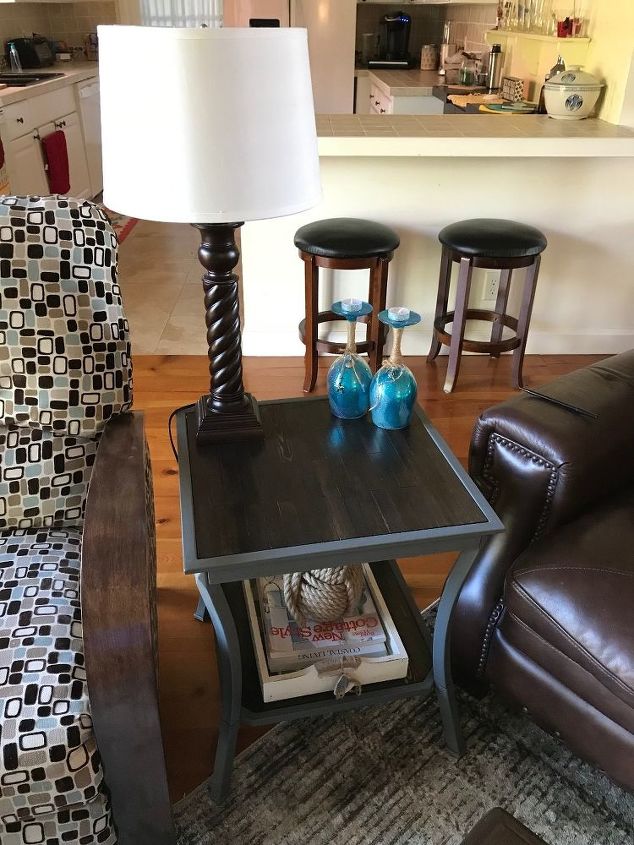
Tada! The finished table in its home.
Resources for this project:


Any price and availability information displayed on [relevant Amazon Site(s), as applicable] at the time of purchase will apply to the purchase of this product.
Hometalk may collect a small share of sales from the links on this page.More info
Comments
Join the conversation
3 of 43 comments
-
Im SERIOUSLY thinking of doing this to my kitchen countertops! Why not?
-
Sadly not yet.....still going back and forth on it


Frequently asked questions
Have a question about this project?
I love this look. VERY creative of you. I especially love what you did to the metal frame. Two questions. This is not a criticism at all, but I was just wondering why you decided to get rid of the glass. (I have a few of them myself and was wondering if they needed an upgrade.) And also, this may be a bit daft, but where is everyone getting the paint sticks in large amounts for these great projects?
Just a thought instead of using the Luan do you think using the the glass top on top of the paint sticks giving it a smooth top look and protecting the wood from dust and water stains if a water glass was placed on your paint stick table? Just wondering how that would look?
Nice!
Quick question : was there any curing time between waxing & sealing? I've heard if you don't give the wax time to cure, there will be some sticky residue after getting sealed.