


Bathroom Counter-top Make Over

7 Materials
$100
72 Hours
Easy
I turned my counter tops into a granite look and painted my bathroom. I still have to replace the light fixture and the faucet and the floor. But over all I’m very happy with the turn out. I have about 9$ in Sherwin-Williams paint samples and a can of polyurethane. I also replaced my cabinet door hardware. I had thought about painting the hardware to save money but the new ones fit into my budget. The paint for my bathroom was some I purchased awh back so very little Money spent on this project but a whole lot of time. This took me about 3 days to repair holes, caulk and paint. It was pouring rain so took a little longer for my polyurethane to dry. Over all I’m happy.
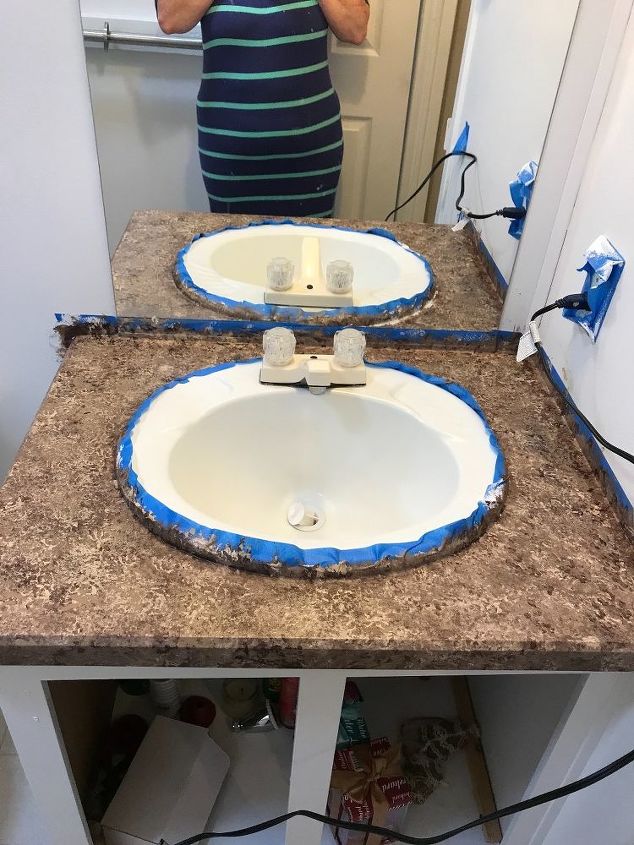
To create the faux granite finish I first got some sandpaper with a rougher grain.
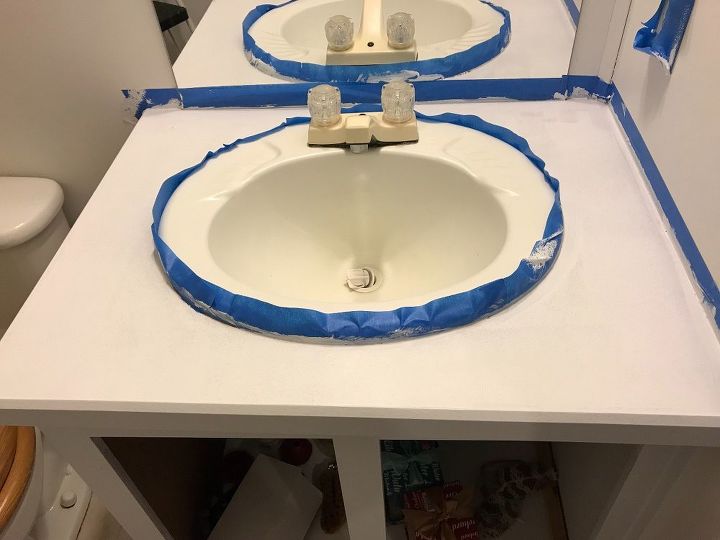
1.I sanded the Formica top to remove any slick finish.
2. I taped off anything I didn’t want to get paint on using painters Tape.
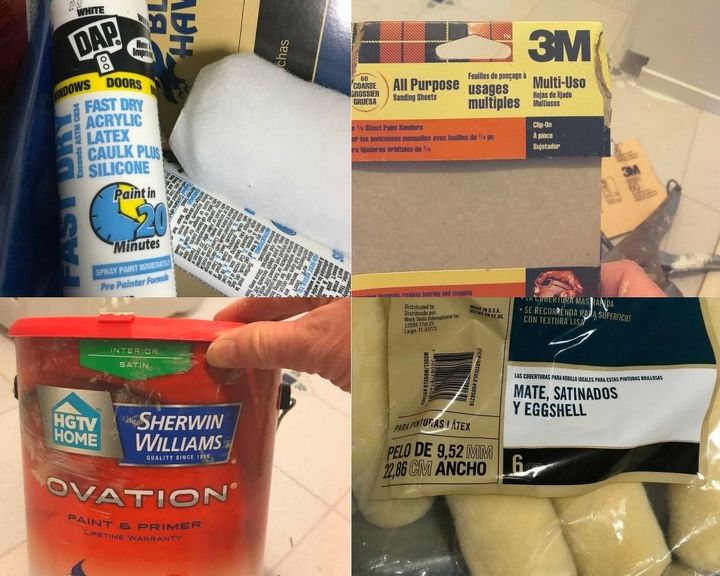
Sherwin-Williams paint samples and a can of polyurethane. I also replaced my cabinet door hardware. I had thought about painting the hardware to save money but the new ones fit into my budget.
The paint for my bathroom was some I purchased awh back so very little Money spent on this project but a whole lot of time. This took me about 3 days to repair holes, caulk and paint.
3.then I painted a coat of kilz primer and let that dry. Any kilz will do. I applied 2 good coats of primer.
4. Using a sea sponge I cut into 3 pieces and 3 paper plates to divide the different paint colors.
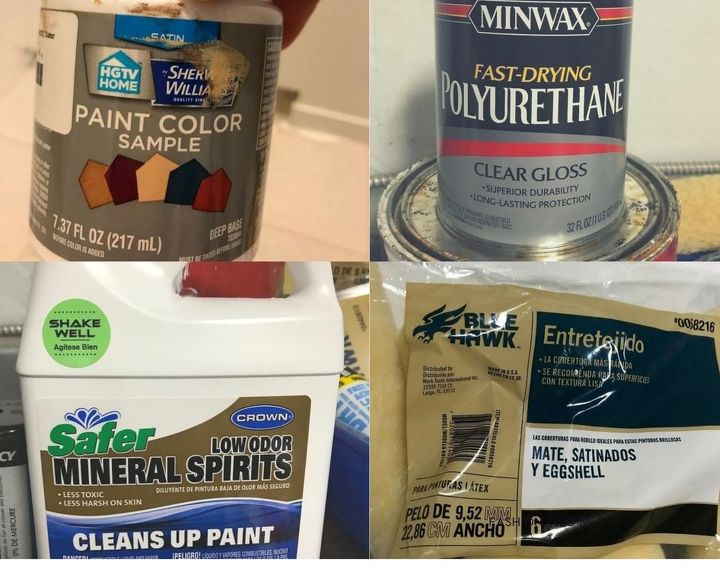
5 I used the darkest colors first and began to dab my sea sponge in it lightly and Dab all over the sink. Then I followed with the remaining colors until I created the look I wanted. (Use any colors you wish to use) I personally went to Lowe’s and purchased Sherwin-Williams sample paints.
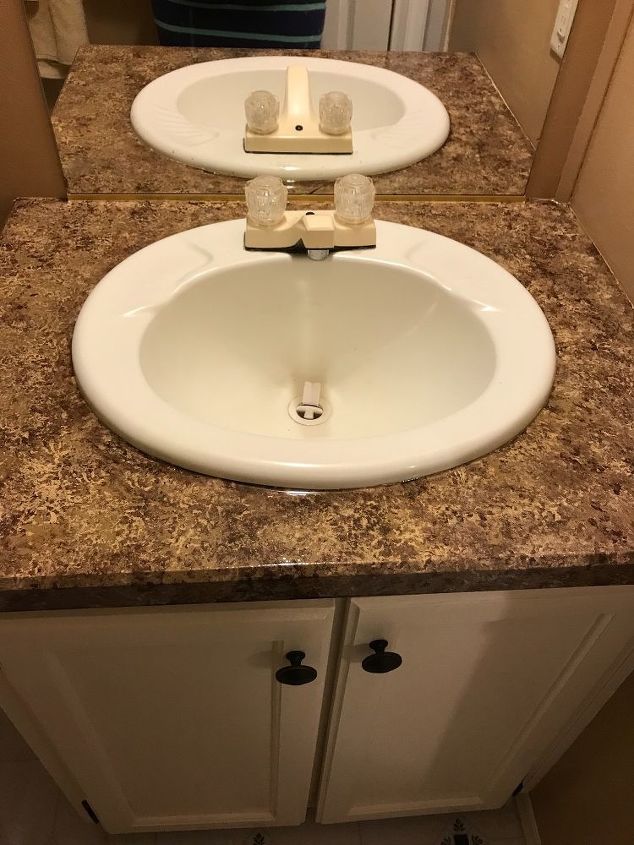
6. Using an OIL BASE POLYURETHANE. Oil base in this step is important if it’s used where there will be water splashed on the counter.all other paints and kilz was water based until the polyurethane step.
My polyurethane I used is pictured above.
7. I then used a good bristled brush created for oil base paints and started applying a thin coat of polyurethane moving my brush in the same direction. After each coat dries use a 220 fine grain sandpaper to lightly sand between each coat. Repeat this process at least 3 times and let your last coat be a good thick coat.do not sand the last coat.
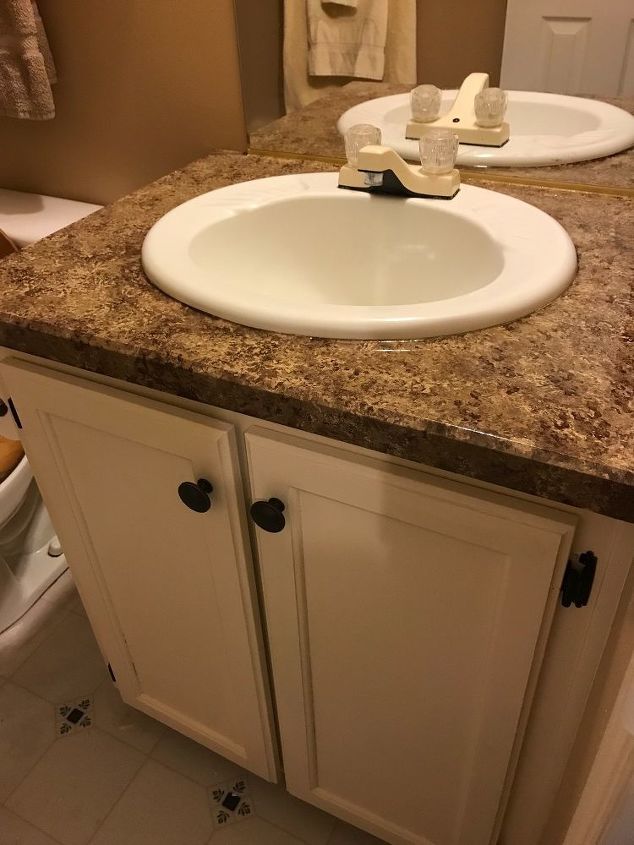
Finished project!
Resources for this project:
See all materials


Any price and availability information displayed on [relevant Amazon Site(s), as applicable] at the time of purchase will apply to the purchase of this product.
Hometalk may collect a small share of sales from the links on this page.More info
Comments
Join the conversation
3 of 37 comments
-
I am going to start this project today. I am prepped and ready to go. Wish me luck!!
-
Thank you for sharing your project, I really didn't know what to do regarding painting my vanity top. Good stuff!


Frequently asked questions
Have a question about this project?
Did you remove the caulking around the sink before you started painting and apply new caulking when finished? Otherwise, do you paint over the existing caulking or tape it and not paint it?
Esther: I didn't get an answer to my original question: did you remove the caulking around the sink?
I am going to do this in the kitchen but I have a lot of counter space. Should you do it all at once or can you do it in sections?