


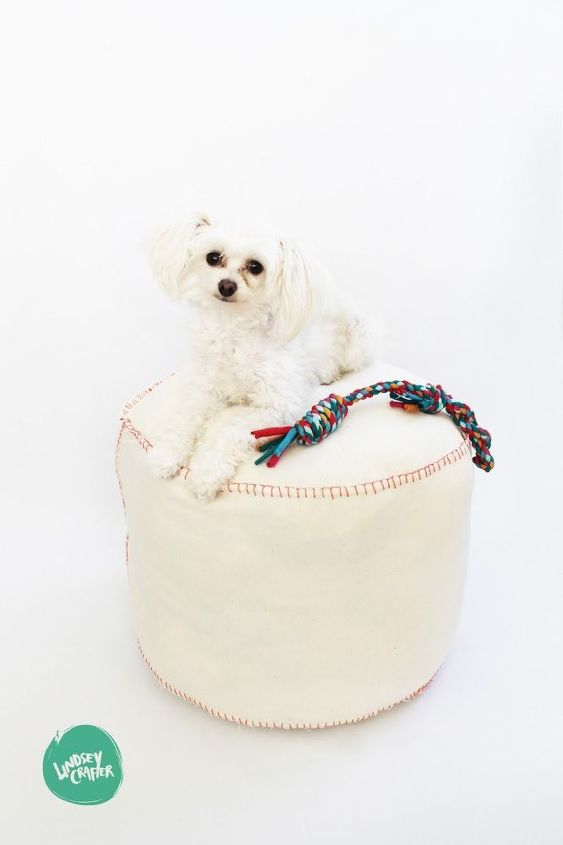
Hand-Sewn Floor Pouf
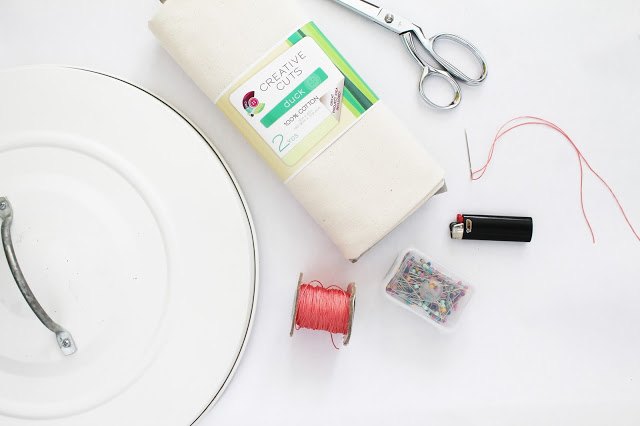
10 Materials
$30
2 Hours
Easy
No sewing machine? No problem! Accomplishing sewing projects is completely possible without a sewing machine and there are more methods other than using iron on no-sew strips. Complete a few of these poufs for about $10 and find a way to up-cycle your hoard of plastic grocery bags that have taken over your pantry!
What You'll Need
Large upholstery needle
Chinese knotting cord
Several yards of canvas (depending on the size of your finished pouf and how many you plan to make)
Fabric scissors
Pencil
Recycled grocery bags or bean bag filler
Trash Can Lid or large round shape to trace
Tape Measure
Lighter
Straight pins

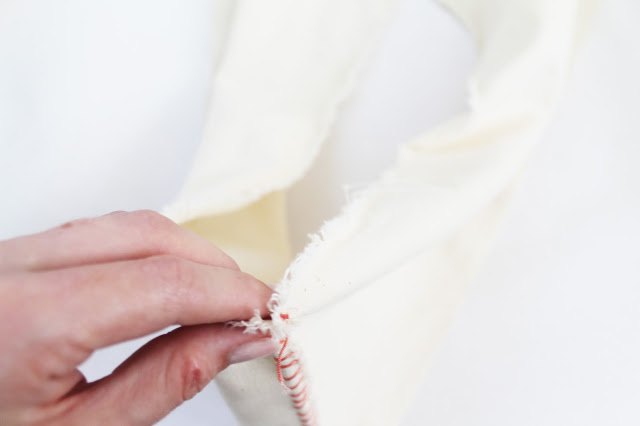
Walk a tape measure around the circumference of your cut circle piece to determine the length of your body piece.
The body of your pouf will be your choice of height (I made mine 13") and the length you just found by walking the circumference.
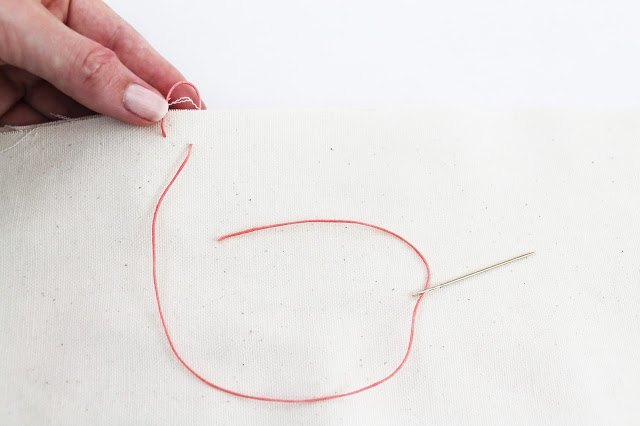
Pull cord through from the back, 1/4" down from the edge.
Pass the needle behind the fabric and pull through 1/4" to the right of your last stitch
Pull to create a small loop
Pass the needle through the loop and pull taught
Repeat these steps, passing the needle through the fabric from the back and up through the loop it creates.
After a few stitches you'll have a neat row of blanket stitches.
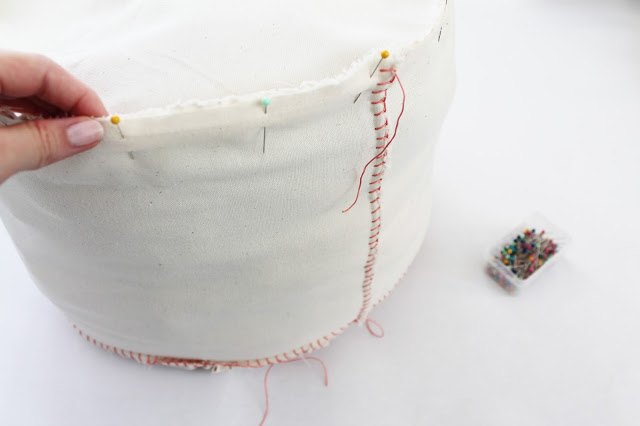
Pin one circle around the bottom edge of the loop and bind raw edges together with the blanket stitch. Remember to tie off the end in a secure knot and melt the cord tail into the knot .

Fill the base of your pouf with plastic shoppers so that it stands easily on its own. This will make the next steps easier to complete.
Pin the second circle around the top edge of the pouf and bind 3/4 of the way around, leaving a small opening to fill with more bags. Be sure to pack bags in tightly or your pouf will lack… oomph. Try sitting on it to see how far it compresses -- plan on over-stuffing!
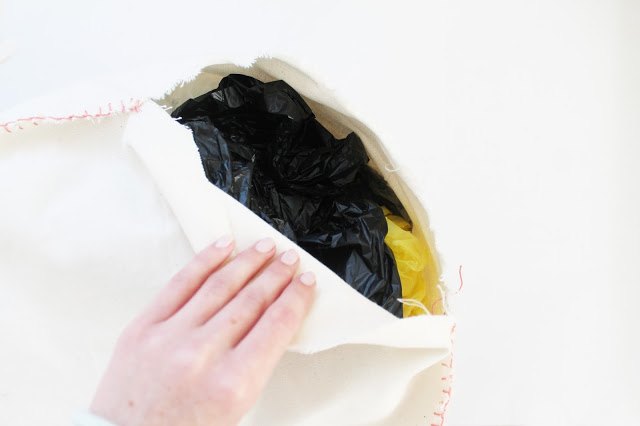
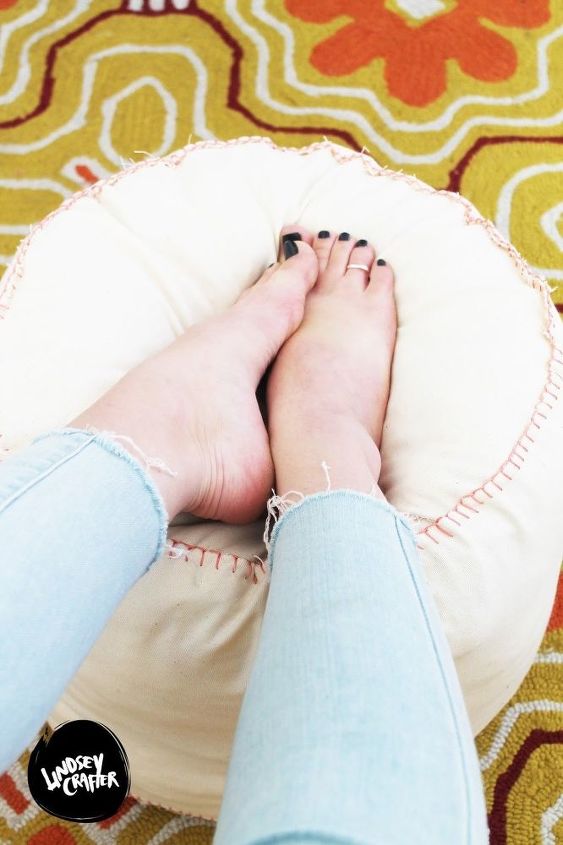
When you've finished stuffing your pouf bind the rest of the top edge and secure with a knot. Trim off any stray threads or cord and POUF! YOU'VE FINISHED YOUR FIRST HAND-SEWN POUF!
Once you've completed this project you'll want to sew EVERYTHING by hand. There are numerous stitches and treatments to learn and the results are so much more personal. Looking for more sewing projects? Follow my STITCHES Pinterest board.
Resources for this project:
See all materials


Any price and availability information displayed on [relevant Amazon Site(s), as applicable] at the time of purchase will apply to the purchase of this product.
Hometalk may collect a small share of sales from the links on this page.More info

Want more details about this and other DIY projects? Check out my blog post!
Comments
Join the conversation
2 of 14 comments
-
This is a fantastic idea, even if you use something else to fill them!
-
I made mine with a little zipper insert on the side. This way I can refill as gets floppy from use, and if I need a bag, I know where to get one! I also made a cute little one with a bell in it for the cat to bat around, she loves it. Thanks for the great project idea.


Frequently asked questions
Have a question about this project?