


Tin Can Tune-up

6 Materials
$10
3 Days
Easy
I used to have a glass jar in my bathroom that held all the little tubes of things you use in a bathroom. One day my cat got startled and knocked that jar to the floor and well we all know what glass does when it suddenly makes contact with a hard surface. I needed something that wouldn't shatter should something like that happen again.
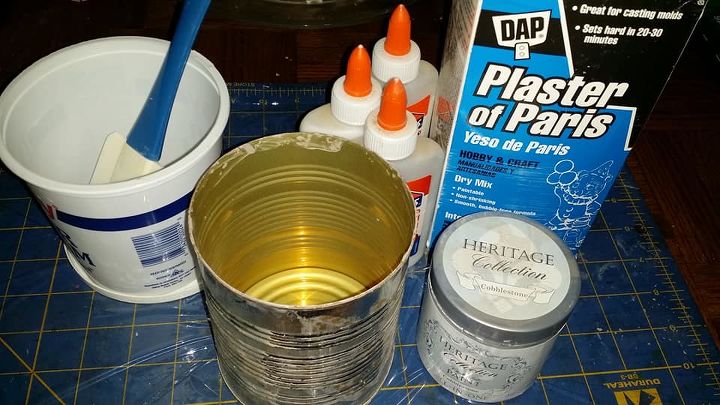
I wish I could remember the post I saw that used glue and plaster. Their post also used water I didn't. If you know the post let me know I'll update and give them the credit.
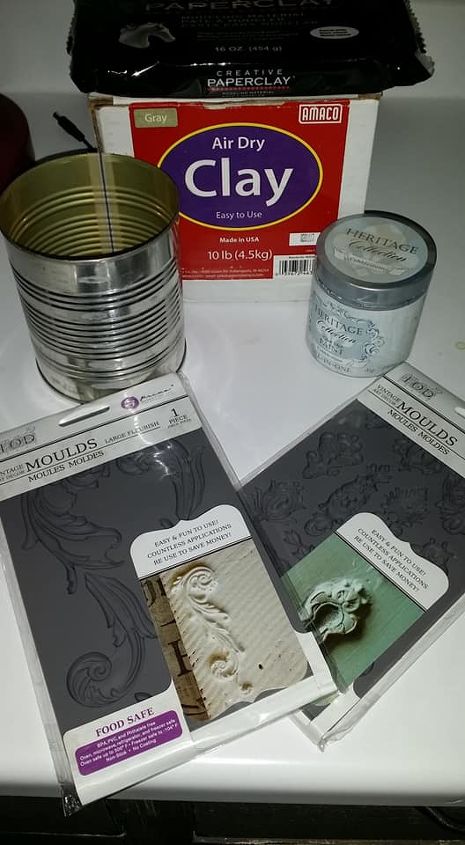
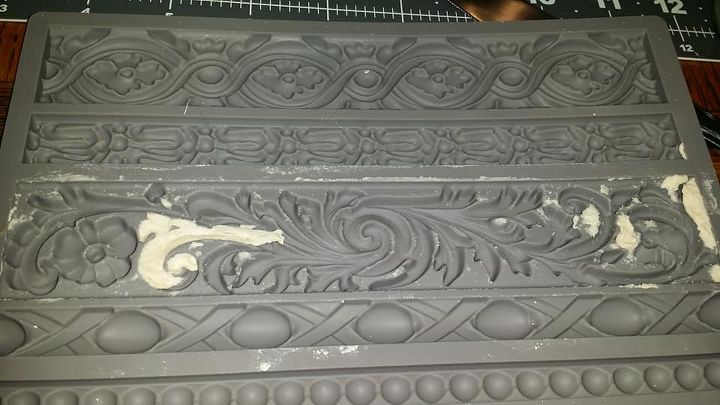
I also used these silicone molds you can buy off Amazon. I used air dry clay to cover the can. That didn't work. When air dry clay dries it shrinks and it cracked and fell off the can. Time to start over. I ordered paper clay off Amazon.
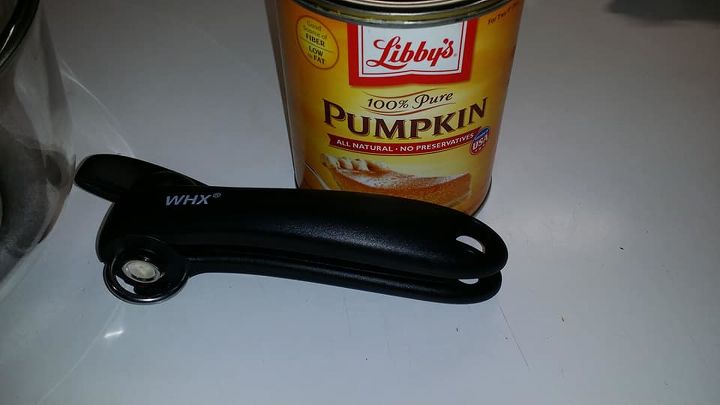
Step one, open the desired can with one of those side opening can openers. I also ordered that off Amazon I couldn't find one in a local store.
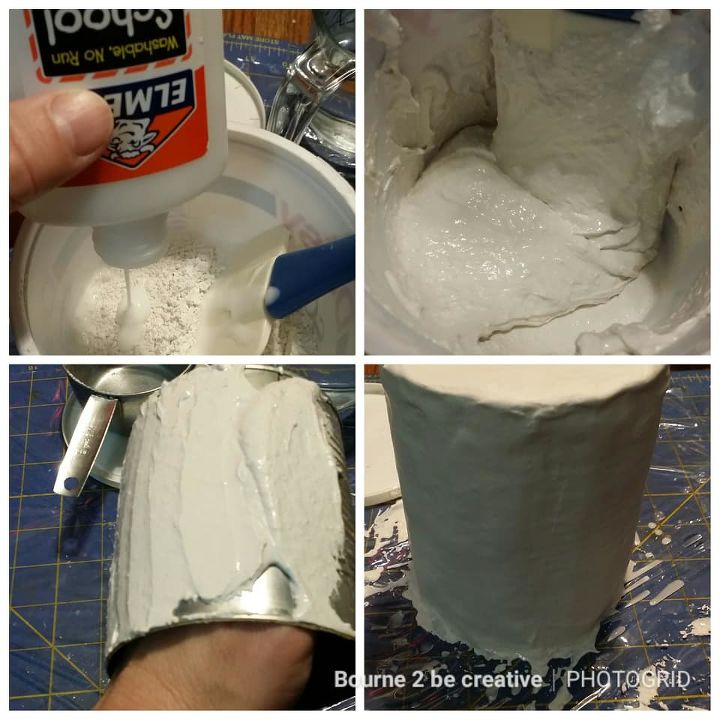
I mixed 1 cup of plaster with one 4 oz bottle of Elmer's glue. At this point I was supposed to add water, but I liked the consistency so I left it. Protecting my work surface with plastic wrap I covered the can in the plaster glue and let that dry.
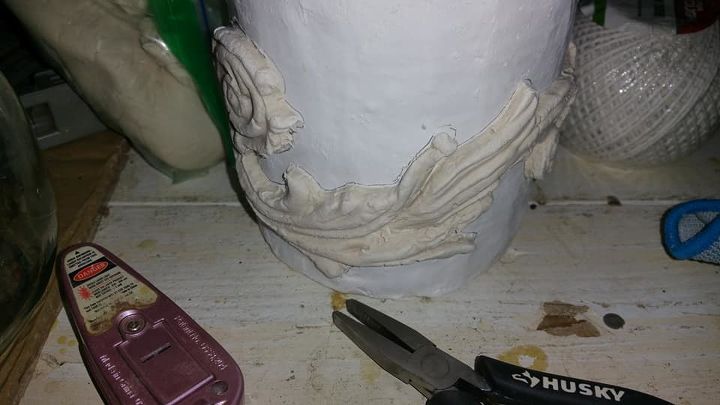
I have never worked with paper clay before. I had read you just push it in the mold and pull it out. It didn't exactly work like that, so I tried again using the technique I use with polymer clay... Water.
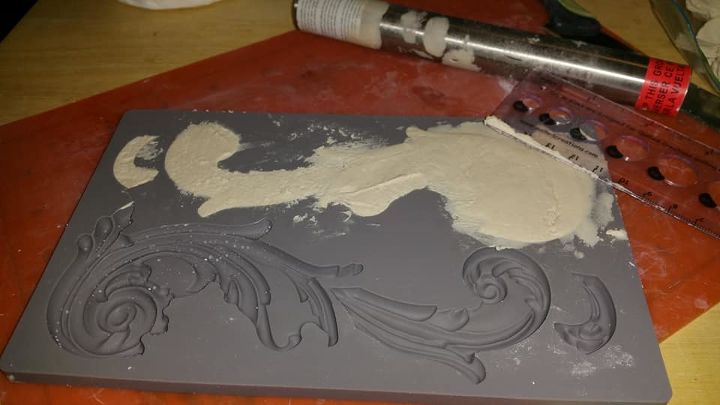
I misted the mold with water. I pressed in the clay and rolled it smooth. I used a straight edge to remove the excess and it stuck again. So I pressed in more clay and left just a bit hanging off the edges this worked.

To remove the excess clay, I used one of my clay tools and picked it away.
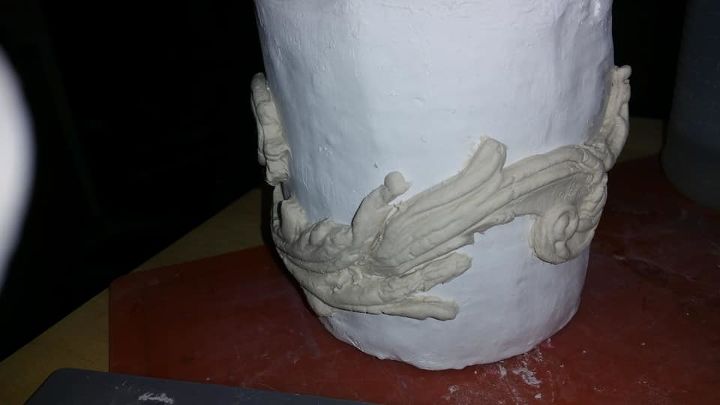
I then placed it on the can. I worked at the edges with the clay tool to make them look nice and blend in.
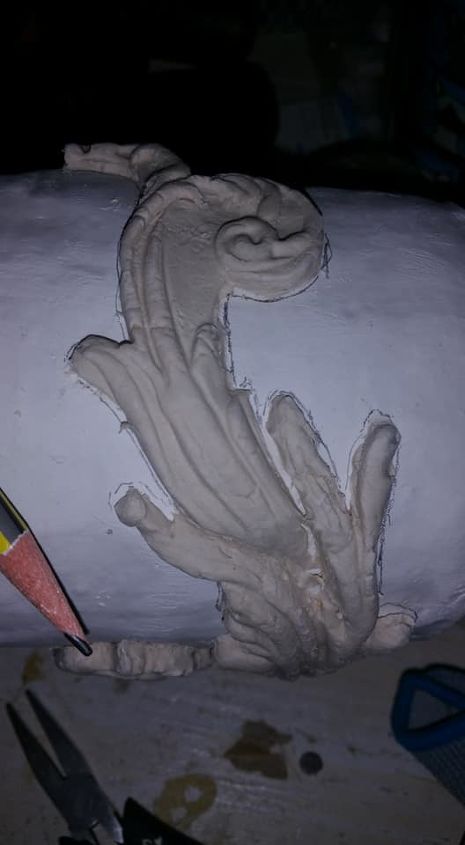
I wasn't sure if the paper clay would stick or fall off so I used a pencil to carefully trace around the design. I did this because the surface of my can was uneven. it wouldn't have looked right if it came loose and I applied it in a different place.
I left it to dry over night. The next day the paper clay was dry and firmly stuck to the can.
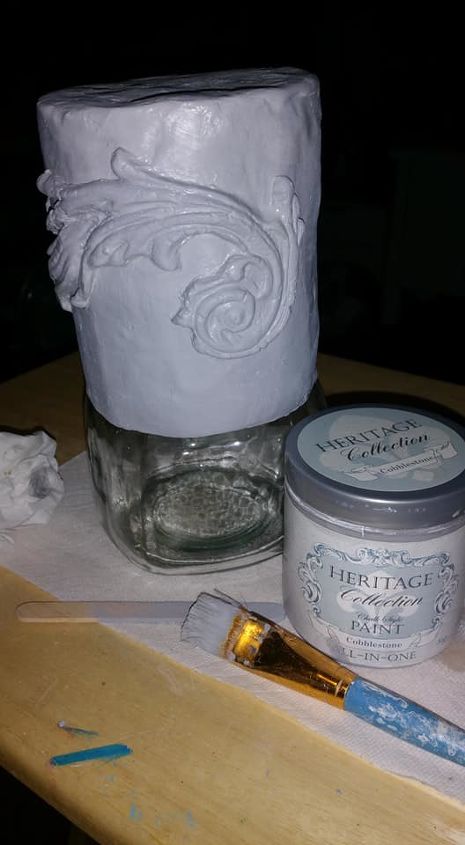
I used the Heritage Collection all in one chalk style paint that I received from Hometalk. The color is cobblestone. I painted that all over. I did two coats and let that dry over night.
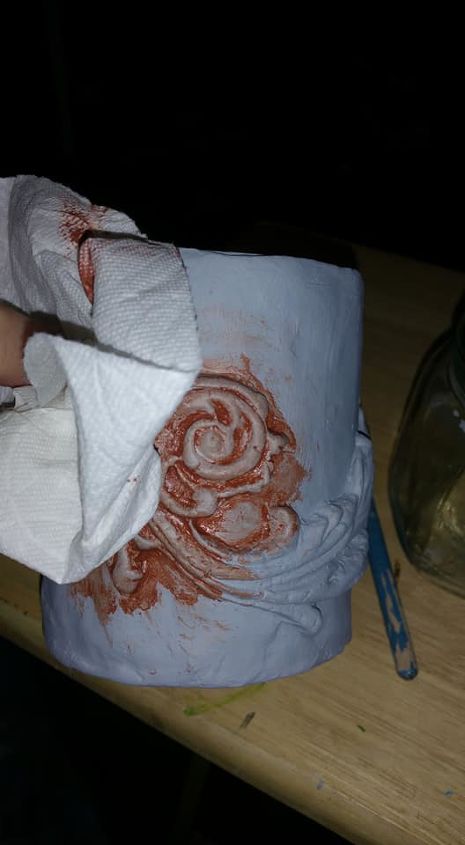
I then used brown enamel craft paint and painted that all over and wiped off the excess .
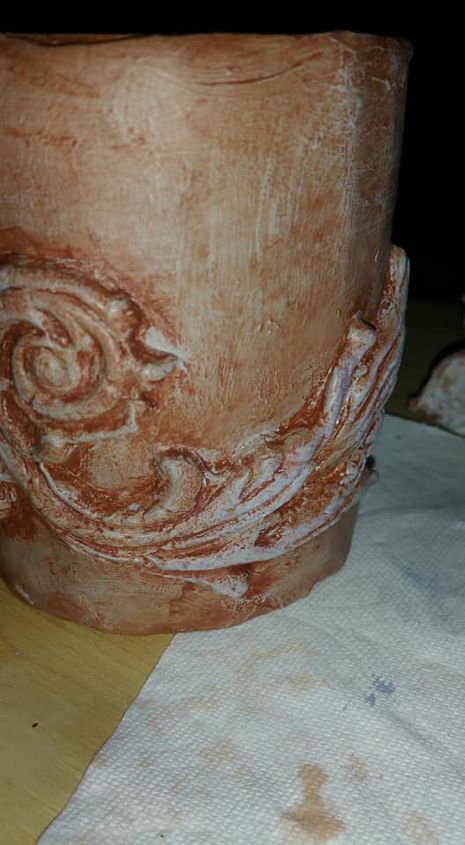
I decided it was just a bit darker than I wanted so I dry brushed on more of the Heritage paint.
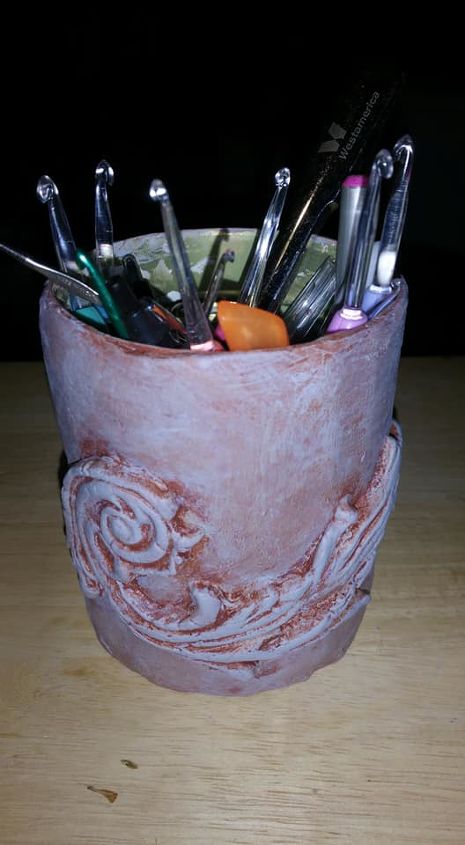
All done now fill it with what ever you need. Pens, pencils, crochet hooks, cotton balls, Q-tips.... If you need to buy everything necessary it will cost about $50 but you will be able to decorate lots of things. If you already have the stuff this will cost you next to nothing so I am estimating my cost at $10 since I have enough of everything to make more. Maybe I'll do a whole set in different sized cans.
Comments
Join the conversation
3 comments
-
Wow, hard to believe that was a tin can before!
-
This is a really creative idea! Thanks for sharing!


Frequently asked questions
Have a question about this project?