


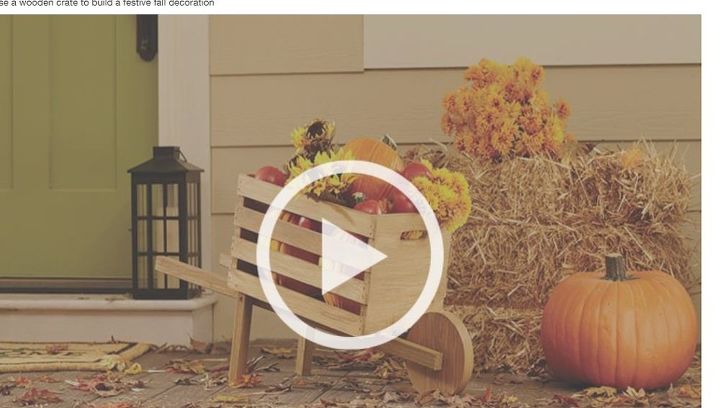
Fall Wooden Crate Wheelbarrow

I was inspired by a project that I saw at The Home Depot and thought I would try it.
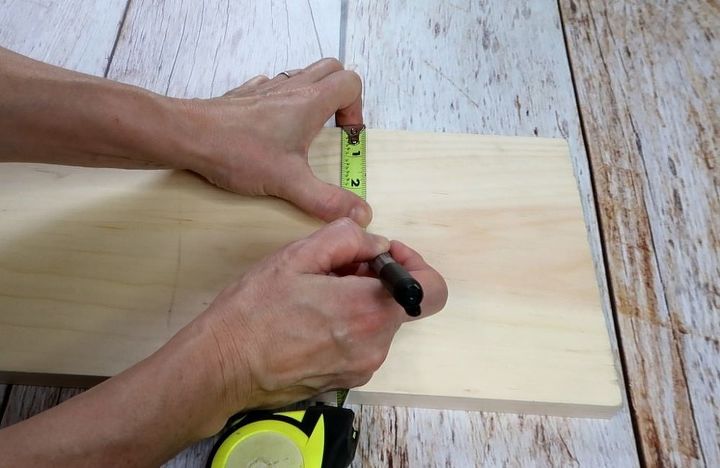
Step 1: The Wheel
Using a piece of 1"x 8", I measured and found the center of the board.
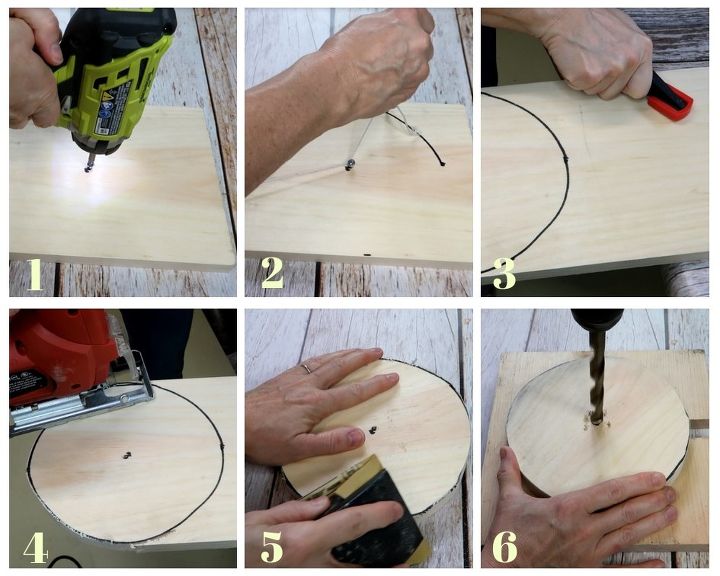
1 - I placed a screw on the mark in the middle of the board
2 - Using a piece of string tied to a marker, I drew a circle on the board
3 - I clamped the board to my work surface
4 - and cut out the circle using a jig saw
5 - I sanded all of the rough edges
6 - I drilled a 1/2" hole in the middle of the wheel
Step 2: The legs
A - I measured two pieces of 1" x 2" pine board 8"
B - and cut the board using a jig saw
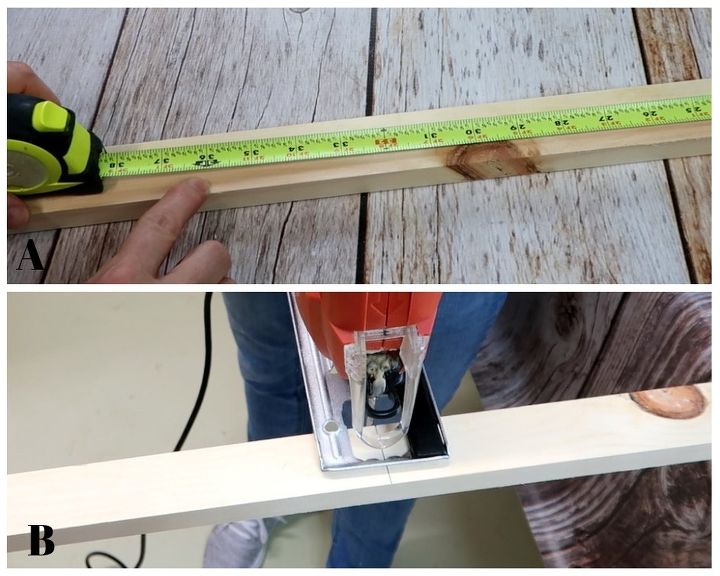
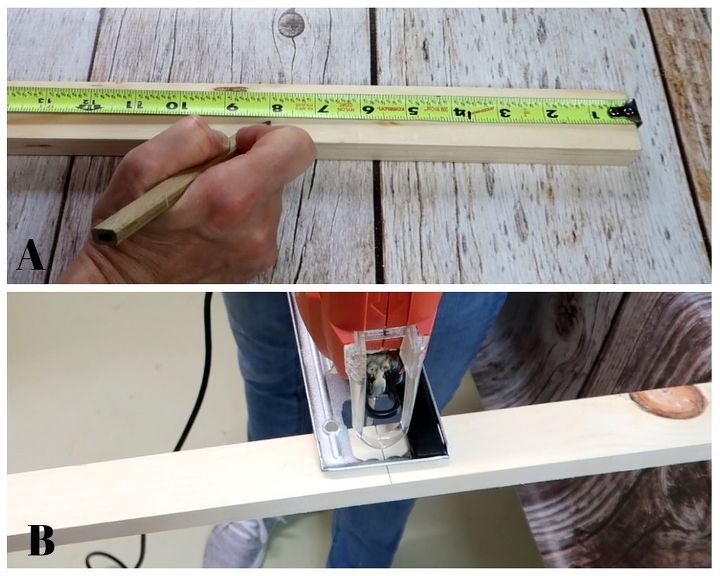
Step 3: The handles
A - I measured two pieces of 1" x 2" pine 36"
B - and cut the board using a jig saw
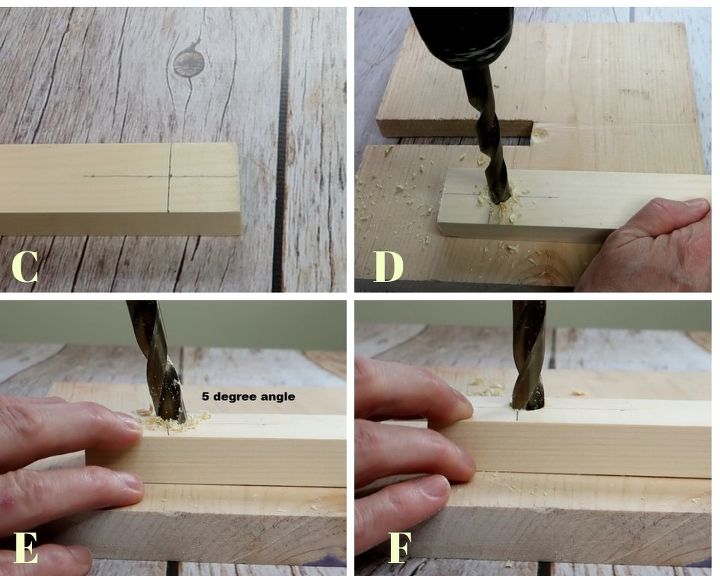
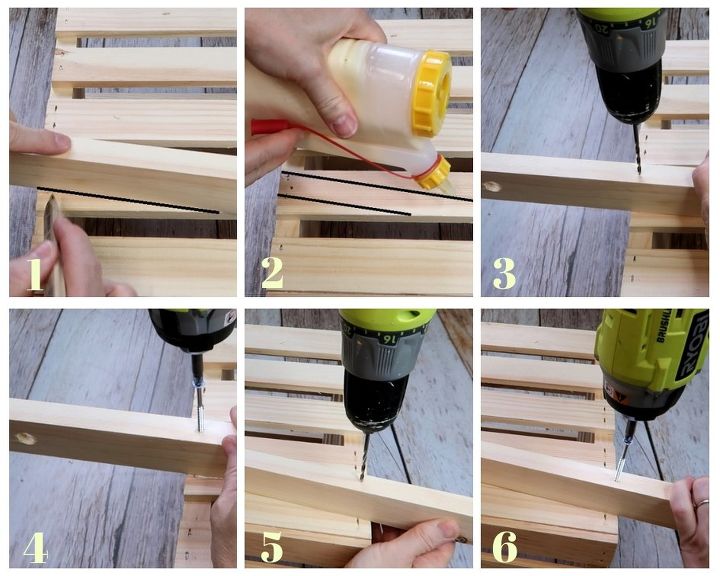
For the hole for the wheel axle:
C - Find the center of the 1" x 2" x 36" handle and mark one end measuring 1" from the end
D - Using a 1/2" drill bit, drill a small indent into the wood
E - Hold the drill bit at a 5 degree angle and drill half way through the board
F - Now hold the drill bit at a 90 degree angle and finish drilling through the board.
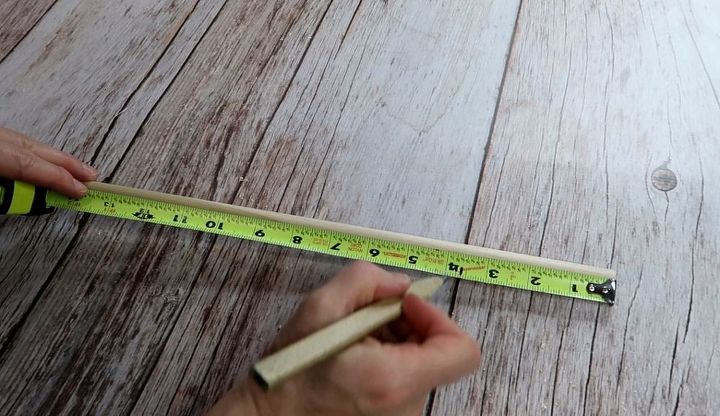
Step 4: Wheel Axle
Measure and cut a 1/2" wooden dowel 4" long
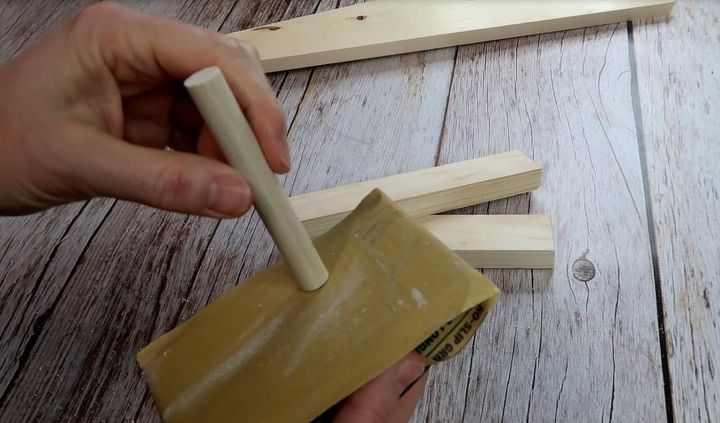
Step 5: Sand
Sand the rough edges off the wheel axle, the two handles, and the two legs using fine grit sandpaper.
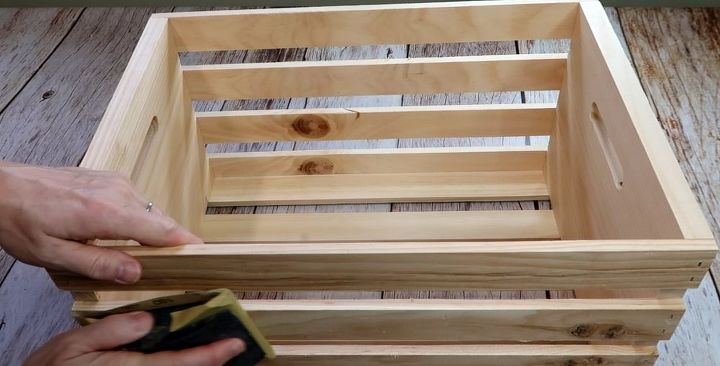
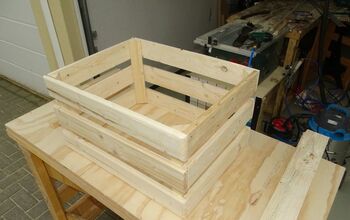
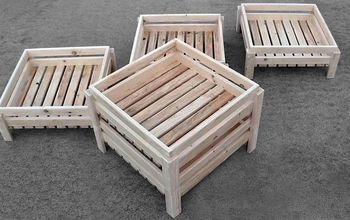
Step 6: Sand the Crate
When you purchase your crate, take the time to find one that isn't made with rough wood. If there is rough wood, sand it with fine grit sandpaper.
Step 7: Attaching the Handles
1 - Lay the first hand onto the back of the crate and measure 6" from the end of the handle to the front of the crate. Mark where the handle rests on the crate
2 - Apply wood glue inside those marks
3 - Drill a hole through the handle
4 - Using a 2-1/2" screw, attach the handle to the crate
5 - Complete steps 3 & 4 to the back of the crate
Turn the crate around and attach the other handle to the other side
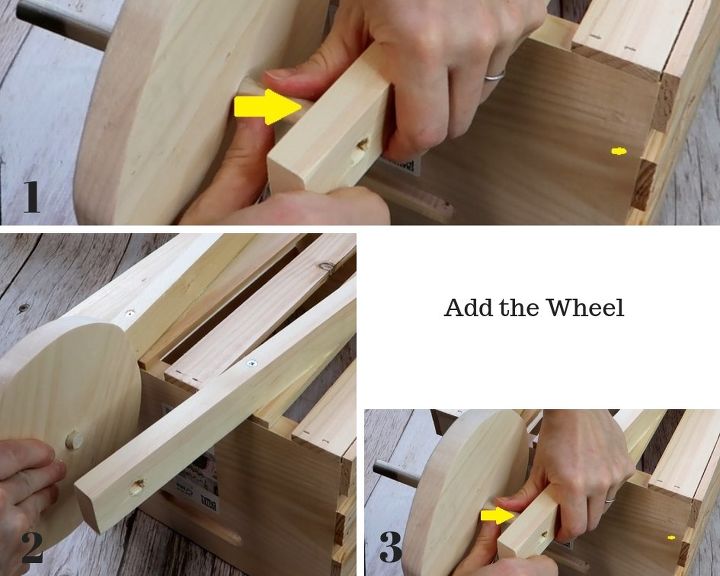
Step 8: Attach the Wheel
1 - Place the axle dowel through one hole in the handle
2 - Once the axle is through the hole, place the wheel onto the axle
3 - Push the axle through the hole in the other handle
Step 9: Finishing
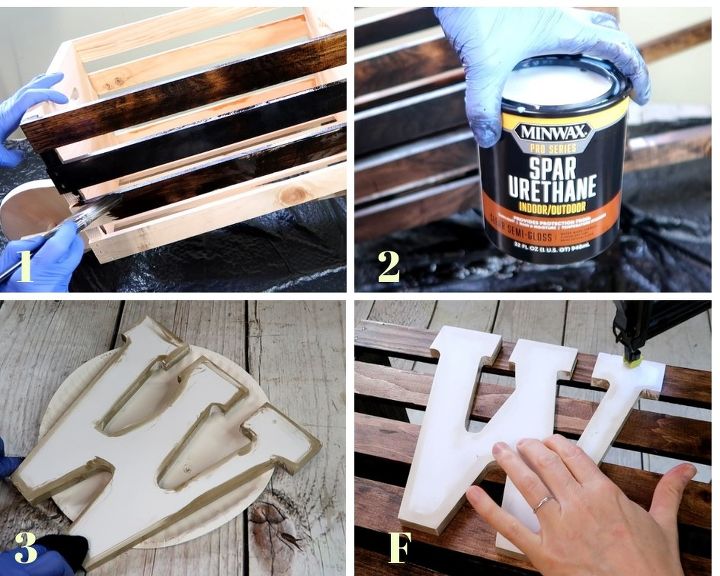
1 - Stain or paint the entire wheelbarrow. I used Minwax stain in "Walnut"
2 - Once the stain or paint is dry, follow the manufacturer's directions to apply polyurethane
3 - I purchased two "W" to attach to the wheelbarrow. I used some leftover stain to add a rustic look to the letters
4 - Once they were dry, I nailed them to the wagon on either side.
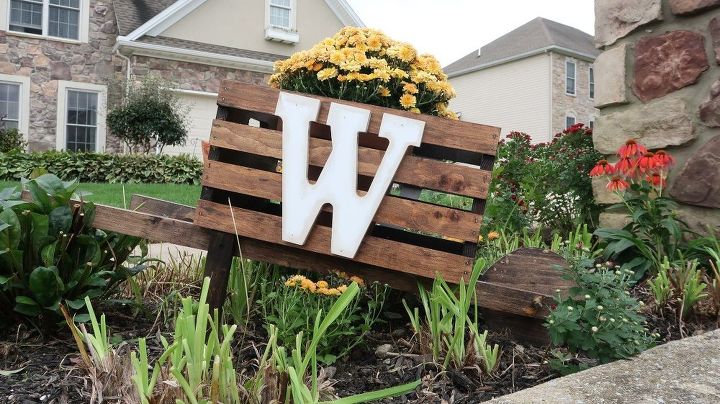
I set my wheelbarrow out by our mailbox in the garden and filled it with mums.
Resources for this project:
See all materials


Comments
Join the conversation
-
What a great Idea!! It came out really nice!! I think I will try to make one!
-
Gr8T Job !!!! Really looks Nice I would like to do that and put our house number on it Thanks for sharing !!!


Frequently asked questions
Have a question about this project?
very cute. What is the reason for the 5°angle on one side of the handle? If it is to ease the angle of the handles where they attach to the wheel/axle, does the angled side of the hole go inside towards the wheel or outside away from the wheel? When you say measure from end of handle to front of crate, do you consider the front as the wheel end of the crate? Did you attach the legs to the handles or to the bottom of crate?
Thank you
What’s the size of crate,, the dimensions
I’m TOTALLY in LOVE. Want to make this! ❤️❤️❤️