


Sliding Kitchen Barn Door (from Drab to Fab)

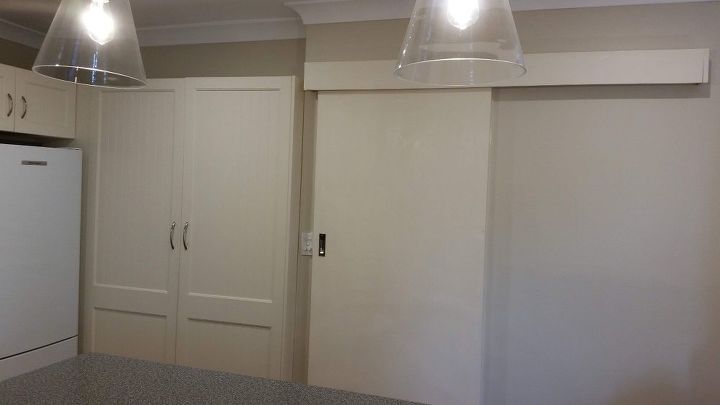
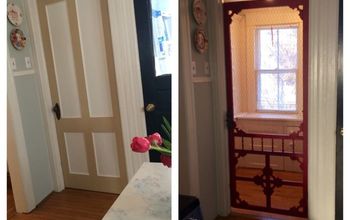
We had been in our home for 19 years and I was tired of the original boring sliding door which separated the kitchen from the hallway. We had painted it when we originally renovated it back in 2000 but it was in need of a fresh paint. I suggested to my husband that we transform it into a barn door, remove the old outdated pelmet and track and replace it with a barn door track. He didn't like the idea at first but soon saw the potential. We priced new barn doors but they were well over $1,700 (AUD) installed which was well beyond our budget. So we visited the local hardware store and saw barn door kits for $150.00 (AUD). This was going to be the better option. There were several designs to choose from and it looked easy to install.
This is a photo of the original door.
We first removed the old door, wall pelmet and track. We realised the metal track in the kit was longer than our old pelmet so we had to remove it from the wall but not without damaging the plaster. After repairing the damages and painting it all, we attached the longer piece of timber to the wall and painted it. This is probably not necessary in all installations but we had big gaps in plaster to hide.
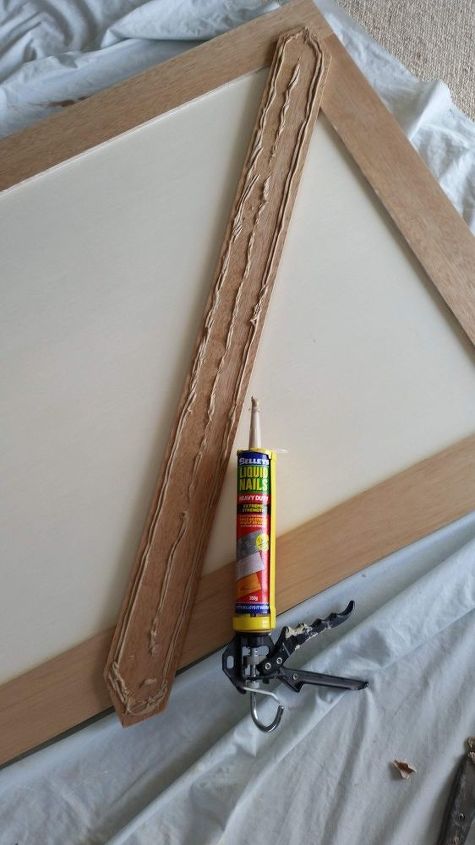
We then commenced transforming the door. I removed the hardware and sanded the door down. After working out what design we wanted we purchased some timber which we got dressed and cut to size. We bought two strips which were cut to the height of the door and three strips which were cut to fit across the top, middle and bottom, plus two strips cut to form the diagonals. I haven't quoted sizes because every door is different. However you must keep in mind the maximum door thickness allowed by the track kit itself. We then used liquid nails to glue the timber to the door on the kitchen side only. We left the hallway side of the door plain.
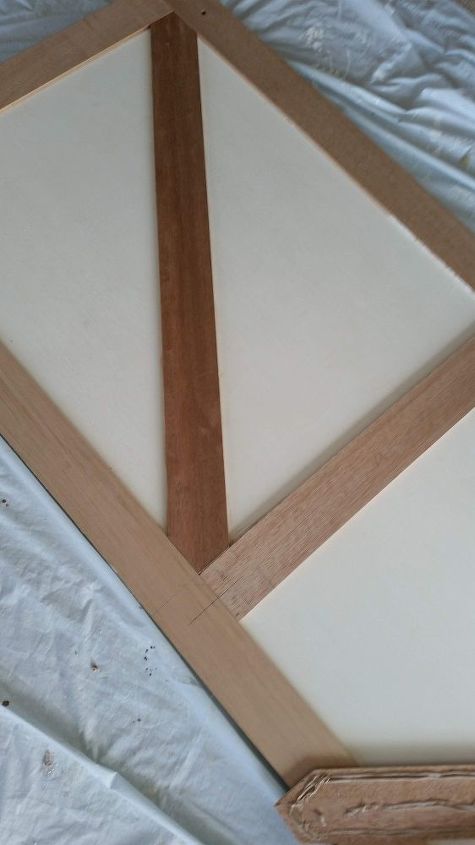
Above photo shows the angles cut for the diagonal strips.
After clamping and weighing down the timber until dry, we then filled in any gaps with wood filler, sanded then painted with semi gloss acrylic (2 coats) on both sides of the door. We then attached the new handles.
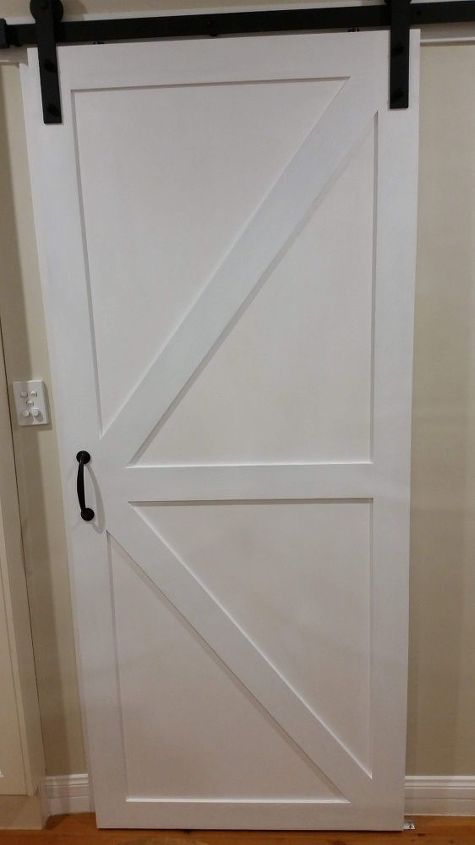
Following the barn door kit instructions, which were relatively easy to understand, we mounted the track onto the timber beam on the wall. We had to replace the original one as it was 8 inches too short. We found we had to drill holes in the steel track so the screws lined up with the wall studs otherwise it would not be very secure. The pre-drilled holes in the track were evenly spaced at set intervals but as we found out, our timber did not match up.
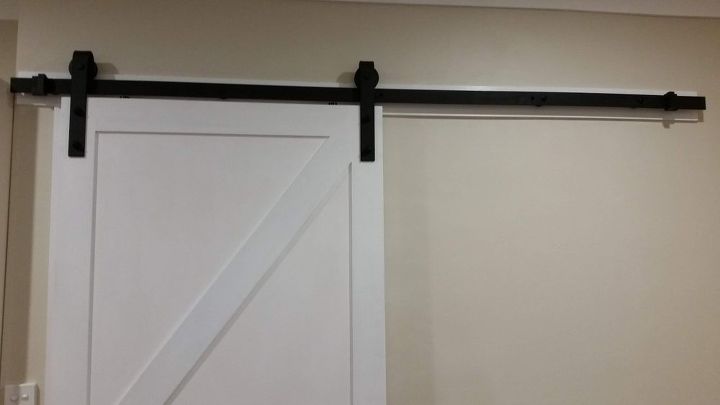
After making final adjustments we put the door up.
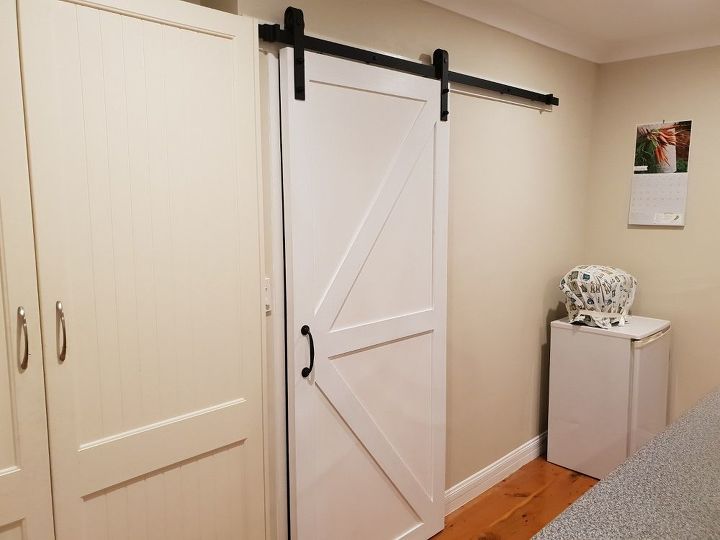
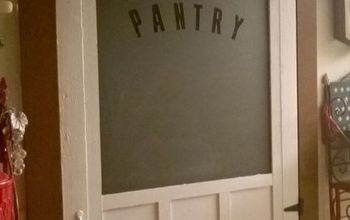
This is the finished door.
Resources for this project:
See all materials


Comments
Join the conversation
-
Super cute! Great idea.


Frequently asked questions
Have a question about this project?
I see a lot of these doors done the way you have done yours but I never see that anyone mentions what keeps the door from hitting the wall at the bottom????
Why did you choose to paint the door white when everything around it is cream?
Could you do the same design on the pantry doors next to it and paint them white also. I think that would be a bright improvement.