


Faux Tin Ceiling Tile Installation
Learn how to install ceiling tiles and give your home the makeover you didn’t know it needed. These ceiling tiles instantly upgrade your home and give you a luxe look on a budget. Use the following steps to install ceiling tiles in just a few hours.
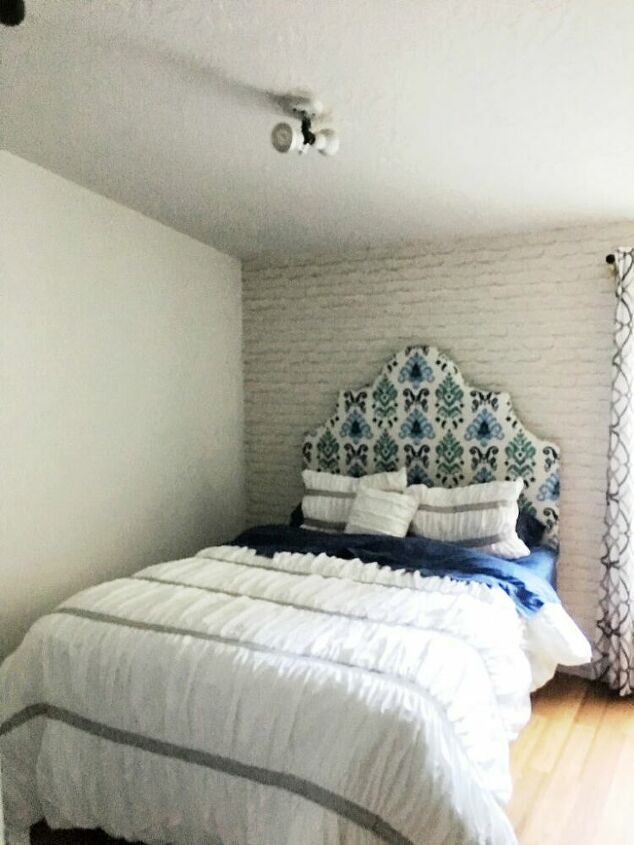
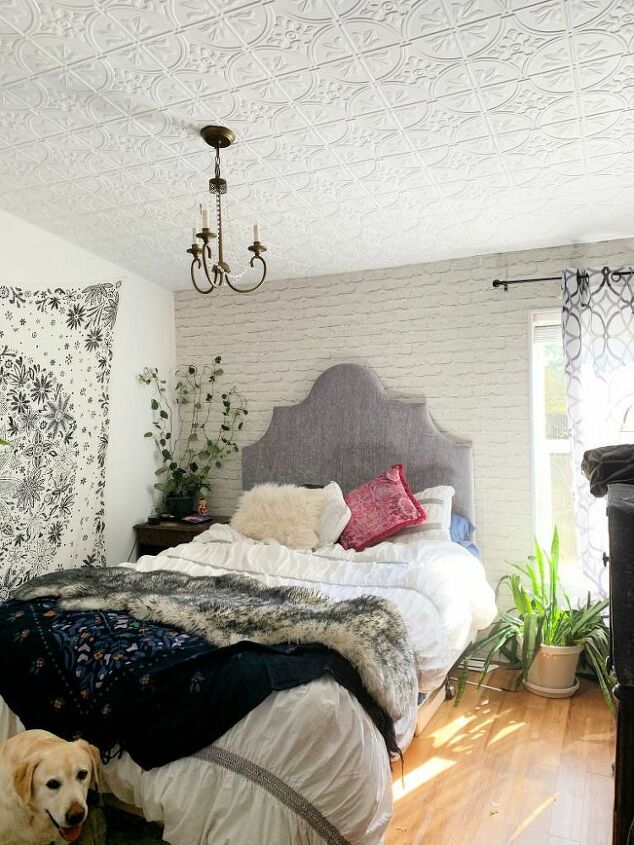
Before I started, the ceiling in my bedroom had a pattern stamped into the drywall which looked fine but wasn’t really my style.
These tiles are very thin- but super durable plastic. I opted for the Fasade Ceiling Tile -2×4 Direct Apply-Traditional 2 in Matte White style.
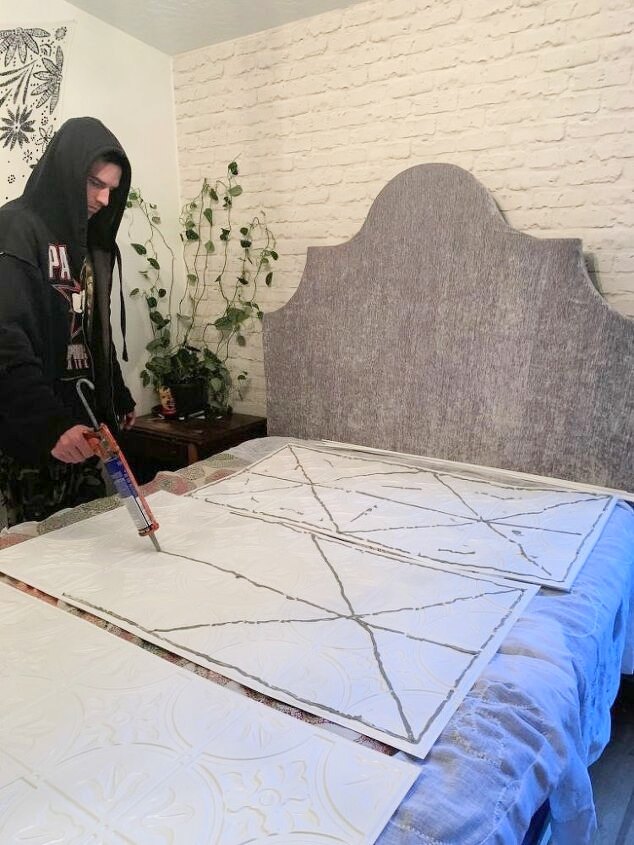
The preferred method for installing Glue-Up ceiling panels is to apply the adhesive directly to the back of the panels. Then use use a notched trowel (1/4″ x 1/4″ x 3/4″) and spread the adhesive evenly on the panel. ACP, the manufacturer of Fasade recommends using Loctite PL Premium adhesive. Do not use double-sided tape to install ceiling panels.
You need to make sure your ceiling is clean. You may want to apply a fresh coat of primer or paint on the ceiling before you install the panels.
Wipe the back of each panel with some rubbing alcohol. This will remove any the finger prints, dust or dirt to ensure maximum adhesion to the ceiling.
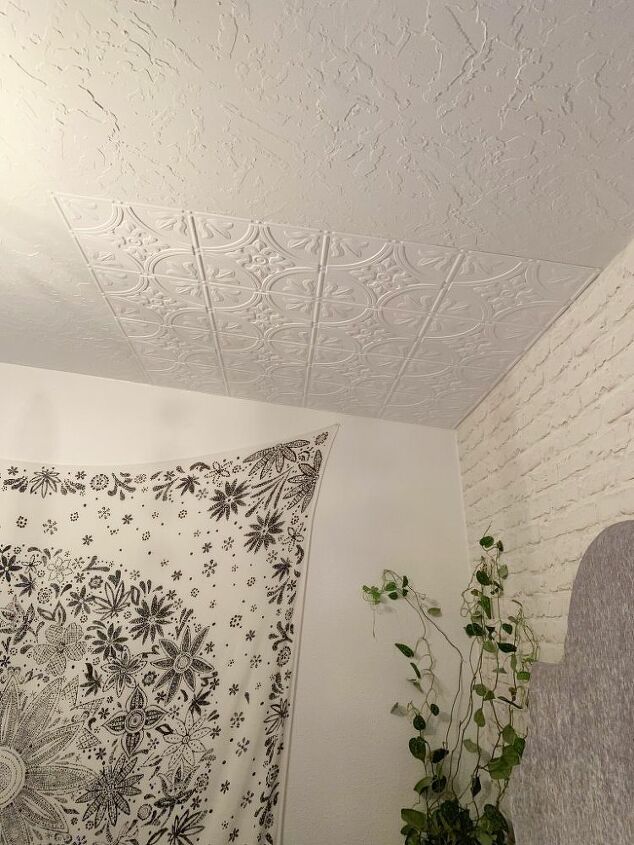
Start in one corner and glue up the panels left to right. Work your way across the ceiling and over. Trim the tiles to fit as you go.
After an hour reapply pressure to the ceiling tiles to make sure they are secure.
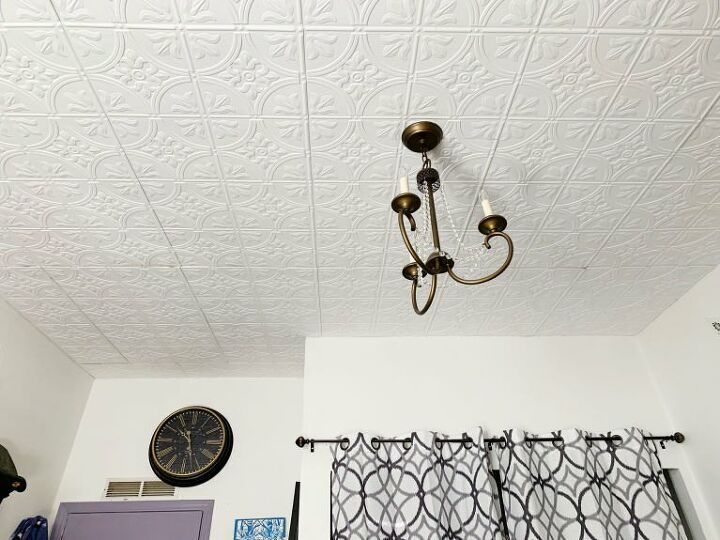
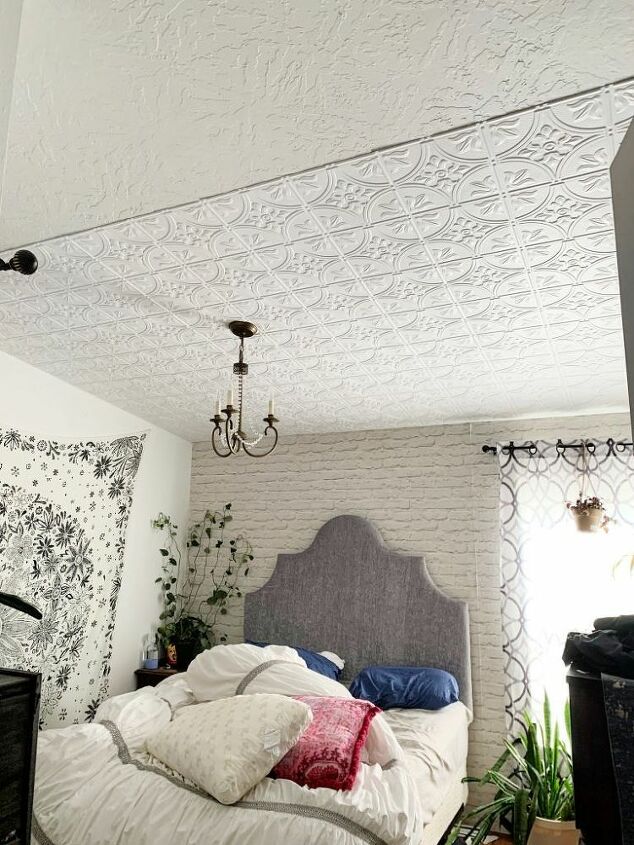
The after look on my ceiling, looking up from my bed.


Comments
Join the conversation
-
Love the white brick walls and airly light feeling of the bedroom
-
Love it! My house was built in 1989 and has what I describe a starburst ceiling. I never thought of this as a coverup. Thanks for the idea. Great job! Hope I can do as well as you did.


Frequently asked questions
Have a question about this project?
By starting in a corner did you have an off size at the other corner?
Can you apply these over a popcorn ceiling?
I have a tray ceiling. Would I put that around the edges of the tray as well as the horizontal surface? Do you have a recommendation for the seams when they would meet?