


How to Turn a Sewing Table Into a DIY Cooler

Summer wouldn’t be the same without cool drinks with friends outside, and what shows off your crafting ability more than a bespoke and personalized DIY cooler made from an old sewing table. Turning an old sewing table into a DIY cooler helps do two things; not only does it provide you with a bespoke and unique cooler for your summer events, but it also helps upcycle something that would otherwise be discarded. For anyone interested in creating something special that will have people talking, look no further than this DIY cooler made from an old sewing table.
Tools and Materials
- Sewing table
- Screwdriver
- Painter's tape
- Spray paint
- Sandpaper
- Plastic tub
- Rust-oleum
Step 1: Gather Your Materials
The first stage of any project is to gather the materials. For this one, I realized how simple creating the DIY cooler would be based on the few materials that would be needed in order to create the desired look. The benefits of using an old sewing table for this, is that there is already a hole built into it where the sewing machine went.
If you have upgraded your sewing machine, or outgrown it, the table would usually just be donated away. If you wanted to continue using the table, finding another use for one that had a huge hole in it could be difficult - except when it comes to summer and somewhere to store cool drinks out of the sun. The first step was to gather my materials. Once I had gathered all my materials, I was ready to make the DIY cooler.
Step 2: Prep the Sewing Table
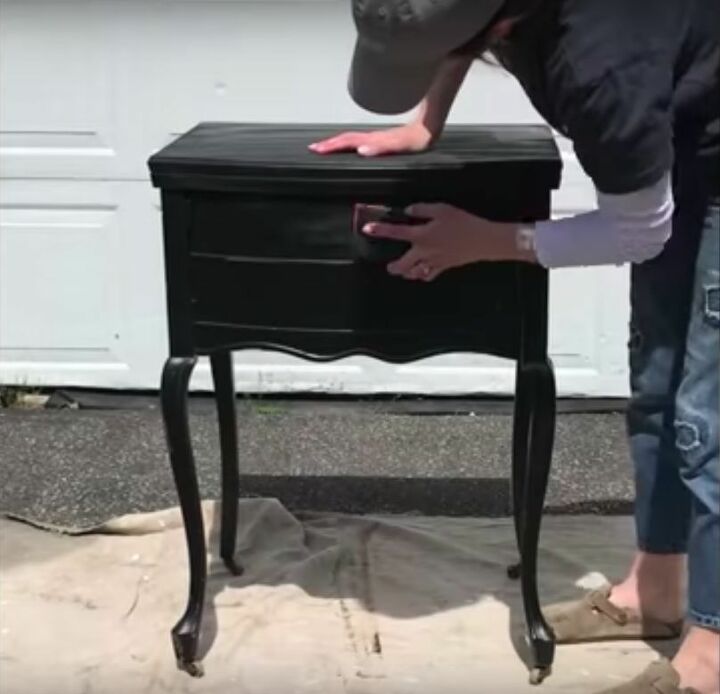
Assessing the condition of the sewing table is the first step once the materials are gathered. I realized that it would definitely need repainting and, in places, needed sanding down. Years of use may leave your sewing machine tables looking shabbier than you’d like, but this can be easily fixed. I removed the sewing machine easily with a screwdriver, as well as the extra flap of wood that would just get in the way of the plastic tub of the cooler. Once I had sanded down any of the rougher parts of the sewing table, I was ready to decide how I’d want the actual table to look.
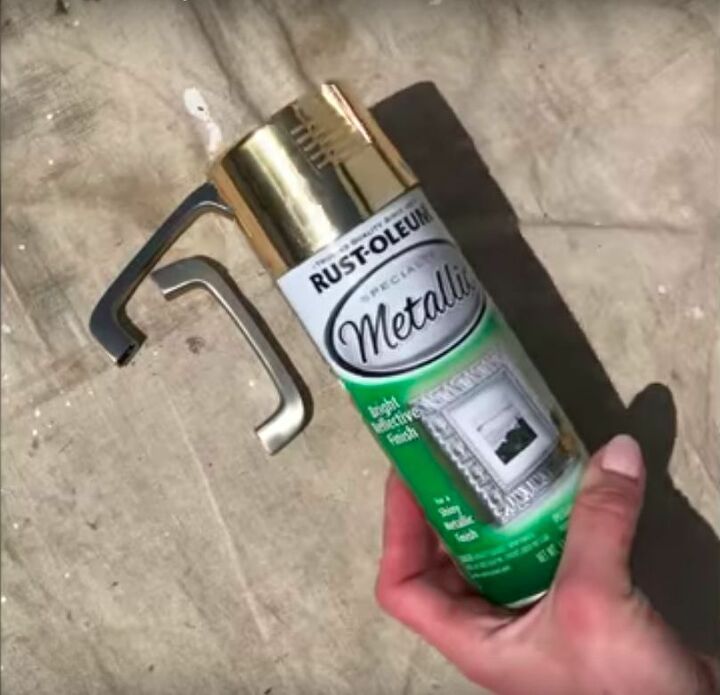
The first thing to paint are the handles, so I removed them from the sewing table. The handles are suitable for the original piece of furniture, but you can use any handles you like if you're going for a different look. I decided that they looked good, but could do with a different style of paint.
Step 3: Paint
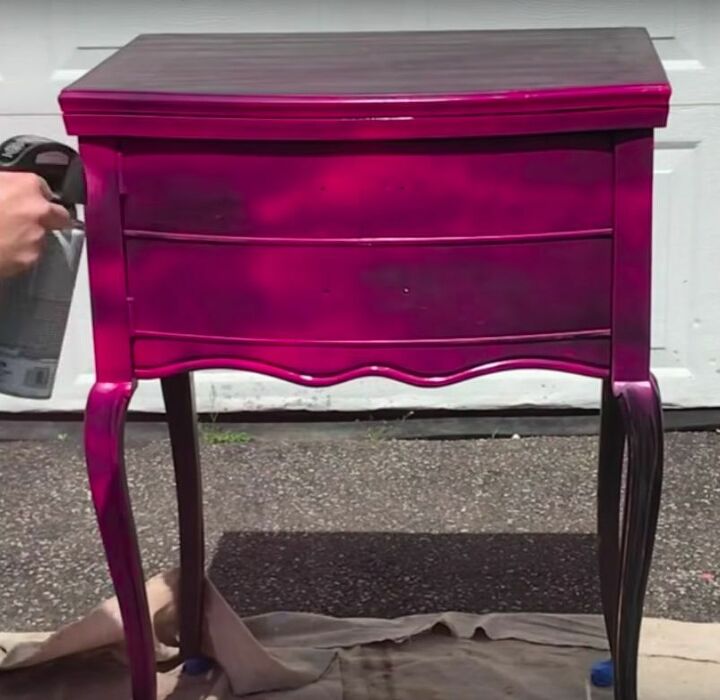
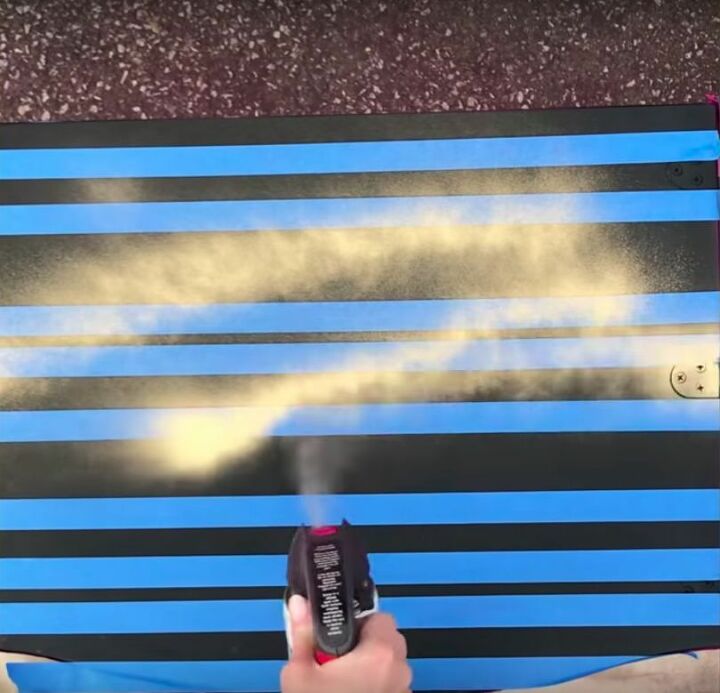
The next stage involves painting the table. I started by spray painting the handles a metallic color using Rust-oleum, and used painter’s tape to cover the hinges and feet of the table. I then used pink spray paint to give the sewing table a few coats of paint. As the color was dark to begin with, it took a few coats to ensure the previous color didn’t show through. After that, I painted the inside of the lid and the wood around the hole black.
To add an extra pop of color, I used painter’s tape to create stripes and then painted over parts of the black paint inside of the lid with yellow, which created a black and yellow striped effect. You may need to touch up some of the areas, depending on the color that your sewing table started as. Once you’re confident with the aesthetics of the table, you’re ready for the next step.
Step 4: Add a Bucket and Ice
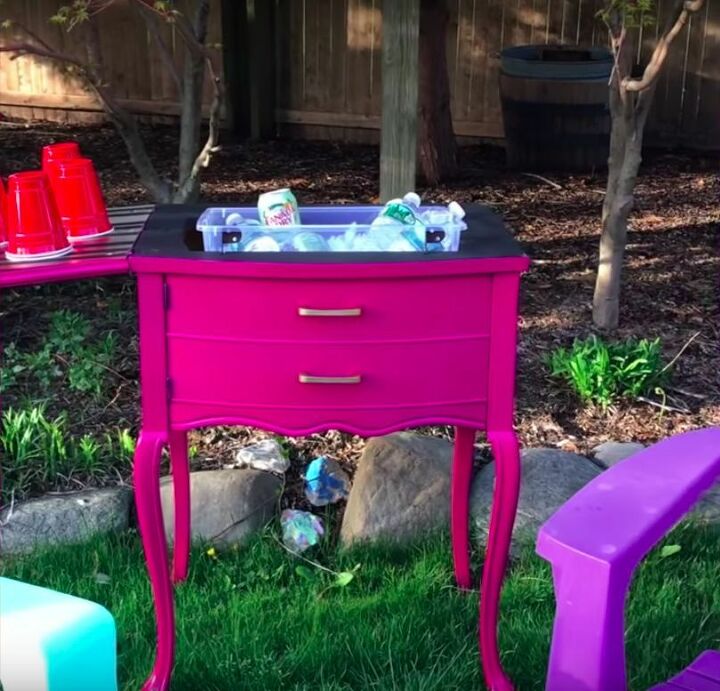
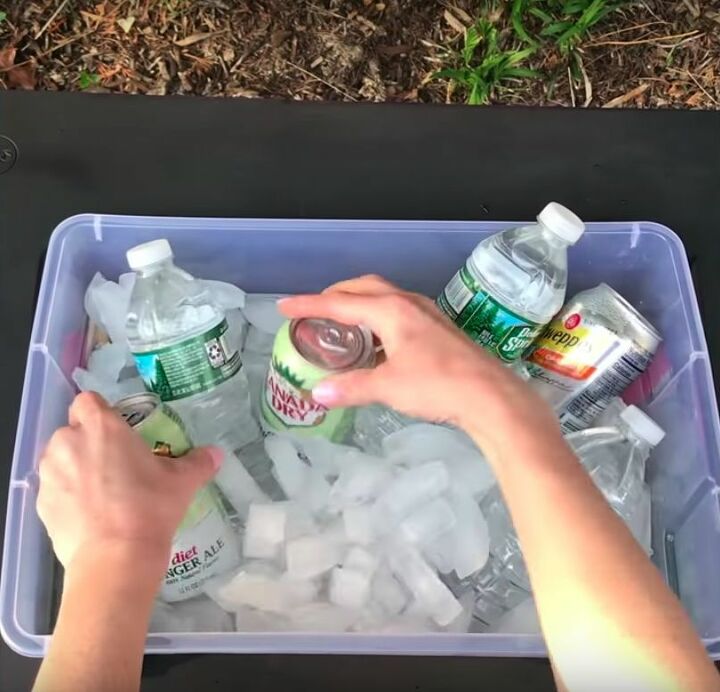
Once the paint dried, it was time to fit in the bucket. I used a plastic tub that would fit into the size of the pre-existing hole, and filled the box with ice. The lid could be used to place solo cups on or used to prepare other drinks. While the sewing table I used meant that the plastic cooler had to stick so far out, there could be other designs that might suit boxes that can be hidden inside the sewing table.
Step 5: Enjoy
One of the major benefits of this DIY cooler is that it means you can benefit from having cool drinks, without having to have an ungainly cooler ruining the aesthetic of a summer event. This small touch will ensure that you successfully showcase your artistic flair from something very simple that most people would overlook. Of course, your guests will enjoy the cool drinks and it will be a talking point at any party, but, hopefully, it will also reignite your love of making things and your creativity, as it did for me!

Admire Your Work
When thinking of what to create your own DIY cooler from, an old sewing table might not be everyone’s initial thoughts. Similarly, you might not immediately think of placing a cooler in the gap in the old sewing machine.
This is why this project will give such a unique and awe-inspiring piece for your summer parties and get-togethers. You could customize the colors to reflect a summer theme, or could use the space inside the sewing table to place a box filled with almost anything. It could be used to store snacks that you’ve brought outside. The design means you can customize it to whatever suits you and you’re guaranteed to get people talking.
Resources for this project:
See all materials


Comments
Join the conversation
-
Lay an absorbent towel underneath your bucket to keep everything nice n dry
-
The pink table seems to be missing the rod support that comes out when you open the top.


Frequently asked questions
Have a question about this project?
How long will the plastic bin keep items cold. Is there drainage for the melted ice? Love the idea.