


Transform Ordinary Dollar Tree Pumpkins
Easy, budget friendly DIY Dollar Tree Pumpkins transformed into High-End Decor, non-traditional fall colors, pinks, sea foam green, white and copper with roses. Dazzle your fall and Thanksgiving guests with beautiful handmade decor.
Did you know pumpkins are not just for fall? Therefore, I wanted to grab a couple extra Dollar Tree pumpkins while shopping at the dollar store so I could transform them into an elegant tablescape for anytime of year. If you love pretty in pink pumpkins, styled with green and white pumpkins did you also know they can be used for pumpkin birthday parties, baby-shower decorating and more?
Dollar Tree Pumpkins
The shape and size of these Dollar Tree pumpkins were perfect to sit on some old rusty upholstery springs I had stored in the studio. I grabbed a cart full of these pumpkins to transform into some elegant decorations I had been dreaming about creating.
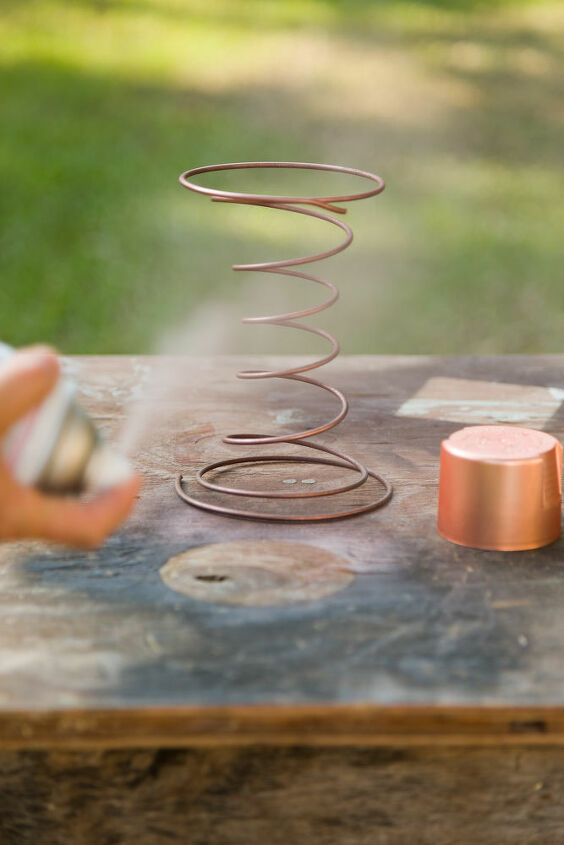
Note to self don't forget to stop to purchase some copper paint for those rusty springs. I purchased two different types of Rust-Oleum copper spray paint.
The springs look amazing with one coat of paint!
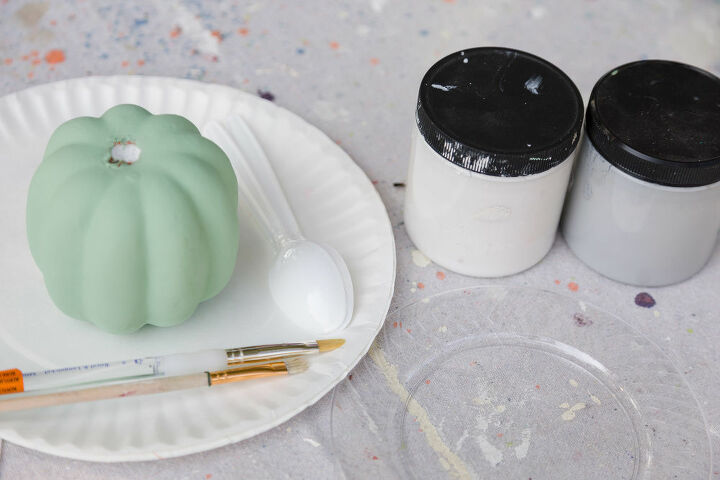
Supplies and tools
- X-acto Knife
- Pumpkins
- Chalk paint
- Paint brushes
- Floral
- Upholstery spring
- Spray paint
- Moss
- Display riser
- Bead garland
- Doily
- Hot glue and hot glue gun
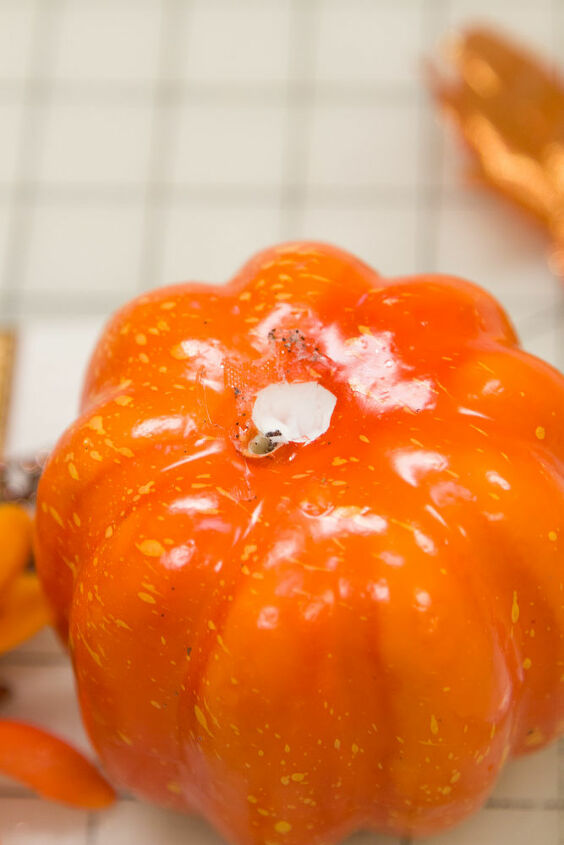
Then using my X-acto knife I cut out a hole the size of my stem (stick) before painting.
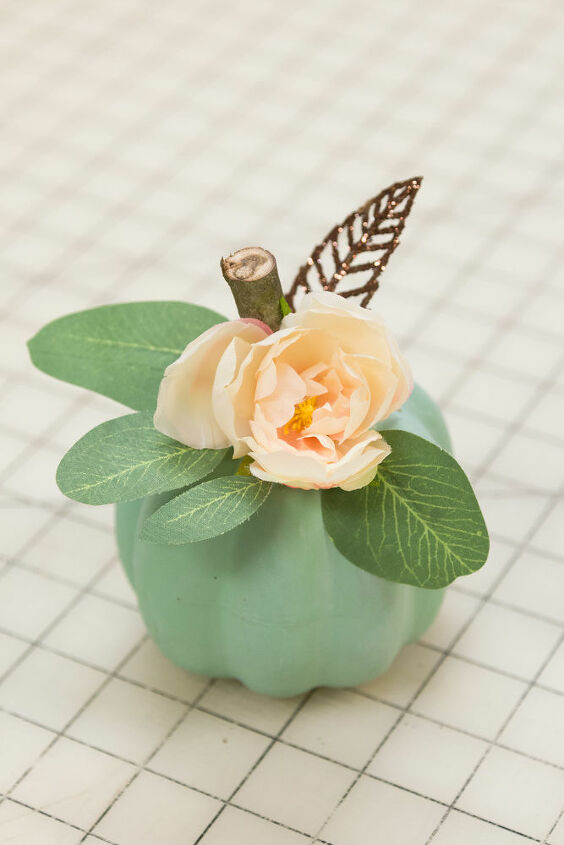
I painted 2 coats of green chalk paint on these Dollar Tree Pumpkins and let them dry overnight before adding some gray and white highlights.
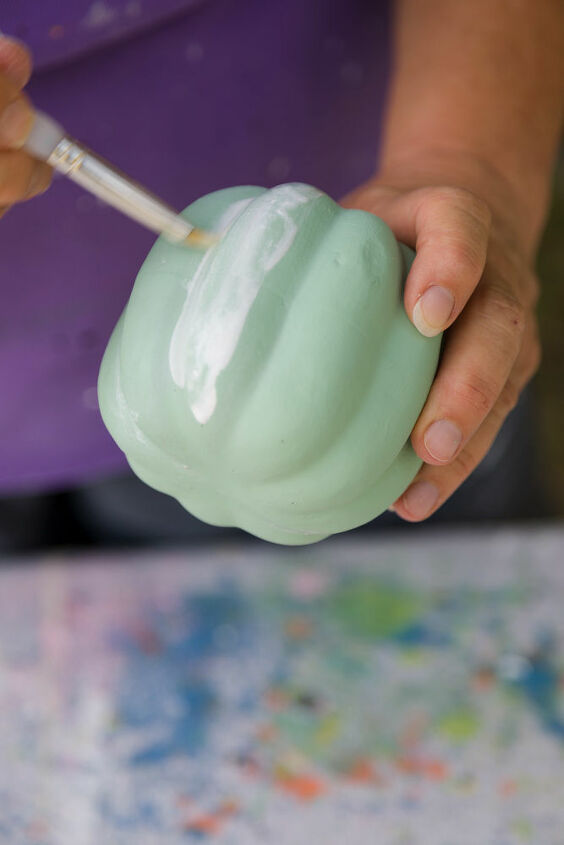
I wanted to add some more interest to the green painted pumpkin so I painted gray paint in the grooves and I painted the high spots white.
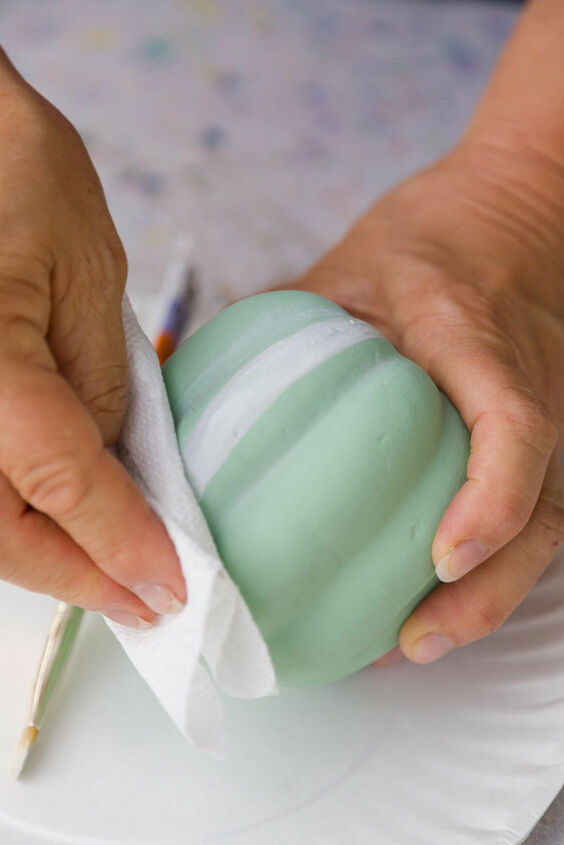
While the paint was still wet I quickly removed some of the paint with paper towels.
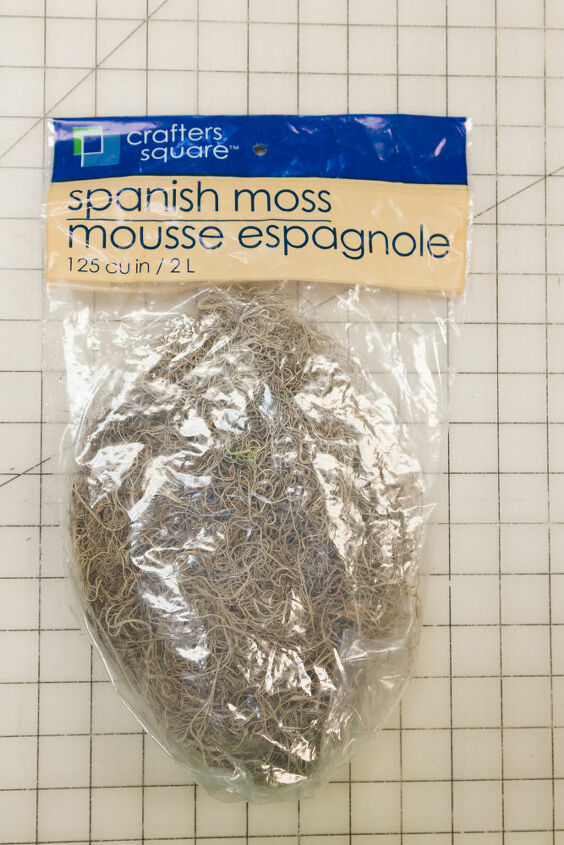
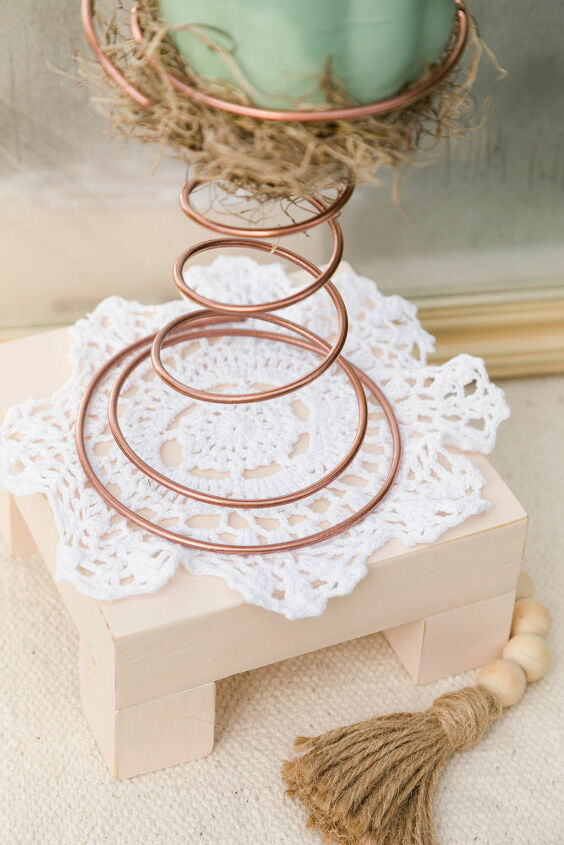
I placed some moss on the upholstery spring to form a moss "nest" for the pumpkin to sit on.
Decorating the pumpkins
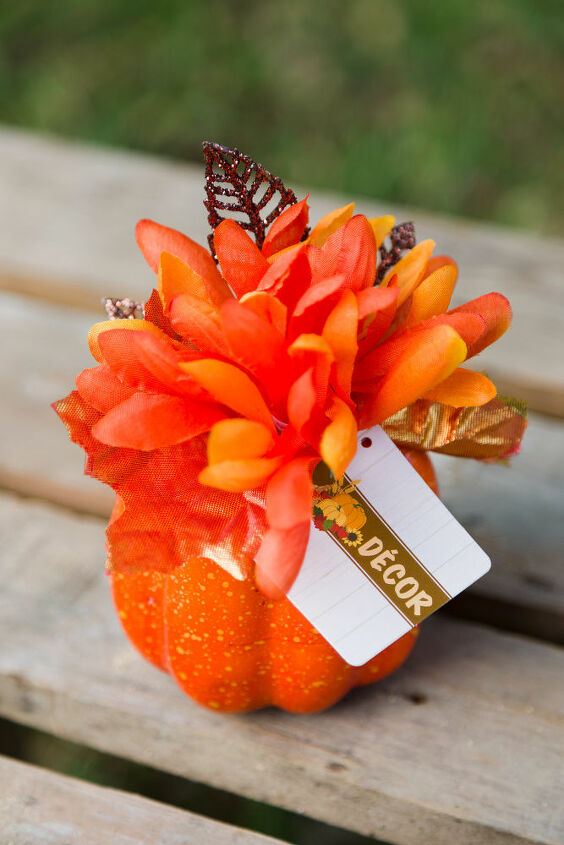
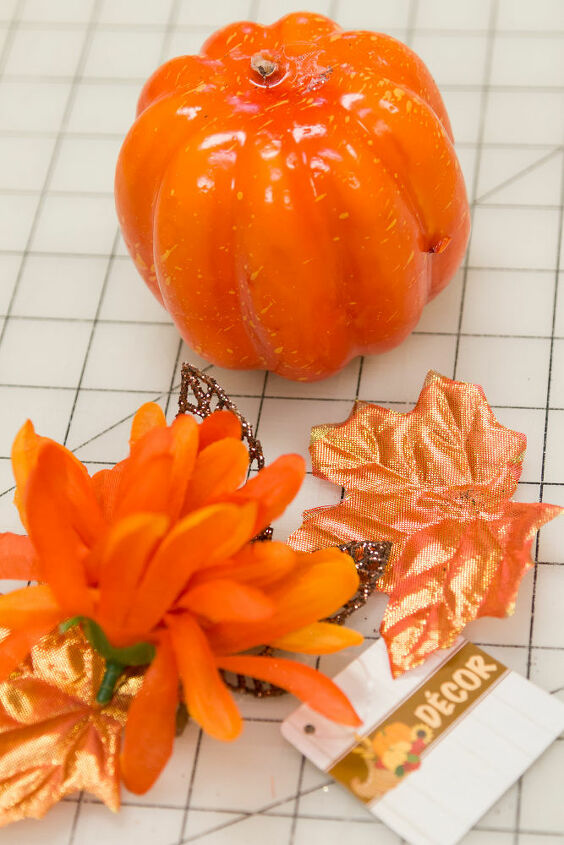
The chalk paint only took minutes to dry hence I was able to get my Dollar Tree Pumpkins decorated in minutes. This pretty green pumpkin needed a pink flower, some greenery and a stem (stick from my yard) to be finished. It still needed something so I used the glitter leaf I removed from the original pumpkin since it had a rose hue to it. I added a little hot glue to hold the flower and leaves in place. With that glittery leaf added it was perfect.
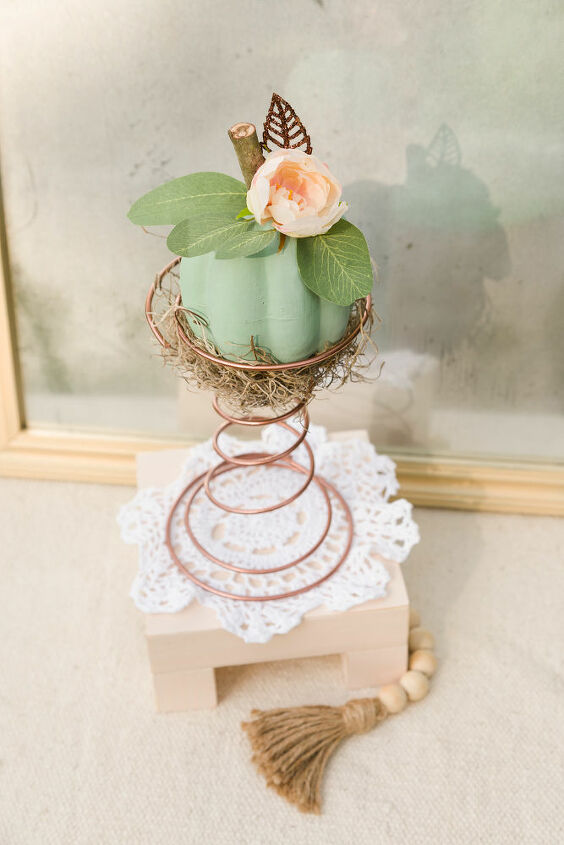
The pink wooden display riser I made from scrap wood and the how to build one is in this earlier post. The crocheted doily adds another feminine element. I love the bead garland and with the rustic twine tassel too.
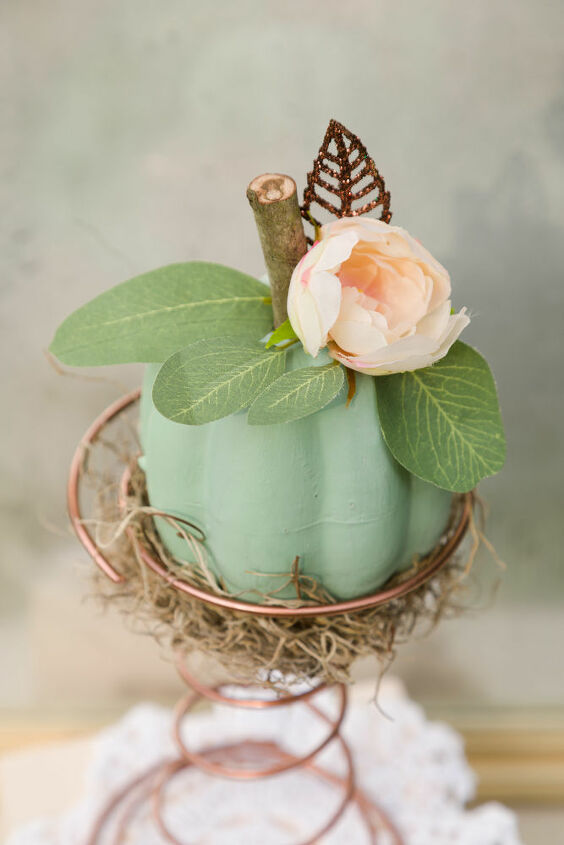
This pretty pumpkin says happy fall in a non-traditional pumpkin style. Crafting tip: I never know how I am going to use some of these interesting (upholstery springs) upcycle items, so I keep some on hand for craft times such as this.
Thank you so much for stopping by. I hope you found some inspiration I also would like to invite you to join our Fall Inspiration Newsletter and have all this inspiration and more delivered to your inbox.
Happy Fall!!!
Hugs,
Kippi


Comments
Join the conversation
-
Thank you so much. For more inspiration please check out my blog.
-
Love these! I have a couple of sweaters that I was going to donate, now I have other plans for them.


Frequently asked questions
Have a question about this project?
It came out really cute but where in the world did you get springs of all things? Loved it.