


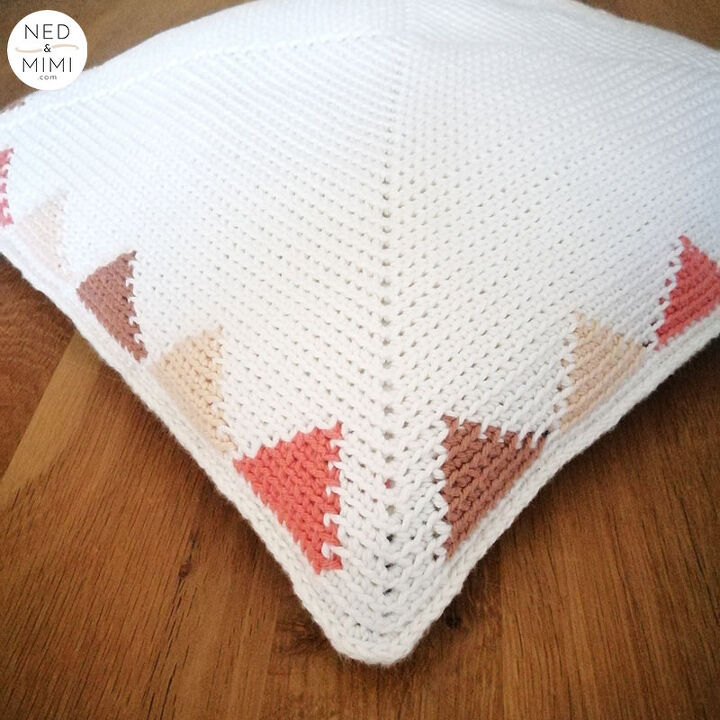
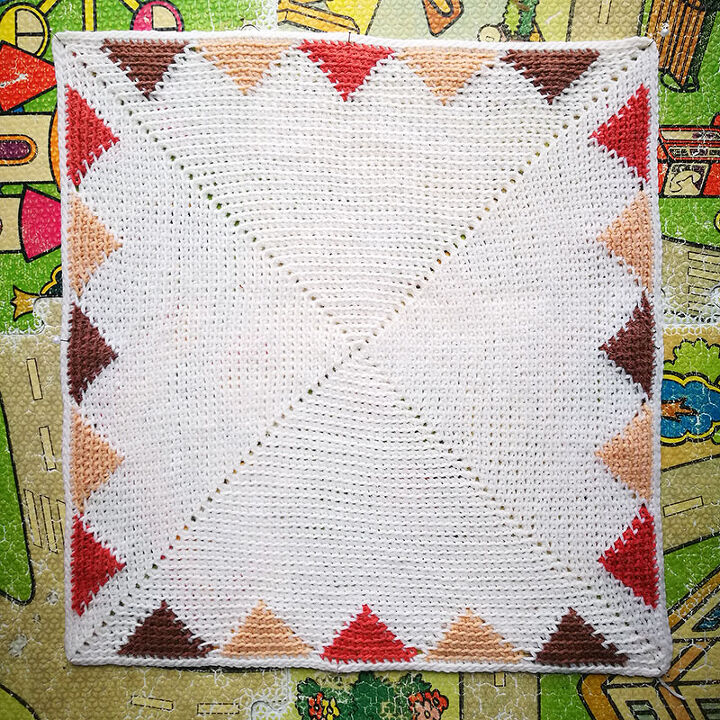
Tapestry Triangles Crochet Pillow

I love the geometric pattern trends that are everywhere at the moment and luckily crochet lends itself perfectly to recreating the trend. This Tapestry Triangles crochet pillow is worked in the round like a granny square, using single crochet through the back loop only.
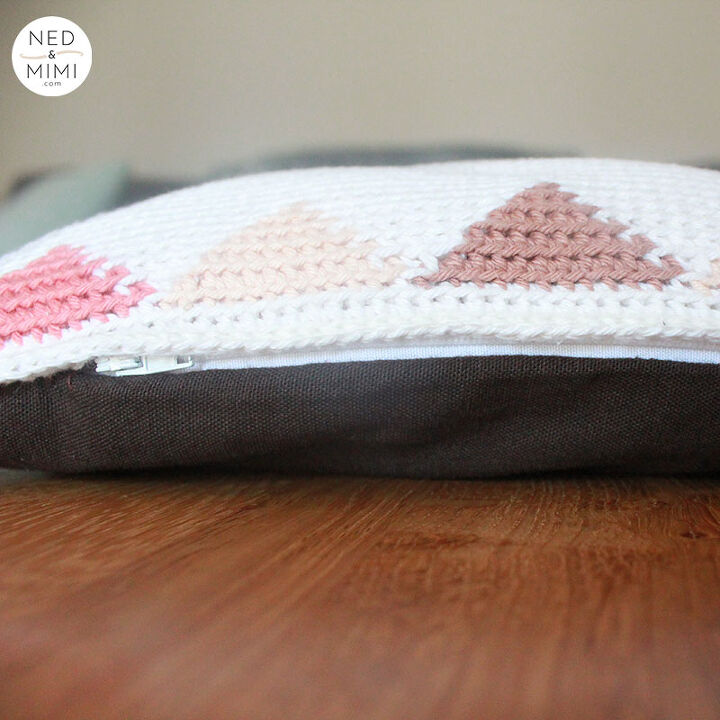
Crocheting through the back loop helps a bit with the ‘lean’ that you sometimes get when you crochet a really large square. And finishing off with a good blocking will give you a near perfect square at the end.I decided to use fabric for the back of the pillow, but you could easily crochet a second panel and join them together. I even went one step further and added a zip but this is completely optional.
Construction
- The pillow panel is crocheted in the round from the middle outwards
- For the back panel I used a piece of fabric (all instructions given below) but you could just as easily crochet 2 panels and join them using round of slip stitches.
Colorwork
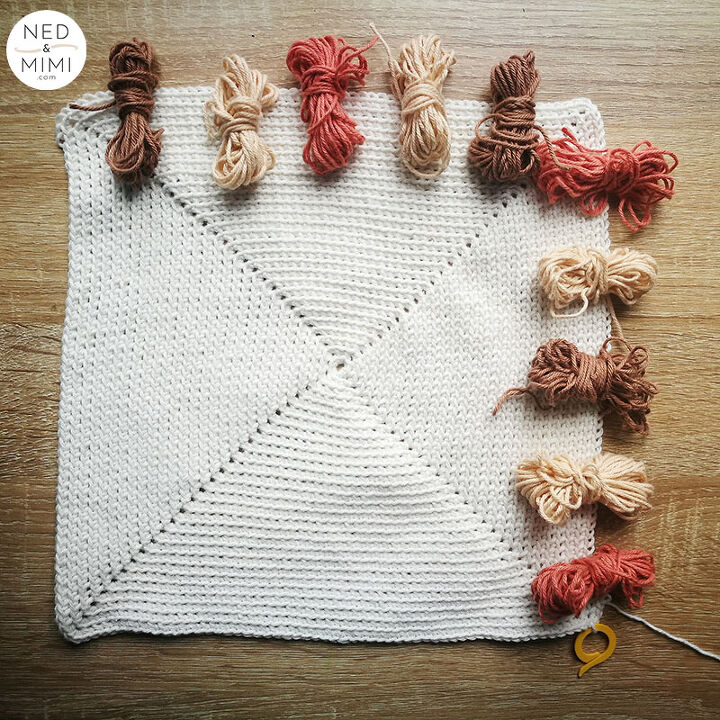
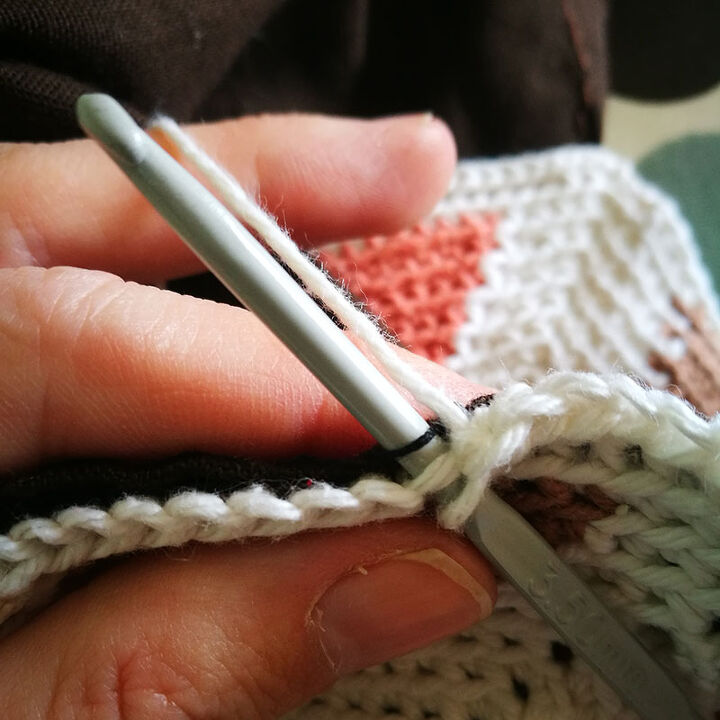
- The triangle colorwork on this pillow is done using tapestry crochet. Each triangle is made using a ‘bobbin’ with the unused strand ‘floated’ behind the active strand (the wrong side will be hidden so you do not need to worry about the floats being seen)
- Before you begin the colorwork section, create your bobbins by cutting approx. 2 yds/2m of yarn for each triangle. To prevent the bobbins from getting tangled up, I used clothes pins to clip the unused bobbins to the main square as I went along. You can also use special plastic or cardboard yarn bobbins (like these ones: http://bit.ly/yarn-bobbins)
Finished Measurements
Approx 16” x 16” (Pillow without border measures about 15.5” x 15.5” to take a 16” x 16” cushion insert)
Materials
Hook: 4mm/G-6 crochet hook
Yarn: Any DK/Size 3/Light weight yarn
Misc:
- Yarn Needle for weaving in ends
- Stitch marker
- Zipper (approx 12-14″)
- Fabric to measure the same size as the finished pillow + 0.5 inch seam allowance -> approx. 16” x 16”
- 16″ x 16″ cushion insert
You can access the full pattern here: https://nedandmimi.com/tapestry-triangles-crochet-pillow/
Pattern overview
1. The pillow is worked in the round from the inside out.
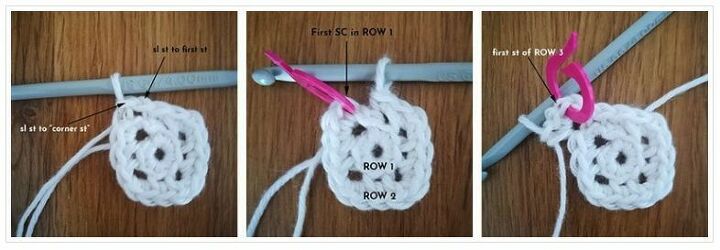
2. Once your pillow has reached the correct size (26 rounds), you will start your colorwork to create the triangles. The easiest thing to do to avoid the different colors getting tangled is to create a “bobbin” of approx. 2yds/2m for each triangle. I used clothespins to keep the bobbins in place as I worked my way around.
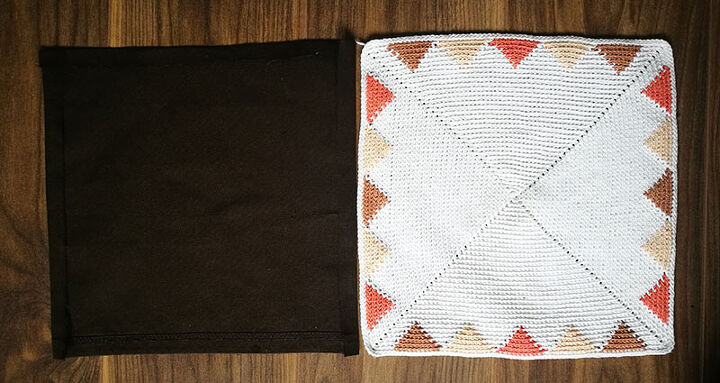
3. Once the crochet piece is complete, it should be blocked to iron out some lumps and bumps and give you a perfect square
4. Next, cut a piece of fabric the same size as the crochet panel - this will form the back of the pillow cover
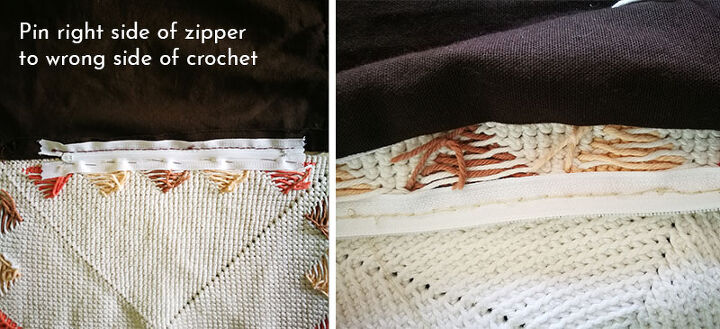
5. Next, attach a zipper to both the fabric and the crochet panel
6. Sew a series of backstitches along the seam line of the fabric all the way around
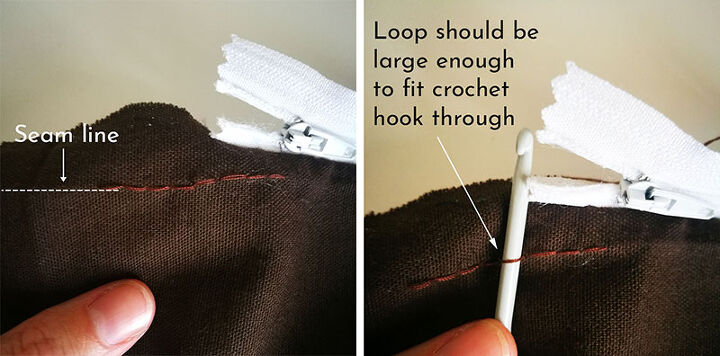
7. Finally, join the fabric and the crochet panel with a round of slip stitches through both the last round of crochet AND the backstitches
All done!
Resources for this project:
See all materials


Comments
Join the conversation
-
Nice work!
-
US source for yarn bobbins: https://halcyonyarn.com/knitting/7000080B/intarsia-bobbin-set--clover


Frequently asked questions
Have a question about this project?