


Simple Sink Swap - Stainless to Farmhouse

I have jumped into the kitchen with both feet!! When I did the Better Homes and Gardens' One Room Challenge - here - I had originally wanted to tackle the kitchen instead of our master bedroom. But, surprise! Re-doing the kitchen the way I wanted to was going to be really expensive. It included counter tops, cabinets, light fixtures, wall treatments (maybe removing a wall?) Of course, it also included a sink swap.
I had always wanted a beautiful, white, Fireclay farmhouse apron sink instead of my boring stainless steel one. However, when I searched around for sinks, they were either frighteningly expensive or seemed really challenging to install. That was, at least, until I found the Sinkology Josephine Drop In Farmhouse Sink! For $399, it was relatively affordable compared to a lot of other Fireclay farmhouse sinks. And the biggest bonus was that it was a quick-fit install - dropping into your existing sink hole with hardly any modifications! The price reflected here includes silicone and the faucet purchase.
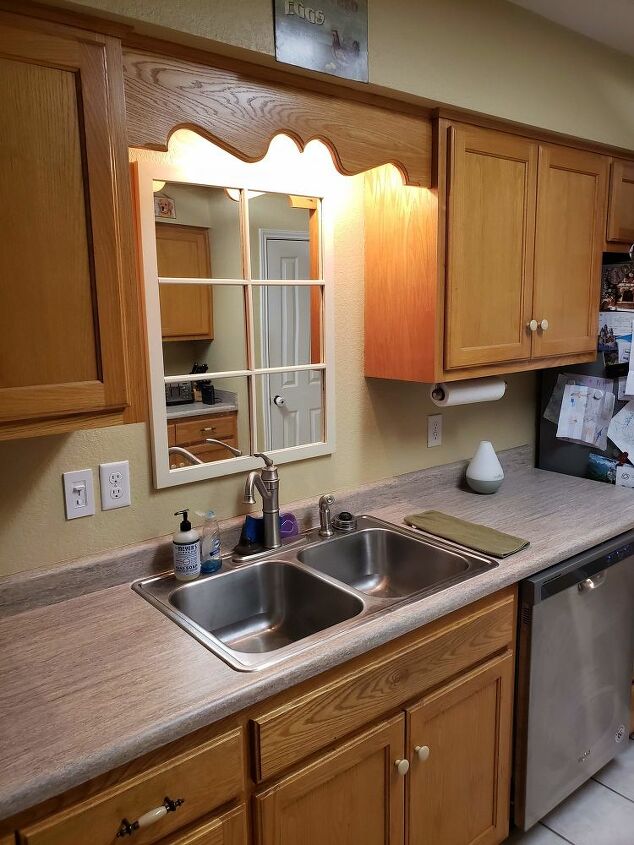
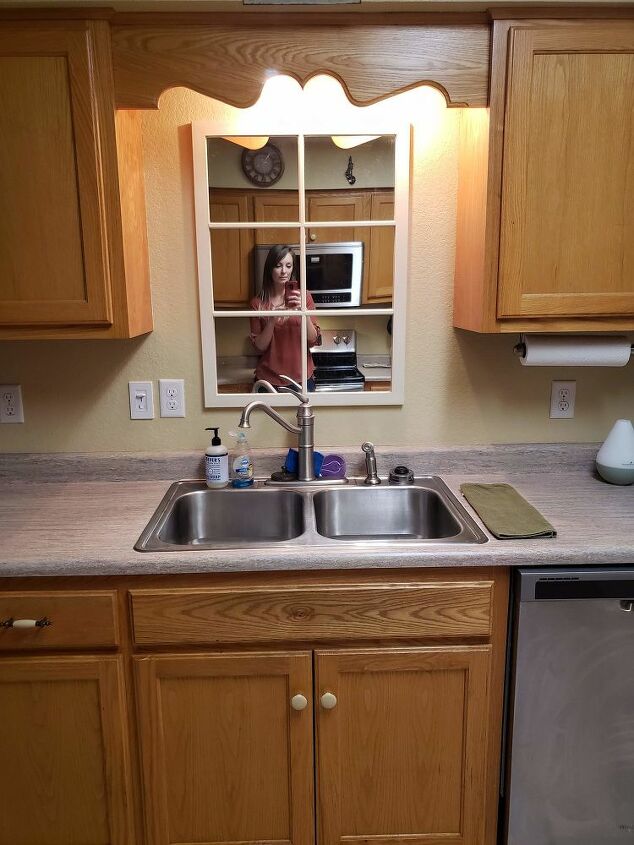
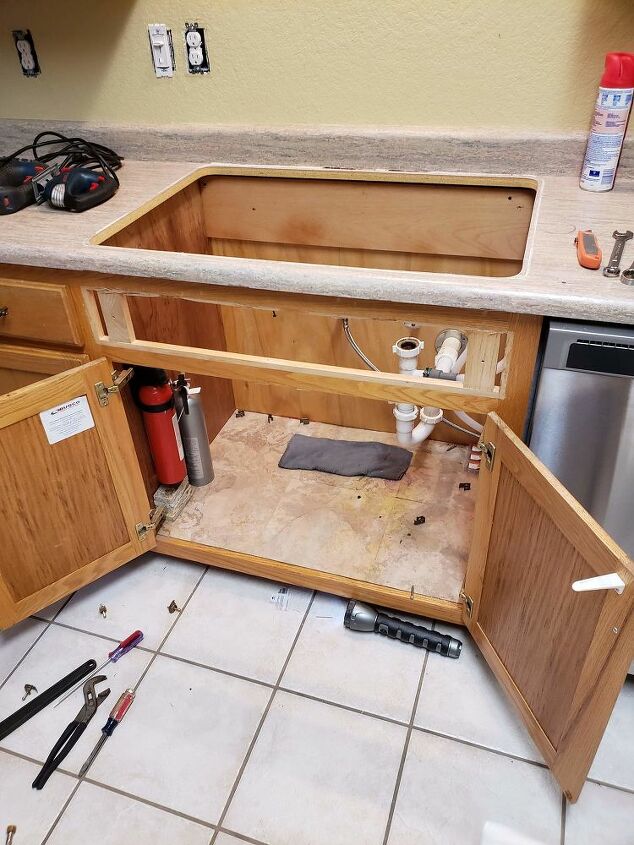
So, let's get into this super fun project, by showing you the before:
The greatest part of this install was that it came with this interactive installation guide - BILT. You just download the app and it takes you, step by step, through the installation process with 3D video demonstrations. It was awesome.
Necessary Tools/Materials:
- Carpenter's Square
- Jigsaw with carbide or diamond tip blade
- Tape Measure
- Screwdriver
- Plumber's Putty
- Silicone
- Pencil
- Utility Knife
- Hammer
- Pry bar

Step 1: Remove the False Panel
Use the hammer and pry bar to remove the false panel in front of the sink.
Step 2: Loosen the Fittings for the Faucet
Before you do anything, turn off the water!! Disconnect the plumbing connections from the water supply and then loosen the hardware underneath the faucet.
This was what my hardware looked like under here and I struggled for quite a while to figure out how to loosen that. What ended up happening was that I tightened it down really well and actually spun the faucet around to loosen it!
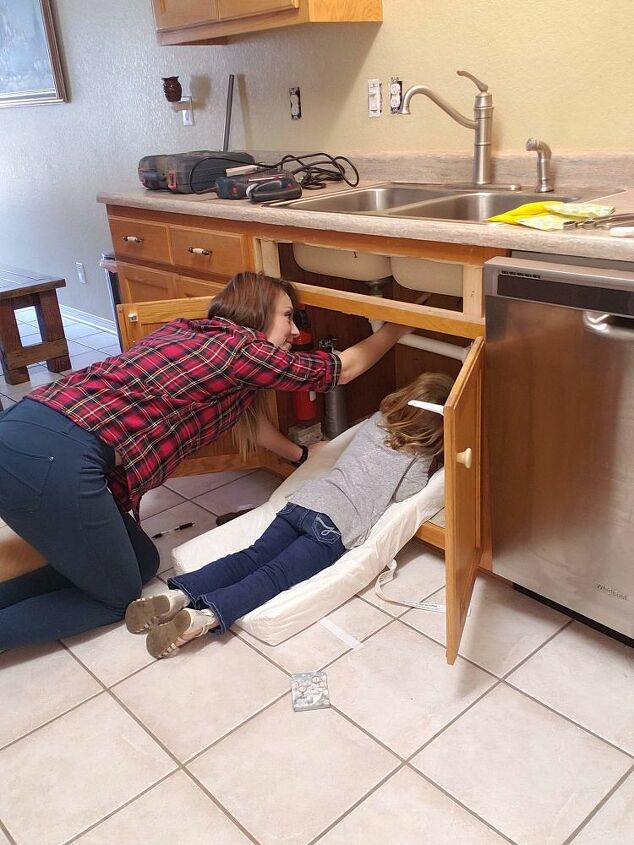
Step 3: Remove the Sink
Cut the sealant around the sink and loosen any clamps that are holding it into place underneath the sink. We had no less than 14 or so clamps that had to be loosened with a flat head screwdriver at really awkward angles in order for the sink to be free enough to just bump out.
Step 4: Measure the New Sink and Cut
Just to be safe, measure your new sink and make sure your opening is large enough. Centered, it should be about 32 1/4" wide and 23 1/2" from front to back cut line. Mark a cut line from the sides of the opening to the front of the counter top.
Also mark cut lines on the counter top 8/10" from the main side cut marks (the apron slides into place as you have removed that front portion).
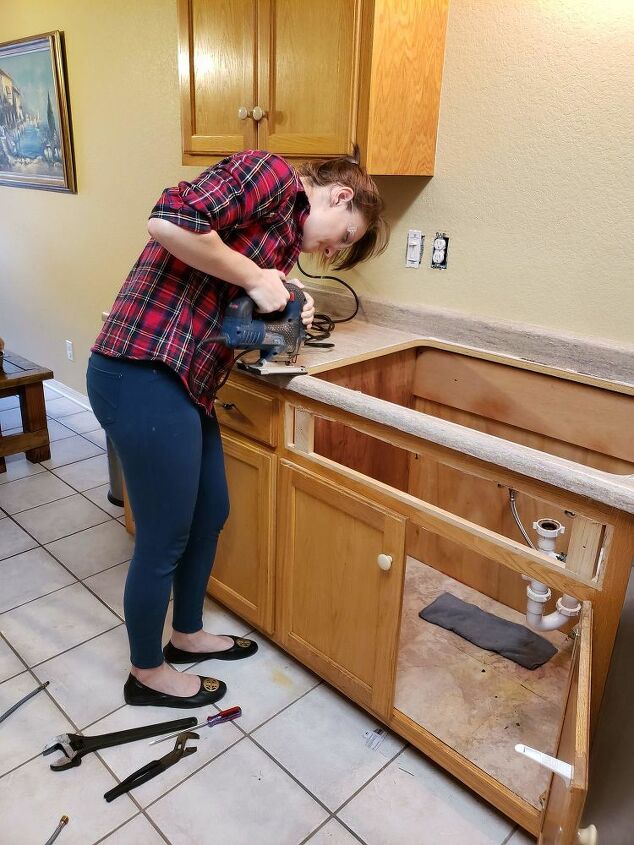
Step 5: Cut the Counter Tops
Using your jigsaw, cut the counter tops along the lines in order to fit the sink in - we only had to cut out the front portion and little notches on either side for the apron. Make sure your cuts are square.
Step 6: Measure and Cut the Front of the Cabinet
Measure the area the sink will cover on the cabinet face and draw cut lines accordingly. Cut the face out so that the sink slides in and the apron fits nicely into the notches you cut previously.
Dry fit the sink (use someone to help you lift it!)
Adjust any cuts as needed.
Step 7: Place Sink
Remove the sink first and apply a thick bead of 100% silicone around the edges of the counter top where the sink will sit. Replace the sink and seal the gaps with white or clear silicone.
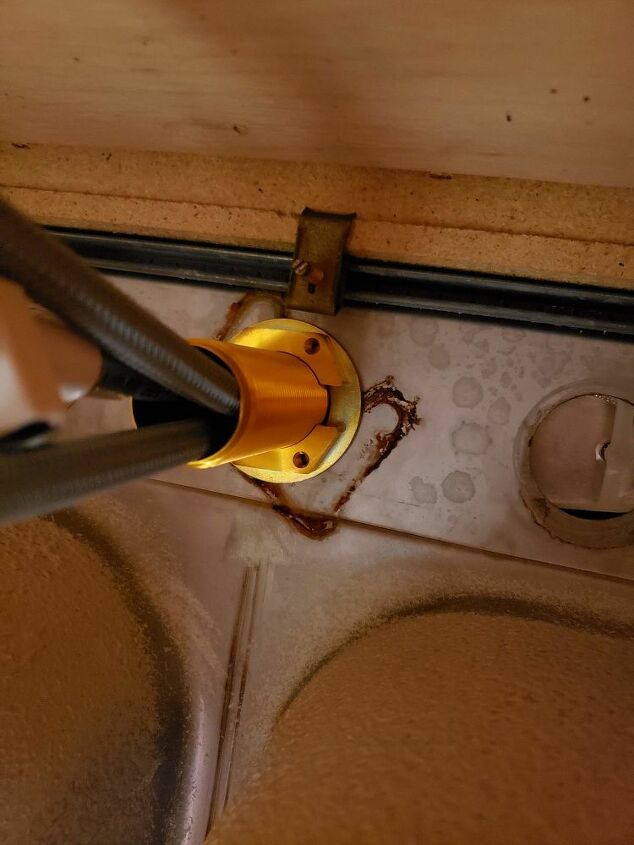
Step 8: Replace Plumbing
We went from a two-basin sink to a single basin, so I got to learn how to plumb for a single basin sink! It was like a really gross puzzle.
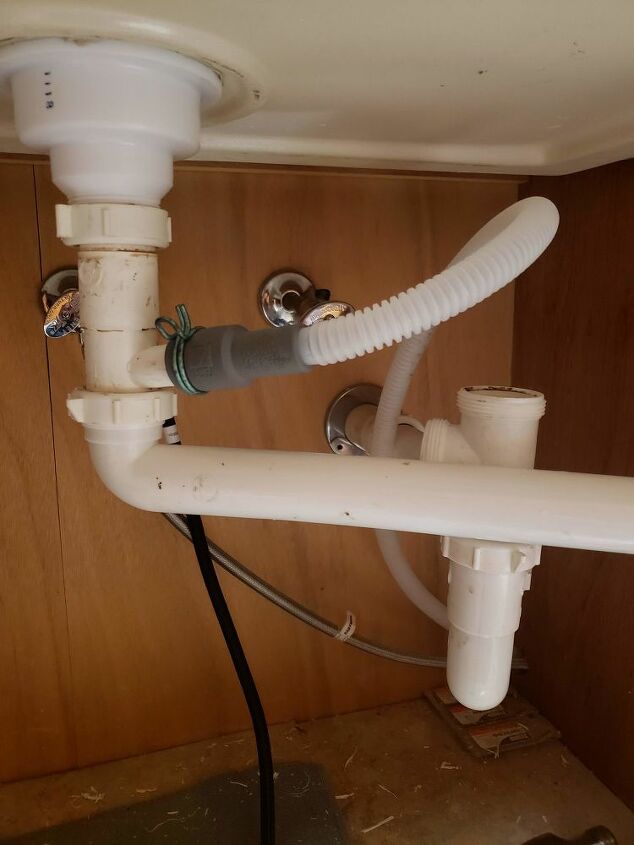
I did have to buy a new strainer to install in the sink. I went to Lowe's knowing absolutely nothing about what I was doing and they were so helpful. They walked me through every step and pointed out the things I would need.
I brought a picture of the existing plumbing setup and they also helped me figure out how to re-plumb the drain. I was able to use almost no new parts to re-plumb this drain! I took it all apart and shortened the main arm (the long piece you see in this picture) so that it would connect with the elbow on the right. I moved the dishwasher drain to below the strainer and then placed a vent on top of the elbow where the previous dishwasher connection had been.
Then, I was able to cut the piece I had trimmed off of the long arm into a connection from the strainer to the dishwasher drain piece and, when it was all put back together, there were no leaks!
Step 9: Replace Faucet
I got a new faucet to replace our old one, since this sink had only one hole on the back. I was not confident enough to tap out a new hole for a sprayer, so I purchased a faucet that had a pull down sprayer.
I installed it using their instructions, but it was pretty straightforward.
Step 10: Enjoy Your Sink!
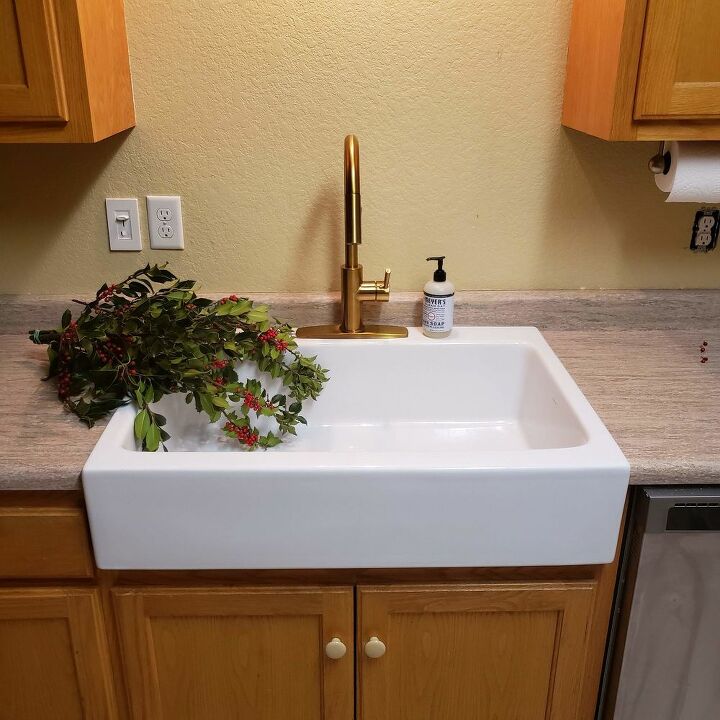
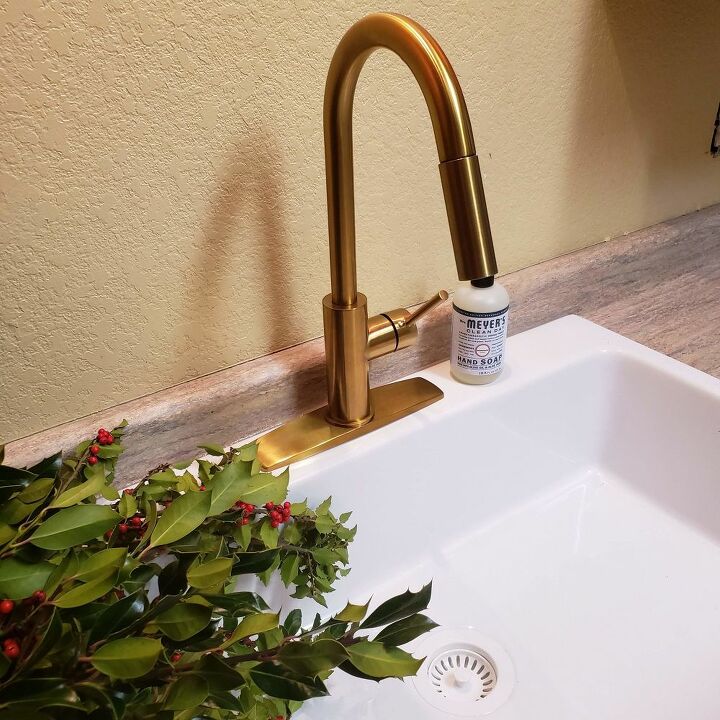
I love the single basin change! It has allowed space for my larger pans so that when I rinse them, water doesn't spill out all over the place. The new faucet also improved my water pressure dramatically! We don't have a water softener, so we get some buildup in our fixtures after some time.
I also love the way it looks! While the dramatic before and after once the rest of the updates have been made is still to come, just this simple sink swap has changed the mood of the entire kitchen!
Next stop - counter tops!
Comments
Join the conversation
-
Wow ! I'm so impressed and inspired by you ! Thank You ...What a job to tackle , having no experience . I'll be doing more projects around the house .

-
Wow I have done total installs with my husband and built bedrooms on but never brave enough to do a kitchen sink by myself!!! Good job


Frequently asked questions
Have a question about this project?
I am actually about to buy this sink and have the same style cabinets and countertop as you have … I was hoping Sinkology would come out with a double bowl, like a 60/40 split, but I don't think that will happen soon. I don't have a dishwasher, so when washing dishes I need a sink to rinse in … but I'm glad you were able to do this on your own. My biggest concern is cutting the countertop and cabinet front! Any other helpful hints????
What about a garbage disposal?