


Stenciling a Wood Floor
At our cabin in the mountains, the staircase treads are sturdy redwood. However, the landing at the 90 degree turn was covered in a low quality wood. This section of the staircase always felt like it didn't belong with the rustic cabin feel. Every time I went up and down the staircase, this bothered me. I once had a contractor that said, if you can't fix something, highlight it. And that's exactly what I chose to do! To see more of our cabin, click here.
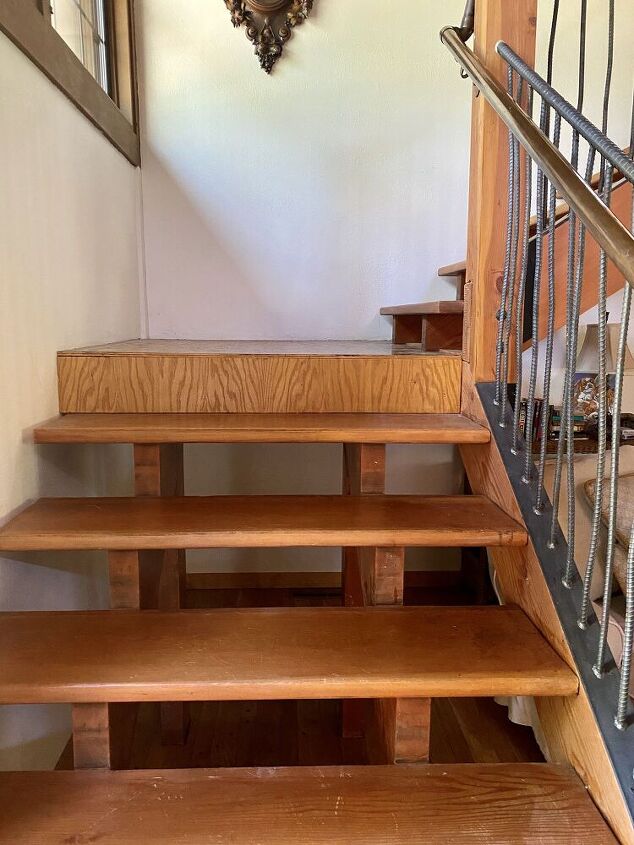
Here you can see the different wood on the landing. Is that plywood? Who would do that?
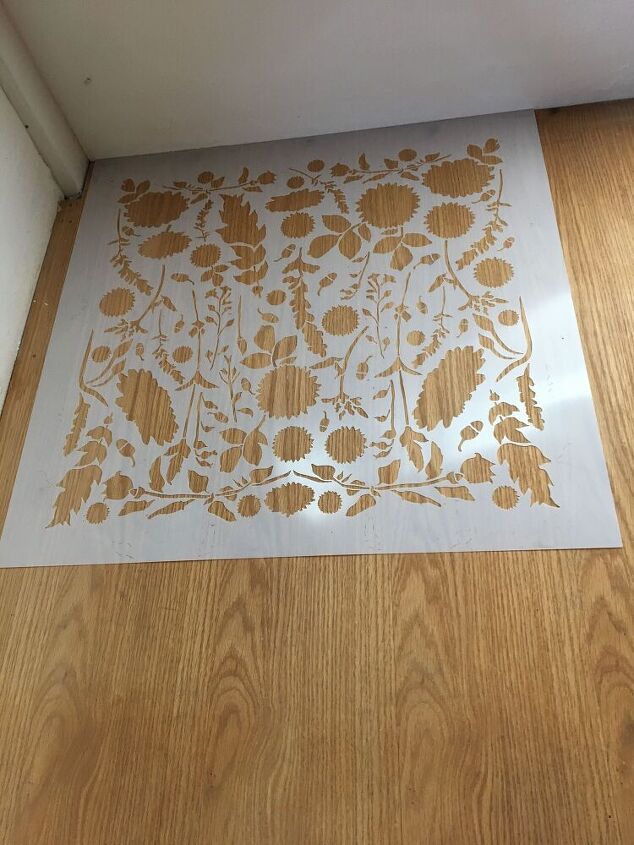
I purchased the Forest Floor Damask stencil from Royal Design Studios for $49.99. Since this is our mountain cabin, the forest floor theme is appropriate. The size of the stencil is 21” x 21” and the landing will accommodate 4 full stencils and 4 partial stencils as the landing is approximately 4 feet x 4 feet.
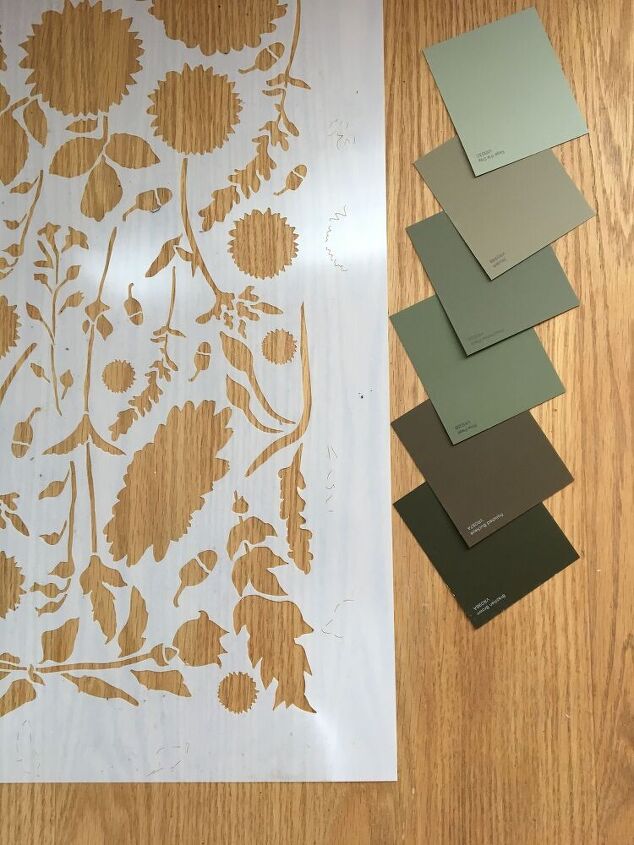
My initial thought was to use one paint color on the stencil. But a forest floor has many earth tones to I decided to use multiple colors, but all in the Brown and Green shades. Color ideas were inspired from paint chips.

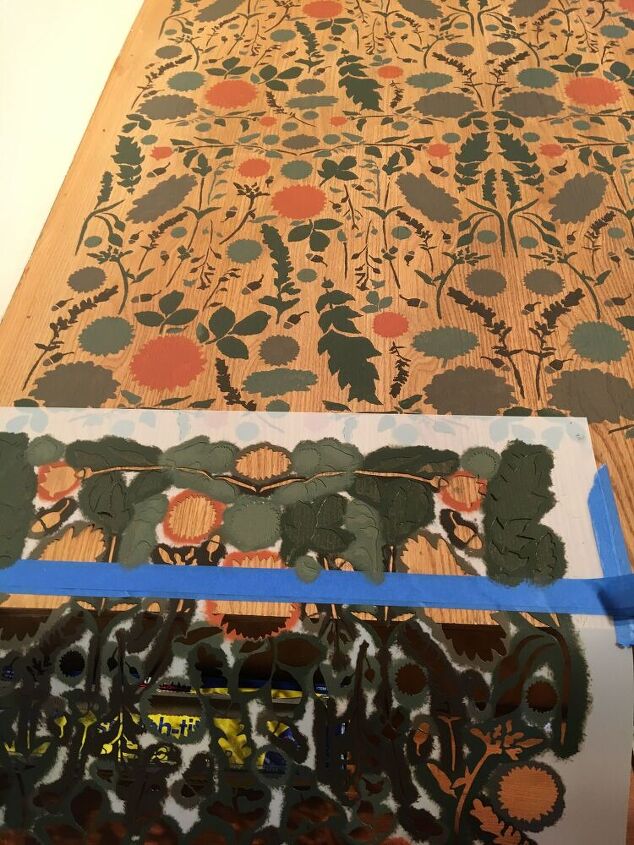
After choosing my two main colors and getting sample sizes of paint from the hardware store, I then added various quantities of white paint to obtain different values of the brown and green tones. Using disposable plastic cups, the paints were readily available during the painting process. Secure the stencil to the floor with blue painters tape.
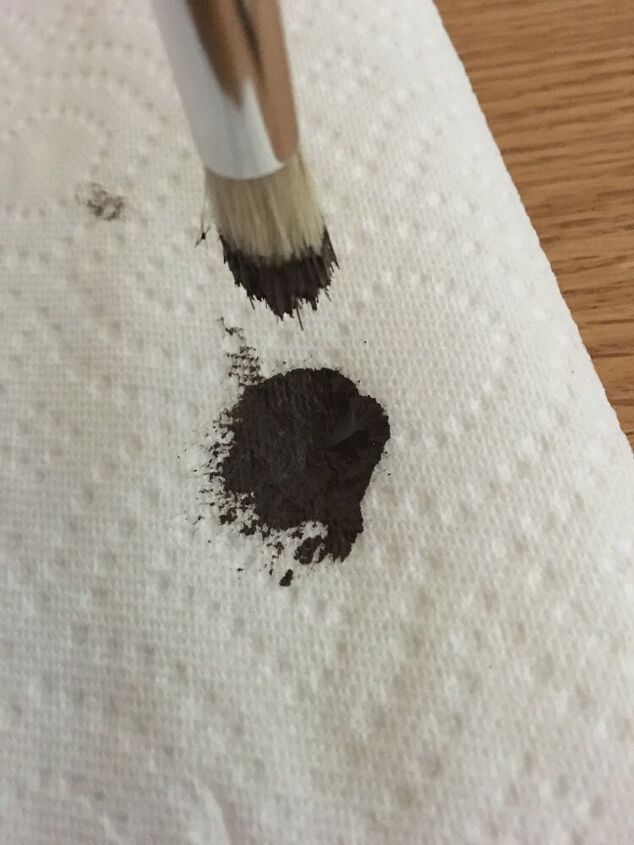
In order to keep the paint from bleeding under the stencil, I tapped the excess paint off the bottom of the brush. I applied the paint by dabbing, not stroking the paint on the stencil. I used stencil brushes whose bristles are bluntly cut.
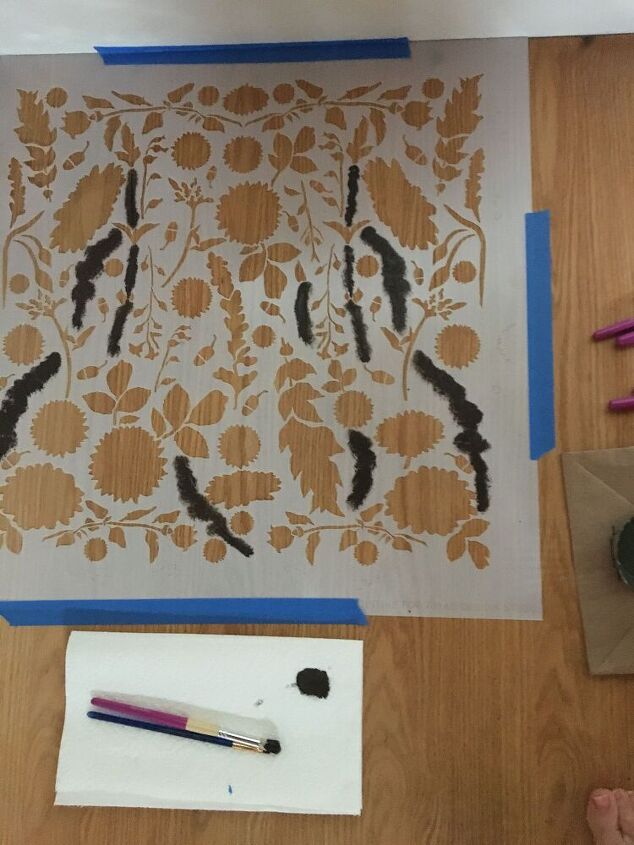
I painted the “branches” in a shaggy bark color. Sherwin Williams 3001 Shagbark.
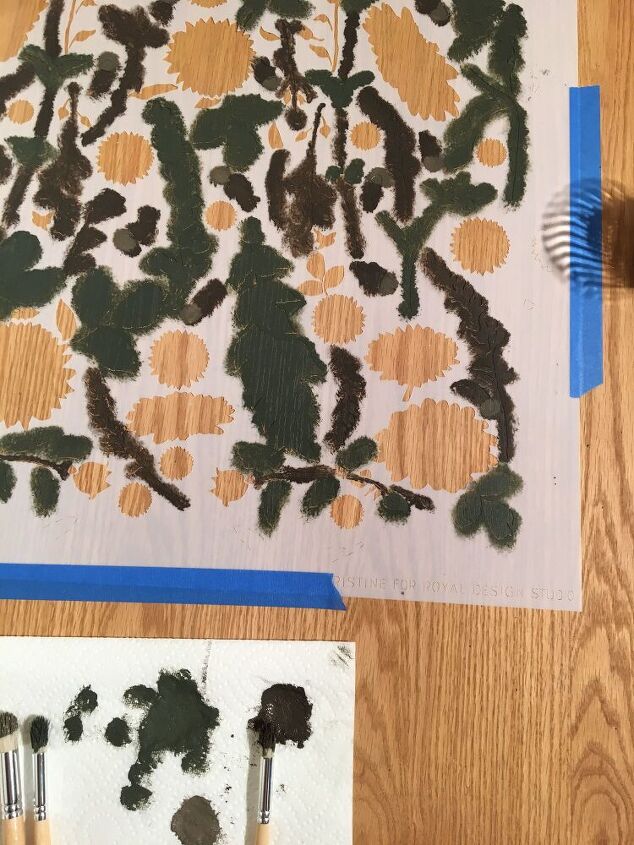
Next I painted the larger leaves in a pine green color. Sherwin Williams 3037 Shade Tree. The very first stencil is the most difficult. This is where you take the time and patience to choose what colors go where.
The stencil has guide marks in the corners to help you align the stencil properly as you move it.
The orange flowers were a combination of acrylic paint colors~~yellow, sienna, raw Sienna, alizarin red, gold and copper. I mixed these colors separately but you could purchase a color of your choice. If you mix it yourself, make sure to make enough paint to complete all the flowers.

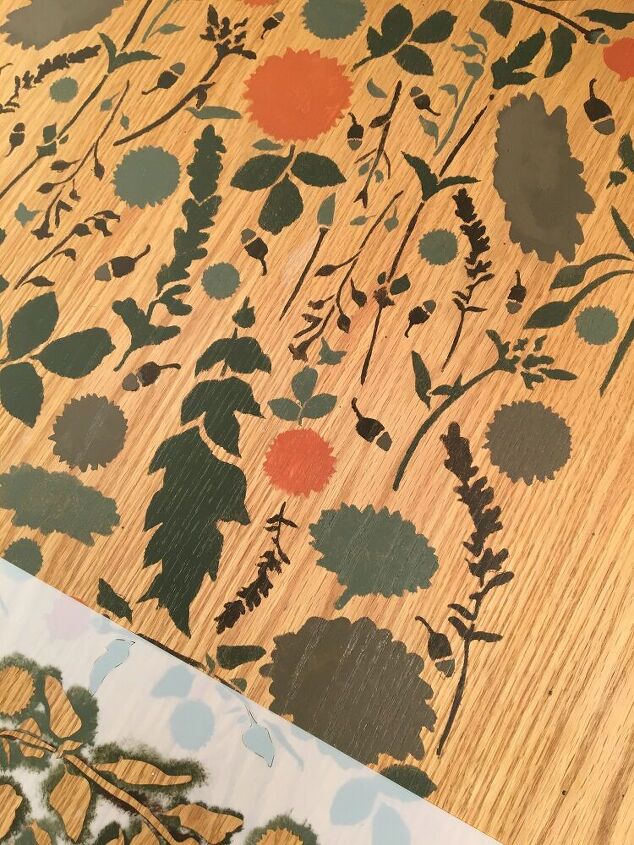
The paint is latex and dries quickly so it is easy to move the stencil and complete the next portion. The remaining sections go rather quickly because the residual paint on the stencil makes it easy to get the right color in the right place.
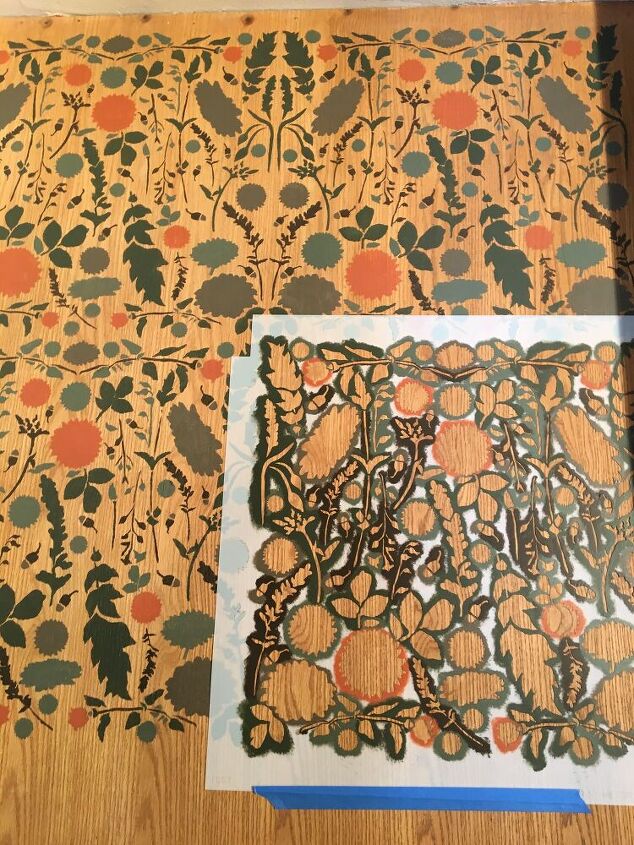
Now the full stencils are complete. But the edges of the landing will require partial stencils.
In painting the partial stencil, I tried leaving room for a solid border. Using blue painter’s tape, I carefully allow for a 1.5” border.
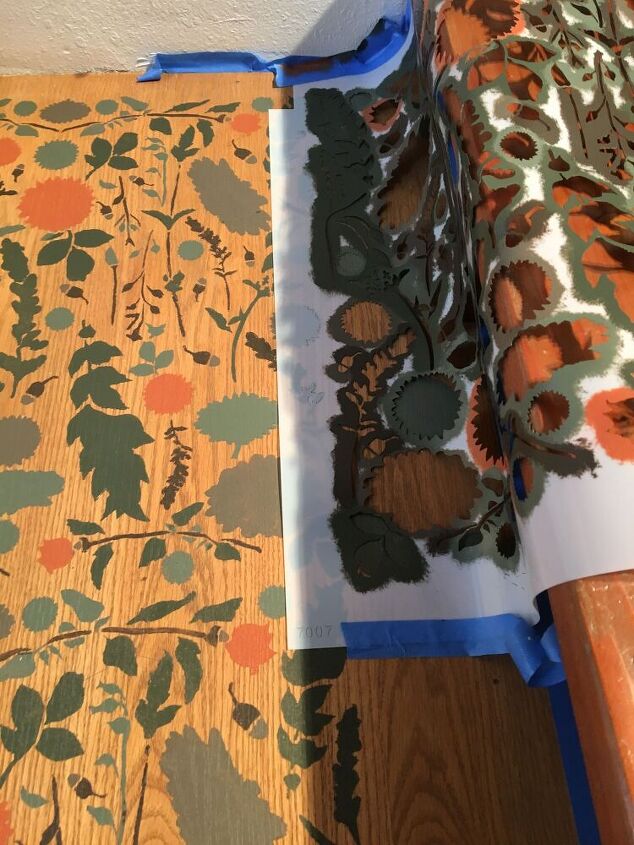
Painting near the steps was challenging, but make sure you secure the stencil with blue tape so it doesn’t slip as you are painting.
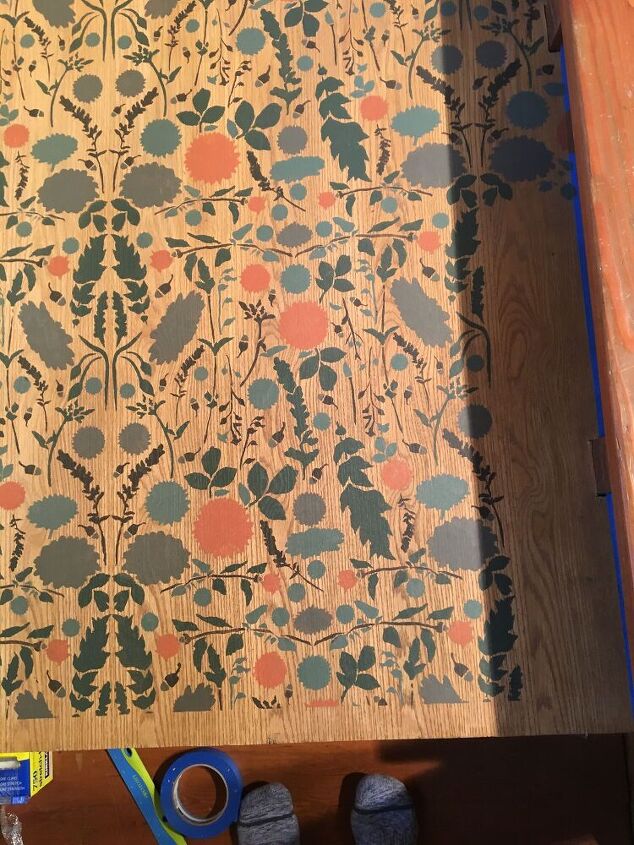
The border is painted next. Make sure the paint you have already applied is completely dry. Mark off the border width with blue tape and paint in your border color. I chose the dark pine green. This finishes off the edges of the stencil where it meets the wall.

Here is the landing fully painted. The last step is to add a protective polyurethane clear coat. My first choice is a matte finish, however, my husband surprised me and painted it during his next trip to the cabin. He used a high gloss top coat. The stencil is reusable and the paint washes off easily with soap and water!
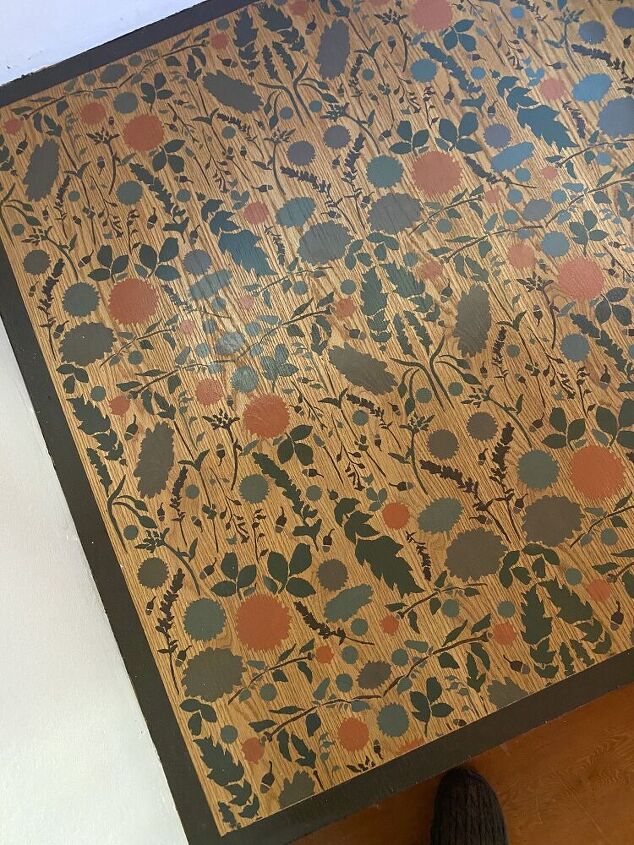
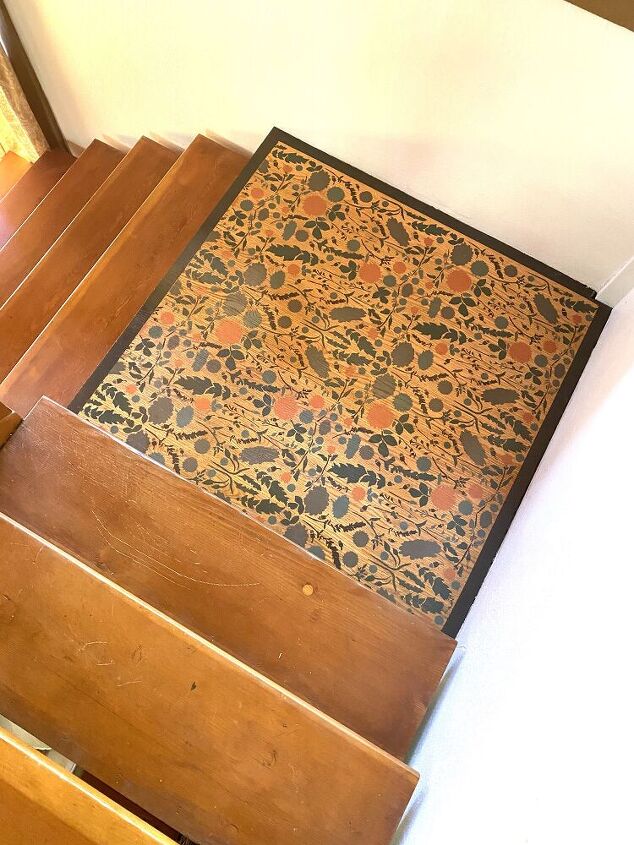
Now the landing is a work of art vs. an eyesore. Everyone comments on it, plus the design makes you pay attention while traveling down the staircase! For more information about my historical home, please visit my blog, Life at Bella Terra here.


Comments
Join the conversation
-
i love the design, it is perfect for a rustic retreat! 🙌🙌🙌🙌
-
Lisa, thank you!!


Frequently asked questions
Have a question about this project?
I cannot get the link to work to see the rest of the cabin..... but it looks to me like the staircase may have been one long piece at some point and was cut and made to go in that direction to put a wall up...maybe? So the landing was added later and they cheaped out using what does appear to be pressed board?
How beautiful to redo that landing in redwood to match the stairs? Sure, it would be more costly than what was done, but oh so worth it.
How did that help the look of the 1 riser at the top made out of plywood? Did you stencil that too?
Wondering why you have bent up rebar on your steps?