


DIY Small Animal Cage, Detailed With Build Plans

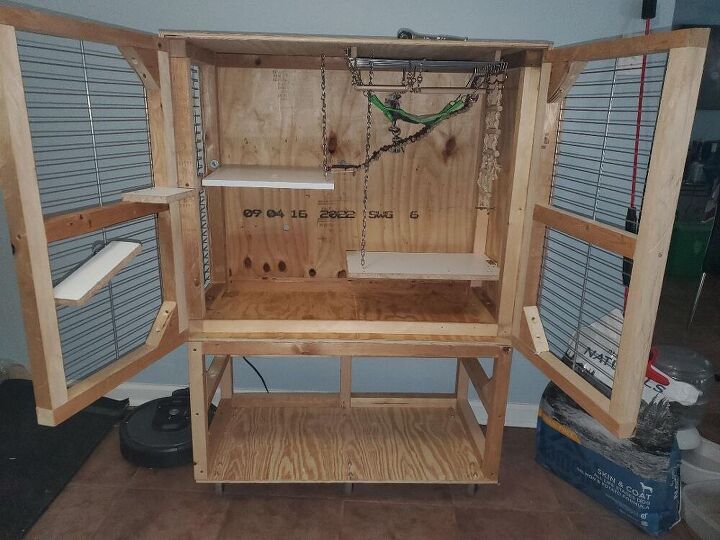
easily disassembles for moving/storage. I came up with this from different ideas to save some money and have some fun, hopefully it helps someone out. Its very sturdy, and comes apart very easily with only 8 nuts and bolts. All measurements and supplies lists are written on paper in the photos. I used mostly scrap wood I had laying around so I don't know how much it actually costs, but my guess would be about $90-$110 if you have no supplies at all (much better than retail $200-$250 cage of same size). Also since a 2x4 is much cheaper than a 2x2, I used a table saw to rip the 2x4 into the 2x2 (1.5x1.5) that are needed for the build. Be sure to use countersink but at least while assembling because its highly likely to split. It doesn't look like much in the photos, but you will need 60 feet of 2x2 (1.5x1.5). *Tip*: cut the 2x4`s first, write measurement on the board, and pile them in sections (Top, Sides, Storage Box, Doors), and then cut with table saw in order to prevent overheating of motor. I'll admit, I don't do this on a regular basis and I'm not the greatest artist, but hopefully it works for you. I would really enjoy seeing your completed cage, comments, and/or modification on facebook or twitter with the hashtag
"GusAndJaksHome"
Have fun.
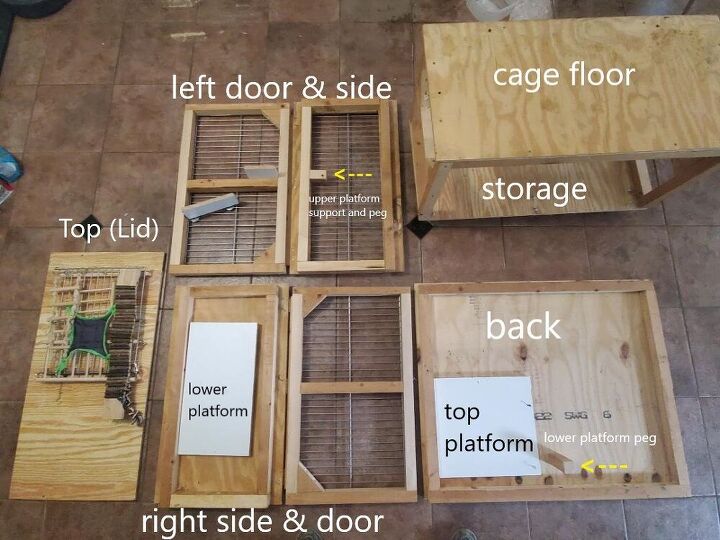
check description on each photo for instructions/tips
Be sure to use NON-TREATED wood for areas that they could potentially chew. also
NON-GALVANIZED HARDWARE
Tools required:
measuring tape
Drill
Countersink/pilot hole drill bit
drill bit for screws
skill saw
speed square
drywall "T" square *(or chalk line)*
clamps (2)
Grinder (or bolt cutters)
Additional (Recommended) Tools:
Miter saw
Table saw (for ripping 2x4 into 1.5x1.5)
1/2 inch spacer/ scrap block of wood (2)
small level
Human assistant :)
materials not listed in photos:
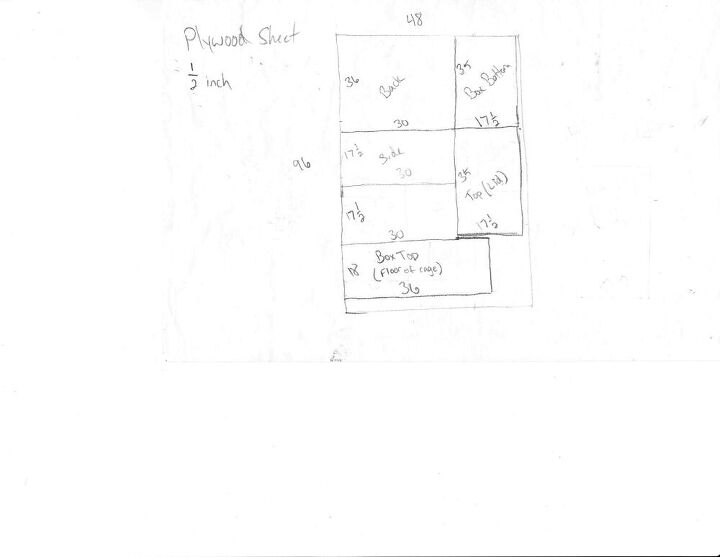
1 sheet of 1/2 plywood
57 feet of 2x2
Casters
scrap 2x4 for corner reinforcement
project tags:
Tags
Rat Cage Diy
Pet Rat Cages
Ferret Cage
Pet Cage
Wood Rat
Mouse Cage
Rat House
Small Animal Cage
Fancy Rat
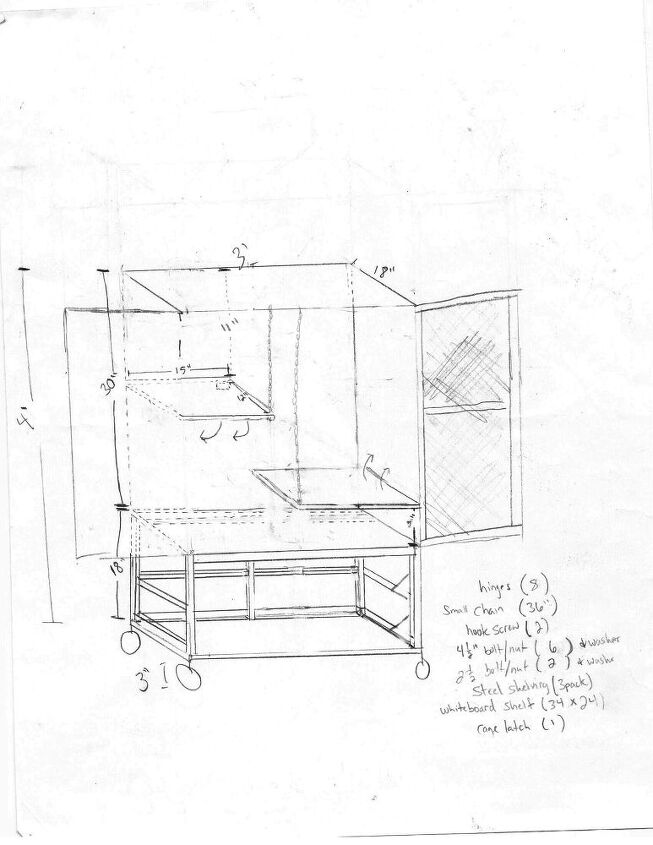
2 inch hinges, i used 3 in. casters, the cage didnt come out to be very heavy but my scrap wood was pretty dry and light. also important: i used a 1/2 inch scrap piece of wood along the outer door edge -which youll see in fiully assembled cage photo- in order to attach the hinges
Be sure to make precise cuts, important for assembly.
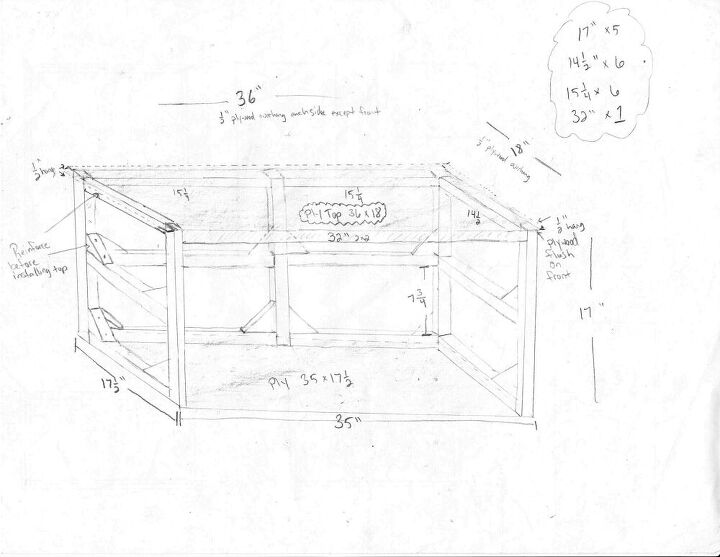
countersink and note the corner reinforcements, you may have to install them during the assembly if you dont have U-joint socket adapter
ATTENTION to 2x2 placements and gaps along edges (use gap spacers). Platforrms are "whiteboard shelving" not plywood
cage is secured with 4 small screws on each corner
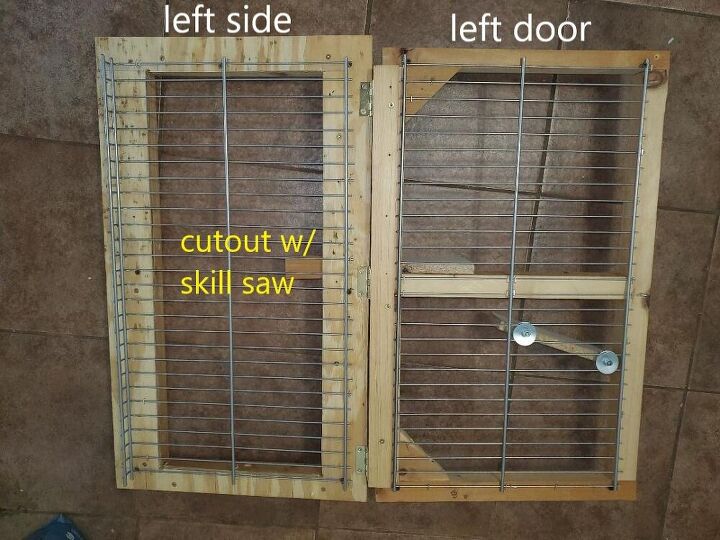
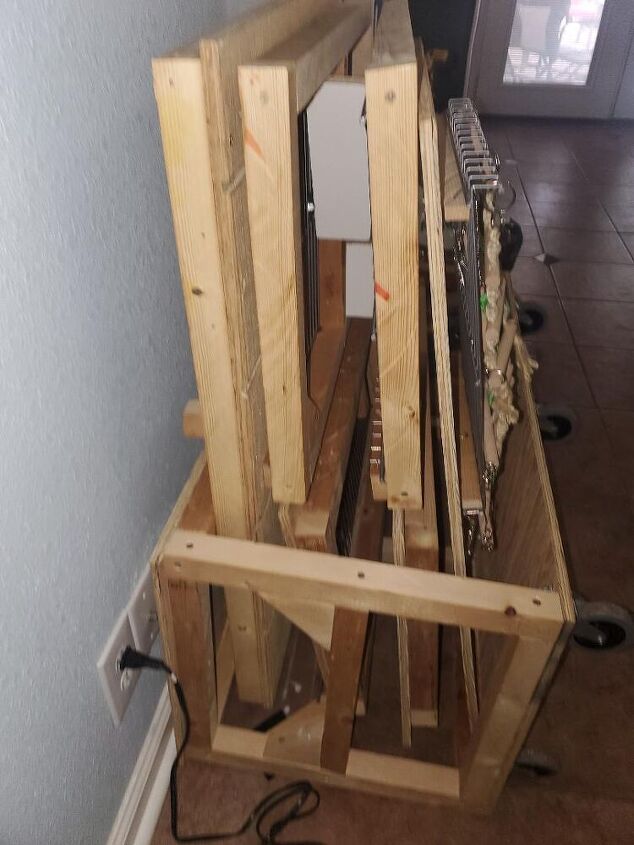
drill corner holes from the inside, use chalk line to connect holes and cut out the side with a skill saw. place cage over it.
if you notice, the cage panel to the far left, on the left side, remains uncut to prevent injuries of someone passing by and rubbing against it.
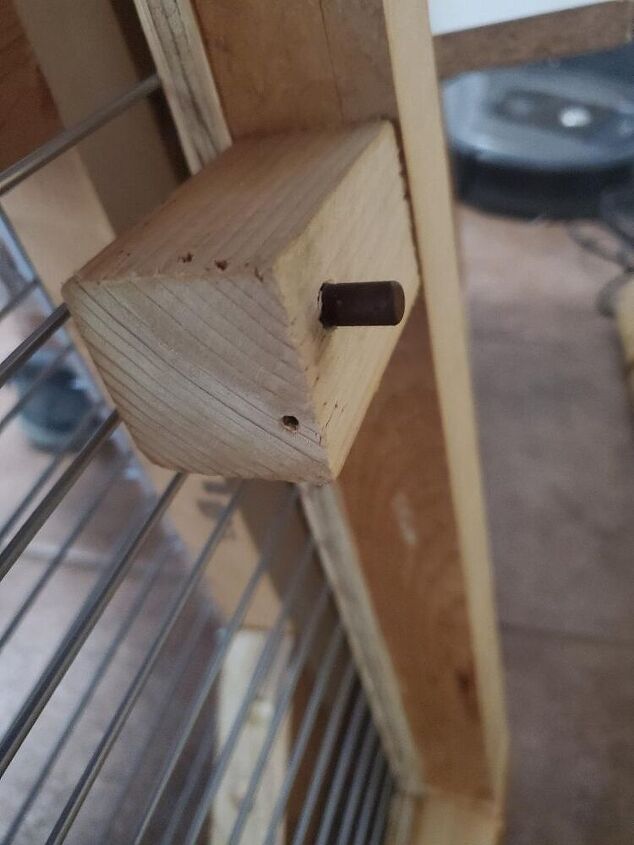
also Left side where cutout was made. done after assembly to reinforce upper platform. drill hole, insert peg for easy removal
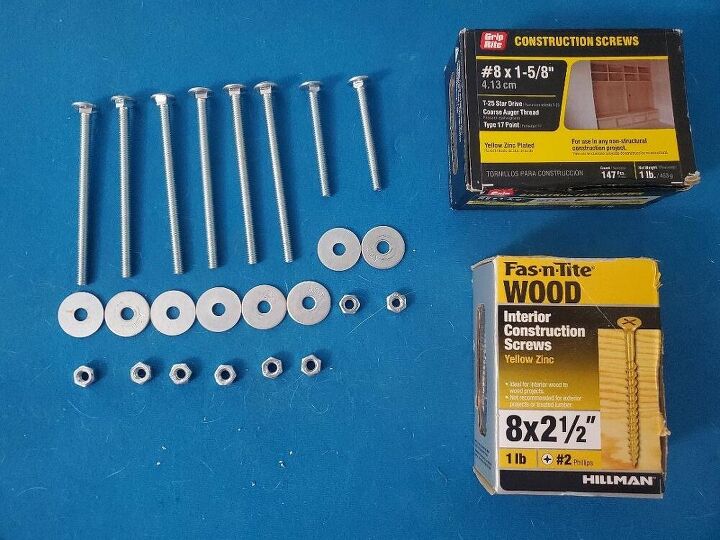
1/4 in. bolts and nuts.
2.5 in and 1.5 in screws (go cheap).
wont use very many 2.5 in (maybe 10-15)
countersink holes
make sure you're not placing the drill bit over a screw below
4.5 inch bolts (6):
"back piece"- 2 bolts going down into the storage box.
"sides" (2) 1 going down into storage box
1 going on the back wall
2.5 in bolts (2)
"Top/Lid" - 1 on each side of the top near the front of the cage, going down into the side panels
notice: long piece of thin scrap wood wedged between the bottom of opening so bedding doesnt fall out when door opens

long piece of wedged wood to hold in bedding would work better if it was 3 inches tall, not 1.5. but still big help.


Frequently asked questions
Have a question about this project?