


Refinished Mid-Century Dresser
After having our second-hand dressers for ten years, I finally decided to give them a makeover! And because I have shelves of paint in the basement, I was able to do this project budget-friendly and spent $0! The best kind of projects to do, at least in my opinion!
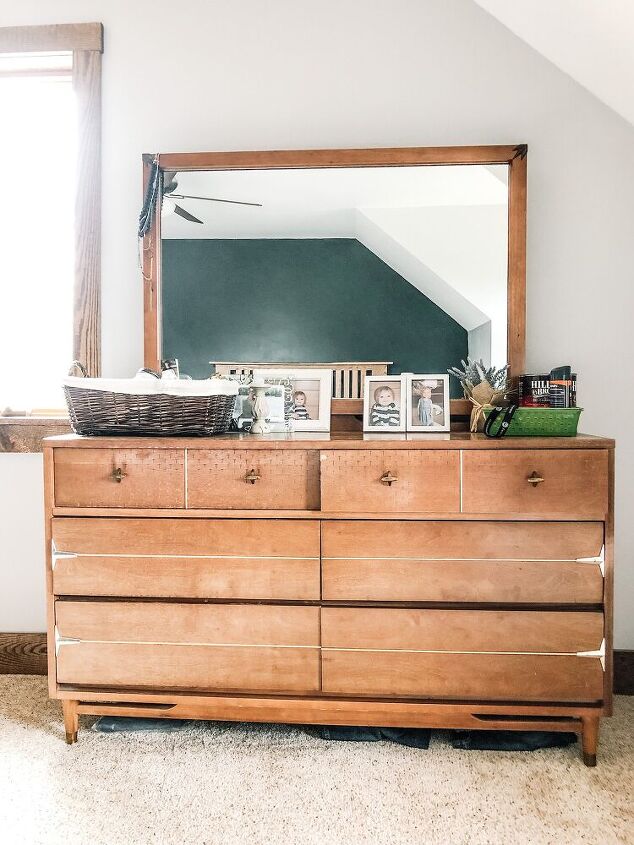
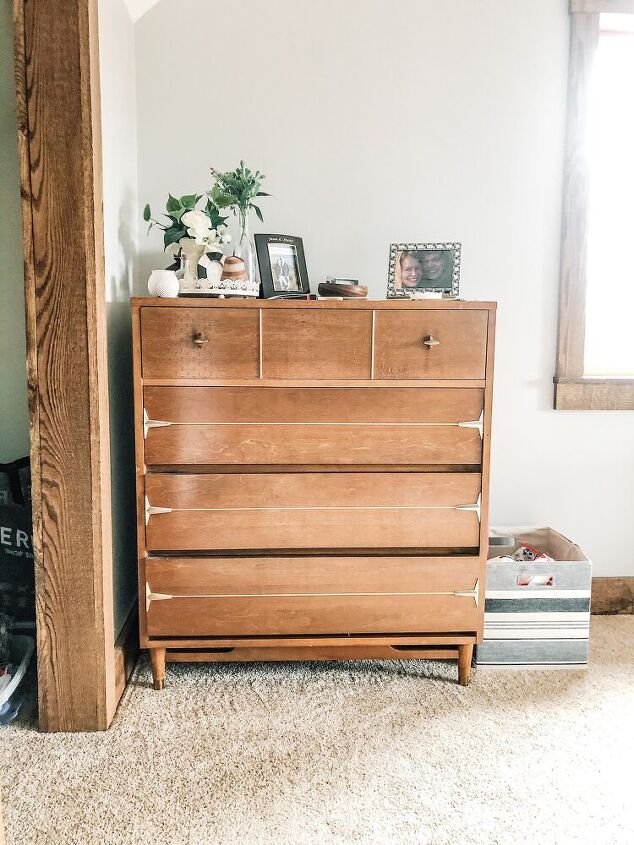
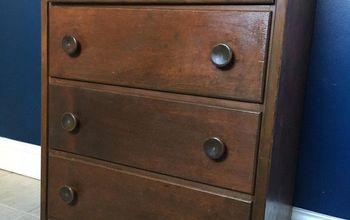
Before Photos of the dressers. Not too bad, some fading, and the tops had some water damage from the previous owner. There was some chipping of the veneer on a few of the drawer fronts, but not too bad.
Prep work included removing all of the hardware (and place in safe place for keeping), a light sanding of the dressers and drawer fronts that are going to be painted, and clean to get all dust off.
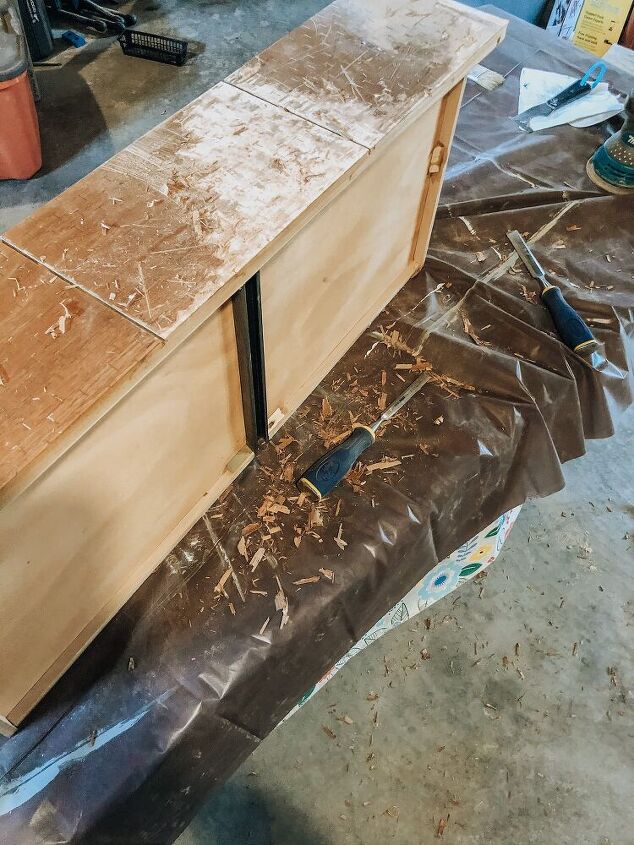
I decided to remove the veneer from the top drawers and stain them. But first I had to remove the veneer. Using a paint scraper and a random orbit sander with grit 80, I was able to remove the veneer in very small chunks. After removing all of the veneer, I sanded the drawer fronts with sandpaper grit 80-120-320.
Tip - Make sure to sand completely to avoid having a splotchy finish when staining.
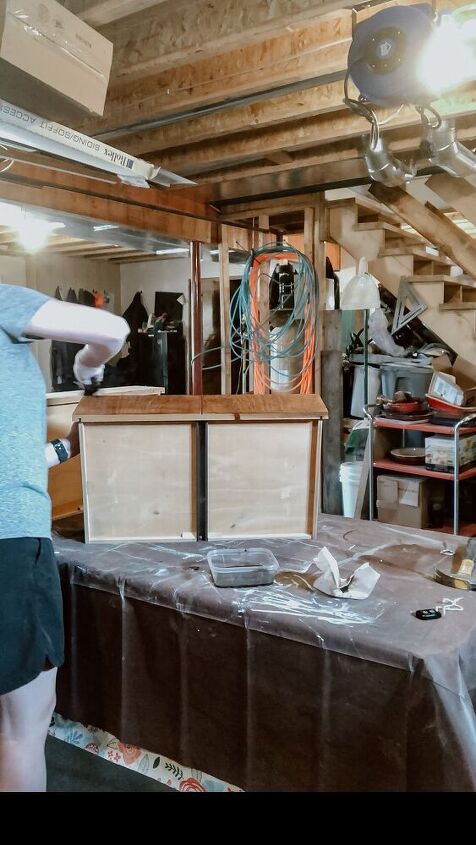
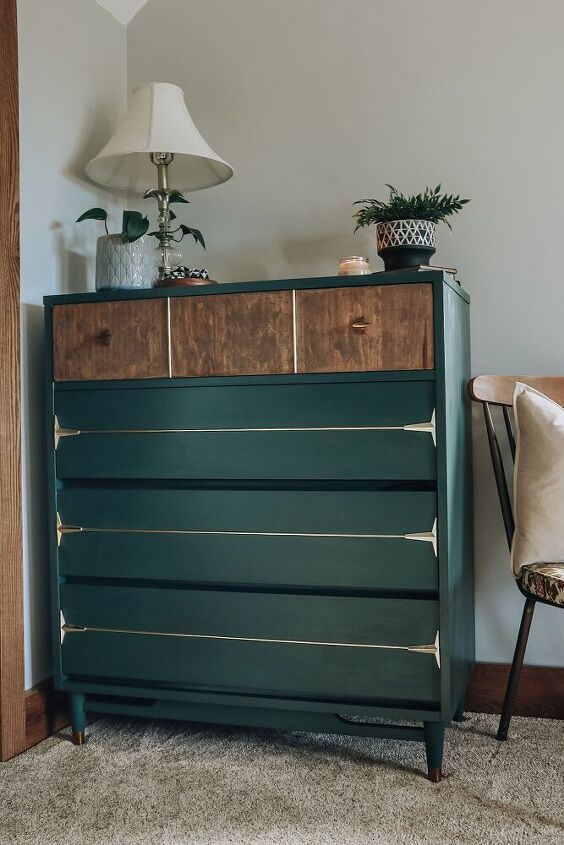
I stained the drawer fronts using a mixture of 1:1 Minwax Special Walnut + Minwax Weathered Oak. I applied two coats of stain with a cotton rag and allowed to dry. After drying, I applied a thin coat of Minwax Polycrylic with a brush.
After allowing to dry, I replaced the hardware to these drawer fronts.
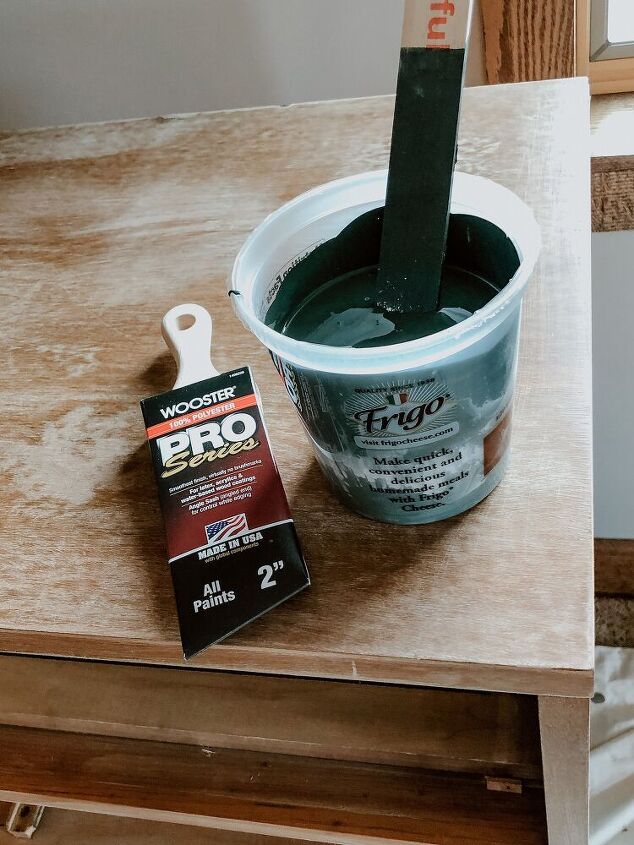
I mixed a DIY chalk paint mixture using about 6 Tbsp calcium carbonate + a little bit of water + about 2 cups of satin latex paint. All of the ingredients I already had hand, otherwise I would have used flat paint instead of satin.
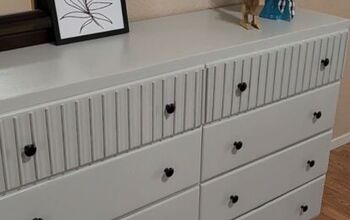
Paint Color: Clark & Kensington - Blossom Silhouette
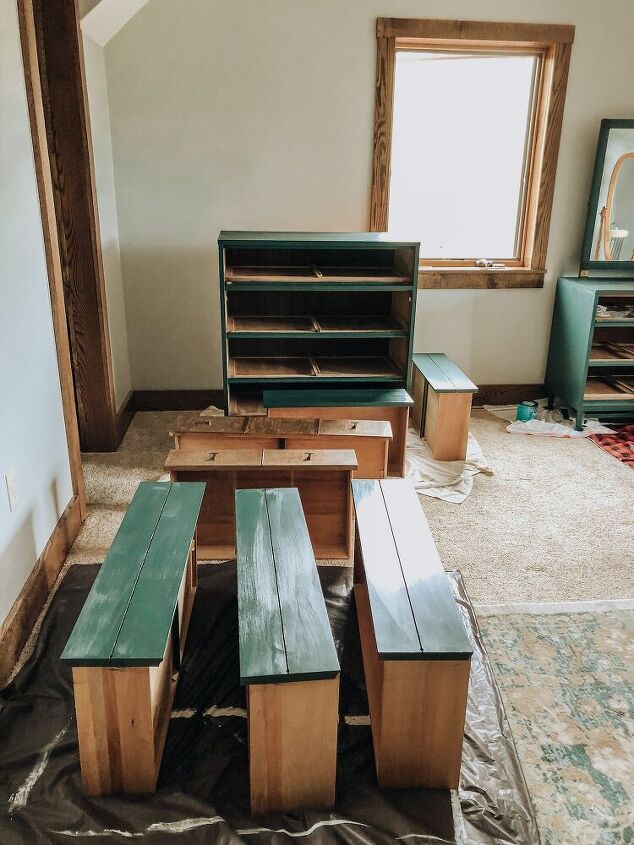
Because I had already prepped the dressers, I was able to start painting the dressers and drawer fronts. I did two coats of the DIY chalk paint, and two coats of Minwax Polycrylic to seal the paint.
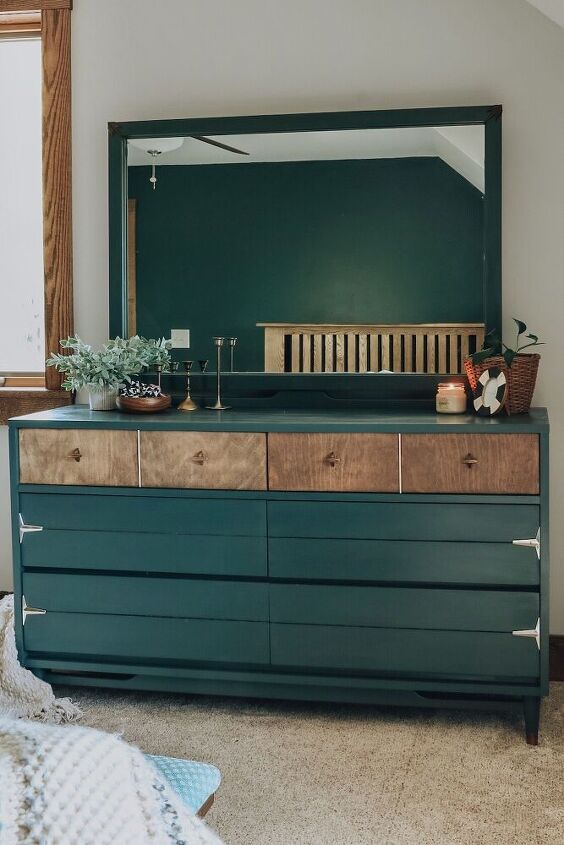
The hardware was replaced, and the drawers put back into the dressers!
I hope you enjoyed this tutorial!
The hardware was replaced, and the drawers put back into the dressers!
I hope you enjoyed this tutorial!
Resources for this project:
See all materials


Comments
Join the conversation
-
Very nice!
-
It is so rewarding to see an old well used piece of furniture transformed into something as lovely as what you have done with this dresser. A job well done and one to be very proud of.


Frequently asked questions
Have a question about this project?
There appears to be some white or some metal across the front of the drawers a line and on either side of a t shape how did you protect that what is it made of thank you