


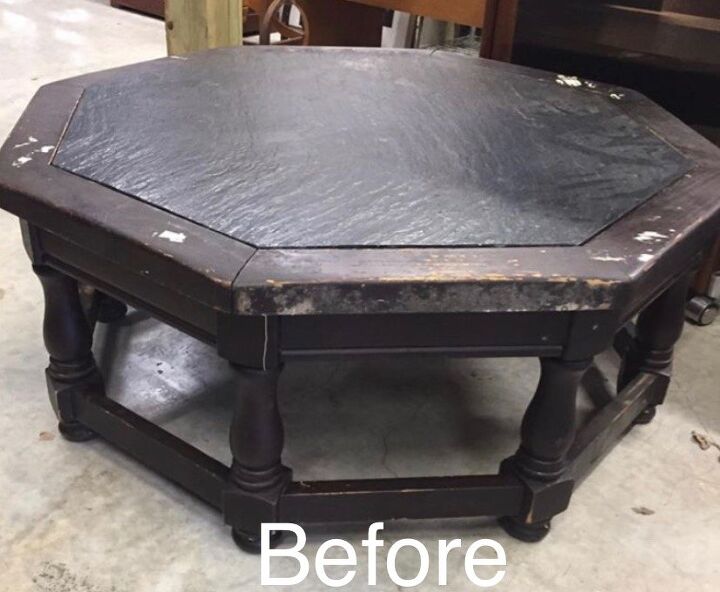
The Rebirth of a Vintage Coffee Table

What a makeover! This awesome slate topped and huge coffee table was refinished with love for my best friend. We brought it back from the dead as it was in pretty rough shape with a finish that was the old, thick, rough and nasty varnish. Quite the project, right? But once we finished, it is the perfect coffee table for a young person’s apartment (once moving day occurs). For now, it will go in mom and dad’s basement family room and still be used by young people. 🙂
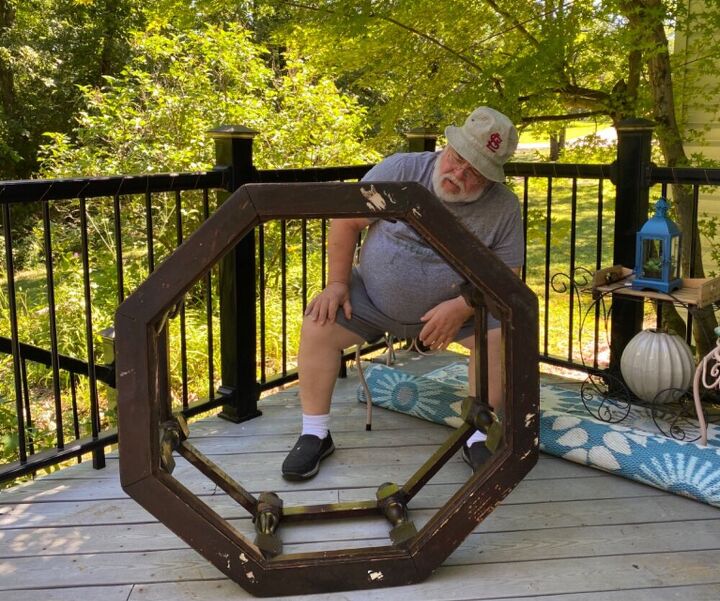
The first thing you need to do is spend some time contemplating how to remove the top. Oh, and to find a place to store the slate top until needed again. No problem, it resided under our living room couch until needed. 🙂
“It looks like there are screws. I think we will remove the top to make it easier to paint and to see if any repairs are needed.”
After many minutes of contemplating, the screws were removed. The only repair needed actually was one section on the bottom needed some glue.
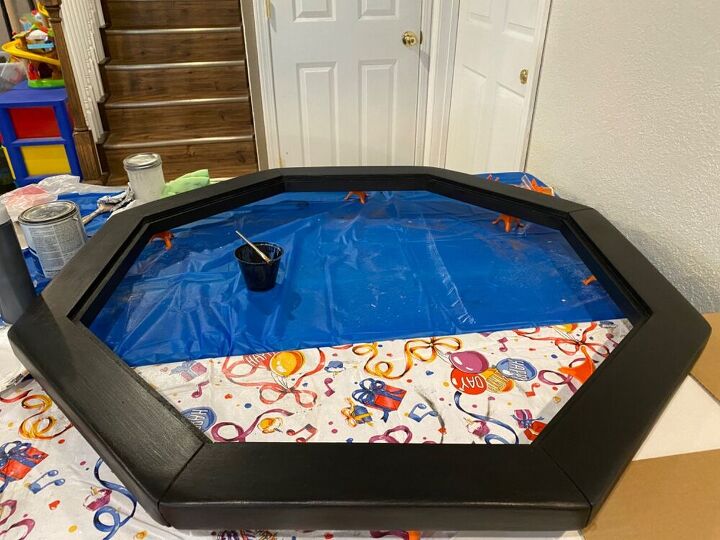
The top sanded easily to get it smooth enough to paint. A good cleaning and two coats of our Missouri Limestone Paint Company chalk-style paint “Coal Shovel” and two coats of Varathane Crystal clear water based polyurethane in satin finish later, it was ready for curing.
Whoever says you don’t need to prep if you use chalk-style paint doesn’t know what they are talking about. It was definitely a process on the bottom piece! And if you want your finish to last, you must prep!
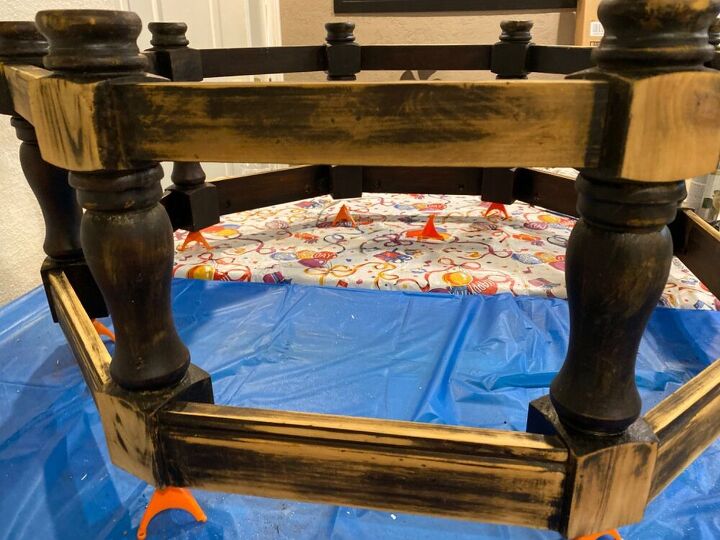
Sanding the base wasn’t working at all. My husband got a good amount off with stripper, then I did another round of stripping with mineral spirits mixed in. That helped a lot. Then another round of mineral spirits. Cleaned well them sanded again. Used a tack cloth to get rid of any sanding dust. Then cleaned really well again. That finally got it smooth enough for painting.
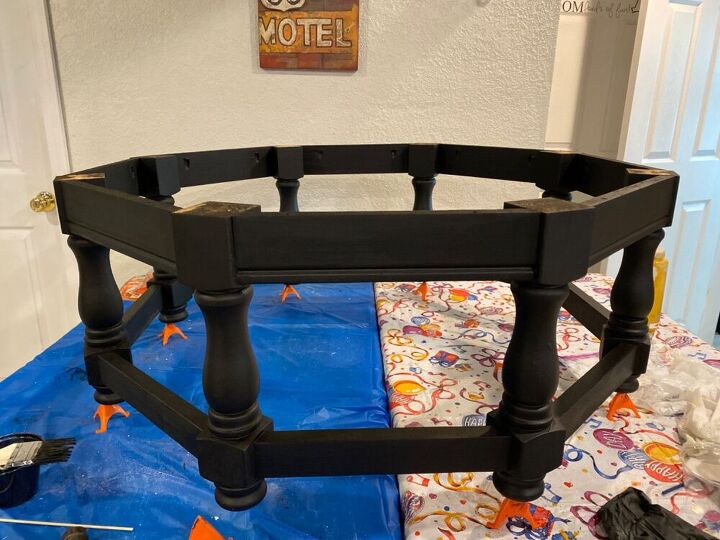
Painted with two coats of Missouri Limestone Paint Company chalk-style paint “Coal Shovel” and sealed with two coats of Varathane water based polyurethane in satin finish. This table is now ready to be put back together!
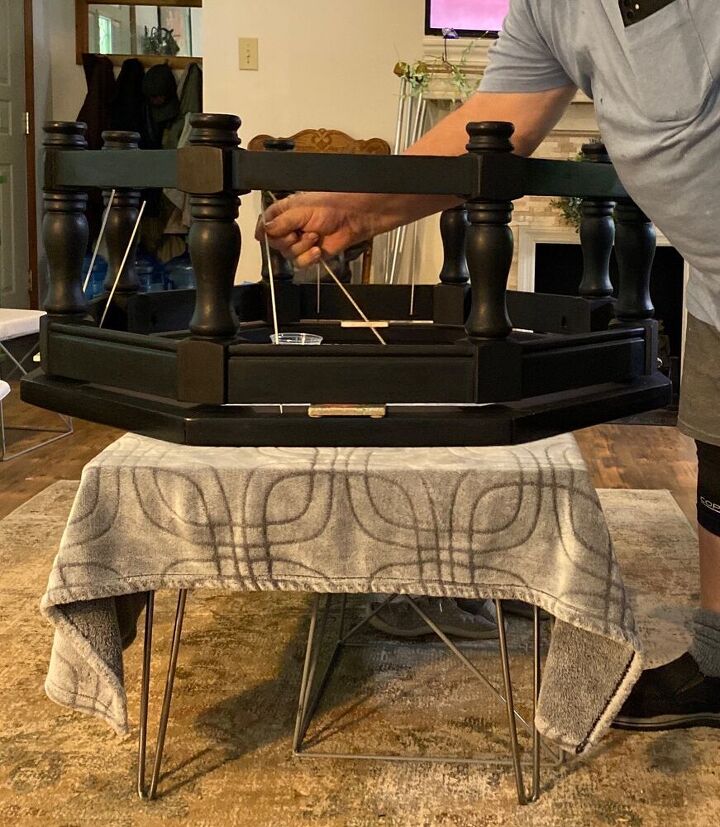
Now came the task of lining the top and bottom holes and screwing it back together. Bamboo skewers from Dollar Tree to the rescue!
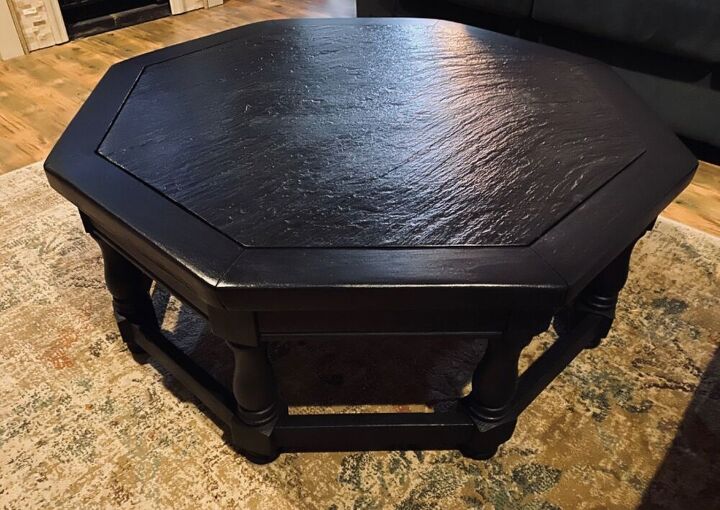
The beautiful slate top was rescued from under the couch and got a good drink of Wise Owl Lemon Verbena Salve. What a difference that made! It smells good now, too!
I love the texture of the black, rippled slate.
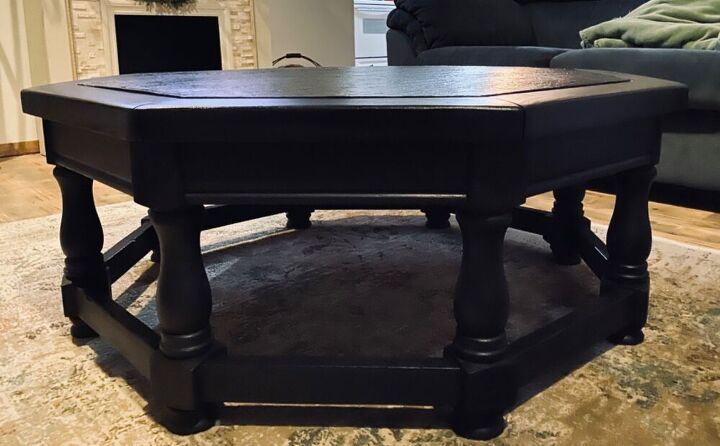
So happy how it turned out. There will be a lot of fun times gathered around this coffee table. I can just see a group of young people gathered around it, sitting on colorful pillows that could easily be stored underneath.
Resources for this project:
See all materials


Comments
Join the conversation
-
Great save! Looks so fresh and pretty.
-
Looks great.


Frequently asked questions
Have a question about this project?
please republish how to clean your oven shelves, and inside walls. Thank you
Is this Lee Curry?
I have this very coffee table in my shed; i think i painted it prior to it getting packed in there with other stuff. Unfortunately the slate top got broken as it was just laying in there without being attached, and my son turned the table on its side....crash, bam, boom. Here is my question: since you have the same table, was wondering if you had any ideas on a replacement top. (The large slate pieces may be in the building as well... i was prob thinking I would figure a way to glue it.) AWESOME job on your table re-do; it is simply beautiful. After seeing your project, i an doubly sad about our mishap. Enjoy!