


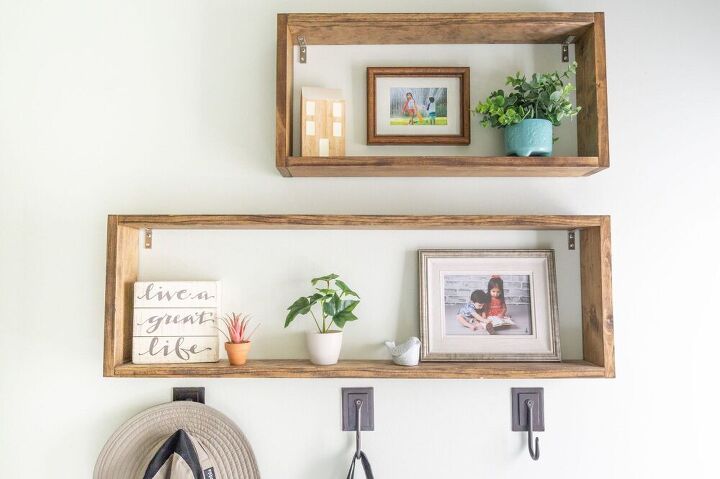
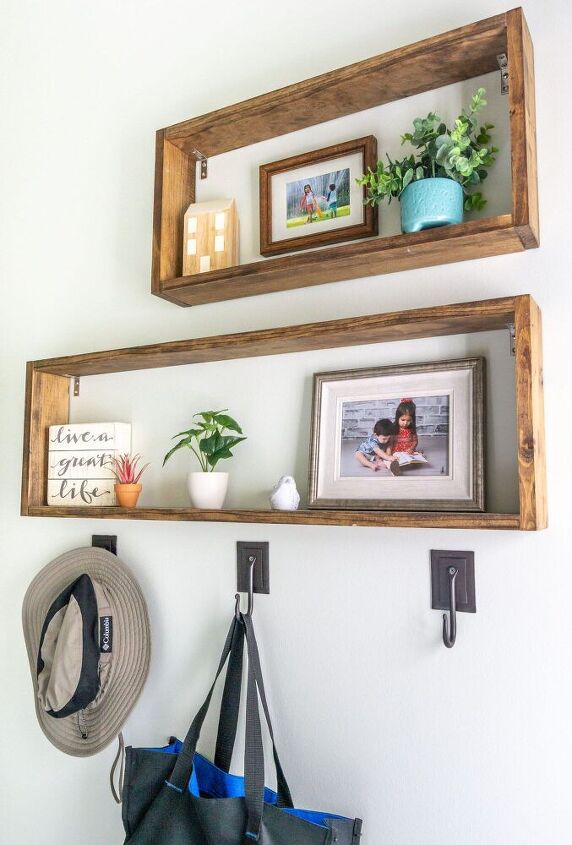
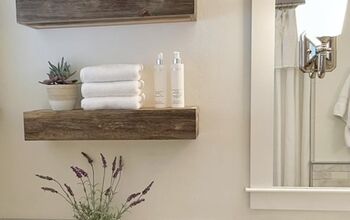
Simple DIY Box Shelves
13 Materials
$50
90 Minutes
Medium
I absolutely love these DIY box shelves. They are easy to make, great for organization or display, and a unique statement piece. I love organizing and decorating. And it’s a good thing I do, because I feel like I am pretty much always organizing, decorating, or rearranging something – be it a closet, drawer, room, desk, etc. I like everything to have its own place in the house. It never ceases to amaze me, though, how quickly things multiple, which often results in items laying around with nowhere to go. How does that happen?! Does this happen to you, too?Well, these box shelves offer a great solution for both organizing and decorating!Here's the step-by-step: . I had 2 boards at 34.5″, 2 boards at 22.5″, and 4 boards at 11.5″. This gave me one shelf that was two feet wide and a second shelf that was 3 feet wide. You could make your shelves whatever size you wanted though.
 into each side.
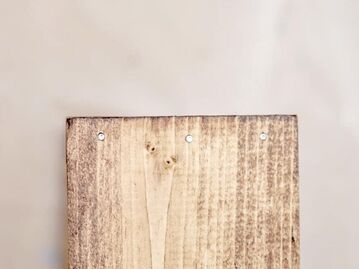
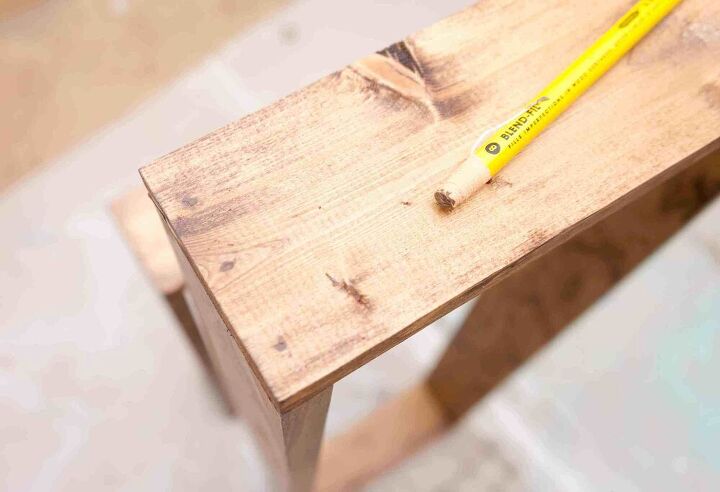
 on top of each nail, and gently drive the nail down into the board a bit further with your hammer.
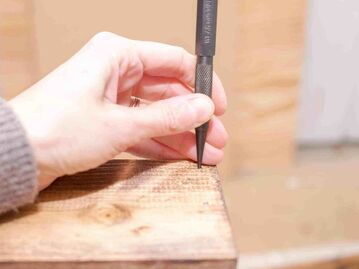
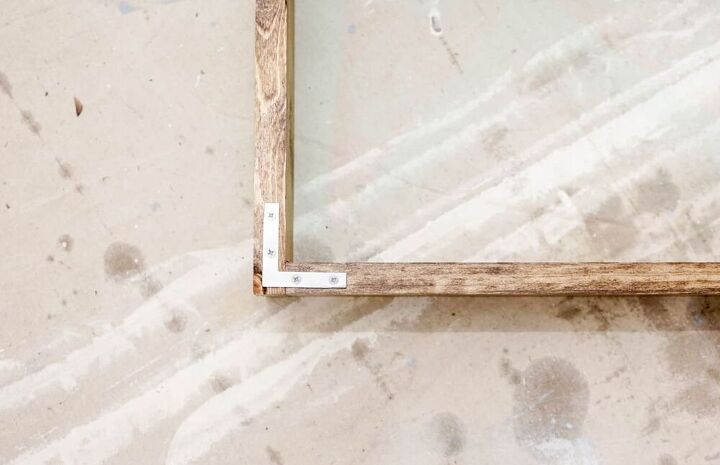
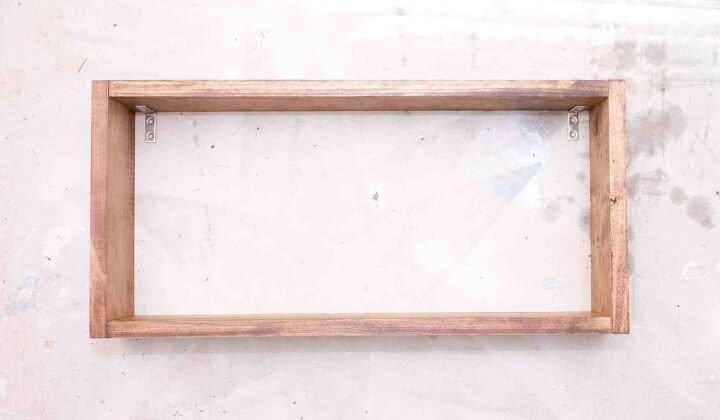
 Then, you can add the L-brackets for hanging.
 I absolutely love them! What do you think?
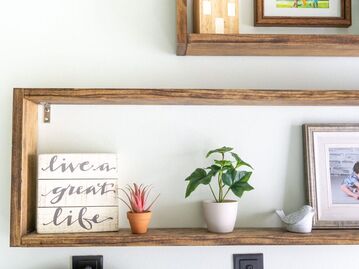
SUPPLIES
- 14′ of 1 x 4 Pine Miter Saw
Minwax wood stainFoam brushWood glue1-1/2" finish nailsHammer Nail SetMinwax Blend Fill Pencil8 Corner Braces, 1.5" x 1.5"4 L-Brackets Compact drill Anchors and screwsSTEP 1 – CUTTING
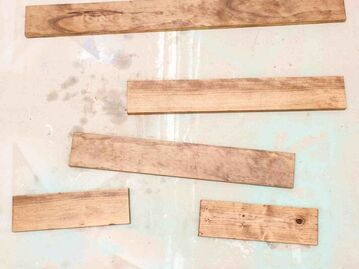
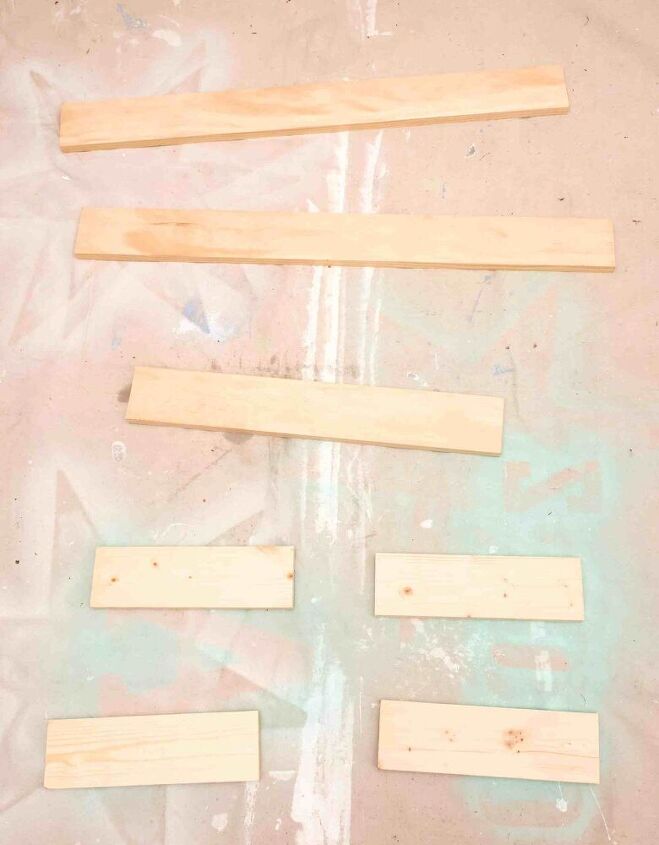
The first thing you need to do is cut your boards down to size. The width of my shelves was based on the size of the wall I would be hanging them on, and I determined the height by using one of the tallest toiletry items and adding a couple inches onto that.Then, we cut each board to the appropriate size using our miter saw. I had 2 boards at 34.5″, 2 boards at 22.5″, and 4 boards at 11.5″. This gave me one shelf that was two feet wide and a second shelf that was 3 feet wide. You could make your shelves whatever size you wanted though.STEP 2 – STAINING
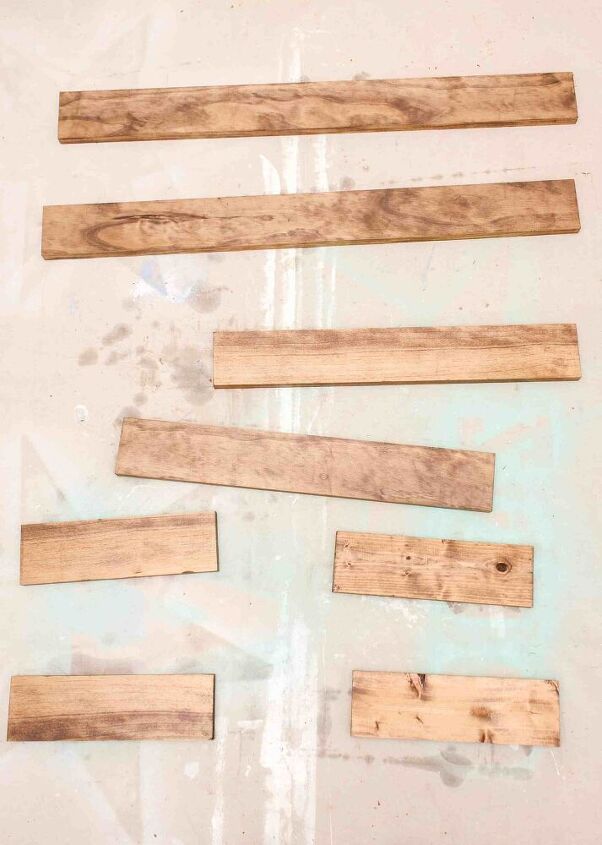
The next thing to do is stain the boards. I used my favorite stain, which is the Minwax wood stain in Provincial.Simply brush the stain on with a foam brush, making sure to cover the whole board. Then, wipe the excess off with a rag, and let dry. Once dry, flip the boards over and do the same thing to the other side. I only did one coat on mine. *The more coats you put on, the darker the stain will be.STEP 3 – NAILING
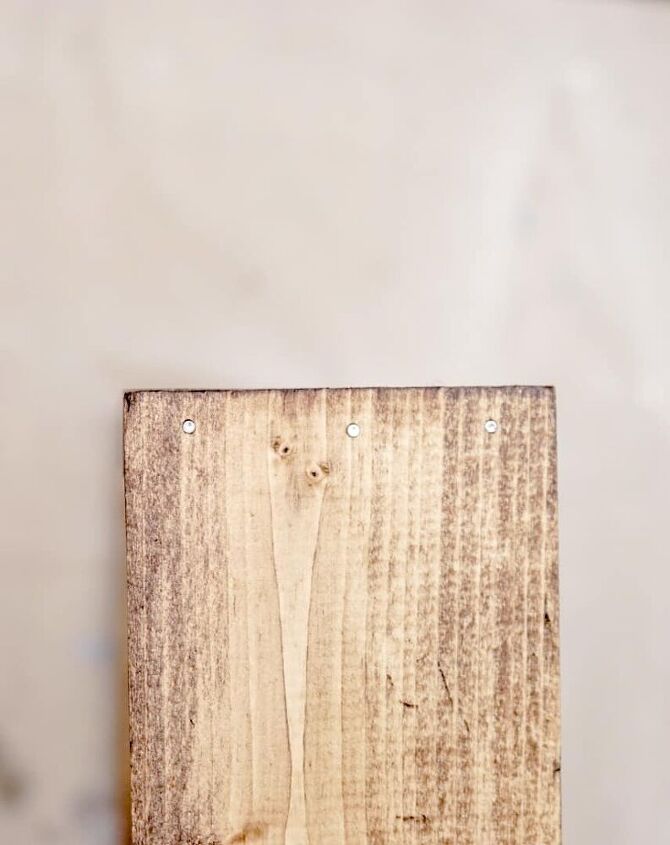
Now it’s time to put them together. You will want the long boards to go on the inside of the frame, and the short boards to be on the outside. So, the end of the long board will attach to the face of the short board, and you will be putting your nails into the short boards.Before nailing, I ran a thin strip of wood glue along the ends of the longer boards just to help reinforce the hold.We put three nails into each side.STEP 4 – SINKING THE NAILS
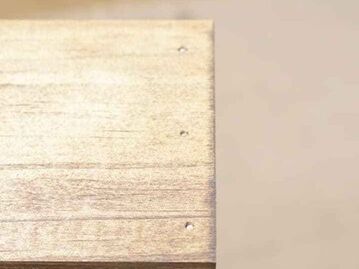
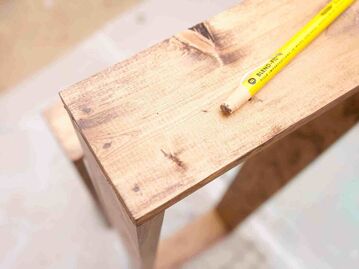
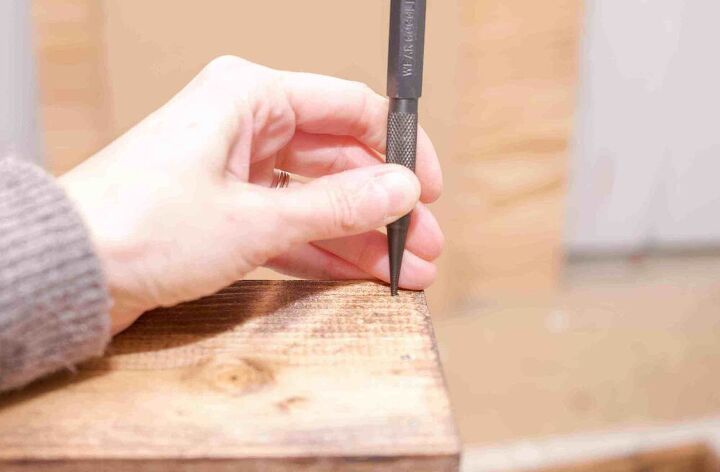
If you don’t want the nails to be visible on the outside of the shelves, then you will need to sink your nails into the board. Place a nail set on top of each nail, and gently drive the nail down into the board a bit further with your hammer. STEP 5 – FILLING THE HOLES
Then, using a fill pencil that matches your stain, simply fill in the holes, and wipe off the excess.STEP 6 – ATTACH THE HARDWARE
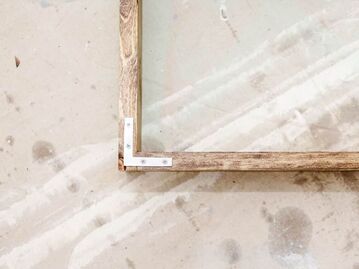
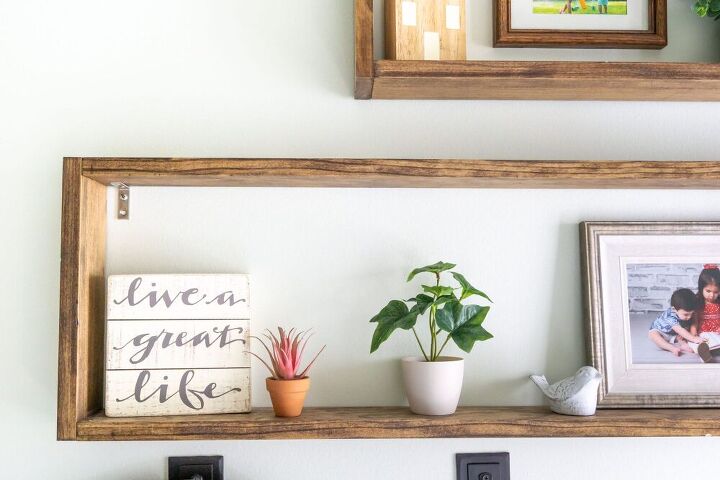
We chose to further reinforce the shelves by adding corner braces to the back of each corner. This step is optional, but will definitely help add to the durability of your shelves.Then, you can add the L-brackets for hanging.STEP 7 – HANG AND ORGANIZE
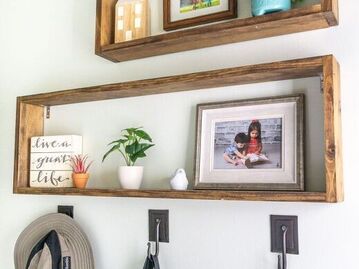
Finally, you are ready to hang these beauties on the wall! We used drywall anchors and screws in order to ensure that the shelves would stay safely on the wall.I absolutely love them! What do you think?
Resources for this project:
See all materials


Any price and availability information displayed on [relevant Amazon Site(s), as applicable] at the time of purchase will apply to the purchase of this product.
Hometalk may collect a small share of sales from the links on this page.More info

Want more details about this and other DIY projects? Check out my blog post!
Comments
Join the conversation
3 of 9 comments
-
Wow! What a great look you got from a few simple pieces of wood! These are awesome! I gotta make Some!!!
-
Beautiful


Frequently asked questions
Have a question about this project?
Love these. Thanks for the great instructions. Where did you find your hooks under the shelves?? These are me all the way.
They came out nice! Question, Couldn't you have put the brackets on the wall first and then attached the part of the bracket sticking out horizontally to the top side of the shelf with the vertical sections behind the outside edges of the shelf so you couldn't see them at all?