


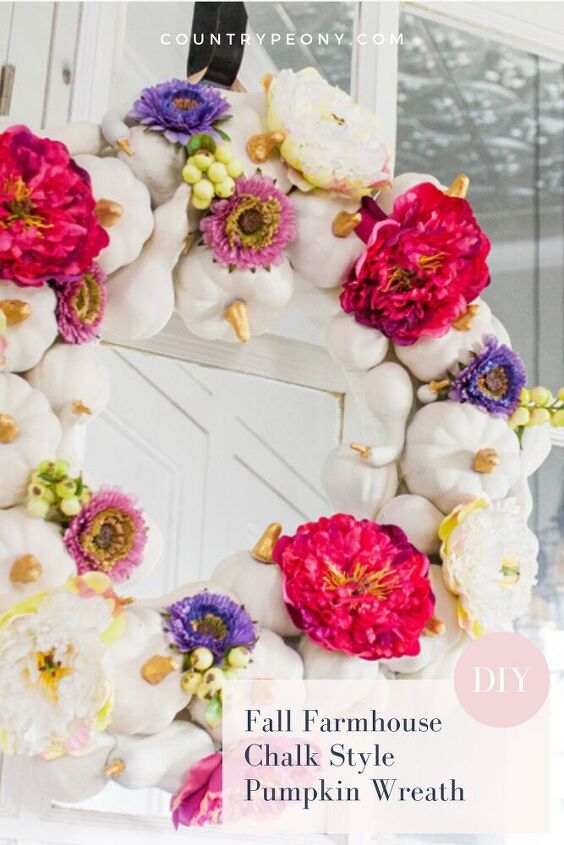
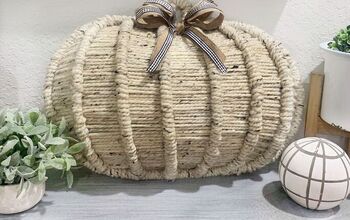
How to Make Your Own Fall Farmhouse Chalk Style Pumpkin Wreath
A step-by-step tutorial that features a whimsical take on the classic Fall decor with this DIY chalk style pumpkin and floral Fall wreath.
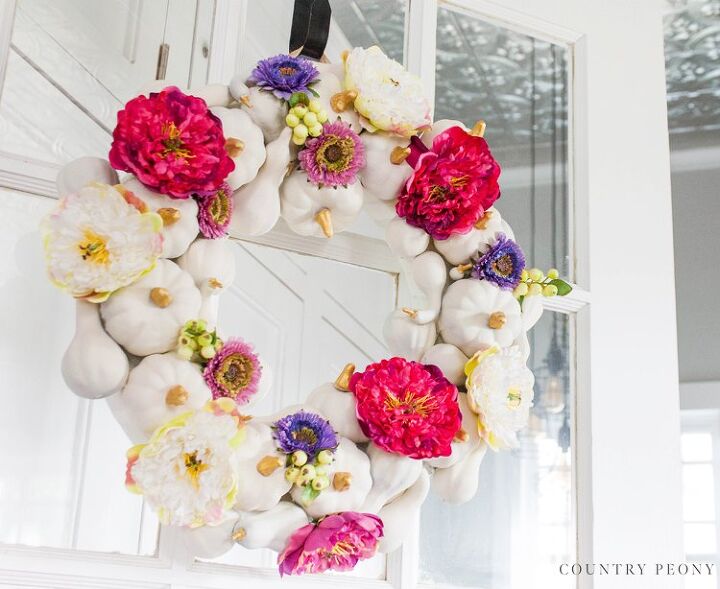
I wanted to update my front porch with a fresh take on the Fall color palette. Today I want to show you a simple DIY wreath that inspired the rest of my Fall front porch design.
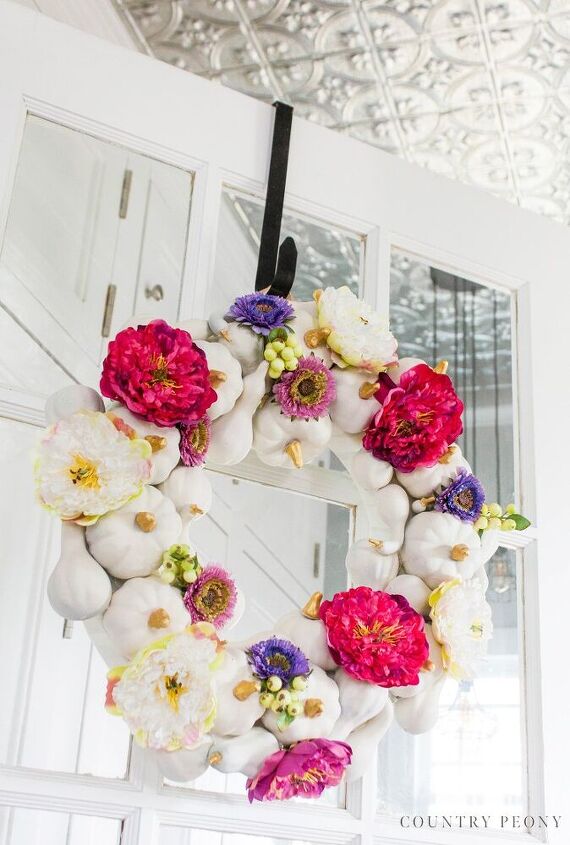
A couple of lessons from today’s DIY. The colors I used in today’s Fall wreath are not considered “typical” Fall colors. That is okay. It is okay to step outside of the box as long as it makes you happy. On my morning run, my eye gravitates toward the darker purples in the mums, bright pinks in the late blooming crepe myrtles, and the lighter green pumpkins that this time of the year brings. I wanted to create a wreath that reflected that. I also wanted to try a new technique with dollar store pumpkins that made a pretty base for the wreath: chalk style matte pumpkins.
In full disclosure I also wanted to share that this wreath was not what I originally had in mind. I didn’t like the shape it was taking with just the pumpkins so I decided to add leftover flowers from a different wreath to elevate the pumpkins, and I am so happy with the end result. This brings me to my second lesson, don’t be afraid to sit on your thoughts. Take a break and let your mind rest, and you will see your project in a new light and with new inspiration. Don’t be afraid to change your mind. You never know what you can end up with when your creative heart is open!
The beauty in this piece is that you can customize it to your liking. You can also use leftover items from other pieces to embellish it. I look forward to seeing how you customize your wreath.
Follow the steps below to make your own Fall farmhouse chalk style pumpkin wreath.
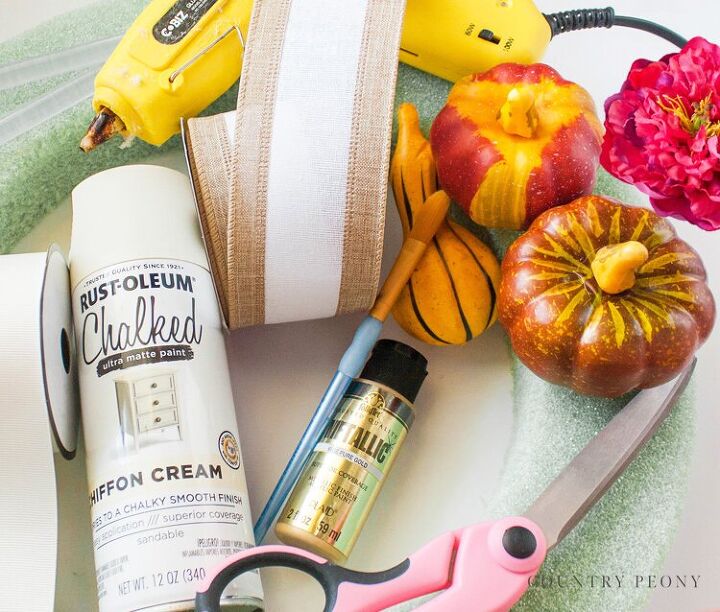
- 13 inch foam wreath. You can use whatever material or size wreath you would like. But I find foam is the easiest base to wrap.
- Miniature Pumpkin and Gourd Plastic Mixture. I used about 40 miniature pumpkins and gourds for this project. (affiliate link)
- Rustoleum Chalked Chiffon Cream Ultra Matte Spray Paint (affiliate link)
- 1 Inch Off White Ribbon
- Hot Glue Gun with Glue Sticks
- Gold Craft Paint
- Craft Paintbrush
- Scissors
- Faux Flowers. As I said above I used some flowers from an old wreath.
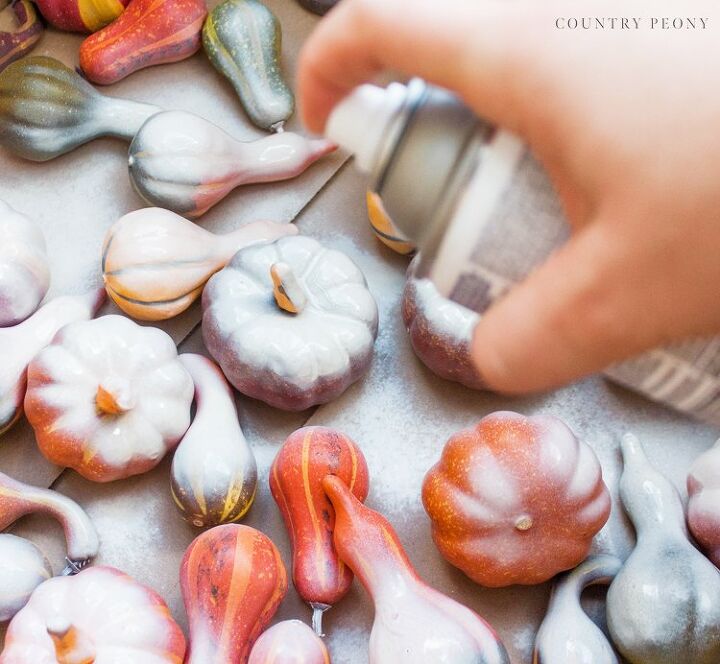
*I find it helpful to spray paint smaller objects in a large box outside. This will contain the objects so they won’t roll around onto the dirt. It also protects the objects from getting dirt blown onto them. Just be careful not to inhale the fumes since the box is a more contained space.
*Make sure you roll the pumpkins over so both sides are painted.
Once the first coat of spray paint is dry (it should only take about 15-30 minutes with a nice breeze), spray paint the second coat onto both sides of the pumpkin.
Apply a third and final coat of spray paint once the second coat has dried.

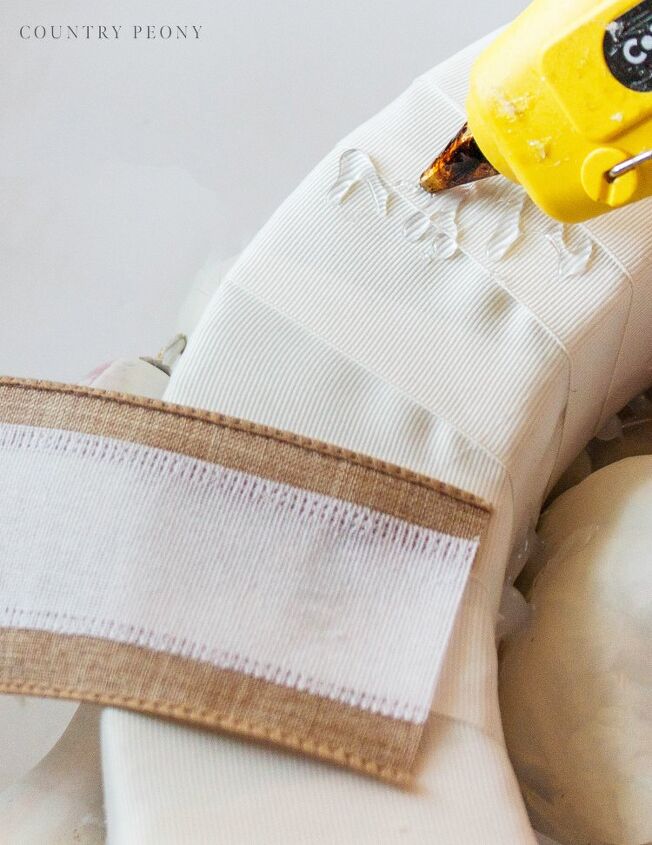
While you are waiting for the paint to dry on the pumpkins, tightly wrap the ribbon around the foam wreath and secure it with hot glue.
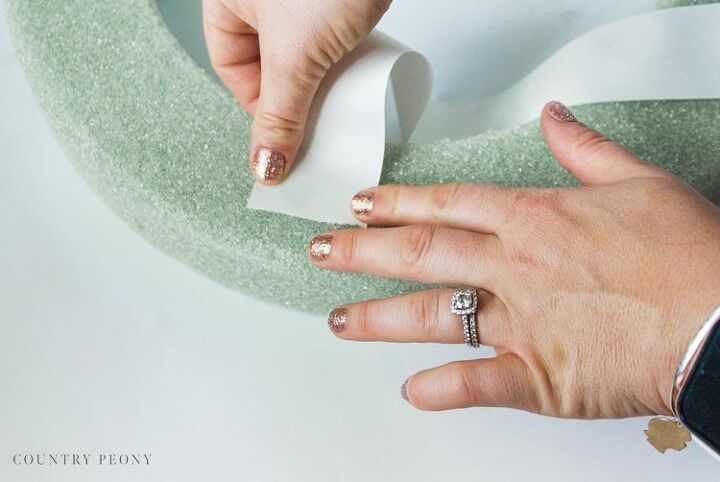
The ribbon provides a pretty backdrop for the pumpkins and flowers to rest on. It also provides a steadier surface area for the hot glue to secure the pumpkins to.
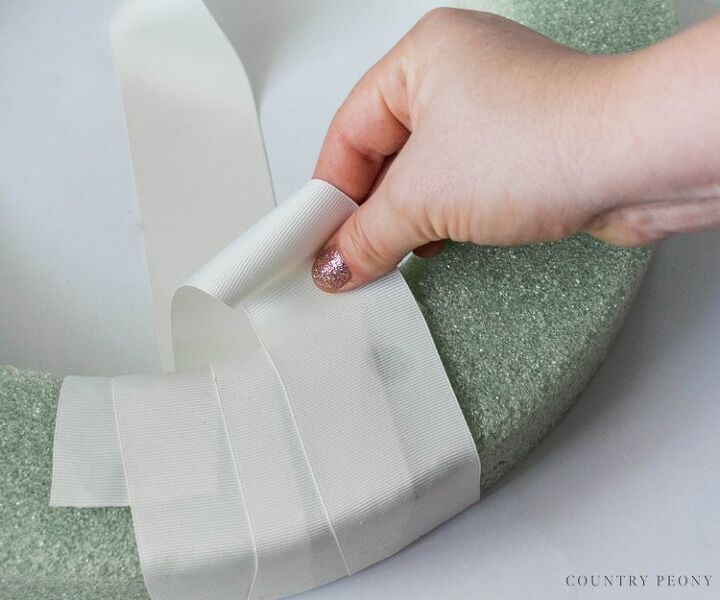
*I find it helpful to hot glue every fourth wrap around.
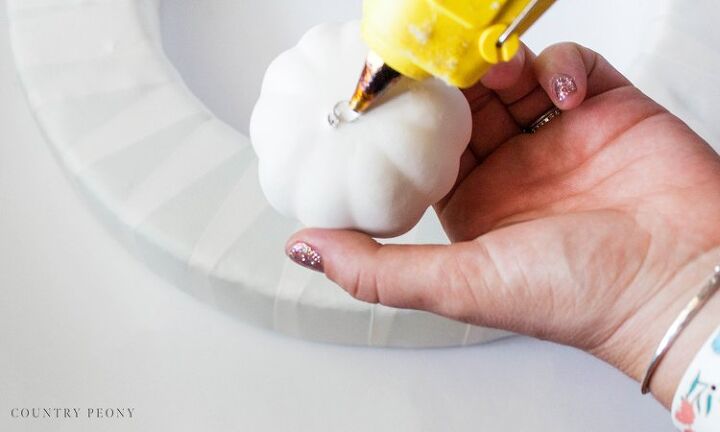
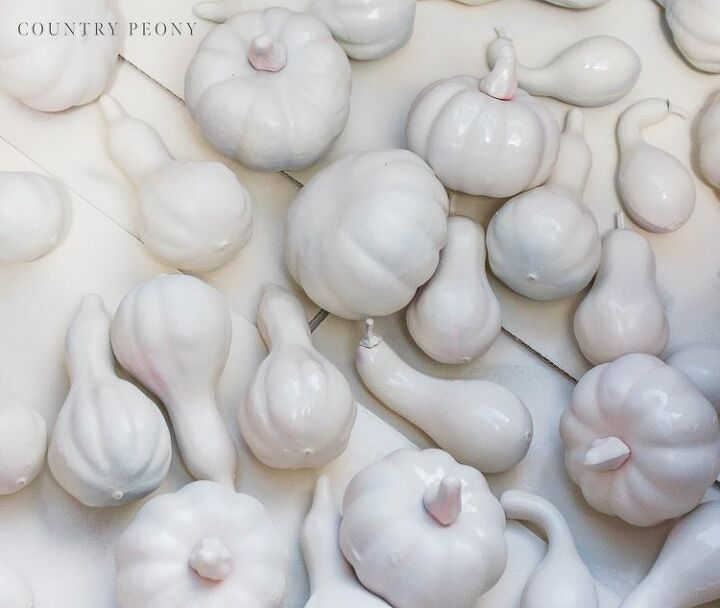
Once the pumpkins are completely dry, attach them with hot glue to the wrapped wreath.
Add the pumpkins to the top face of the wreath first. You will fill in the sides later.
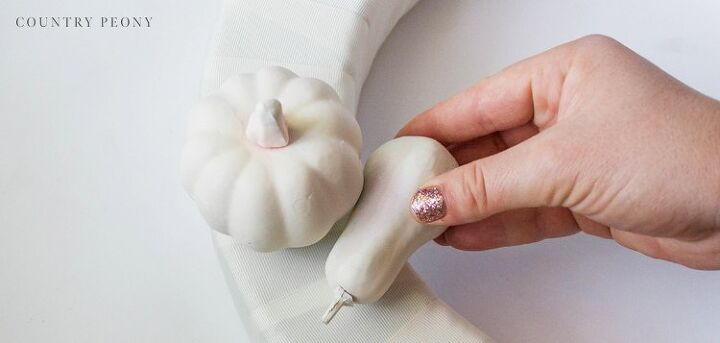
Add the pumpkins and gourds right next to each other. Hot glue them to each other so they create a stable foundation.
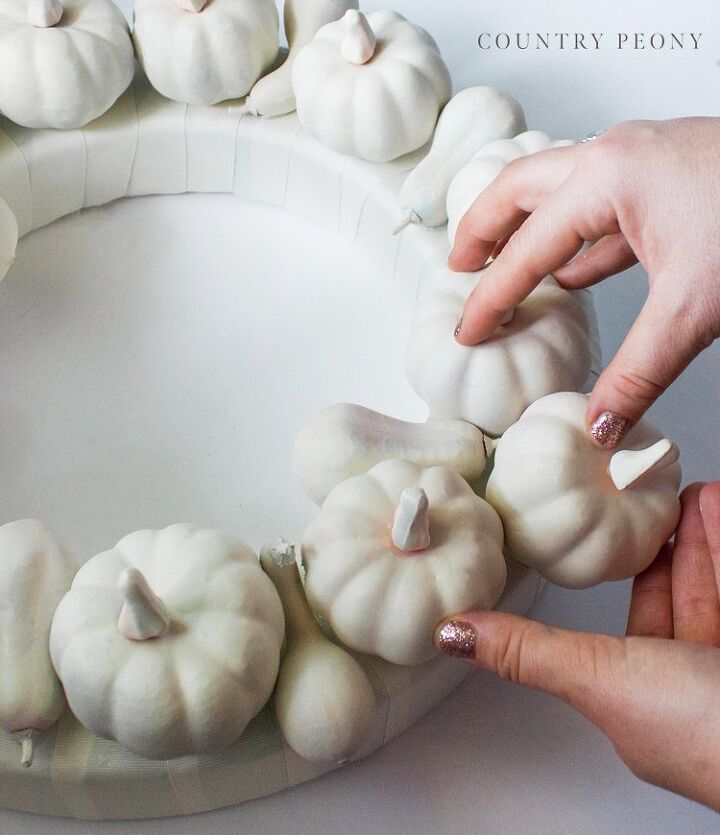
Once you attach all of the pumpkins and gourds to the top face of the wreath, start to fill in the sides and gaps with more pumpkins and gourds.
*Remember, it is helpful to secure the pumpkins and gourds to each other and the wreath with hot glue. Press the attached pumpkins firmly to each other as you wait for the hot glue to dry.
Step 6: Remove the hot glue whiskers from the wreath.
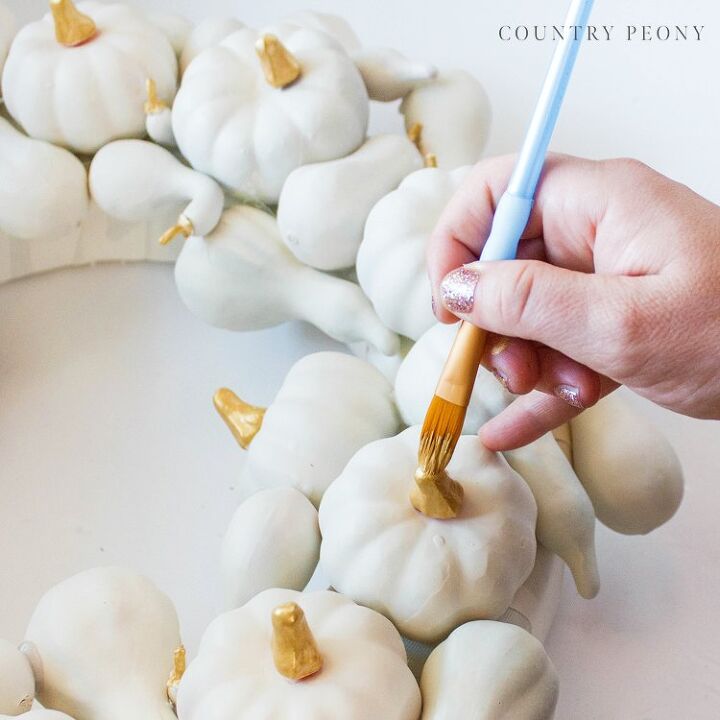
Add a touch of glam to the stems of the simple, classic white pumpkins and gourds with gold craft paint.
*Only one coat of gold craft paint is necessary for the gold painted stems.
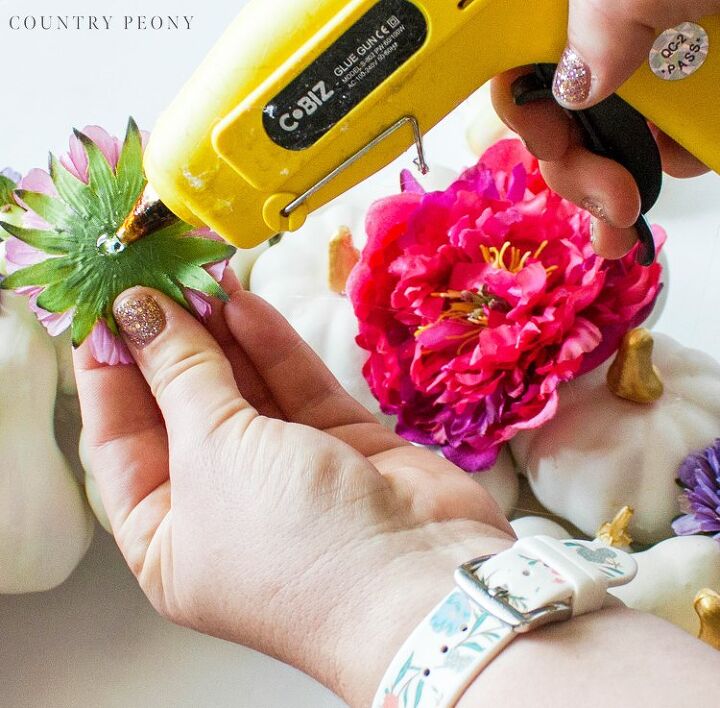
Once the gold paint is dry, start to lay out your faux flowers onto the wreath. Look for areas that have gaps and possible paint flaws. Have fun with the placement of these flowers.
*A little bit goes a long way with the florals. I added about 15 large and small faux flowers to the pumpkins.
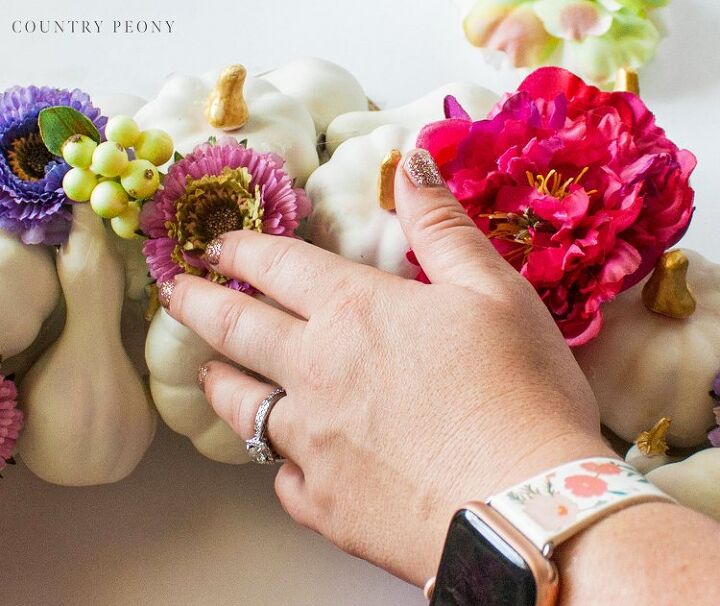
Once you are happy with the placement of your flowers, hot glue them to the wreath. Nestle the flowers firmly into your “pumpkin patch.”
You can use decorative ribbon or the same ribbon that you used to wrap the wreath with.
I hope you enjoy adding your own whimsical twist to this Fall farmhouse chalk style pumpkin wreath!
I believe crafting is more fun when we share our projects. Please email me at elizabeth@countrypeony.com, or please tag me @thecountrypeony to show me your beautiful, custom creations!
Thank you so much for following along!
Elizabeth with Country Peony
Resources for this project:
See all materials


Comments
Join the conversation
-
Absolutely stunning! I’m going to do this with a coastal theme. Add in a few shells and some pale seafoam green colors. I plan to make two. One for outside my door with more typical fall colors and then one with the coastal theme for the inside of the door so I can enjoy it too!
-
I haven’t made it yet. Just an idea I have. I’ll remember to show it to you once I’ve made it.


Frequently asked questions
Have a question about this project?
What happens when the glue gets wet on yours?
is there not a way to wire them
mine fell off