


Side Board Make Over

I've had this side board for a couple years now. I always knew I wanted to refinish it or knew I had to at some point (the top was very beat up), but I never really knew what to do with it. If you're anything like me, I do not start a project until I have a finished vision of what I want it to look like. Sometimes I go a little off my vision, but for the most part it's pretty spot on. I didn't know exactly what I wanted to do with this piece until I came across the knobs that are on the finished piece. I knew I needed to get new knobs/ pulls because when I purchased this piece it was missing quiet a few. I came across a pack of 12 knobs at Home Goods for $14.99. The exact number I needed and for a heck of a price - I call it fate. After snagging the knobs I got to work!
This piece only cost me the cost of the new knobs and paint. If you needed to purchase everything, your cost would differ.
Link to sanders -
https://www.amazon.com/BLACK-DECKER-BDERO100-Random-Sander/dp/B00MLSS1SW/ref=sr_1_59?pf_rd_i=328182011&pf_rd_m=ATVPDKIKX0DER&pf_rd_p=aebdcf2a-c487-557d-8d80-d62a0ddc594d&pf_rd_r=P9Y6J57AW03QNCJYNWM5&pf_rd_s=merchandised-search-10&pf_rd_t=101&qid=1557660956&refinements=p_72%3A1248909011&s=power-hand-tools&sr=1-59
https://www.amazon.com/TACKLIFE-Multifunction-Sandpapers-Efficient-Collection/dp/B07X148FRH/ref=sr_1_3_sspa?dchild=1&keywords=electric+sander&qid=1585832868&sr=8-3-spons&psc=1&spLa=ZW5jcnlwdGVkUXVhbGlmaWVyPUEyVkQ3U0gzVkI4WTYzJmVuY3J5cHRlZElkPUEwNzc0NjYzMkVYVEUyU1kzVkRBViZlbmNyeXB0ZWRBZElkPUEwMzI5ODQ1OTNKS0c3UTg1UjlMJndpZGdldE5hbWU9c3BfYXRmJmFjdGlvbj1jbGlja1JlZGlyZWN0JmRvTm90TG9nQ2xpY2s9dHJ1ZQ==
Link to my paint brushes I always use to paint with -
https://www.amazon.com/dp/B07DT5YJQ2/ref=cm_sw_r_cp_api_i_vNXWDb3CWGHJW
Link to sealer -
https://www.amazon.com/dp/B000PRNXNY/ref=twister_B07JLY244F?_encoding=UTF8&psc=1

Hometalk Recommends!
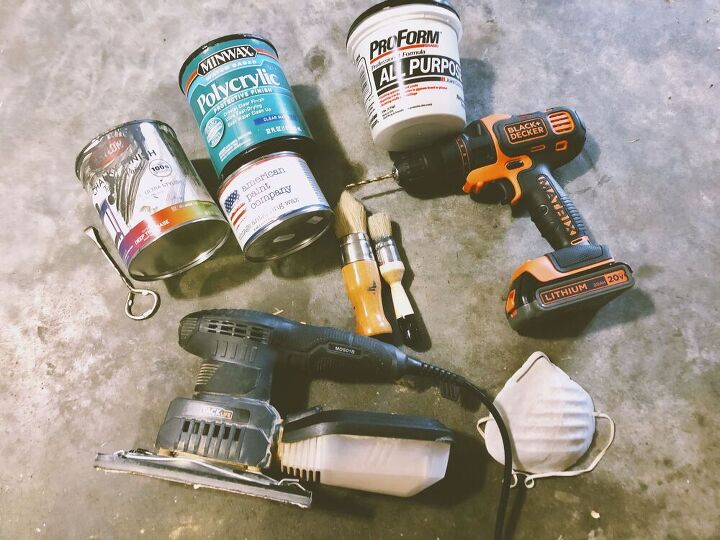
Materials Needed
Before - miss matched knobs and missing pulls. She needs some love!
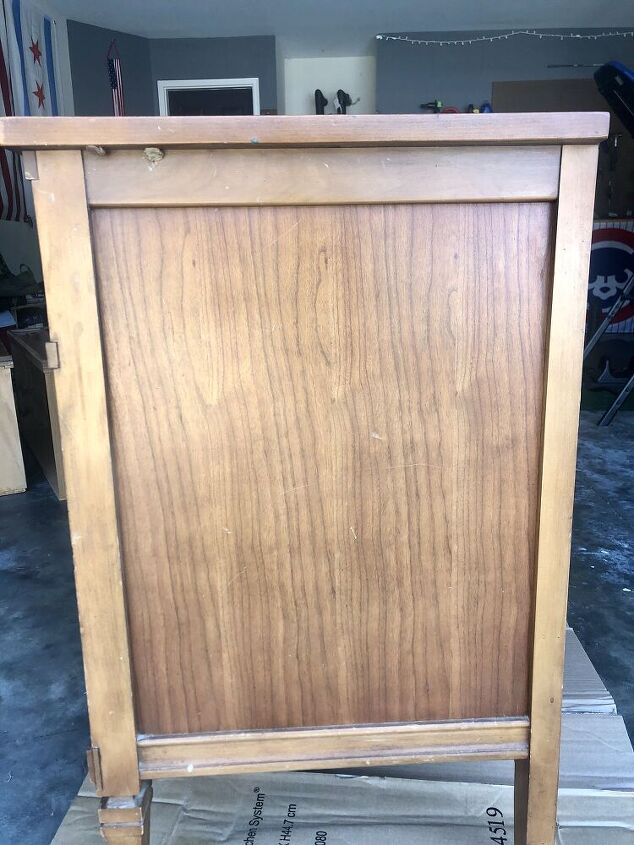
Also discovered some nasty junk on the side.
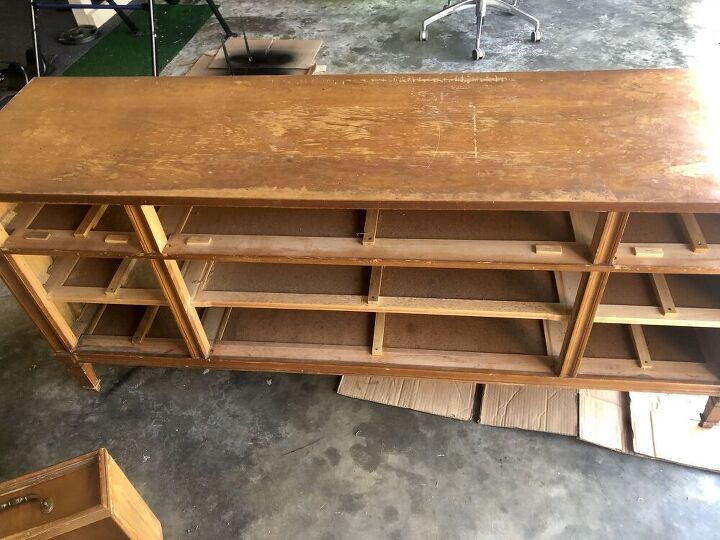
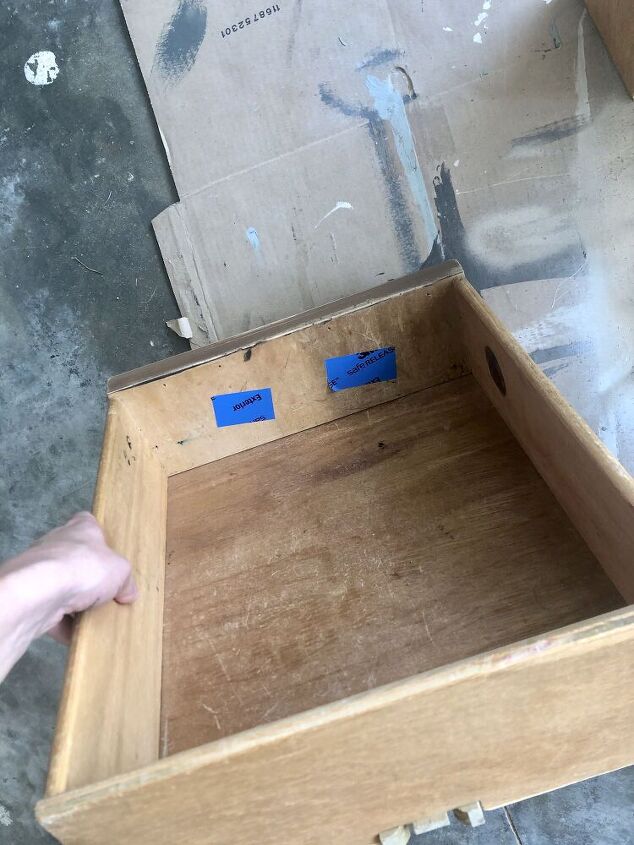
I always start off by cleaning what I can from a piece. I remove everything I can (drawers, hardware, etc.) and get ready to sand.
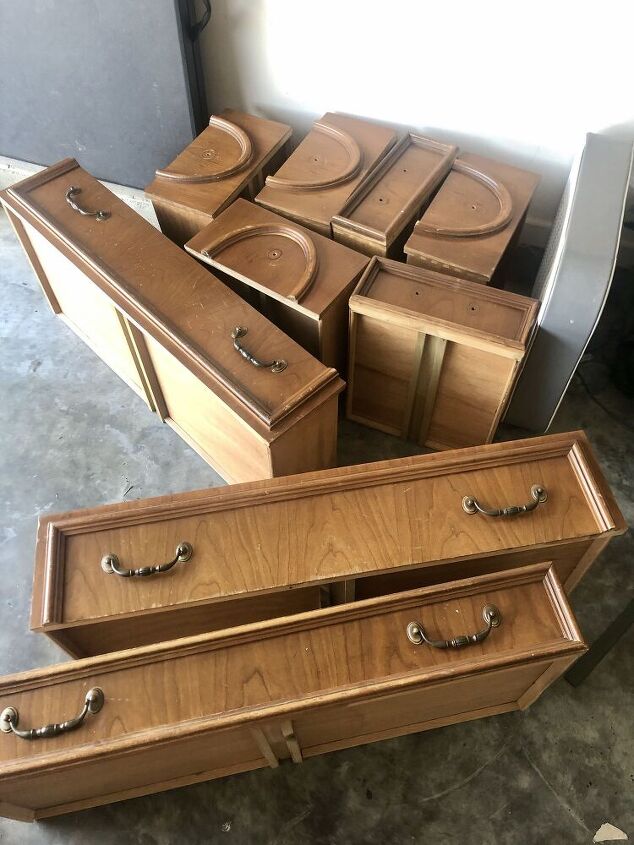
I was a fan on the grain on these drawers, but unfortunately they weren't solid wood. I knew I was going to re-stain the top so I would have to re-stain the drawers as well. But because they aren't solid wood sanding them down would be taking a chance because it's just a thin particle board, which I didn't want to chance, so painting it was the best option.
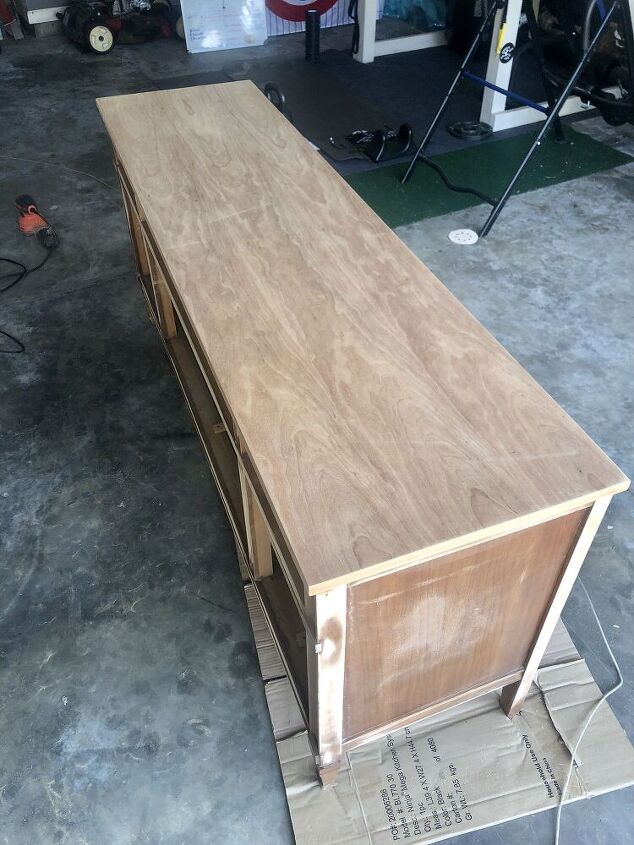
This piece already had the varnish chipping off so I didn't have to do too much heavy sanding. I used 80 grit to get off the existing stain and sealer and then finished it off by using a higher grit sand paper of 120. Using a higher grit makes the wood smoother and gives the new stain or seal something better to stick to.
For the rest of the piece I did a light sanding when I was using the 80 grit. I knew I was going to use chalk paint so sanding it down is optional.
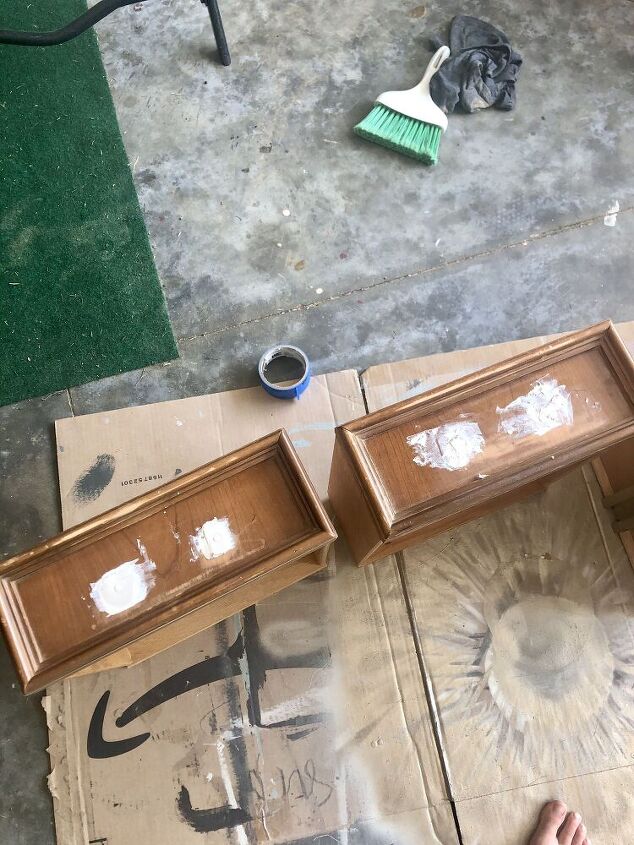
When I originally purchased this piece it was missing hardware, so I knew when I refinished it I would need new hardware. The holes on the piece were intended for pulls not knobs. I found a set of 12 knobs at Home Goods which was the exact amount I needed, how perfect! I covered the existing holes with spackle. There are many, many different products to used to do this - I used what I had on hand in order to save money. I've used this many times before and it works perfectly! After the spackle is dry sand down to a smooth even surface.
Little tip - put some painters tape on the back of the holes so you can push down the spackle and make sure it's fully plugging the hole.
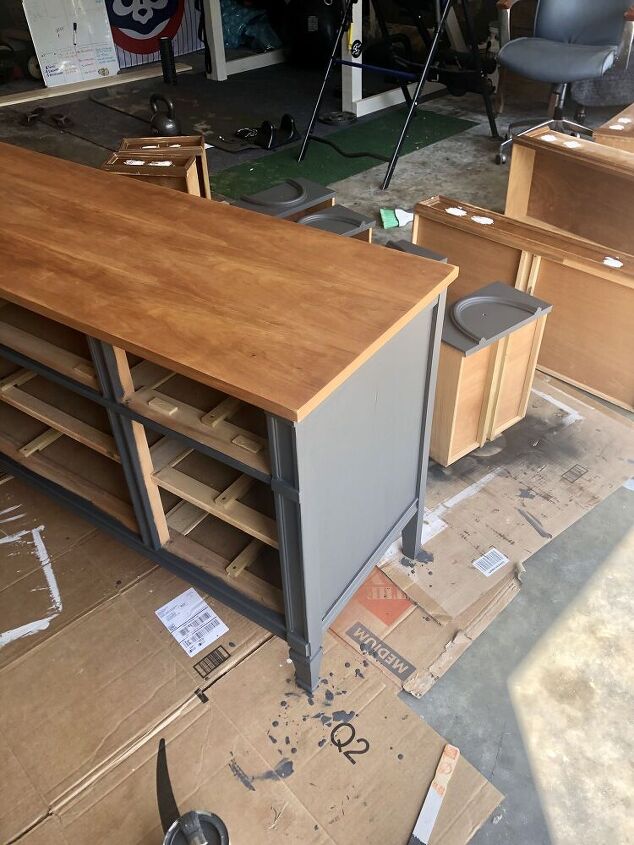
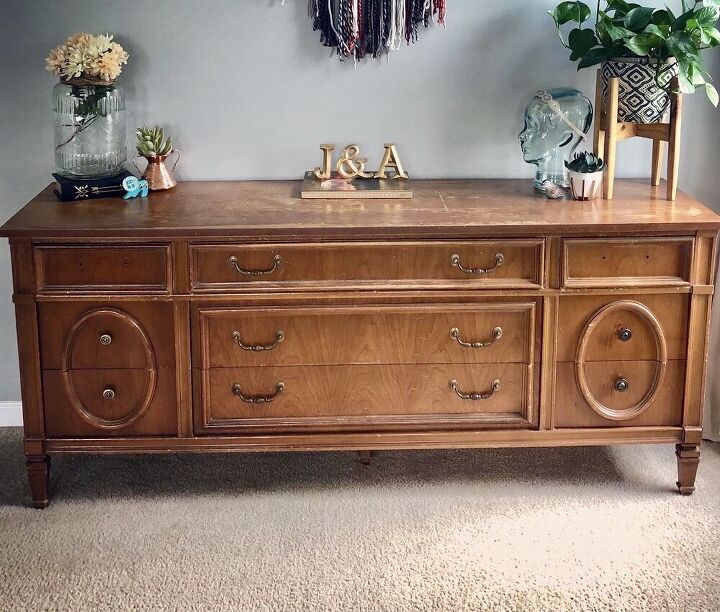
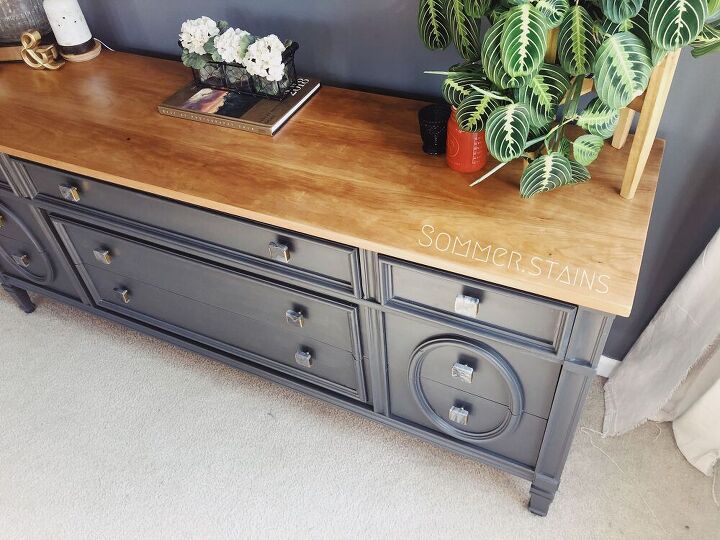
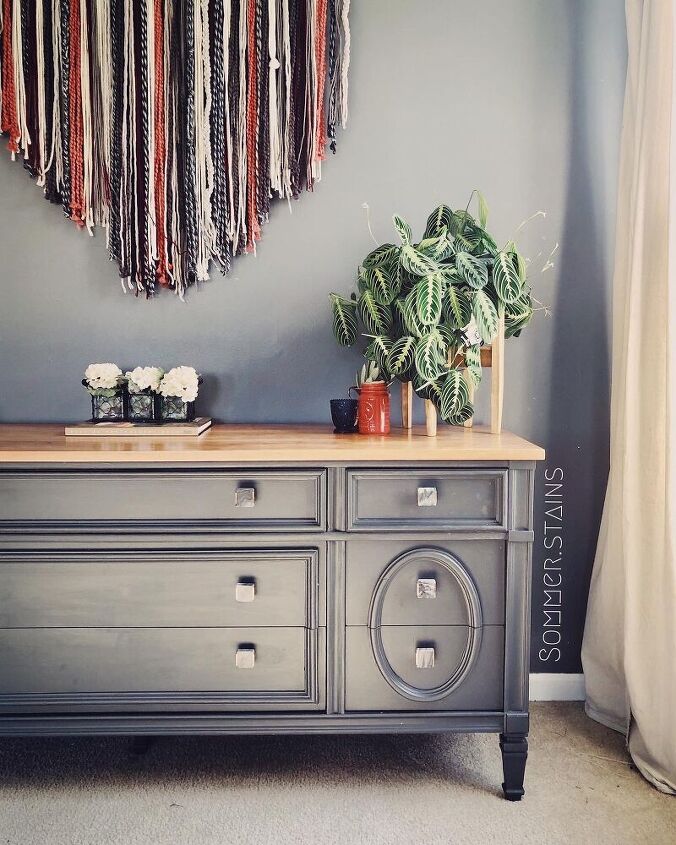
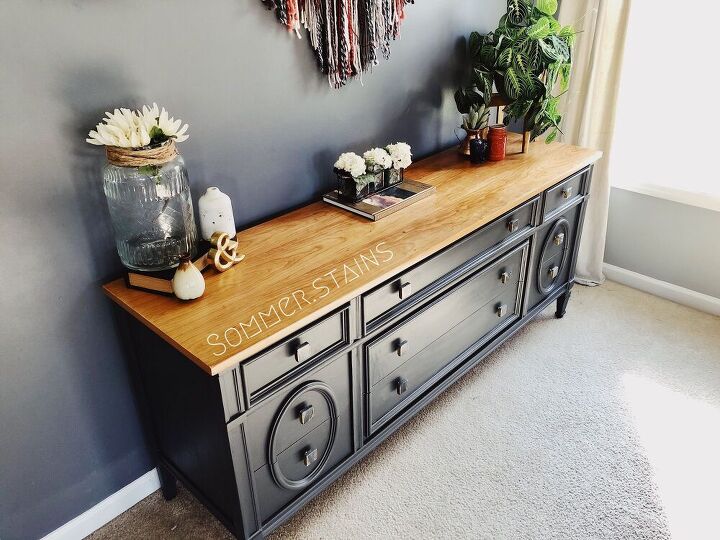
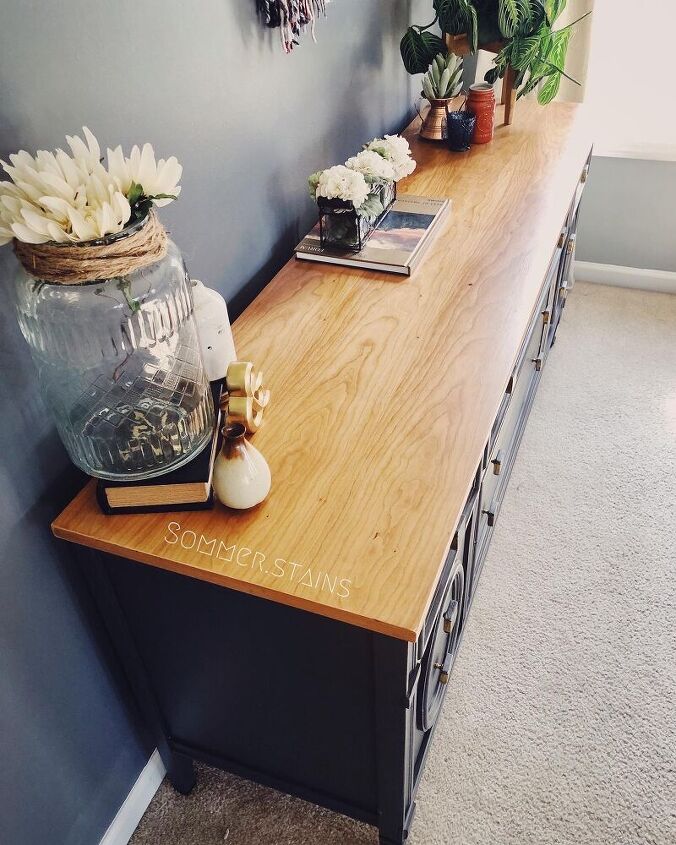
I used chalk paint for this piece in the color Toasted Poppyseed. It's one on my favorite black colors.
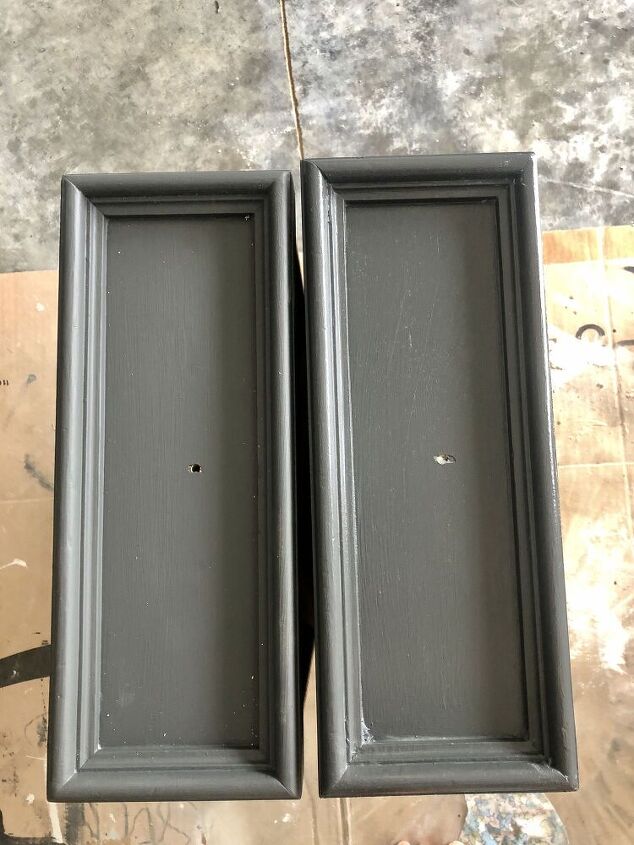
Measure and drill new holes with the appropriate size for your new knobs
I used a chalk paint finish on this piece so to seal I used a sealing wax. American Paint Company was kind enough to send me some products, their sealing wax being one of them and I love it! I've used it on many, many projects and love the way they come out.
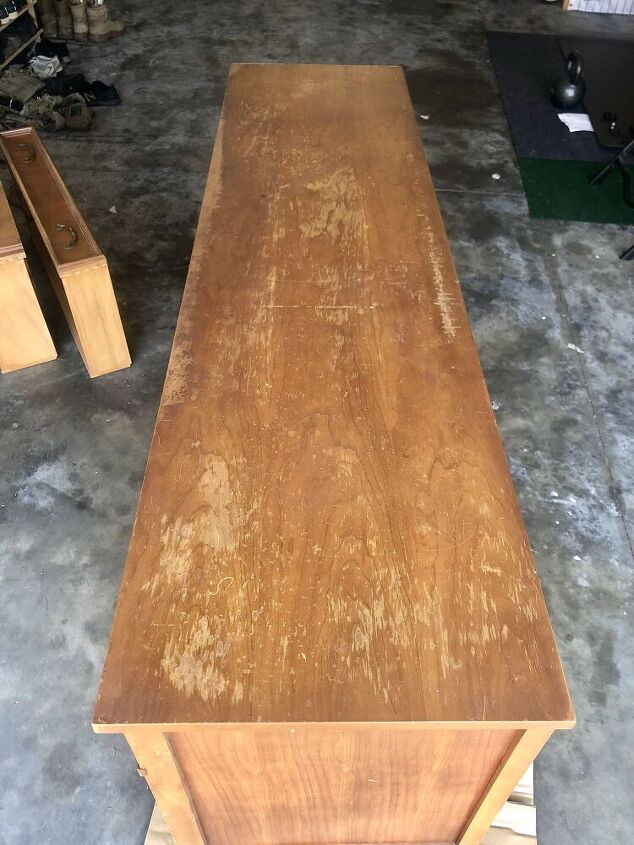
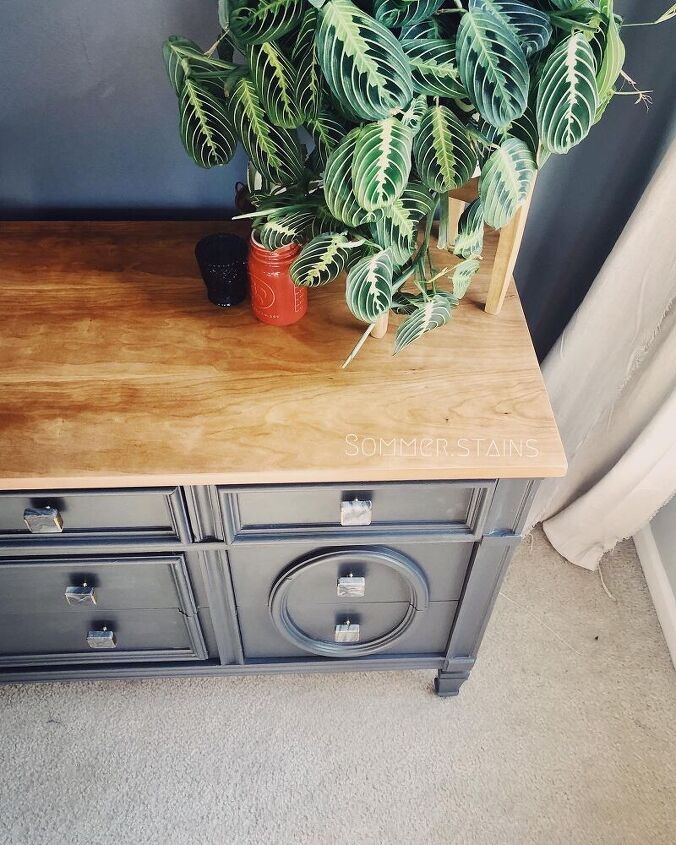
The top of this piece is just sealed. After sanding it down I loved the color of the natural wood so I decided not to stain it and just seal to protect it. I used my go to, holy grail sealer - Polycrylic by Minwax in matte.
This photo also shows the difference between non sealed (left) and sealed (right).
These are the knobs I found at Home Goods. They have held up well and I really like how unique they are.
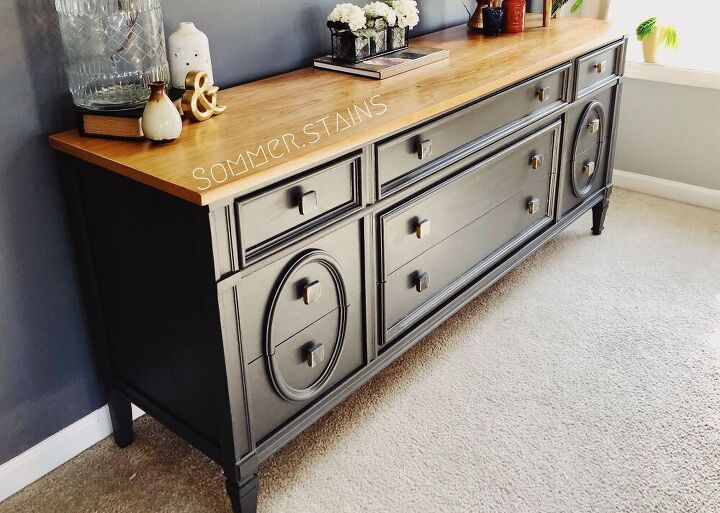
I absolutely love the way this piece turned out. I wish I refinished it sooner, but I'm glad I waited until I was inspired and had a vision on how I wanted it to look.

Resources for this project:
See all materials


Comments
Join the conversation
-
Incredible beauty! Love it!!! Great work!
-
Looks amazing


Frequently asked questions
Have a question about this project?
Beautiful!!! Did you make the art piece on the wall??!!
Beautiful job!
Gorgeous! PLEASE - tell us what brand of chalk paint did you use??? ❓
Is it Krylon Poppyseed Chalky Finish brush on paint?
The color is absolutely scrumptious! 👏
I have a full dining room set that I'm now brave enough to paint the display cabinet. I just couldn't choose a color until Toasted Poppyseed! 😎