


How To Make A Bean Bag With Handles

by
Joy
13 Materials
$20
90 Minutes
Medium
Do you like low seats? We show you how to transform a used car tire into the new beanbag that your living room needs, with a pair of leather handles so you can take it from one place to another. Be careful step by step!
Tools
- Brush Screwdriver Stapler Pencil Awl keyhole saw Sandpaper block Drill
materials
- Mounting adhesive Washers Leather or leather handles Foam Wadding Wood Tire Cloth Screws Nuts
1. Thoroughly clean the tire surfaceThe recycled tires typically be dusty or stained with grease, so it’s important that you clean well provided the use in your DIY projects. Go over the surface first with a stiff bristle brush to remove any surface dirt and then use a scouring pad with soap and water. If the rubber is very greasy, you can use a specific product to clean it thoroughly. Don’t forget to clean the grooves!
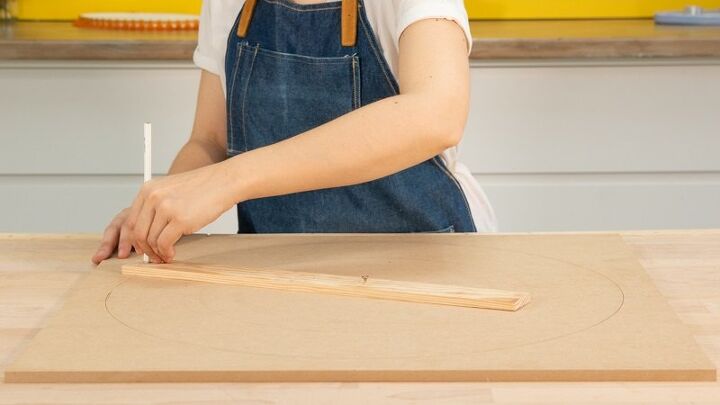
2. Cut a circular piece of wood for the seat
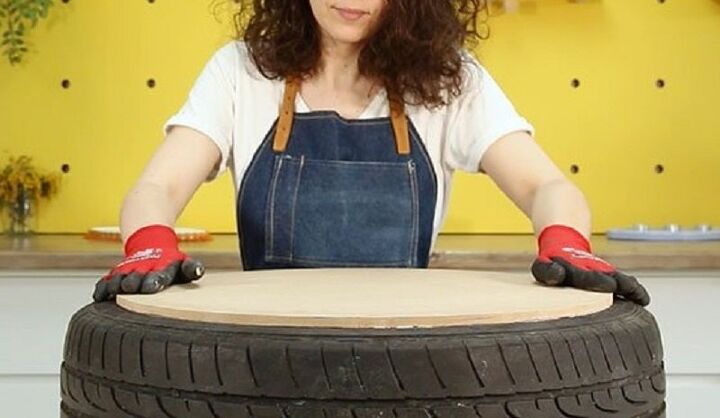
3. Glue the piece of wood to the tire with mounting adhesive

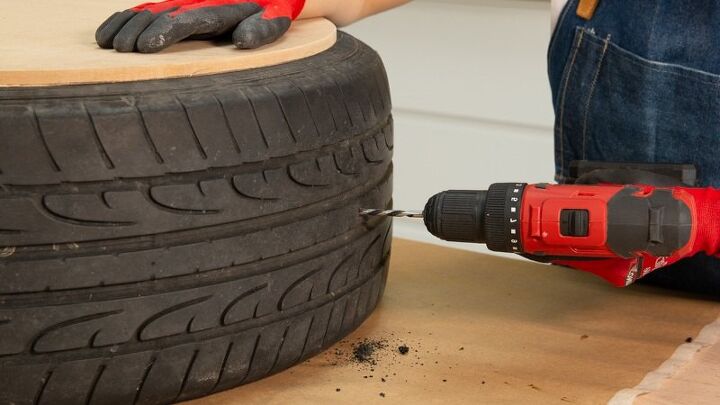
4. Make the holes for the bean bag handles
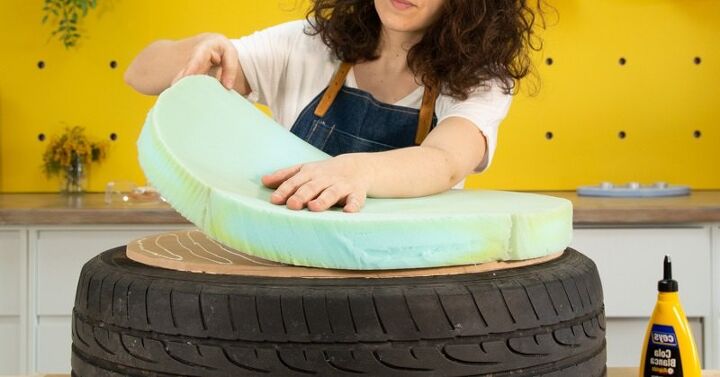
5. Glue the foam and staple a piece of wadding
Then, remove the tire from the table and spread out a piece of wadding large enough to cover it completely. It will serve to soften the shape of the foam and improve the result of the bean bag.Place the tire, foam side down, on the wadding and staple the fabric to the inside of the wheel, making sure it is stretched.
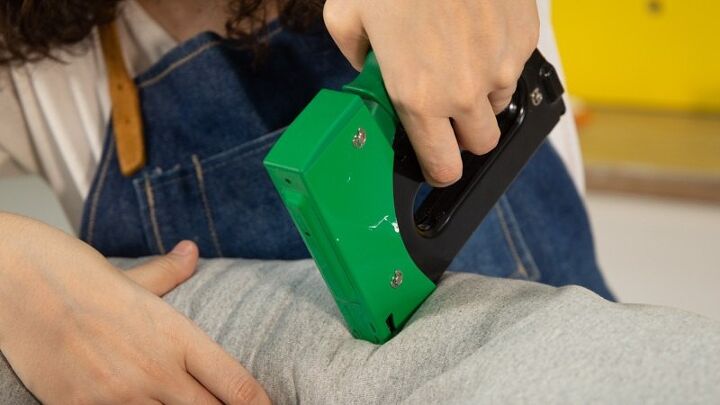
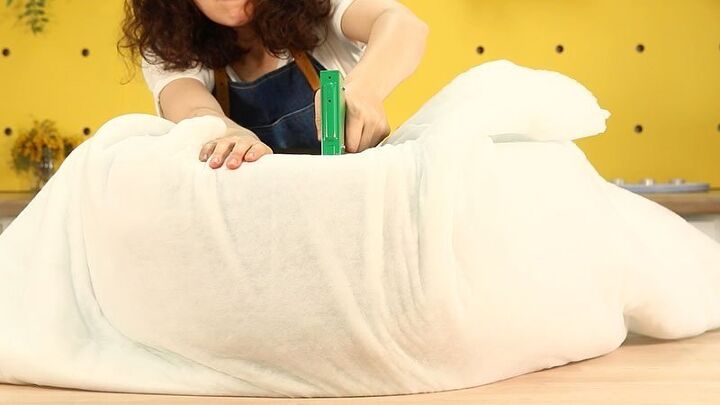
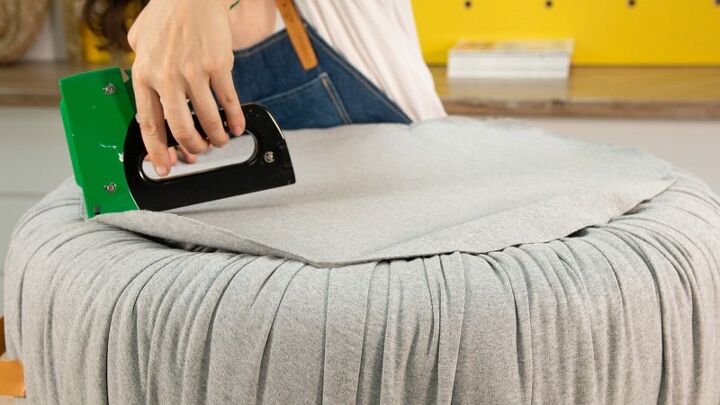
6. Staple the fabric
Repeat the same operation with the fabric. Spread a large piece on your work table and place the tire on top, centered on the fabric. Start by stapling the long sides of the fabric to the inside of the rubber band, stretching hard, and then pin the remaining four corners. When you have it, distribute the pleats evenly.In this case, we have used a gray cotton fabric, similar to that used to make sportswear, to give the beanbag a cozy and warm touch, but you can upholster with many other fabrics: canvas fabric, a leather one with a daring animal print …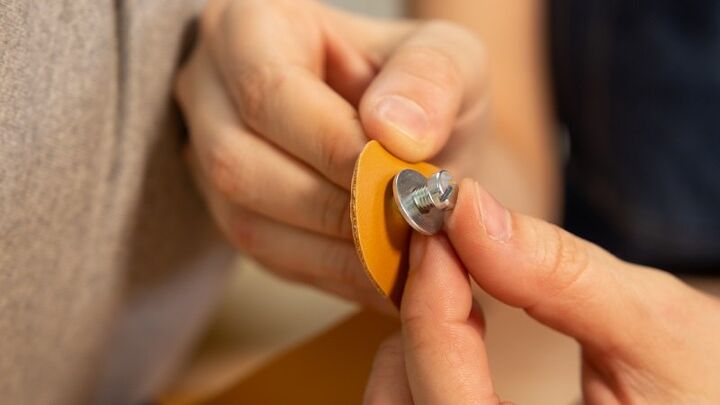
7. Attach the handles
When you’re done with the fabric, screw the handles onto the seat. Take the awl again and pass it through the holes in the rubber, from the inside to the outside, through the wadding and the fabric. Then, enlarge the holes if you need it with scissors and attach the handles with screws and washers, securing with a nut on the inside of the wheel.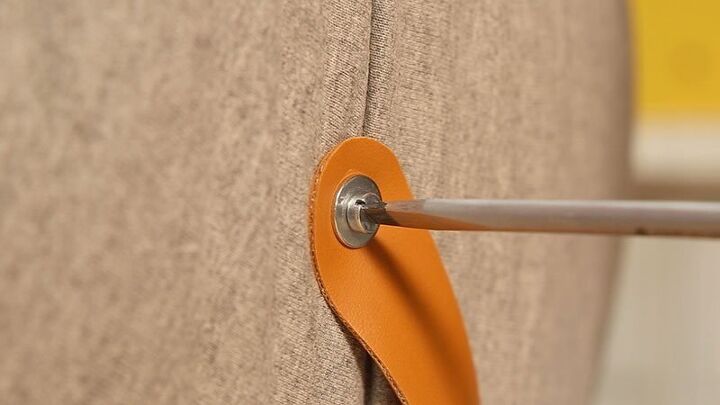
To finish, cut a piece of circular fabric large enough to cover the hole in the tire and staple it at the bottom. Ready!
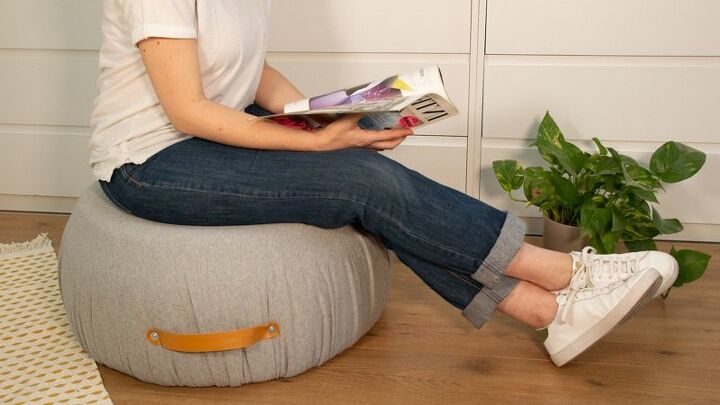
It’s over! What do you think of the result? Let us know in the comments! And ask us what you want if you have doubts.


Any price and availability information displayed on [relevant Amazon Site(s), as applicable] at the time of purchase will apply to the purchase of this product.
Hometalk may collect a small share of sales from the links on this page.More info
Want more details about this and other DIY projects? Check out my blog post!
Comments
Join the conversation
3 of 17 comments
-
Looks good to me. Maybe a coat of paint could cover the smell of an old rubber tire. I love this!
-
Great idea for the grandkids to each have a seat at sit around a coffee table to play games and I bet they also will stack nicely in the corner of the room!!!


Frequently asked questions
Have a question about this project?
Doesn't the tire smell? They have a strong rubber smell.
Girl! ...What an awesome idea! I imagine it to be somwhat comfy with the flexibility of the tire. I like this idea. Someone commented on putting casters or legs on it legs on it. I get the idea; but I would think, with be base being rubber it's going to be to flex able, and put to much stress on the casters/legs. But that's just me thinking. Makes me think plant stand?? Side table(s)?? Pet bed??🤷♀️ I am curious about the rubber smell? Does the smell ever dissipate? Idk, maybe an older tire has less of a "new rubber" smell. If not, I'll turn it into a floor lamp for the garage. Thanks for the idea.
 Happy DIY'ng!
I would be concerned about the chemical smell and odor in the tire. I purchased recycled flip flops made out of old tires and could not deal with the smell. Kept them in the garage until I returned them to the store. Please tell me how you dealt with the smell.